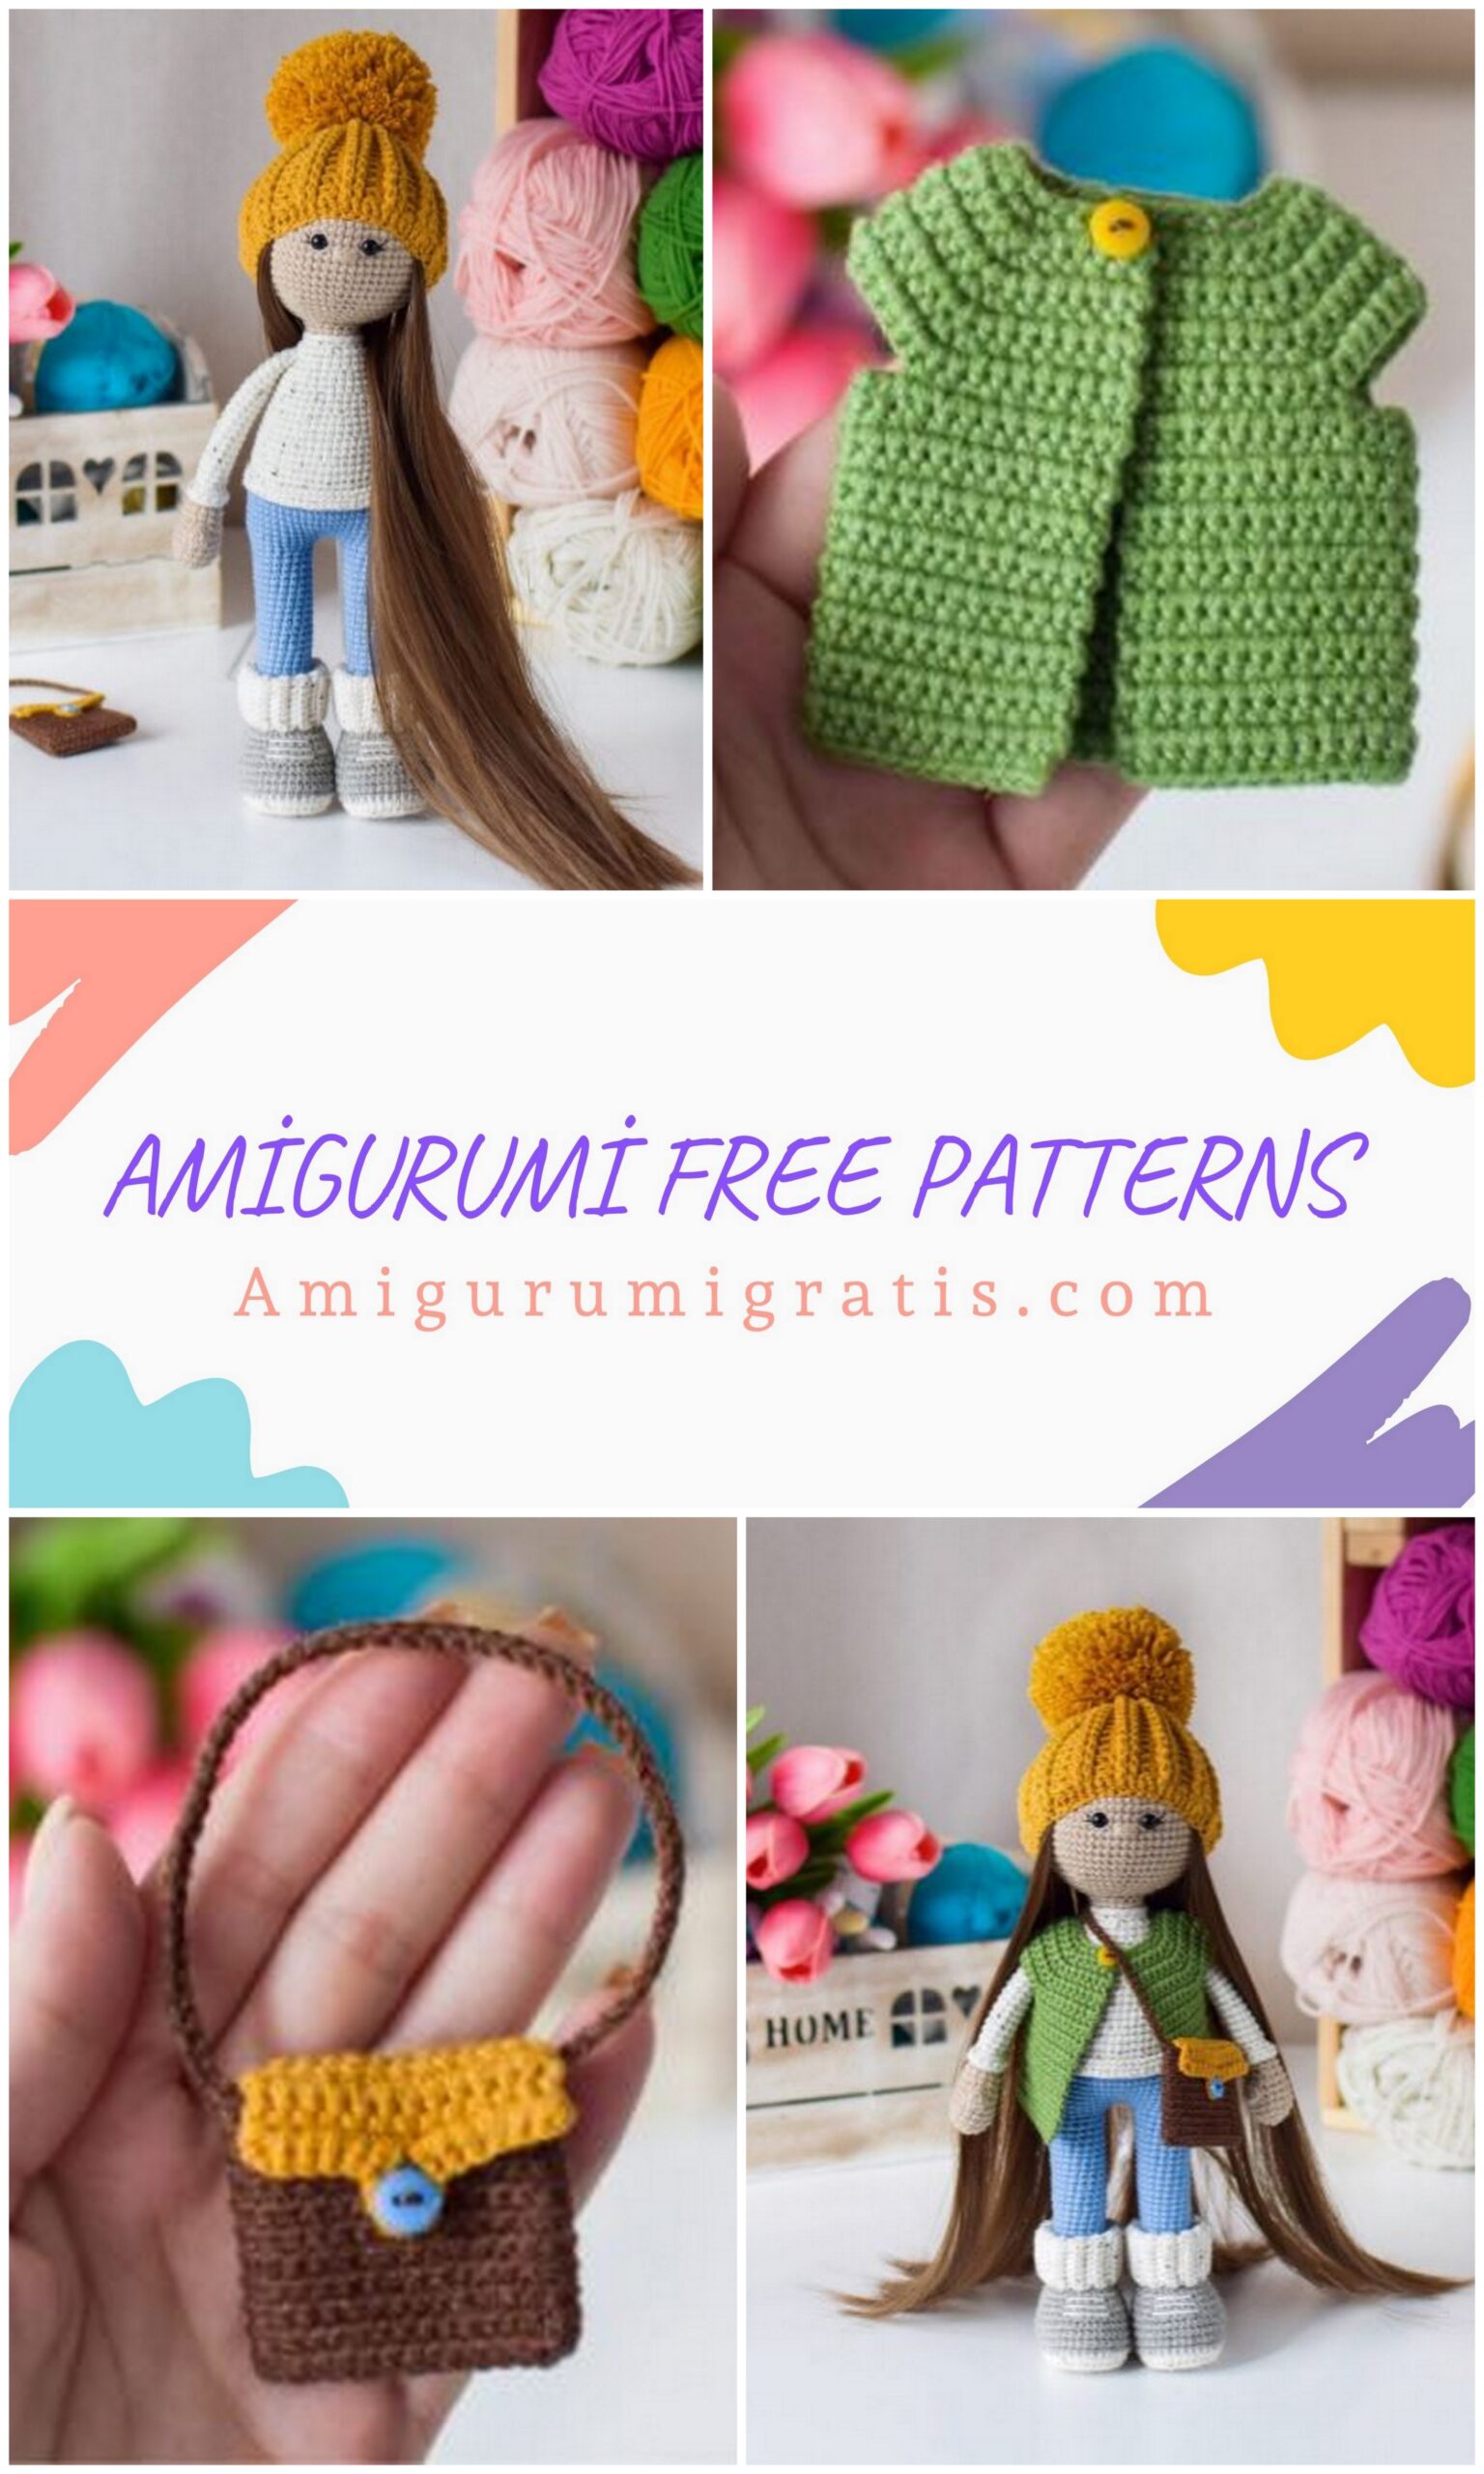
MATERIALS AND TOOLS
1. Yarn
• Milky Alize Cotton Gold Tweed (62)
• Alize Cotton Gold gray (21) and green (485) colors
• Alize Cotton Gold Hobby mustard (02) color
• Yarn Art Jeans beige (87), blue (15) and brown (70)
2. Hook Clover # 1.75
3. Filler (holofiber, etc.)
4. Plastic for the insoles (I use a soft cutting board)
5. Wire d = 1 mm for the frame
6. Adhesive plaster for wire insulation
7. Eyes on a secure mount d = 6 mm
8. Black sewing thread for decorating a face
9. Doll wefts
10. Pompon maker
11. Plastic buttons for vest and bag decor
SYMBOLS
ch. – air loop
sl-st – connecting post
sc – single crochet
dc – double crochet
inc – increase (2 loops in 1)
dec – decrease (2 loops together)
blo – back half loop
flo – front half loop
blo – back wall of the row
flo – front wall of the row
(…) – the number in brackets indicates the number of loops in a row


LEGS
We start with a milky thread. We collect a chain of 9 ch., Insert the hook into the 2nd loop from the hook and knit according to the scheme:
1st row: 7 sc, 3 sc in the last loop of the chain, then on the back of the chain 6 sc, inc (18)
2nd row: inc, 5 sc, 5 inc, 5 sc, 2 inc (26)
3rd row: 1 sc, inc, 6 sc, inc, (1 sc, inc) * 4, 6 sc, inc, 1 sc, inc (34)
4th row: 2 sc, inc, 7 sc, inc, (2 sc, inc) * 4, 7 sc, inc, 2 sc, inc (42)
Cut the thread, fix it.
At this stage, you need to prepare the insoles. We take plastic (I use a soft cutting board) and outline the connected part on it (twice), cut it out. For now, put the insoles aside and continue knitting.
The doll will have a double sole, so we knit one more detail of the same. We do not cut the thread at the end of knitting.
We attach two parts of the sole to each other with the front side to the wrong side so that the second sole is at the bottom, and we connect in one row sc (we insert the hook into the blo in the lower sole, we grab the loops completely in the upper sole, do not forget to insert the insole previously cut from the plastic).
This will be row 5. Cut the milky thread, change it to the main one.
6-9 row: 42 sc (4 rows)
10 row: 8 sc, dec, (2 sc, dec) * 5, 12 sc (36)
11 row: 36 sc
12 row: 7 sc, dec, (1 sc, dec) * 5, 12 sc (30)
13 row: 30 sc
14th row: 7 sc, 6 dec, 11 sc (24)
15 row: 1 sc, dec, (2 sc, dec) * 5, 1 sc (18)
Cut the gray thread, change it to denim. We fill in the detail.
Row 16-39: 18 sc
40 row:
For the right leg (looking at the back of the head): 18 sc
For the left leg (looking at the back of the head): 15 sc, i.e. do not tie 3 sc to the end of row 41 row only on the right leg (if you look at the back of the head of the toy): 7 sc, i.e. do not tie 11 sc to the end of the row, cut the thread, fasten.
We knit the upper part of the shoe. We collect a chain of 16 ch., Insert the hook into the 2nd loop from the hook and knit according to the scheme:
Row 1: 15 sc, turn knitting
Row 2-24 per blo: 1 ch., 15 sc, turn knitting
Fold the part in half and connect the edges with one sl-st row (we insert the hook into the back half-loops of the last row and the loops of the original chain). Cut the thread, leaving a long end for sewing.
We turn the part and sew it to the leg.
We embroider laces with a milky thread as shown in the photo.
TRUNK
From the left leg we collect a chain of 3 ch., Insert the hook into the first column of the last row of the right
legs (after the “step”) and knit according to the scheme:
1st row:
right leg: 3 sc, inc, 6 sc, inc, 6 sc, inc
by chain: 3 sc
on the left leg: 3 sc, inc, 6 sc, inc, 6 sc, inc
on the back of the chain: 3 sc
There should be a total of 48 sc in this row. We put a marker, this will be the beginning of the row.
2nd row: 48 sc
3rd row: (7 sc, inc) * 6 (54)
4-9 row: 54 sc (6 rows)
Knit an additional 27 sc. Cut the denim thread, change it to milk. We put a marker, this place will be the new beginning of the row.
10 row: 54 sc
Row 11: 54 sc for blo
12-13 row: 54 sc (2 rows)
14 row: (7 sc, dec) * 6 (48)
15-16 row: 48 sc (2 rows)
17 row: 3 sc, dec, (6 sc, dec) * 5, 3 sc (42)
Row 18-19: 42 sc (2 rows)
20 row: (5 sc, dec) * 6 (36)
Rows 21-22: 36 sc (2 rows)
23 row: 2 sc, dec, (4 sc, dec) * 5, 2 sc (30)
24-25 row: 30 sc
26 row: (3 sc, dec) * 6 (24)
27-28 row: 24 sc
29 row: 1 sc, dec, (2 sc, dec) * 5, 1 sc (18)
Cut the milky thread, change it to the main one.
30 row: 18 sc for blo
Row 31: 18 sc
Cut the thread, leaving a long end for sewing.
We tie the edge of the jacket. To do this, turn the body upside down and attach a milky thread to the last half loop of the 10th row:
1st row: 1 ch., 4 sc, inc, (8 sc, inc) * 5, 4 sc (60)
Next, knit in a spiral.
2nd row: 60 sc
3rd row: 60 sl-st
Cut the thread, fasten it, hide the end.
It remains to tie the collar. To do this, turn the body upside down, attach a milky thread to the last half loop of the 29th row and knit 18 sl-st. Cut the thread, fasten it, hide the end.
PENS
We start with a thread of the main color. We fill loosely up to the 20th row.
1st row: 6 sc into magic ring
2nd row: 6 inc (12)
3rd row: (3 sc, inc) * 3 (15)
4-6 row: 15 sc (3 rows)
7 row:
For the left handle (looking at the back of the head): bump, 14 sc
For right ru chki (looking at the back of the head): 7 sc, bump, 7 sc
8 row: 15 sc
9th row: (3 sc, dec) * 3 (12)
10 row: 12 sc
11 row: 2 sc, dec, 4 sc, dec, 2 sc (10)
Knit an extra 4 sc for the left handle and 3 sc for the right handle. Cut the thread of the main color, change it to milk.
12 row: 10 sc
Row 13: 10 sc for blo
Row 14-30: 10 sc (17 rows)
Knit an extra 3 sc for the left handle and 6 sc for the right handle. Fold the piece in half, join the edges by knitting 5 sc. Cut the thread, leaving a long end for sewing.
It remains to tie the edge of the sleeve. To do this, turn the handle upside down and attach a milky thread to the first half loop of the 12th row:
1st row: 1 ch., 2 sc, inc, 4 sc, inc, 2 sc (12)
Next, knit in a spiral.
2nd row: 12 sc
Cut the thread, fasten it, hide the end.
HEAD
We knit with a thread of the main color, fill it tightly as we knit.
1st row: 6 sc into magic ring
2nd row: 6 inc (12)
3rd row: (1 sc, inc) * 6 (18)
4th row: 1 sc, inc, (2 sc, inc) * 5, 1 sc (24)
5 row: (3 sc, inc) * 6 (30)
6 row: 2 sc, inc, (4 sc, inc) * 5, 2 sc (36)
7 row: (5 sc, inc) * 6 (42)
8 row: 3 sc, inc, (6 sc, inc) * 5, 3 sc (48)
9th row: (7 sc, inc) * 6 (54)
10 row: 4 sc, inc, (8 sc, inc) * 5, 4 sc (60)
Row 11-20: 60 sc (10 rows)
Place the eyes on the secure mount between rows 14 and 15, 6 sc between the screws.
21 row: 4 sc, dec, (8 sc, dec) * 5, 4 sc (54)
22 row: (7 sc, dec) * 6 (48)
23 row: 3 sc, dec, (6 sc, dec) * 5, 3 sc (42)
24 row: (5 sc, dec) * 6 (36)
25 row: 2 sc, dec, (4 sc, dec) * 5, 2 sc (30)
26 row: (3 sc, dec) * 6 (24)
27 row: 1 sc, dec, (2 sc, dec) * 5, 1 sc (18)
28 row: (1 sc, dec) * 6 (12)
I leave the hole uncovered so that the wire frame can be used to reinforce the neck.
We design the head. We embroider cilia with black sewing thread (2 threads). With the main thread of Yarn Art Jeans (2 threads out of 4) we embroider the eyelids and nose.
ASSEMBLY AND DESIGN
Sew on handles between 26 and 27 rows of the body. How to neatly sew handles can be seen on the example at the link
Before sewing the head to the doll’s body, I suggest strengthening the neck with a frame. To do this, take a piece of wire about 20 cm long, fold it in such a way that the cut points are approximately in the middle. The folded length of the piece should be about 10 cm. We isolate it with an adhesive plaster.
Now we place the frame in the torso and the other end in the hole in the head. The frame must be evenly distributed, i.e. half should fall on the body, half on the head. Sew on the head, fill the neck as it is sewn on.
We sew trusts to the head in 3-4 rows.
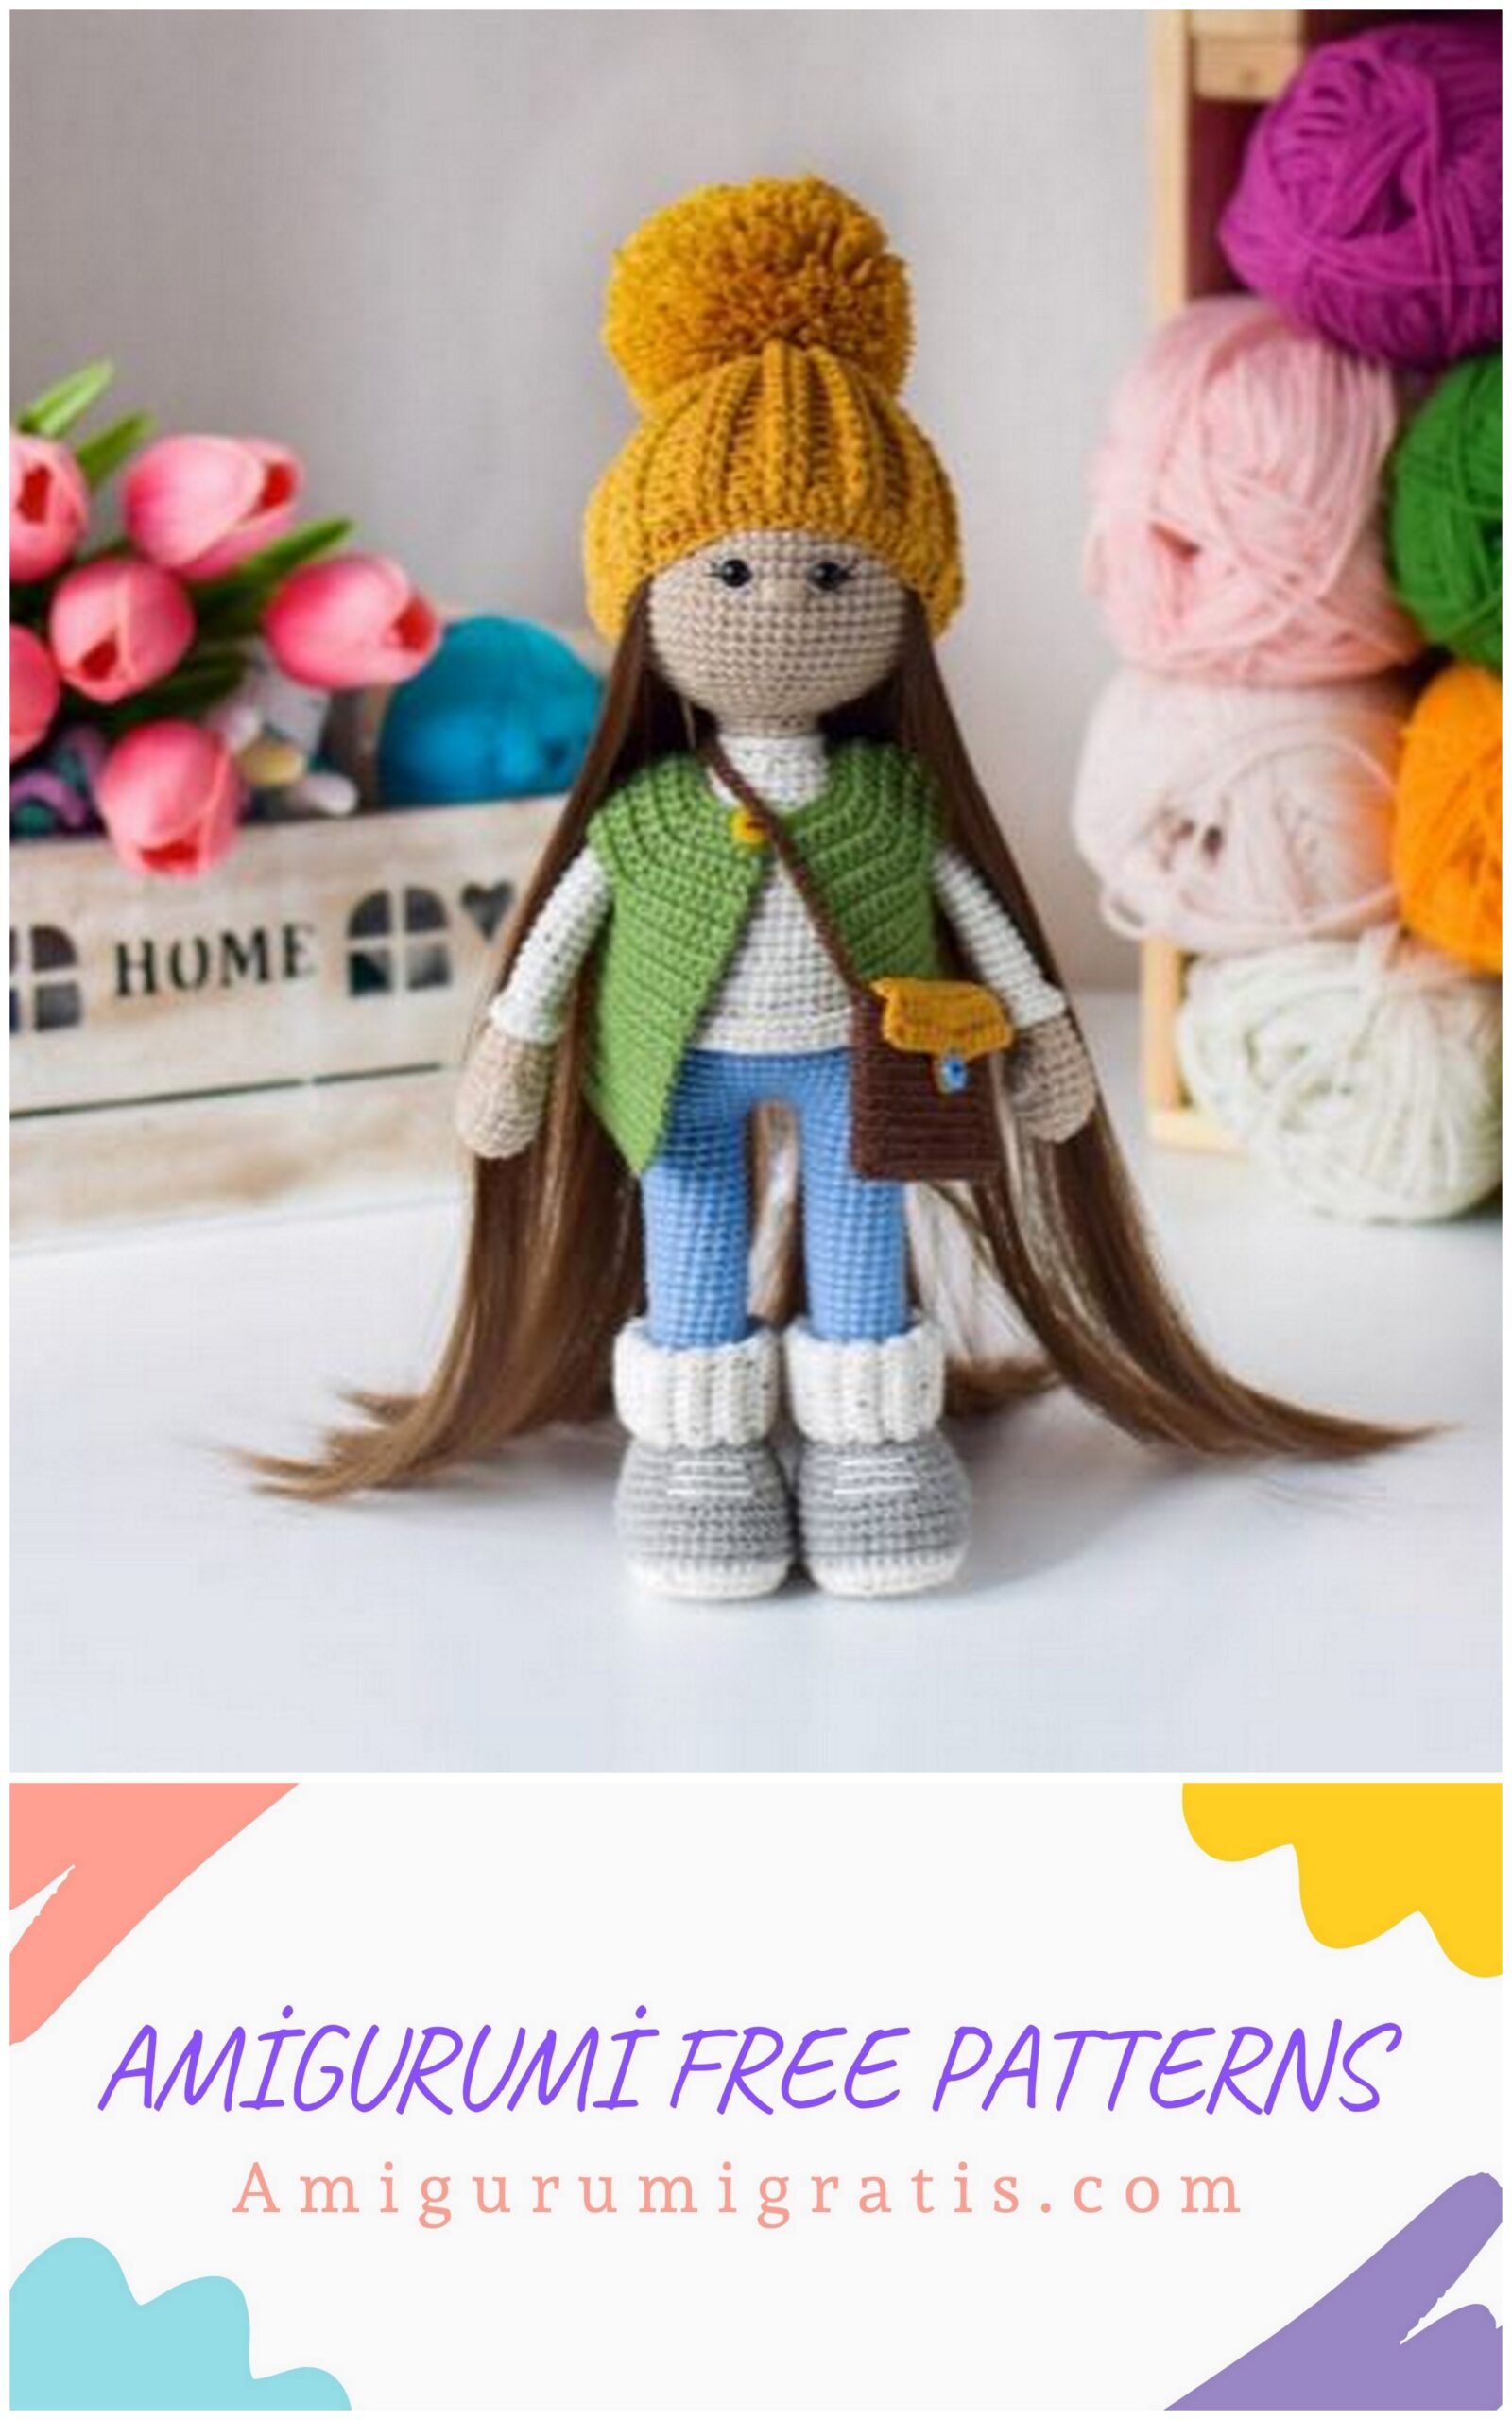
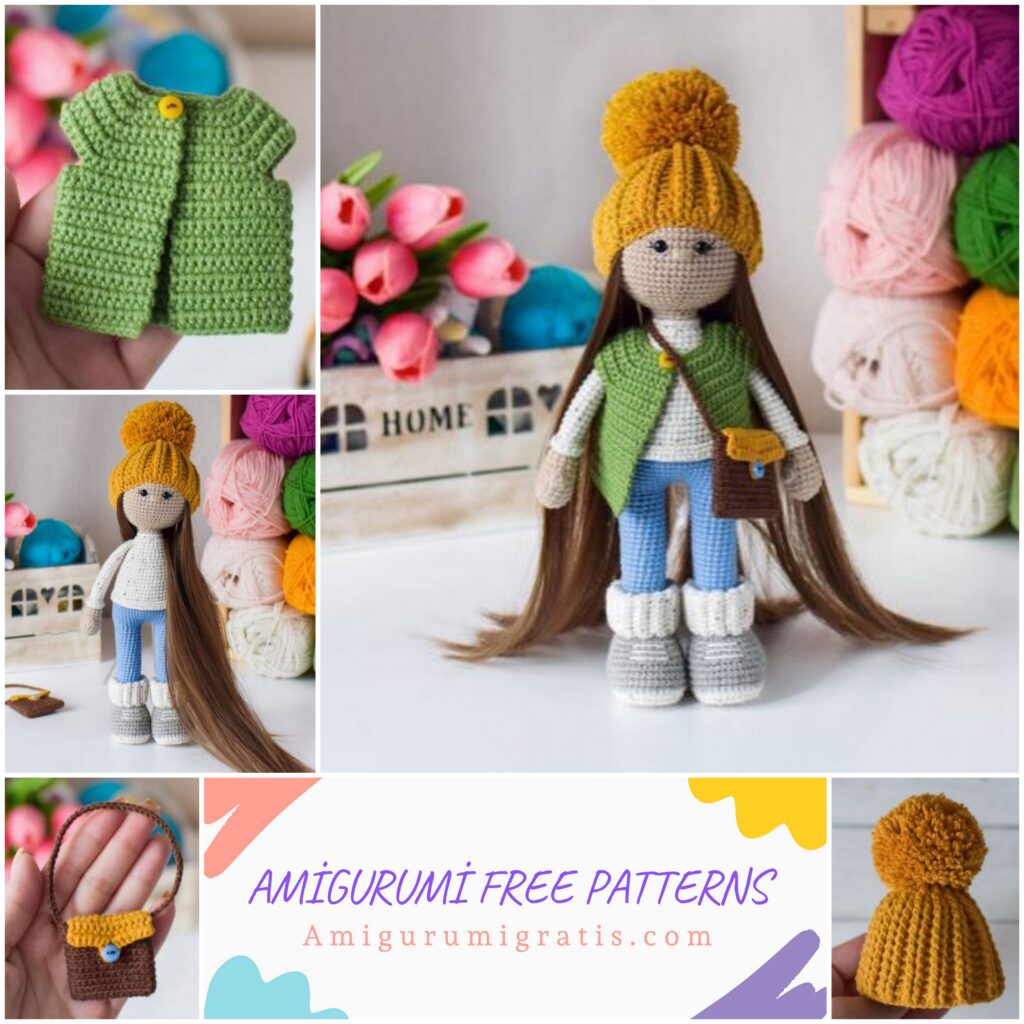
A CAP
We knit with a mustard-colored thread. We collect a chain of 60 ch. and close it into a ring with one sl-st.
1 row – 60 dc
Next, we knit an elastic band 2 * 2 with embossed columns. You can see how to do this by following the link.
2 – 12 row – 2 ch., (2 dc for flo, 2 dc for blo) * 15, sl-st in 2nd ch. (60)
13th row – 2 ch., (2 dc for flo, 2 dc for blo together) * 15, sl-st in 2nd ch. (45)
How to knit 2 dc per blo together can be found at
14th row – 2 ch., (2 dc per flo together, 1 dc per blo) * 15, sl-st in the 2nd ch. (thirty)
How to knit 2 dc per flo together can be found at
15th row – 2 ch., (1 dc for flo + 1 dc for blo together) * 15, sl-st in the 2nd ch. (15)
How to knit 1 dc for flo + 1 dc for blo together can be found at
16 row – 8 dec (we knit the last decrease for the 7th sc and sl-st)
We tighten the hole, hide the thread. We form a pom-pom, sew on. After that, we sew the hat to the head, hiding the base of the wefts under it.
VEST
We knit in rotary rows. We start each row with 1 ch. We collect 39 ch., We insert the hook into the 8th loop from the hook (this will be the loop) and knit according to the scheme:
1st row: 4 sc, 2 inc, 4 sc, 2 inc, 8 sc, 2 inc, 4 sc, 2 inc, 4 sc (40)
2nd row: 40 sc
3rd row: 5 sc, 2 inc, 6 sc, 2 inc, 10 sc, 2 inc, 6 sc, 2 inc, 5 sc (48)
4th row: 48 sc
5th row: 6 sc, 2 inc, 8 sc, 2 inc, 12 sc, 2 inc, 8 sc, 2 inc, 6 sc (56)
6 row: 56 sc
7th row: 7 sc, 2 inc, 10 sc, 2 inc, 14 sc, 2 inc, 10 sc, 2 inc, 7 sc (64)
8 row: 64 sc
9th row: 10 sc, 6 ch. (Skip 12 sc), 20 sc, 6 ch. (Skip 12 sc), 10 sc
Row 10: 10 sc, 6 sc in a chain, 20 sc, 6 sc in a chain, 10 sc (52)
11-25 row: 52 sc (15 rows)
Cut the thread, fasten it, hide the end. Sew on a button.
A BAG
We start with a brown thread. We collect a chain of 15 ch., Insert the hook into the 2nd loop from the hook and knit in a spiral:
1st row: 14 sc, 2 sc in the last loop of the chain, then on the back of the chain 14 sc (30)
Row 2-10 per blo: 30 sc (9 rows)
11 row for blo: 29 sc, sl-st
We collect a chain of 50 ch., We count 14 columns, in the 15th we knit sl-st (in the back half loop). Cut the thread, fix it.
We knit the cover of the bag. We retreat one column from the chain (handles of the bag) and knit 12 sc for the back half-loops. On the other hand, there should also be 1 untied sc left between the chain and the lid. We knit 4 more rows with single crochet. In the 6th row, knit 6 sc, 5 ch., 6 sc. Cut the thread, fix it, hide the end ets. Sew on a button.