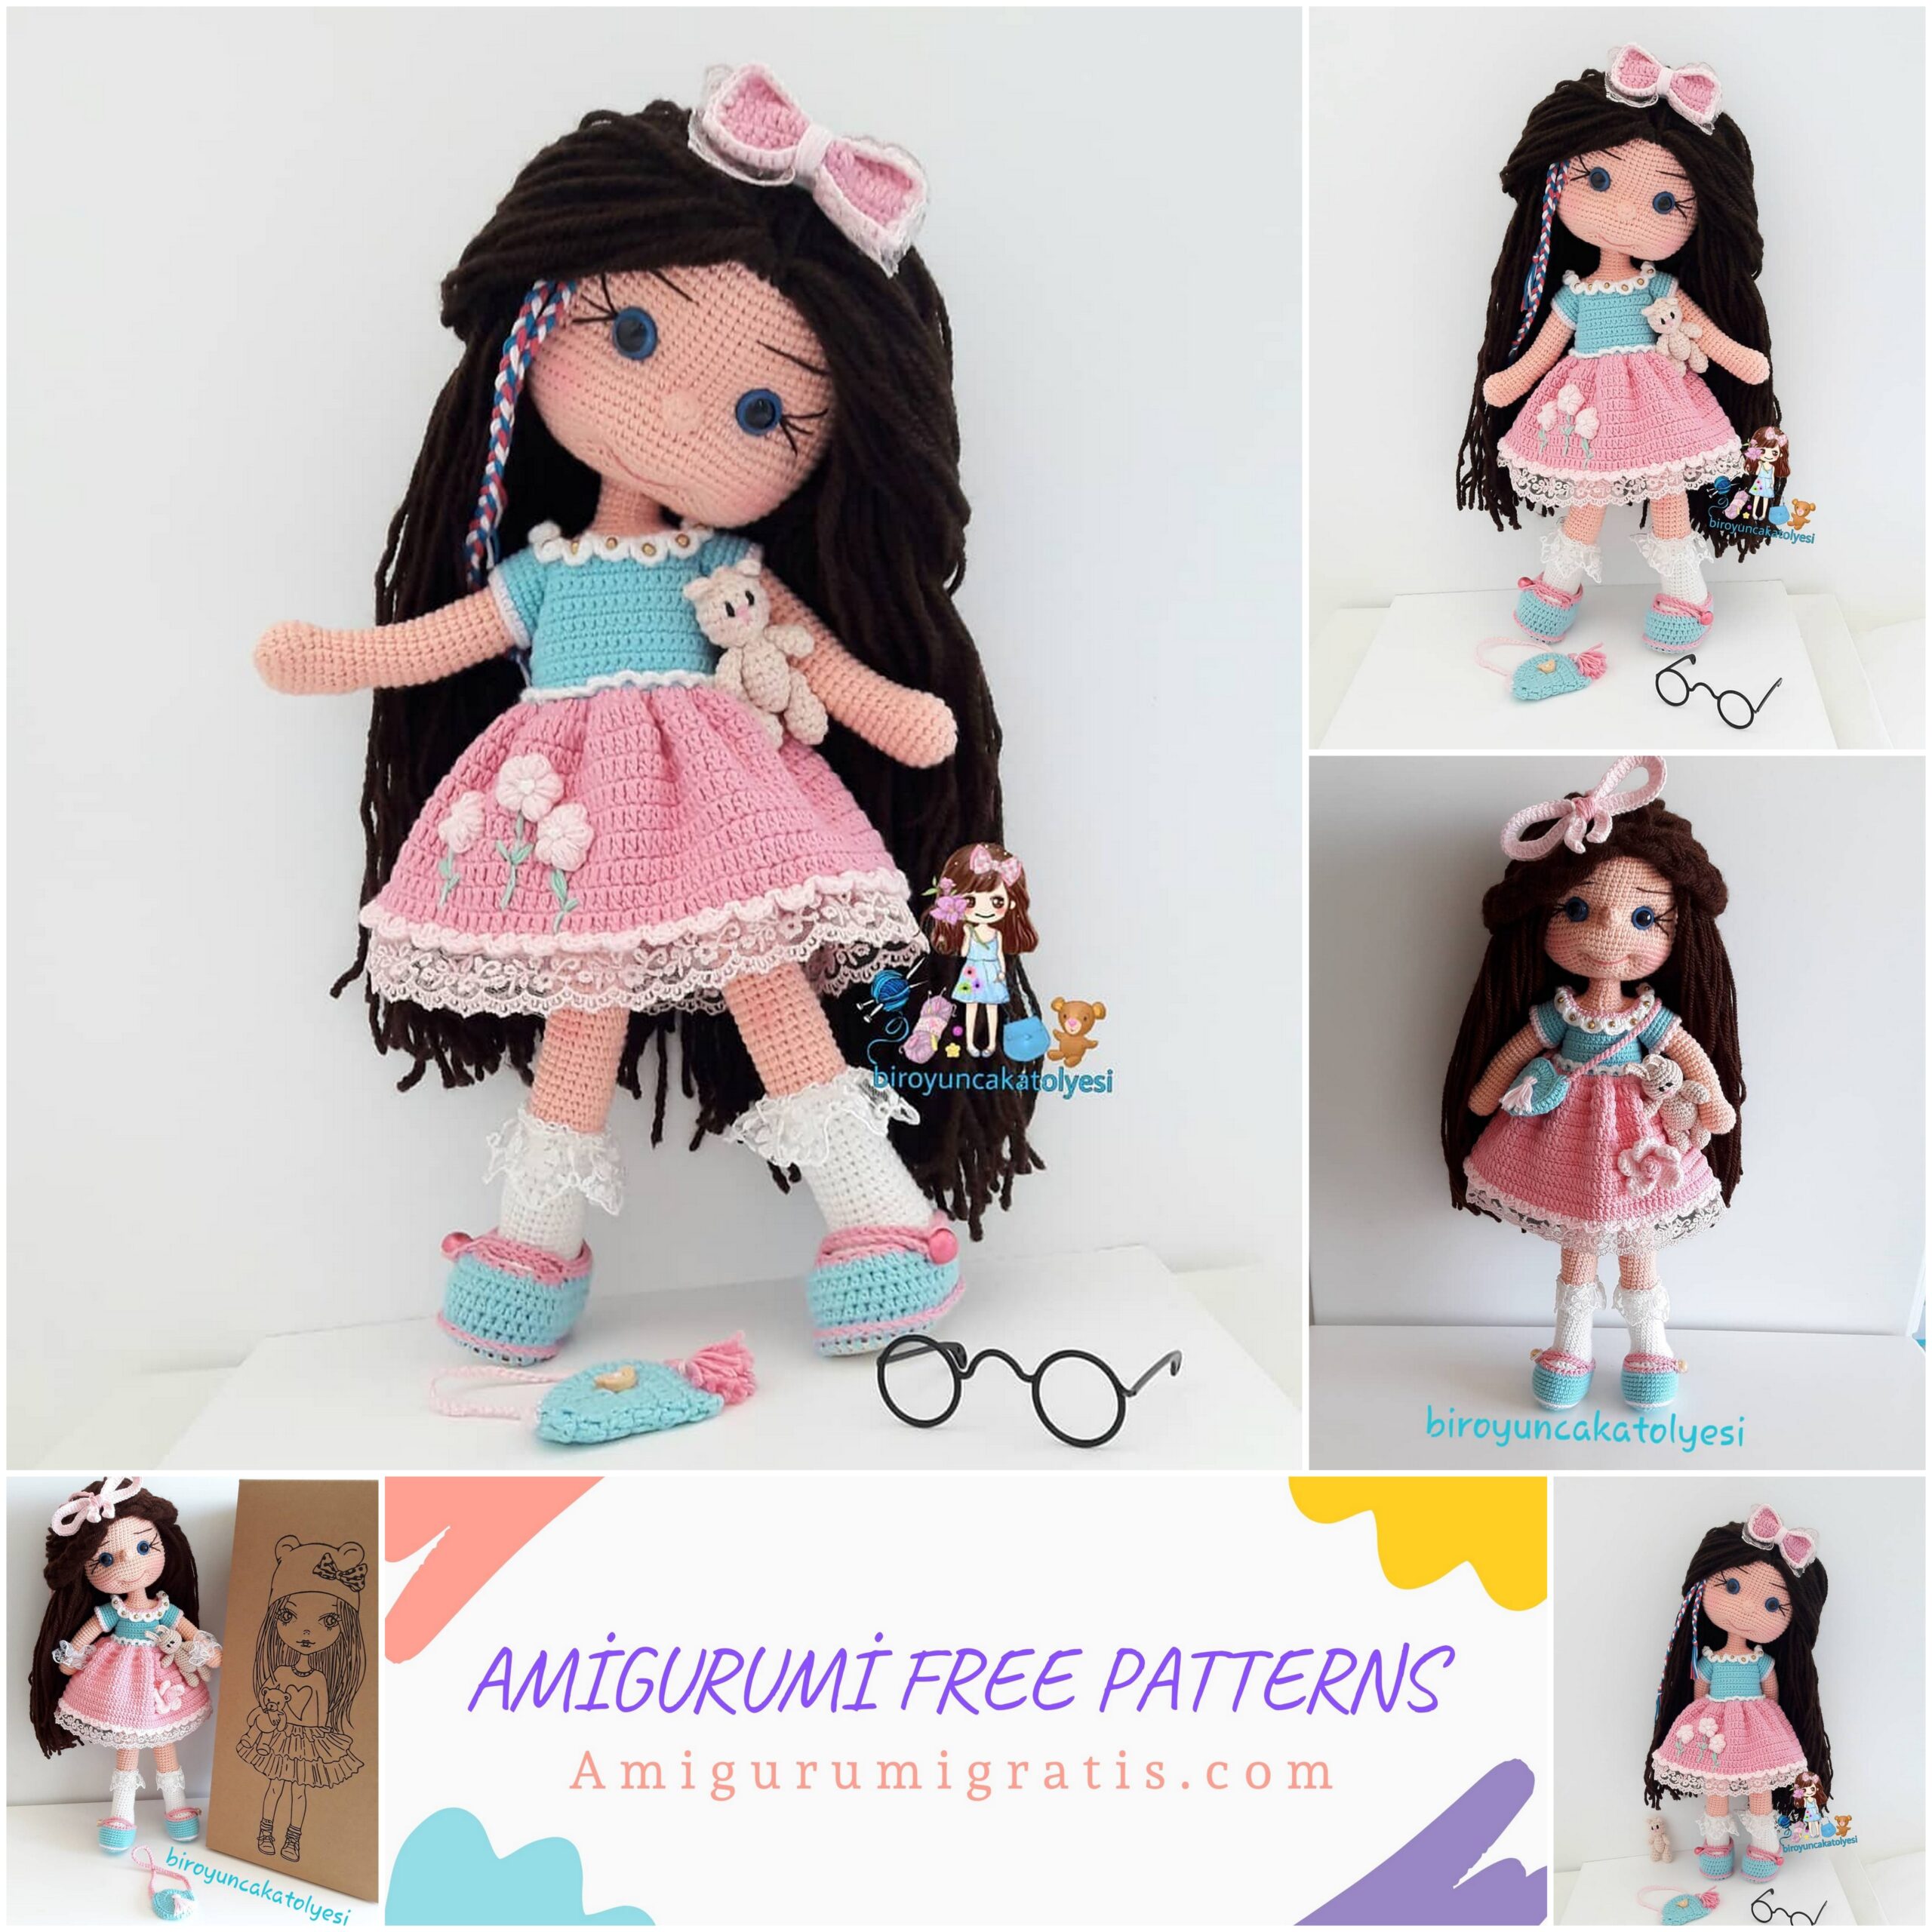
Today I am going to share with you a very sweet baby amigurumi candy girl recipe. I hope you will enjoy it and your children will like it very much. Make it easy already.
Beautiful patterns can be found by following the page.
HEAD MAKING
With skin color,
1-Into magic ring6sc
2-6inc = 12
3- (1sc, 1inc) * 6 = 18sc
4- (2sc, 1inc) * 6 = 24sc
5- (3sc, 1inc) * 6 = 30sc
6- (4sc, 1inc) * 6 = 36sc
7- (5sc, 1inc) * 6 = 42sc
8- (6sc, 1inc) * 6 = 48sc
9- (7sc, 1inc) * 6 = 54sc
10- (8sc, 1inc) * 6 = 60sc
11- (9sc, 1inc) * 6 = 66sc
12-23 (13th place) = 66sc
24- (10sc, 1inc) * 6 = 72sc
25- (11sc, 1inc) * 6 = 78sc
26-29 (4 rows) = 78sc
30- (11sc, 1dec) * 6 = 72sc
31- (10sc, 1dec) * 6 = 66sc
32- (9sc, 1dec) * 6 = 60sc
33- (8sc, 1dec) * 6 = 54sc
34- (7sc, 1dec) * 6 = 48sc
35- (6sc, 1dec) * 6 = 42sc
36- (5sc, 1dec) * 6 = 36sc
37- (4sc, 1dec) * 6 = 30sc
38- (3sc, 1dec) * 6 = 24sc
39- (2sc, 1dec) * 6 = 18sc
The eyes (14mm in size) will be placed between 22-23rd row. I sometimes wear it between 21-22. Adjust the rope and head according to your filling. When you’re out of your mind, you can testify to the face by watching face shaping videos.


FOOT, LEG, BODY MAKING
1-10 chains, back to 2nd chain 1inc, 7sc same place 3sc, 7sc, linc = 20sc
2-1inc, 7sc, 3inc, 7sc, 2inc = 26
3-1sc, linc, 7sc, (1inc, 1inc) .3, 7sc, (1inc, 1inc) .2 = 32sc
4-2sc, linc, 7sc, (2sc, 1inc) .3, 7sc, (2sc, 1inc) .2 = 38sc
5-8) 38sc
9-10sc, (1dec, 1sc) .6, 10sc = 32sc
10-10sc, 6a, 10sc = 26sc
11-8sc, 6a, 6sc = 20sc
12-9sc, 1dec, 9sc = 19sc
13-26 (14 rows) = 19sc
27- 19sc as flo (If you want to make a sock ruffle; after 27.5 races as 3 floats again in the same place as the bat. This process continues until the end of the socks around.) Skin color with rope;
9sc, ldec, 8sc = 18sc
28 to 50 (22 rows). 18sc Let’s go to white color for underwear.
51-18sc
52-Flo as 3 chain pull the same place bat, let’s do the same process to the end. A ruffle will be formed. Let’s switch to the blo of 52nd row with 2 chains. 17sc as blo, linc = 19sc
53-57. Between rows = 19sc
Cut the rope and knit the other leg. Let’s not cut the last leg and set it as the baby’s right sağ leg. Align the legs, center the sides and pull 5 chains and tie the right leg to the left leg. (You can get help from the pictures)
58-19sc left leg 5sc from front of chain, 19sc right leg 5sc from rear of chain = 48sc
Place your locator at the junction of the two legs.
59-64 = 48sc
65- (6sc, 1dec).
Let’s go skin color,
66-68 = 42sc
69- (5sc, 1dec).
70-84 = 36sc
(85th place Let’s place the wires. Let’s go to the arm description and complete the arms.)
85-Let’s make a single crochet on the trunk to the place where the left arm will meet and take the locator here. Let’s put 4 single crochets on the left arm and 4 single crochets on top of each other.
14sc from the front of the body, 4sc from the body and right arm, 14sc from the back of the body.
86-Left arm exposed 10sc, 14sc front body, right arm exposed 10sc, 14sc rear body = 48sc
87-Left arm (1dec, 6sc, 1dec), 14sc front body, Right arm (1dec, 6sc, 1dec), 14sc rear body = 44sc
88-Left arm (1dec, 4sc, 1dec), front (6sc, 1dec, 6sc), Right arm (1dec, 4sc, 1dec), rear (6sc, 1dec, 6sc) = 40sc
89-Left arm (1dec, 2sc, 1dec), front (5sc, 1dec, 6sc), Right arm (1dec, 2sc, 1dec), rear (6sc, 1dec, 5sc)
90-Left arm (1dec, 1sc, 1dec), front (4sc, 1dec, 5sc), Right arm (1dec, 1sc, 1dec), rear (6sc, 1dec, 4sc)
91-Left arm 2dec, front (3sc, 1dec, 4sc), Right arm 2dec, rear (4sc,) dec, 3sc)
92-Left arm 1dec, front 8sc, Right arm 1dec, rear 8sc = 18sc
93-98 = 18sc
ARM CONSTRUCTION
1-Into magic ring6sc
2-6inc = 12sc
3- (1inc, 3sc) .6 = 18sc
4-6 to 18sc
7-2dec, 14sc = 16sc
8- 2dec, 12sc = 14sc
9-32 (24 rows) = 14sc
NOSE CONSTRUCTION
1-Into magic ring6sc
2- (2sc, 1inc) .2 = 8sc
3-8sc
WIRES AND PLACEMENT USED
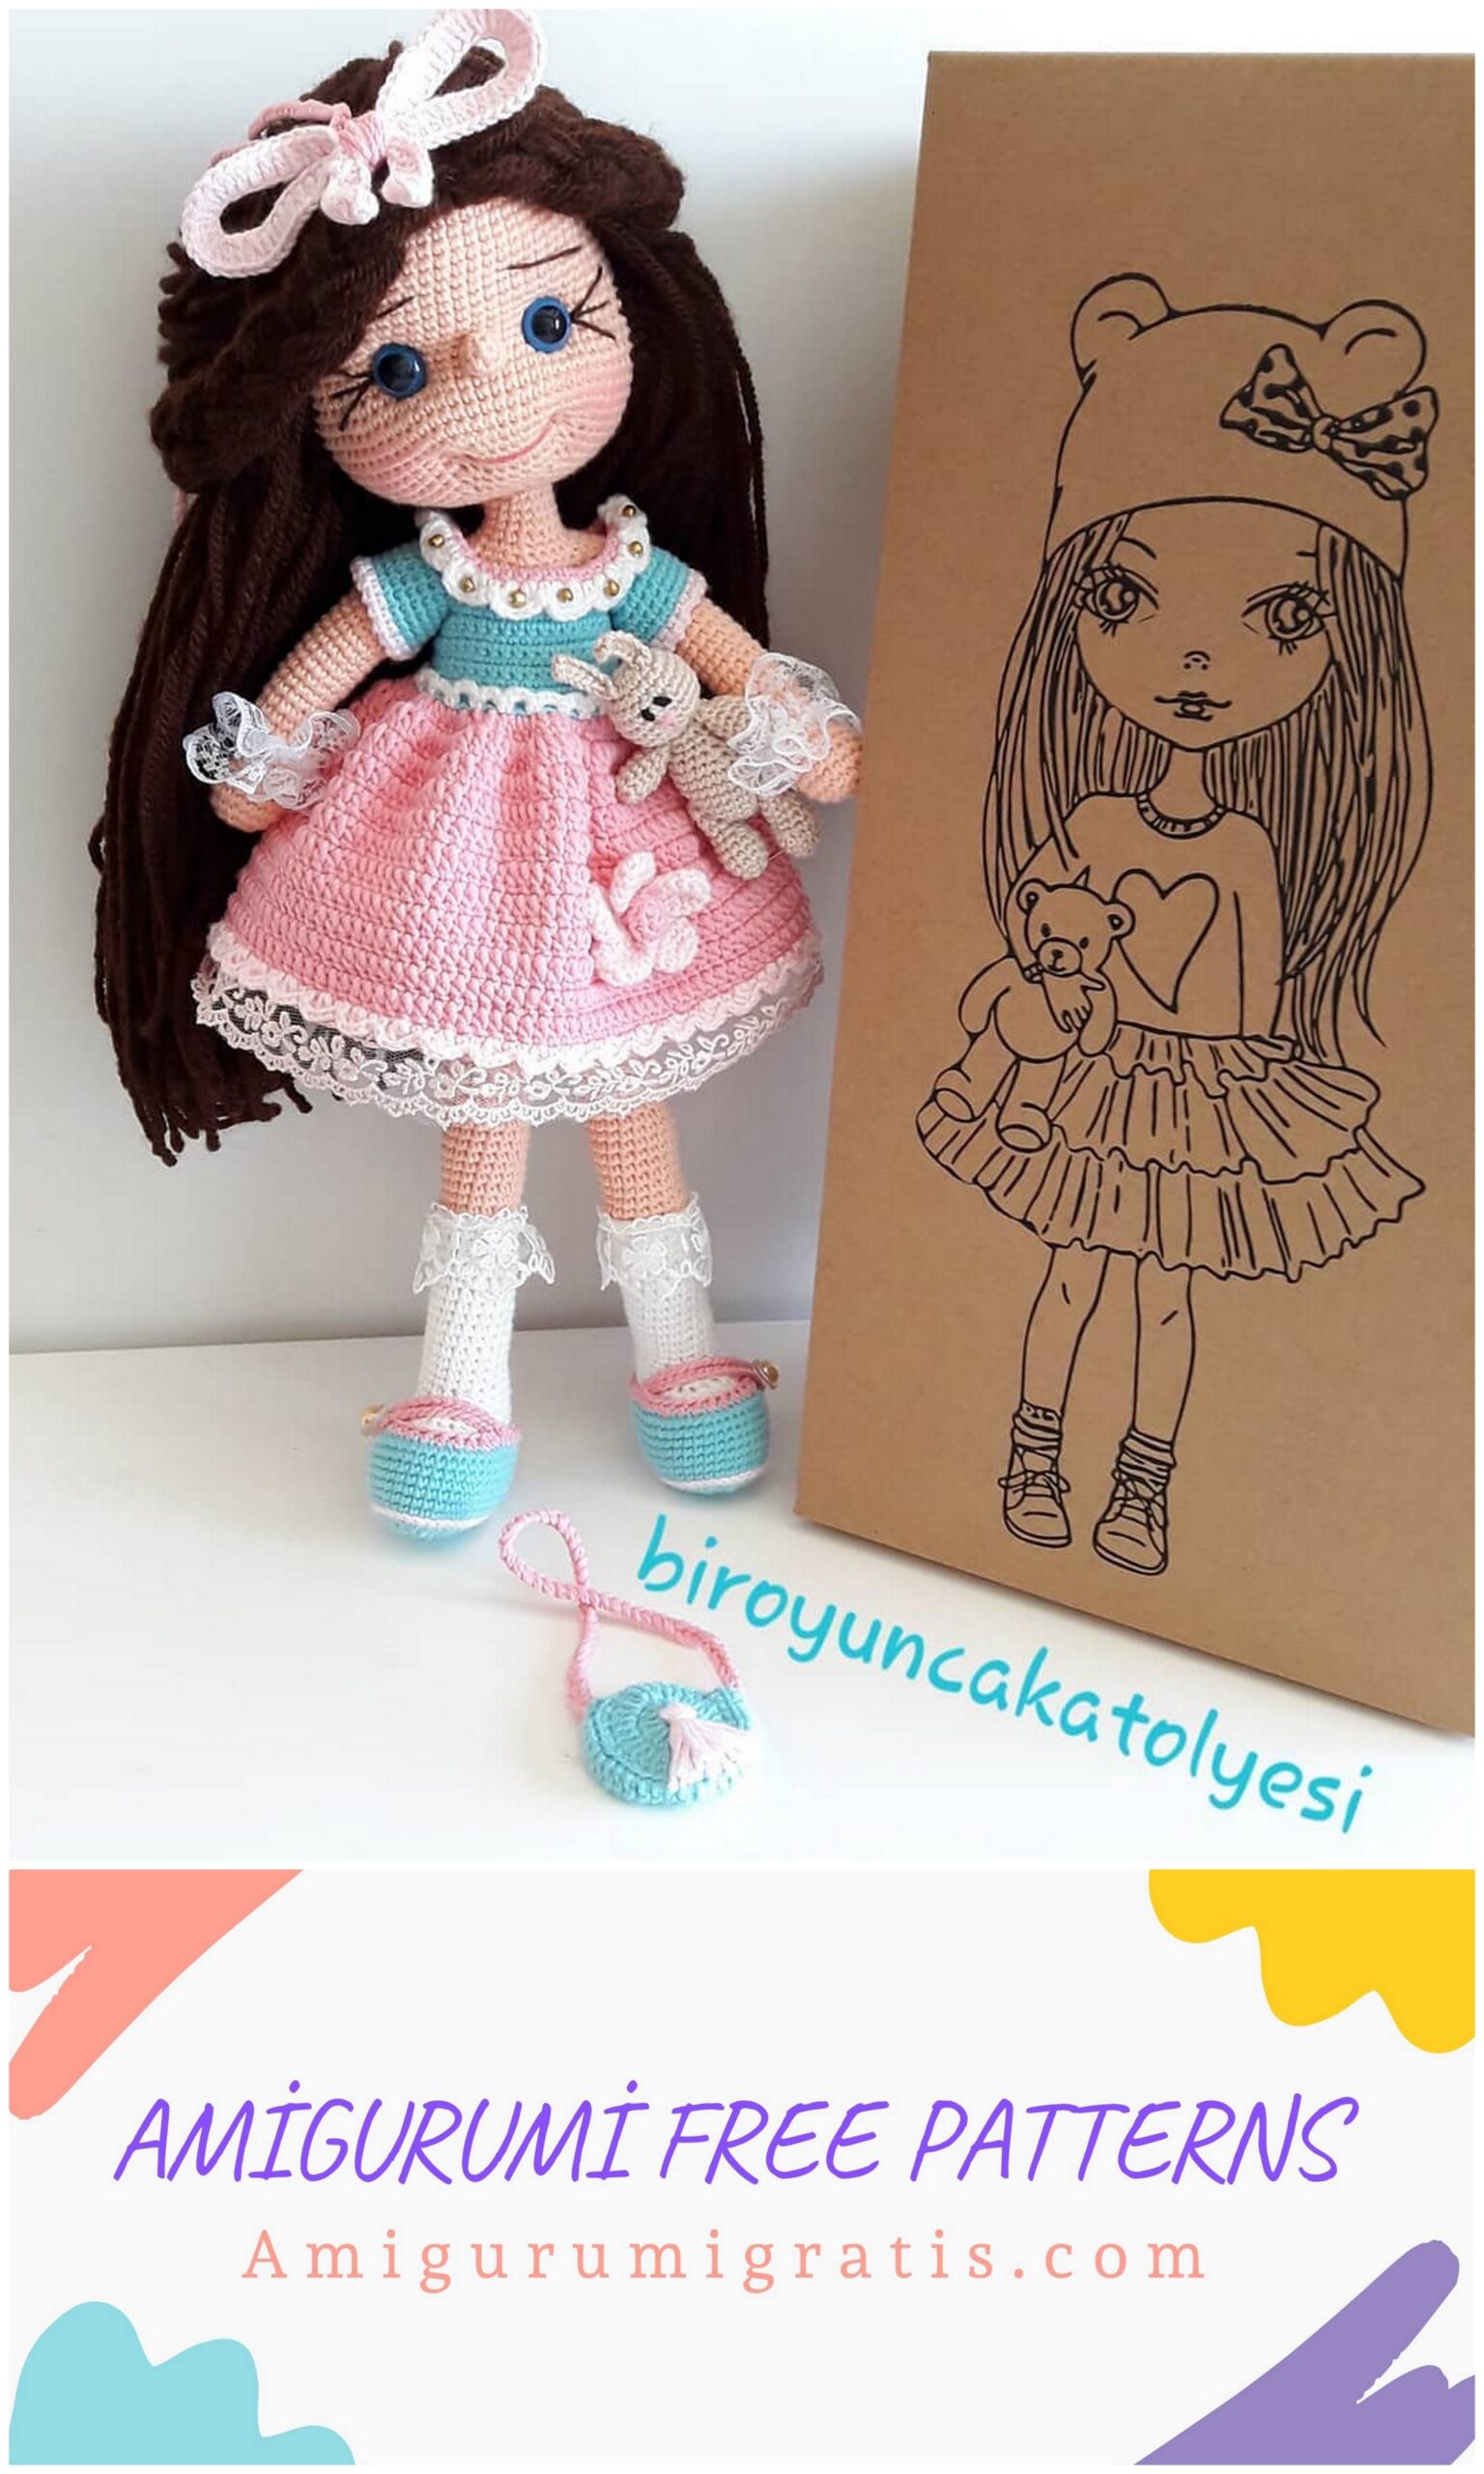
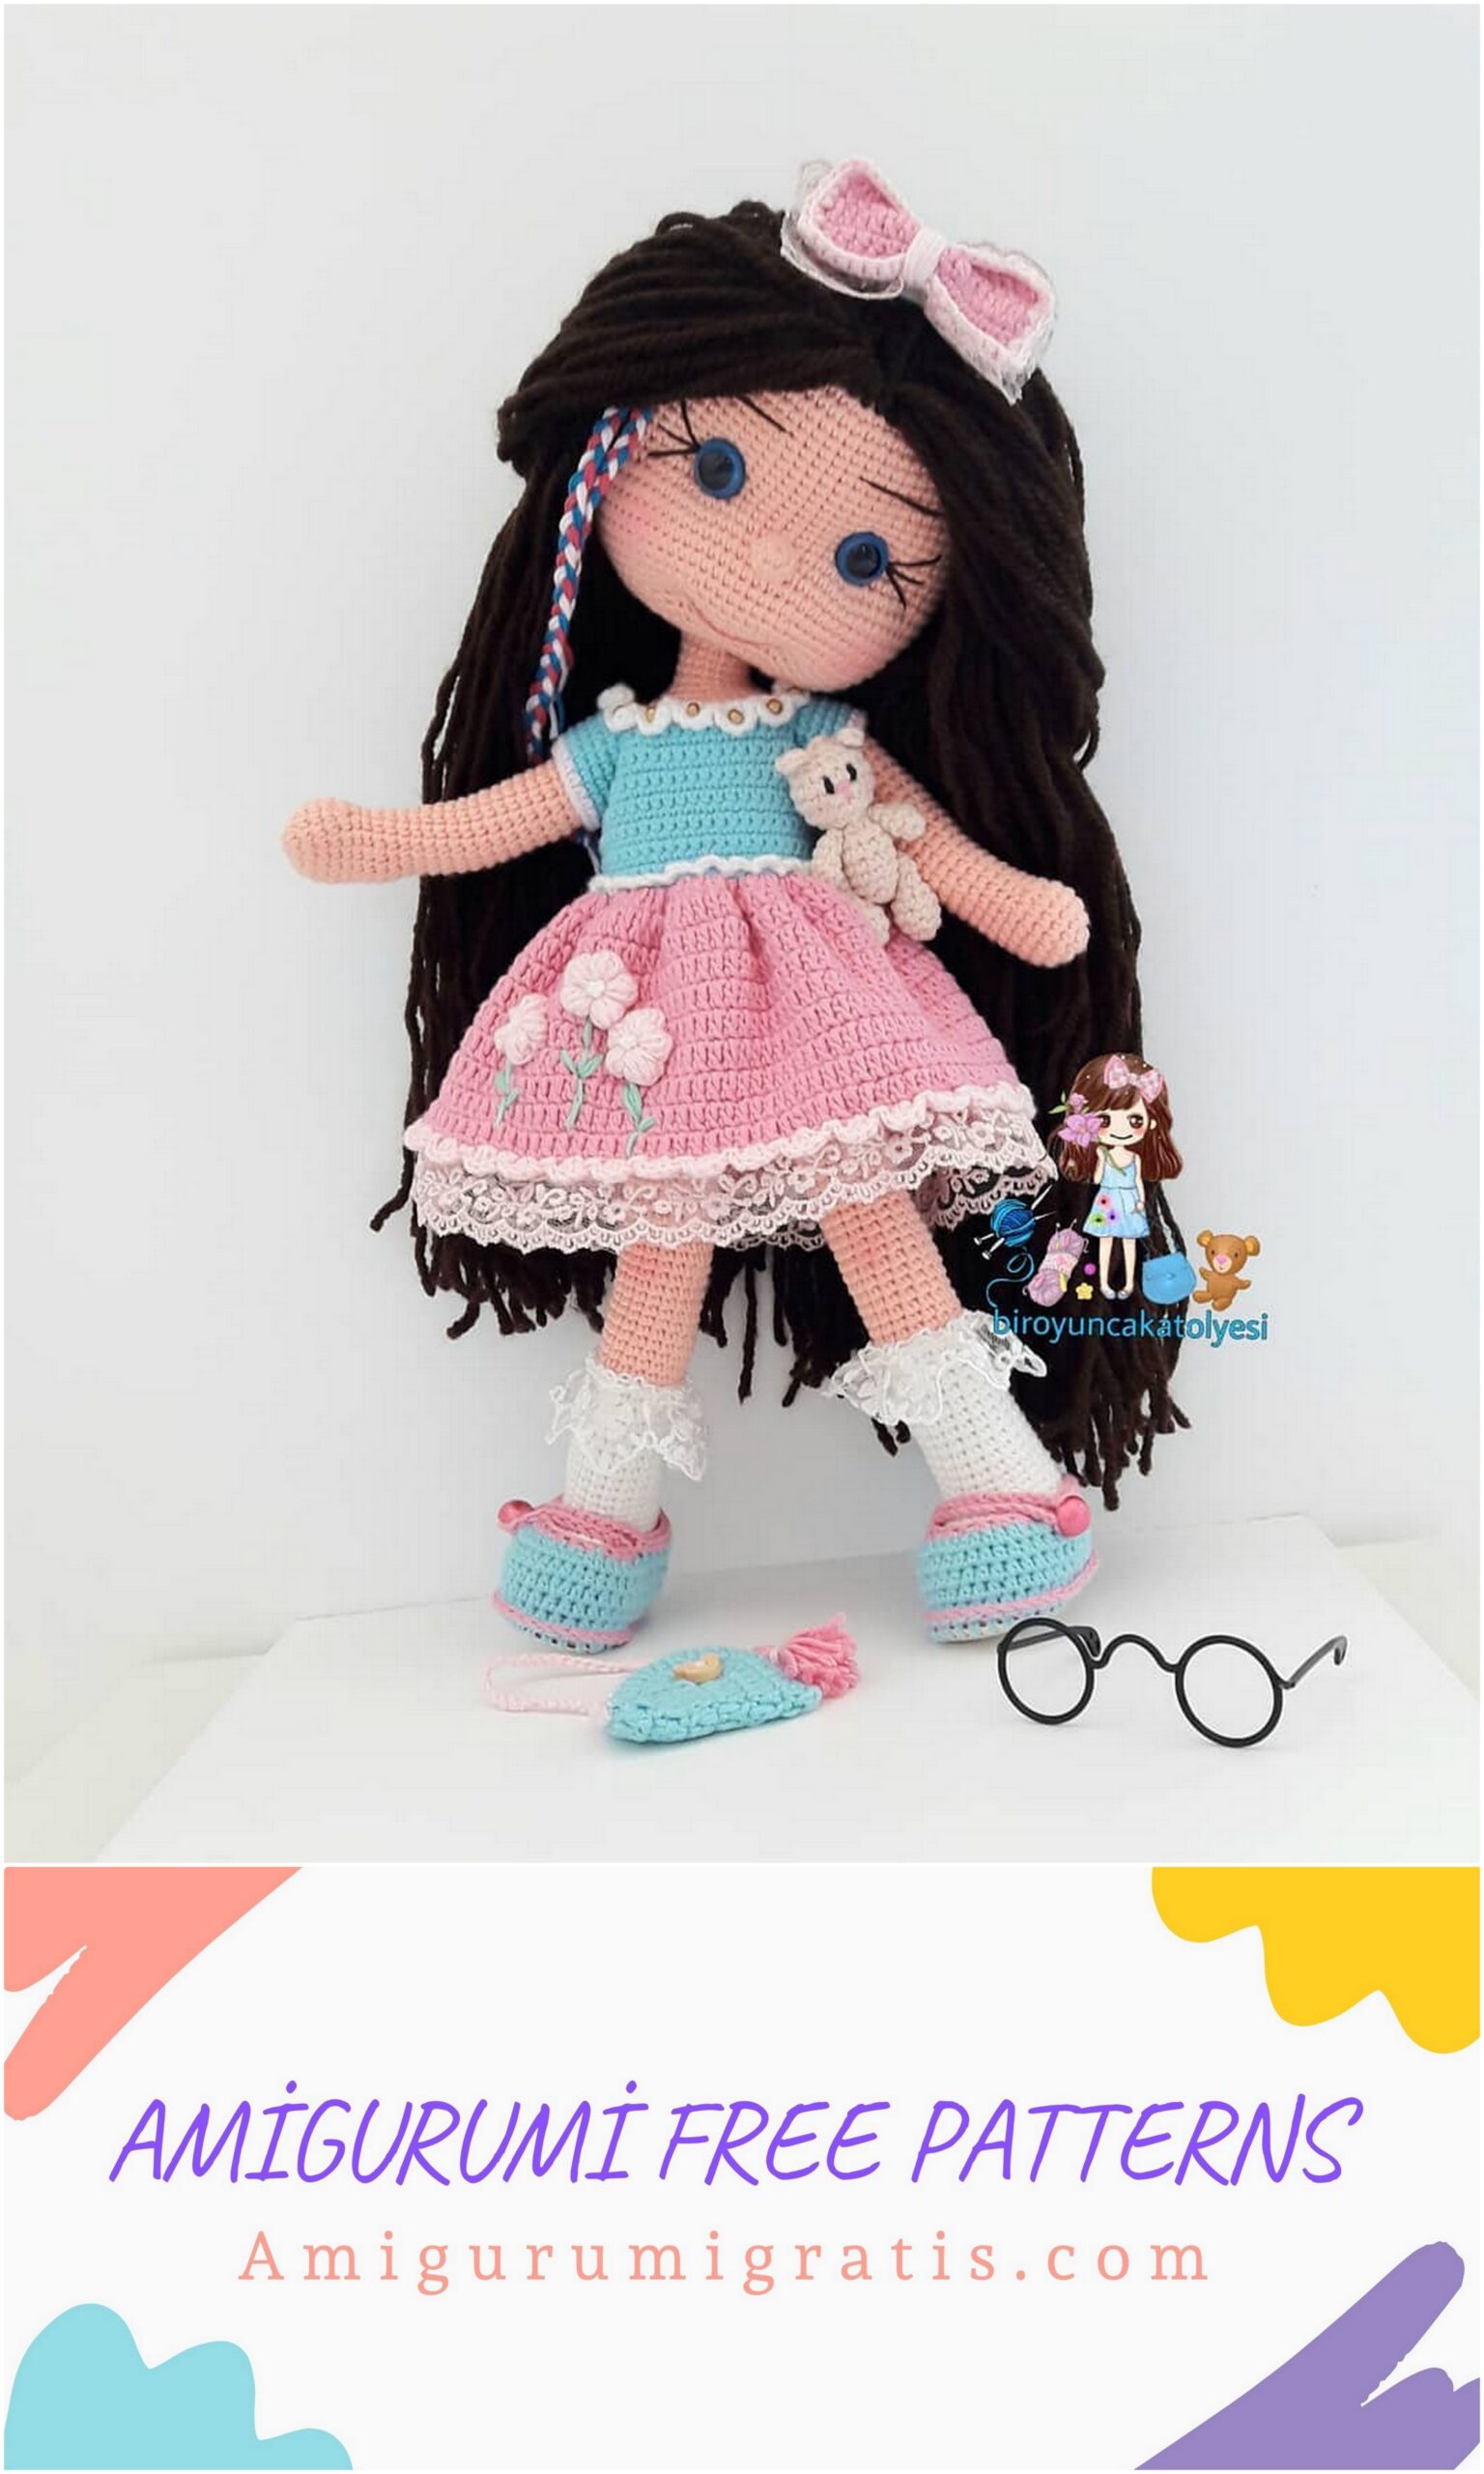
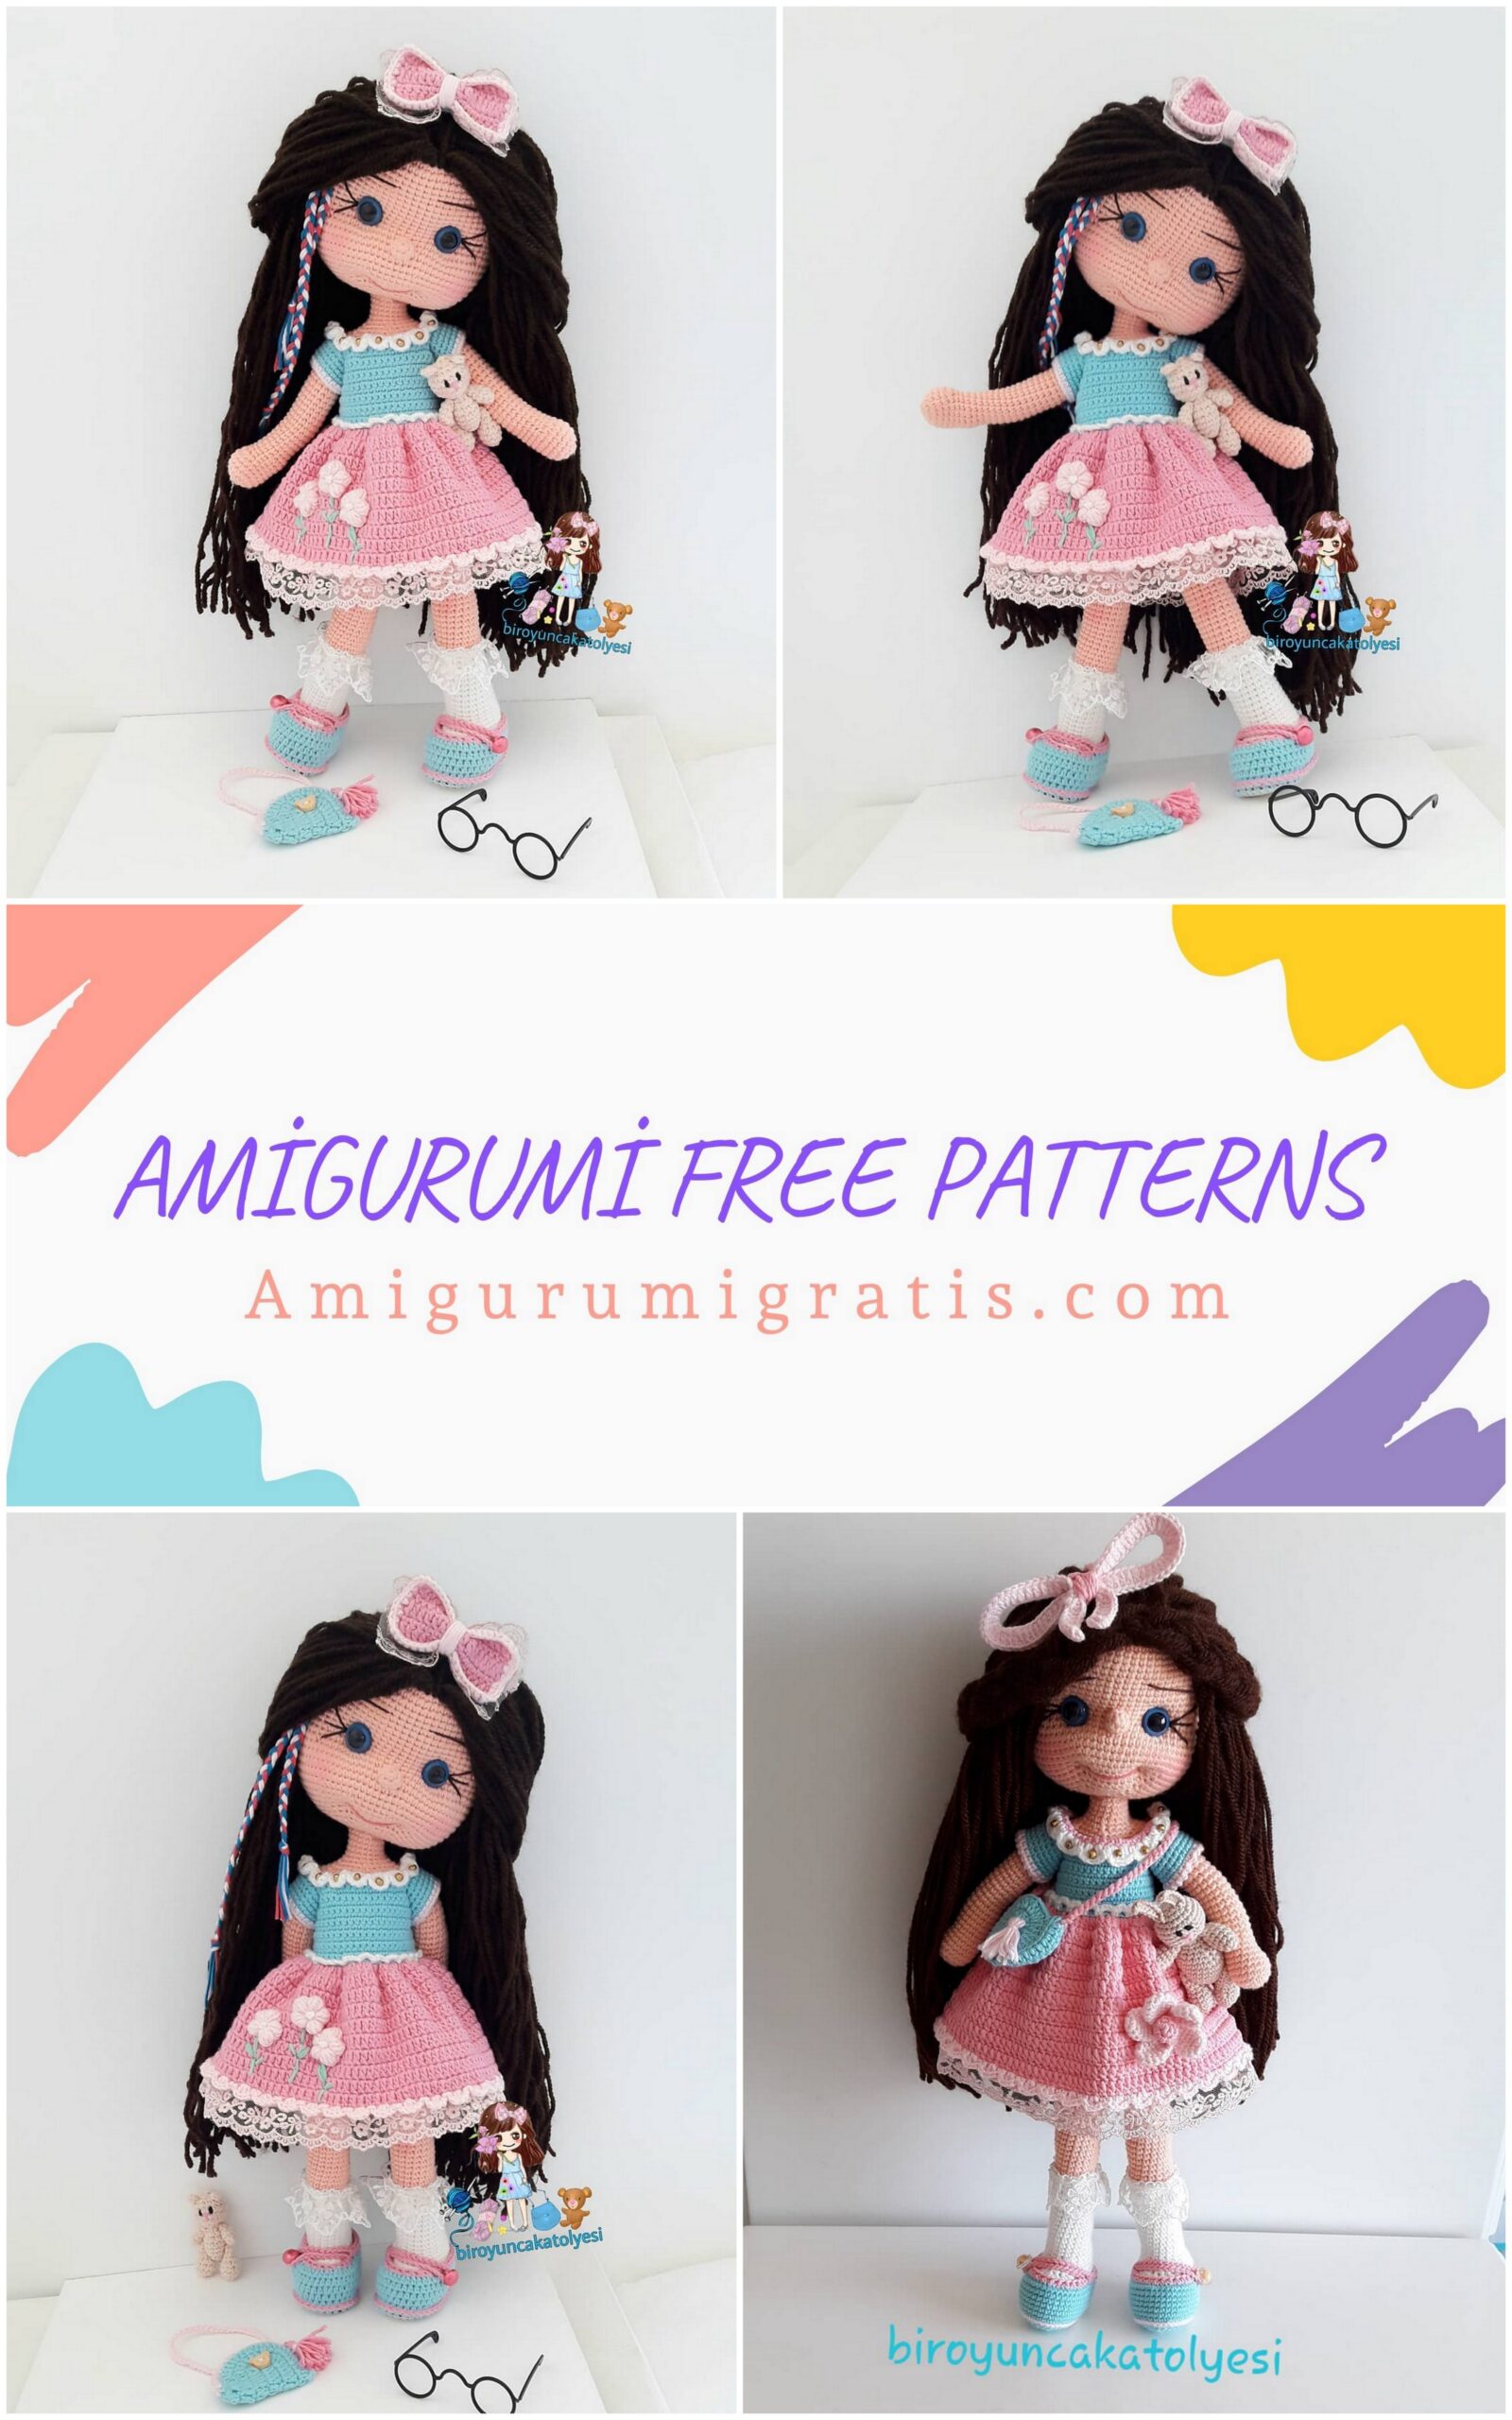
For the arms, cut the 1.5 1,5 wire of about 20-23 cm. Let’s tape them. Let’s lead into the arms with the number 4 skewer and attach the arms to both ends of the wire. You can do this before or after 1-2 rows. For the legs and the body, let’s fold the wire in 2,5 cm length and 70 cm in length. Let’s make room for two legs with a number 5 or 5 skewers and send both ends of the wire to the feet. After joining the arms, twist the wire a little and let the cuffs go up. Let’s fill the body tightly with bead fibers. You can look at the pictures of me planting hair daki on my page while making the hair.
DRESSING
Blouse with Blue,
1-46 chain
2- Go back to the second chain 1 single crochet, 44sc, 1 chain.
3- 7sc, 7 chain, skip 9sc, 14sc, 7 chain, skip 9sc, 7sc, 8 chains back to buttonhole fold back.
Let’s make 8 rows 42sc from 4-11. (Let’s make room for buttonhole when it comes to line 8)
Let’s connect to the end of the 11th place with 1 single crochet.
You come back to the end of the blouse part of the flo as you pull 3chains and jump to a frequent igne sink the next. You go along the waist. Blo, you start skirt. Continue along the row as the first row 1 auction. In the second row, we are continuing to increase 1 railing 1.
3,4,5,6,7,8,9. We continue the queue without increasing or decreasing and finish the skirt. 1 chain with a different color pull the hole next to the chain 2 pull the bat into the hole next to the 1 chain check. We repeat this process along the tip of the skirt.
In the collar we start from behind and weave a row of single crochets. To be from head to toe. Go back and pull 2 chain 2 railing 2 chain pull bat 2 chain pull 2 railing 2 chain pull bat. Continue along the shaped collar. We process beads on the collar.
Flowers of the Dress: 2 chains, 1 popcorn, 1 single crochet into the magic ring. Let’s do this five times. Let’s pull 5 chains to tie it from one place to another, near the center of the flower. Let’s get some of that chain out of front of the flower. With this process we have made the middle of the flower. If you have difficulty in knitting, instead of popcorn, you can make 2 petals, then 3 half double crochet, 2 chains and 1 single crochet. I processed the stem and leaf parts as sl-st. You can also perform the same operation with the needle.
Buckle:
1.16 chains, come back.
Back to 2.15sc, 1chain.
3.15 hdc turn, 1 chain.
4.15sc back, 1 chain.
5.15 hdc back, 1 chain.
Back to 6.15sc, 1chain.
7. 15 hdc, turn back, 1 chain.
8.15sc, turn back, 1 chain.
9.15hdc
Let’s surround all the edges of the rectangle we created with a single crochet. Let’s sew a lace on the back and wrap the rope in the middle of the rectangle to create a bow.
Bag:
hdc: Single railing
inc: Increment as single rail
1-11 chain, 2nd chain 1hdc, 8hdc, same place 4hdc, 8hdc, 1inc
2-1inc, 8hdc, 4inc, 8hdc, 2inc
3-1hdc, 1inc, 8hdc, (1hdc, 1inc) * 4, 8hdc, (1hdc, 1inc) * 2 = 37
4- 2hdc, 1inc, 8hdc, (2hdc, 1inc) * 4, 8hdc, (2hdc, 1inc) * 2
5-3hdc, 1inc, 8hdc, (3hdc, 1inc) .4,8hdc, (3hdc, 1inc) * 2.
Break the rope. Let’s double. Stitch the edges and pull the chain to create the bag handle.
SHOE MAKING
1-11 chain, 2nd chain 1sc, 8sc, same place 4sc, 8sc, 1inc = 23sc
2- 1inc, 8sc, 4inc, 8sc, 2inc = 30
3-1sc, 1inc, 4sc, 4 hdc, (1 hdc, 1inc) .4, 4hdc, 4sc, (1sc, 1inc.2) = 37sc
4- 2sc, 1inc, 8sc, (2sc, 1inc) .4, 8sc, (2sc, 1inc) .2 = 44sc
5-Bowknot scroll with 44sc (yellow color used)
6-8 between 1 = 44sc
9-13sc, 9a, 12sc as single railing (switch to yellow for 10th place)
44sc as 10-sl-st (pull 30 chains to your shoelace and continue to sl-st.)