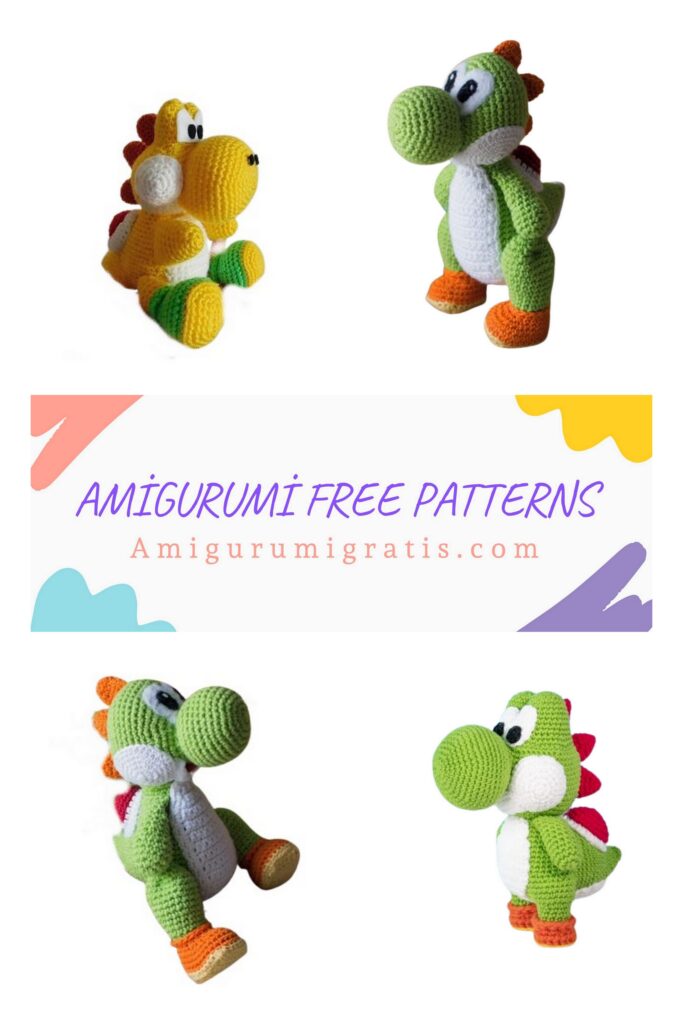
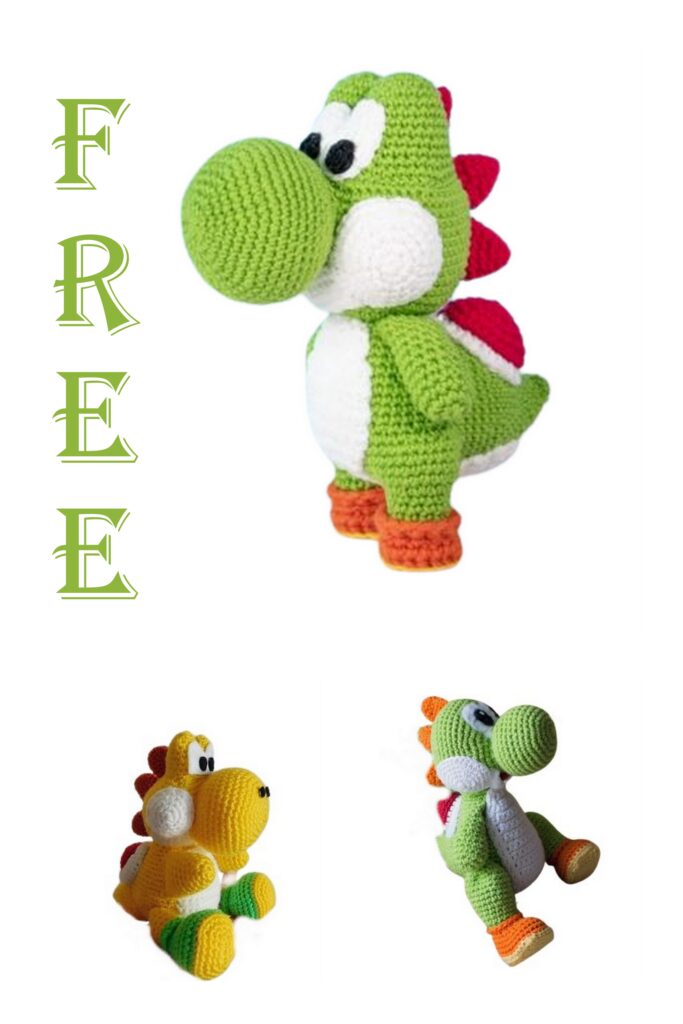
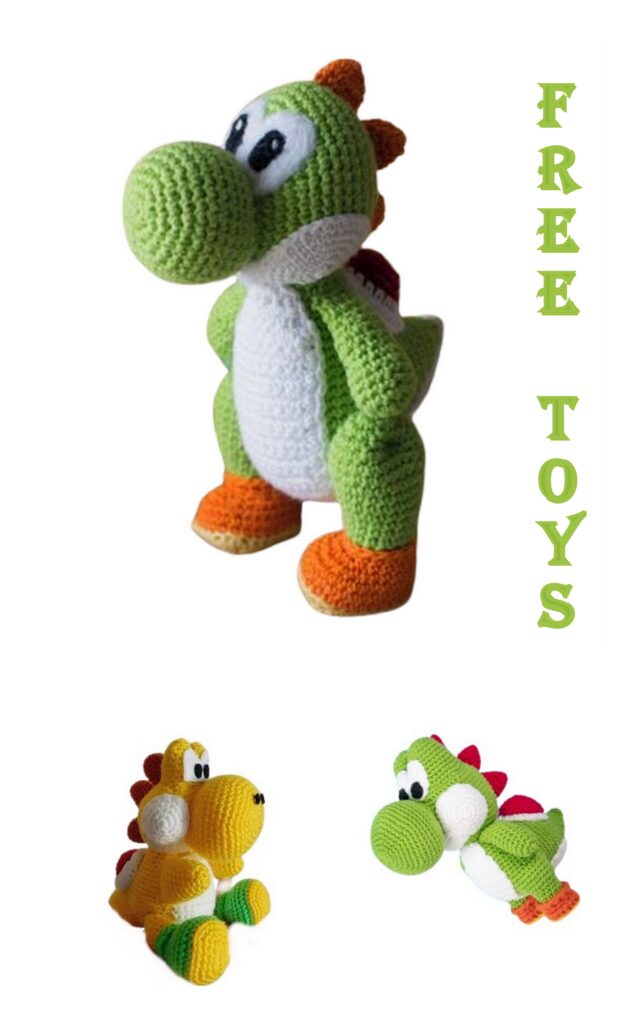
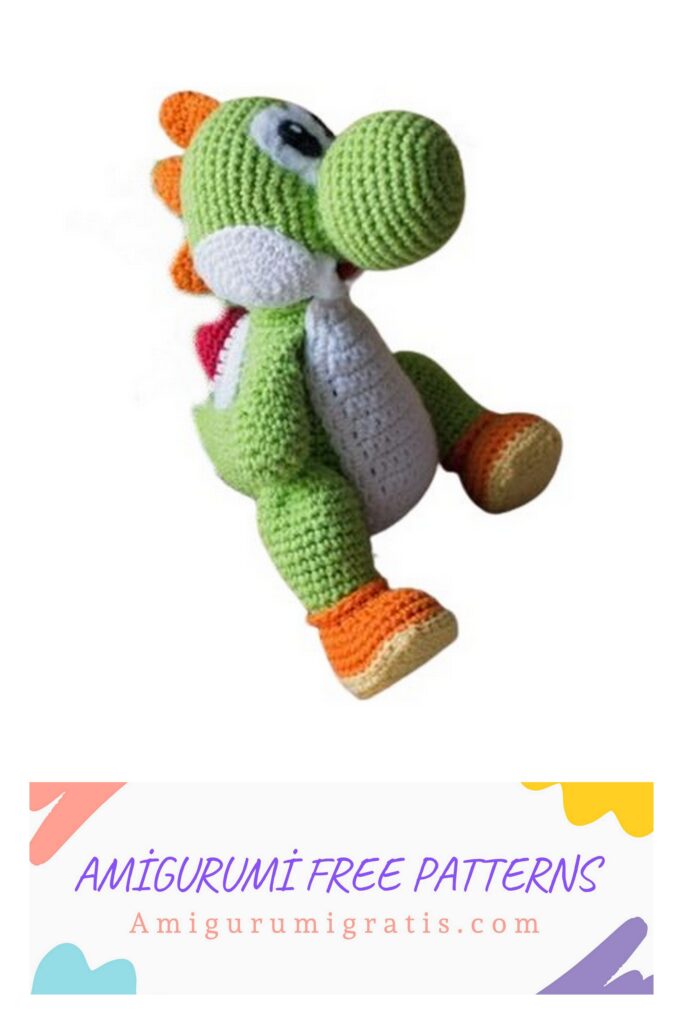
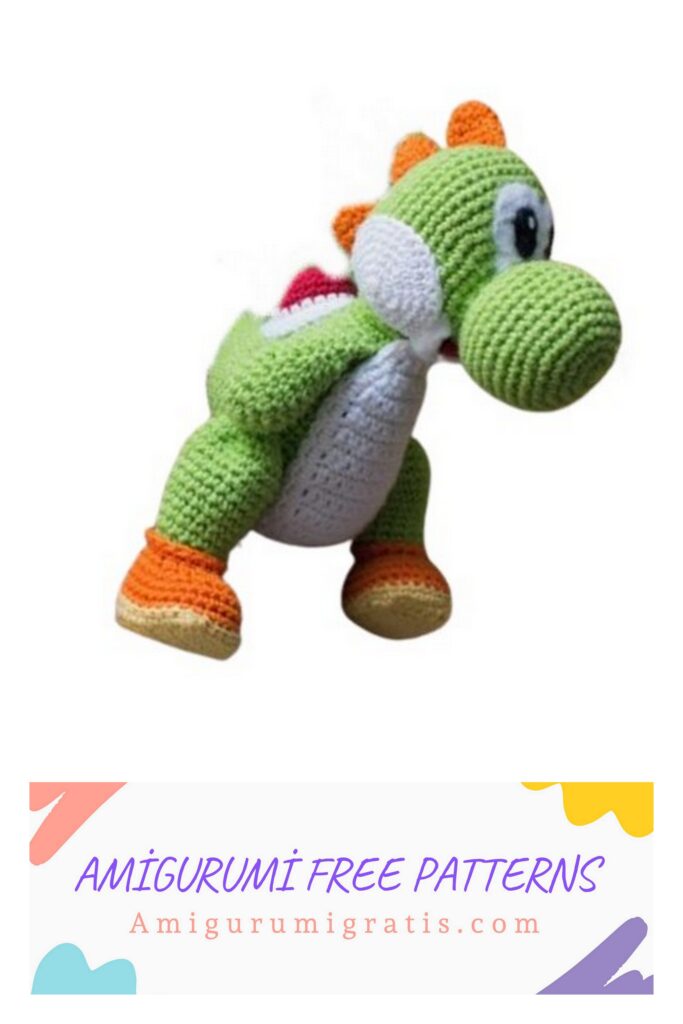
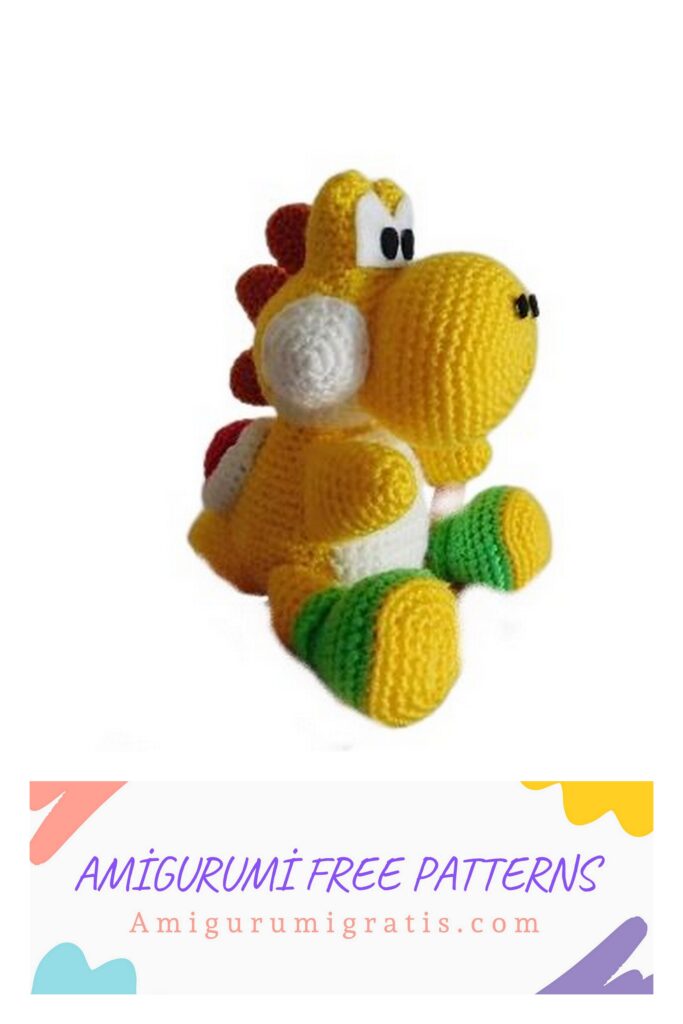
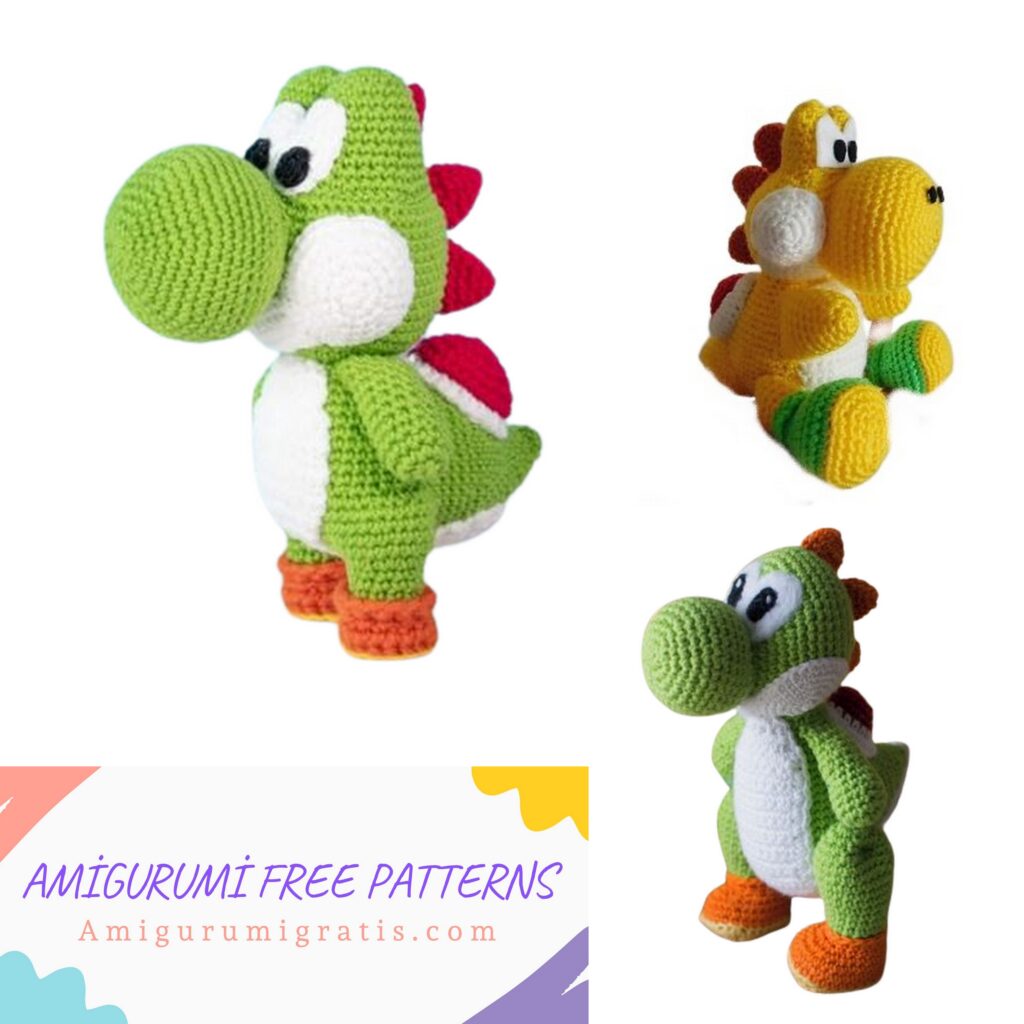
Every part of Yoshi, apart from the belly and the boot details, is worked in rounds – do not join at the end of each round.
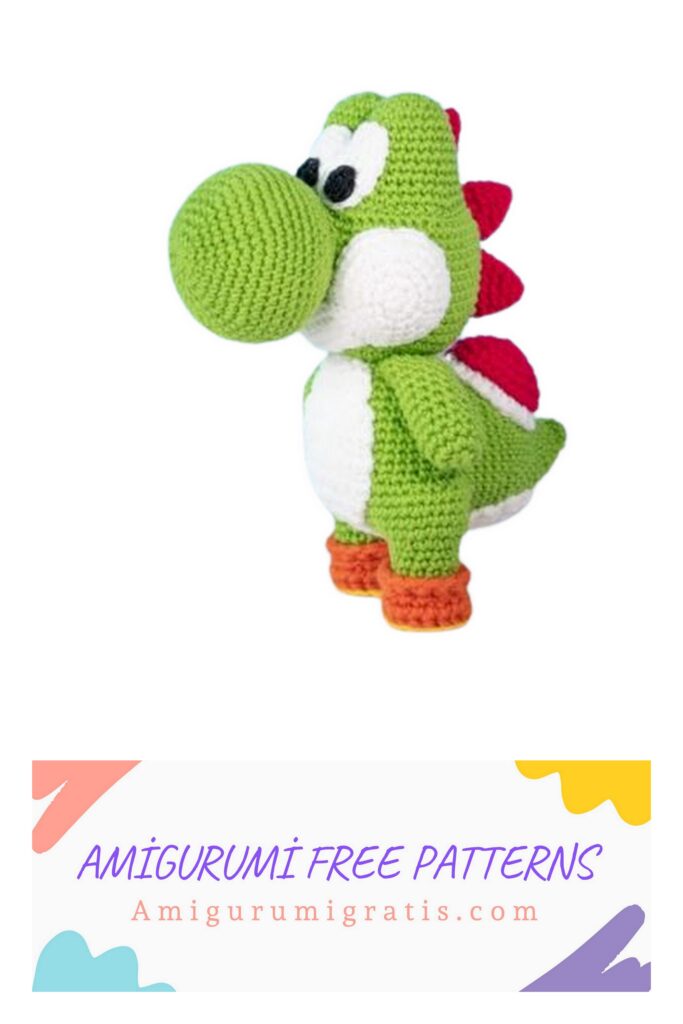
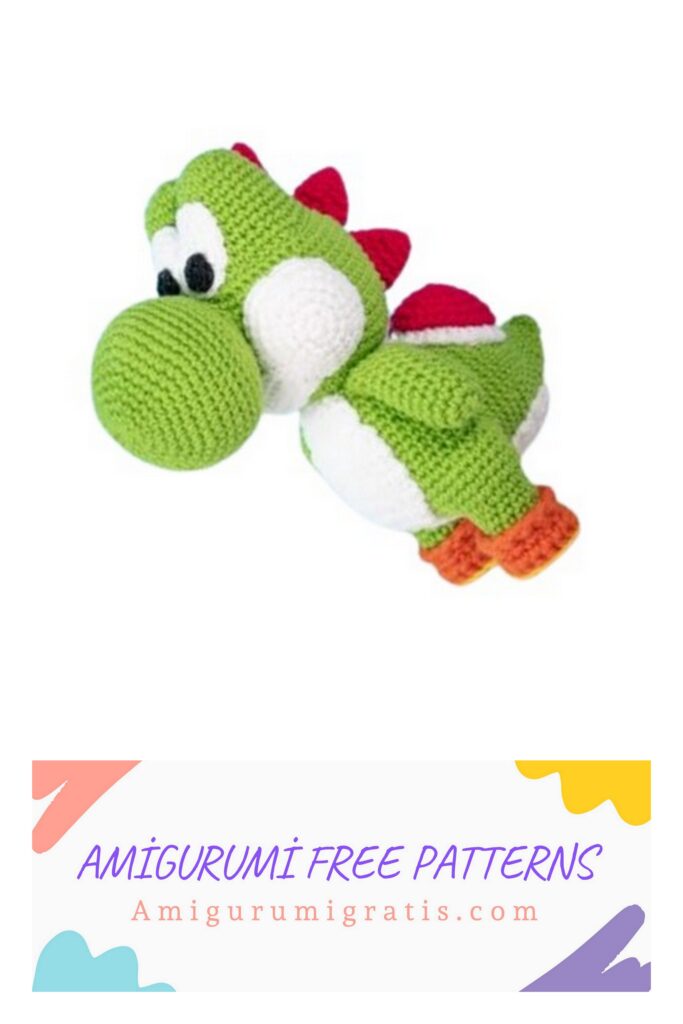
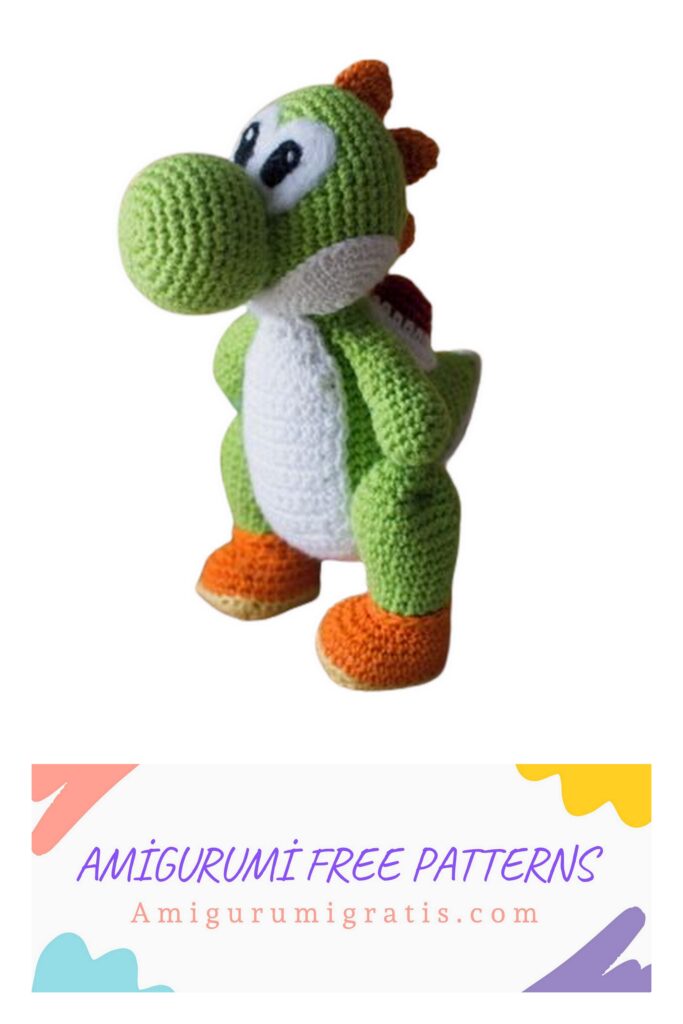
Finished size: approximately 17.5 cm x 12 cm (6.8 inches x 4.7 inches)
Yarn: I use 100% acrylic yarn – Schachenmayr Bravo to be exact. You can pick whatever yarn and colors work for you.
Crochet hook: 3 mm
You will also need: scissors
pins
tapestry needle (or needle and thread)
black and white felt
hot glue (or needle and thread)
toy stuffing
Abbreviations and stitches used: magic ring
single crochet = sc
increase = inc
decrease = dec
chain = ch
back loops only = blo
fasten off = f/o
How to read the pattern: rnd x → we are working on round x
(x sc, inc/dec) * y → the instructions between
parentheses have to be repeated y times; (x sc, inc/dec)
means we will work one single crochet in each x stitches,
and then work one increase or one decrease into the
next stitch. For example, (3 sc, inc) * 6 means: work one
single crochet in each of the next three stitches, one
increase in the fourth stitch; repeat six times
Eyes
start with a magic ring
rnd 1: 6 sc in the magic ring (6)
rnd 2: (1 sc, inc) * 3 (9)
rnd 3: (2 sc, inc) * 3 (12)
rnd 4: 1 sc in each stitch (12)
f/o, leave a short tail for sewing
work rnd 1 to rnd 4 again, don’t fasten off;
you now have the two tops of the eyes and
you have to join them
rnd 5: join the two tops using the yarn still attached to the second top you made by working 1 sc into one of the stitches of rnd 4 of the first top you made; work 1 sc in each of the next 11 sc, then join again the first top to the second one by making one sc in the stitch right after the last sc you made in rnd 4 of the second top; work 1 sc in each of the next 11 sc (24)
rnd 6: (4 sc, inc) * 6 (30)
rnd 7 – 8: 1 sc in each stitch (30)
rnd 9: (3 sc, dec) * 6 (24)
f/o, leave a tail for sewing
Head
start with a ch of 11
rnd 1: starting from the 2nd chain from the hook, work 1 sc in each of the next 9 ch;
make 3 sc in the last ch; start working on the opposite side of the starting chain; 1 sc in each of the next 8 ch, 2 sc in the last ch (22)
rnd 2: inc, 1 sc in each of the next 8 sc, inc, 1 sc in the next sc, inc, 1 sc in each of the next 8 sc, inc (26)
rnd 3: 1 sc, inc, 1 sc in each of the next 9 sc, inc, 1 sc in each of the next 2 sc, inc, 1 sc in each of the next 9 sc, inc, 1 sc (30)
rnd 4: 1 sc in each of the next 2 sc, inc, 1 sc in each of the next 10 sc, inc, 1 sc in each of the next 3 sc, inc, 1 sc in each of the next 10 sc, inc, 1 sc
rnd 5: 1 sc in each of the next 3 sc, inc, 1 sc in each of the next 11 sc, inc, 1 sc in each of the next 4 sc, inc, 1 sc in each of the next 11 sc, inc, 1 sc
rnd 6: 1 sc in each stitch (38)
rnd 7: 1 sc in each of the next 4 sc, inc, 1 sc in each of the next 12 sc, inc, 1 sc in each of the next 5 sc, inc, 1 sc in each of the next 12 sc, inc, 1 sc
rnd 8: (6 sc, inc) * 6 (48)
rnd 9 – 10: switch to white yarn 1 sc in each of the next 26 sc, switch to color of the body, 1 sc in each of the next 22 sc (48)
rnd 11: switch to white yarn, (6 sc, dec) * 3, 1 sc in each of the next 2 sc, switch to color of the body, 1 sc in each of the next 5 sc, dec, (6 sc, dec) * 2 (42)
rnd 12: switch to white yarn, 1 sc in each of the next 23 sc, switch to color of the body, 1 sc in each of the next 19 sc (42)
rnd 13: switch to white yarn, (5 sc, dec) * 3, 1 sc in each of the next 2 sc, switch to color of the body, 1 sc in each of the next 3 sc, dec, (5 sc, dec) * 2 (36)
rnd 14: switch to white yarn, 1 sc in each of the next 20 sc, switch to color of the body, 1 sc in each of the next 16 sc (36)
rnd 15: switch to white yarn, (4 sc, dec) * 3, 1 sc in each of the next 2 sc, switch to color of the body, 1 sc in each of the next 2 sc, dec, (4 sc, dec) * 2 (30)
rnd 16: switch to white yarn, 1 sc in each of the next 17 sc, switch to color of the body, 1 sc in each of the next 13 sc (30)
rnd 17: switch to white yarn, (3 sc, dec) * 3, 1 sc in each of the next 2 sc, switch to color of the body, 1 sc, dec, (3 sc, dec) * 2 (24)
start stuffing the head and keep stuffing as you go
rnd 18: switch to white yarn, (2 sc, dec) * 3, 1 sc in each of the next 2 sc, switch to color of the body, dec, (2 sc, dec) * 2 (18)
rnd 19: switch to white yarn, (1 sc, dec) * 3, 1 sc in each of the next 2 sc, switch to color of the body, dec, dec, 1 sc, dec (12)
rnd 20: (dec) * 6 (6)
f/o
Cheek (make two)
with white yarn, start with a magic ring
rnd 1: 6 sc in the magic ring (6)
rnd 2: (inc) * 6 (12)
rnd 3: (1 sc, inc) * 6 (18)
rnd 4: (2 sc, inc) * 6 (24)
rnd 5: 1 sc in each stitch (24)
f/o, leave a tail for sewing
Body
start with a magic ring
rnd 1: 6 sc in the magic ring (6)
rnd 2: (inc) * 6 (12)
rnd 3: (1 sc, inc) * 6 (18)
rnd 4: (2 sc, inc) * 6 (24)
rnd 5: (3 sc, inc) * 6 (30)
rnd 6: (4 sc, inc) * 6 (36)
rnd 7: (5 sc, inc) * 6 (42)
rnd 8: 1 sc in each stitch (42)
rnd 9: (6 sc, inc) * 6 (48)
rnd 10: 1 sc in each stitch (48)
rnd 11: (7 sc, inc) * 6 (54)
rnd 12 to 14: 1 sc in each stitch (54)
rnd 15: (7 sc, dec) * 6 (48)
rnd 16: 1 sc in each stitch (48)
rnd 17: (6 sc, dec) * 6 (42)
rnd 18: 1 sc in each stitch (42)
rnd 19: (5 sc, dec) * 6 (36)
Muzzle
start with a magic ring
rnd 1: 6 sc in the magic ring (6)
rnd 2: (inc) * 6 (12)
rnd 3: (1 sc, inc) * 6 (18)
rnd 4: (2 sc, inc) * 6 (24)
rnd 5: (3 sc, inc) * 6 (30)
rnd 6: (4 sc, inc) * 6 (36)
rnd 7: (5 sc, inc) * 6 (42)
rnd 8: 1 sc in each stitch (42)
rnd 9: (6 sc, inc) * 6 (48)
rnd 10 to 12: 1 sc in each stitch (48)
rnd 13: (6 sc, dec) * 6 (42)
rnd 14: 1 sc in each stitch (42)
rnd 15: (5 sc, dec) * 6 (36)
rnd 16: 1 sc in each stitch (36)
f/o, leave a tail for sewing
rnd 20: 1 sc in each stitch (36)
rnd 21: (4 sc, dec) * 6 (30)
rnd 22: 1 sc in each stitch (30)
start stuffing the body and keep stuffing as you go
rnd 23: (3 sc, dec) * 6 (24)
rnd 24: 1 sc in each stitch (24)
rnd 25: (2 sc, dec) * 6 (18)
f/o, leave a tail for sewing
Arm (make two)
start with a magic ring
rnd 1: 6 sc in the magic ring (6)
rnd 2: (inc) * 6 (12)
rnd 3: 1 sc in each stitch (12)
rnd 4: (3 sc, inc) * 3 (15)
rnd 5 to 12: 1 sc in each stitch (15)
stuff the arm
rnd 13: join the two sides of rnd 12 by working 7 sc
f/o, leave a tail for sewing
Leg (make two)
start with a ch 6
rnd 1: starting from the second chain from the hook, make 1 sc in each of the next 4 ch; 3 sc in the last chain; turn your work and start working on the other side of the chain;
1 sc in each of the next 3 ch; 2 sc in the last ch (12)
rnd 2: inc, 1 sc in each of the next 3 sc, inc, 1 sc, inc, 1 sc in each of the next 3 sc, inc, 1 sc (16)
rnd 3: 1 sc, inc, inc, 1 sc in each of the next 3 sc, inc, inc, 1 sc, inc, inc, 1 sc in each of the next 3 sc, inc, inc, 1 sc (24)
rnd 4: 1 sc in each of the next 2 sc, inc, inc, 1 sc in each of the next 5 sc, inc, inc, 1 sc in each of the next 3 sc, inc, inc, 1 sc in each of the next 5 sc, inc, inc, 1 sc (32)
switch to color of the shoe if you need to
rnd 5: in blo 1 sc in each stitch (32)
rnd 6: 1 sc in each stitch (32)
rnd 7: (14 sc, dec) * 2 (30)
rnd 8: 1 sc in each stitch (30)
rnd 9: 1 sc in each of the next 4 sc, (2 sc, dec) * 6, 1 sc in each of the next 2 sc (24)
rnd 10: 1 sc in each of the next 4 sc, (1 sc, dec) * 6, 1 sc in each of the next 2 sc (18)
start stuffing the foot and keep stuffing the leg as you go
rnd 11: 1 sc in each of the next 4 sc, (dec) *6, 1 sc in each of the next 2 sc (12)
Spike (make three)
start with a magic ring
rnd 1: 6 sc in the magic ring (6)
rnd 2: (1 sc, inc) * 3 (9)
rnd 3: (2 sc, inc) * 3 (12)
rnd 4 to 6: 1 sc in each stitch (12)
f/o, leave a tail for sewing
Leg (make two)
start with a ch 6
rnd 1: starting from the second chain from the hook, make 1 sc in each of the next 4 ch; 3 sc in the last chain; turn your work and start working on the other side of the chain;
1 sc in each of the next 3 ch; 2 sc in the last ch (12)
rnd 2: inc, 1 sc in each of the next 3 sc, inc, 1 sc, inc, 1 sc in each of the next 3 sc, inc, 1 sc (16)
rnd 3: 1 sc, inc, inc, 1 sc in each of the next 3 sc, inc, inc, 1 sc, inc, inc, 1 sc in each of the next 3 sc, inc, inc, 1 sc (24)
rnd 4: 1 sc in each of the next 2 sc, inc, inc, 1 sc in each of the next 5 sc, inc, inc, 1 sc in each of the next 3 sc, inc, inc, 1 sc in each of the next 5 sc, inc, inc, 1 sc (32)
switch to color of the shoe if you need to
rnd 5: in blo 1 sc in each stitch (32)
rnd 6: 1 sc in each stitch (32)
rnd 7: (14 sc, dec) * 2 (30)
rnd 8: 1 sc in each stitch (30)
rnd 9: 1 sc in each of the next 4 sc, (2 sc, dec) * 6, 1 sc in each of the next 2 sc (24)
rnd 10: 1 sc in each of the next 4 sc, (1 sc, dec) * 6, 1 sc in each of the next 2 sc (18)
start stuffing the foot and keep stuffing the leg as you go
rnd 11: 1 sc in each of the next 4 sc, (dec) * 6, 1 sc in each of the next 2 sc (12)
rnd 12 – 13: 1 sc in each stitch (12)
switch to color of the body
rnd 14: 1 sc in each stitch (12)
rnd 15: (3 sc, inc) * 3 (15)
rnd 16: 1 sc in each stitch (15)
rnd 17: (4 sc, inc) * 3 (18)
rnd 18 – 19: 1 sc in each stitch (18)
rnd 20: (1 sc, dec) * 6 (12)
rnd 21: (dec) * 6 (6)
f/o, leave a tail for sewing
Tail
start with a magic ring
rnd 1: 6 sc in the magic ring (6)
rnd 2: (1 sc, inc) * 3 (9)
rnd 3: (2 sc, inc) * 3 (12)
rnd 4: (1 sc, inc) * 6 (18)
rnd 5: 1 sc in each stitch (18)
rnd 6: (2 sc, inc) * 6 (24)
rnd 7: 1 sc in each stitch (24)
rnd 8: (3 sc, inc) * 6 (30)
rnd 9 – 10: 1 sc in each stitch (30)
rnd 11: (4 sc, inc) * 6 (36)
rnd 12 – 13: 1 sc in each stitch (36)
f/o, leave a tail for sewing
Shell
start with a magic ring
rnd 1: 6 sc in the magic ring (6)
rnd 2: (inc) * 6 (12)
rnd 3: (1 sc, inc) * 6 (18)
rnd 4: 1 sc in each stitch (18)
rnd 5: (2 sc, inc) * 6 (24)
change to white
rnd 6: (3 sc, inc) * 6 (30)
rnd 7 – 9: 1 sc in each stitch (30)
f/o, leave a long tail for sewing
Belly
start with a ch 13
row 1: starting from the second chain from the hook, work 1 sc in each of the next 12 ch, ch 1 and turn (12)
row 2 to 12: 1 sc in each of the next 12 sc, ch 1, turn (12)
row 13: dec, 1 sc in each of the next 8 sc, dec, ch 1, turn (10)
row 14: 1 sc in each of the next 10 sc (10)
row 15: dec, 1 sc in each of the next 6 sc, dec (8)
row 16 – 17: 1 sc in each of the next 8 sc (8)
f/o, leave a long tail for sewing
Eyes
Using white felt, cut a shape as the one shown in the picture below; the base should be approximately 4 cm (1.57 inches) long; each half of the eyes should be 2 cm (0.78 inches) wide and 2.6 cm (1.02 inches) high. Cut some small black ovals with a flat base as pupils.
Boot detail (make two)
start with a ch 19 row 1: starting from second chain from the hook, 1 sc in each of the next 18 ch (18)
f/o, leave a tail for sewing
Assembling
Attach the pupils to the felt eyes, and then the felt eyes to the crocheted eyes – you can use either hot glue or needle and thread.
Stuff the eyes and attach them to the head; they should cover rnd 1 to rnd 3 of the head; the felt eyes should be on the same side as the white part of the head.
Attach the muzzle to the head; try to center it checking with the position of the eyes; it should cover rnd 5 to rnd 17 of the head. Stuff the muzzle when you’re almost done with sewing it t the head.
Attach the cheeks to the sides of the head, one stitch from the muzzle and 1 or 2 rounds under the eyes; they should cover rnd 5 to rnd 13 of the head. Stuff the cheeks when you’re almost done with sewing them to the head.
Attach the spikes to the eyes and head; the first spike should go from in between the middle of the eyes to rnd 5 of the head; the second one from rnd 7 to rnd 11 of the head; the third one from rnd 13 to rnd 17 of the head, possibly following a straight line.
Attach the belly to the body; start from the last round of the body and keep the belly as straight as possible; it should reach approximately rnd 7 of the body.
Attach the arms to the body; they should cover rnd 16 to rnd 22 of the body; the top corner of the arm should be placed two stitches away from the belly.
Place the boot details on each boot, wrapping it around rnd 13 and rnd 14 of the leg; sew the two ends together and then the boot detail to the leg.
Attach the legs to the body; the top of the legs should be , compared to the top of the arms, 4 stitches deeper into the body. They should cover rnd 7 to rnd 11 of the body.
Attach the tail to the body; try to center it counting an equal amount of stitches from the legs on both sides (I got 2 or 3 stitches from each leg). The tail should cover rnd 4 to rnd 16 of the body.
Fold the white edge of the shell and give it a couple of stitches to make sure it doesn’t unfold.
Attach the shell to the body – it should cover rnd 24 to rnd 16 of the body and then cover a bit of the tail as well.
Attach the head to the body – cut two small black felt circles to make the nose and attach them to the muzzle using hot glue or needle and thread.