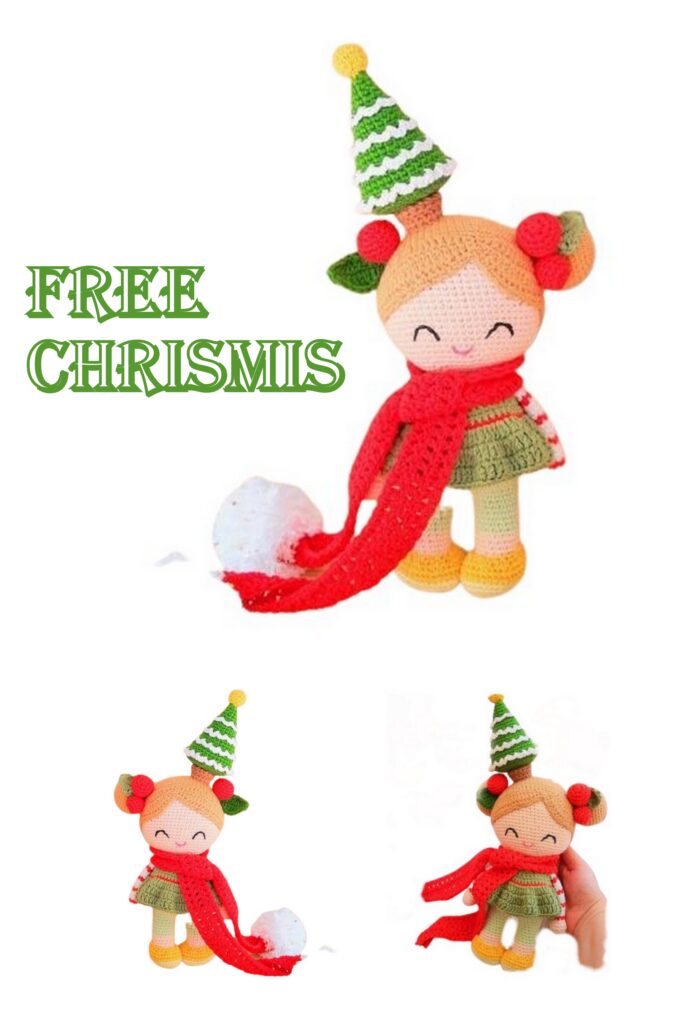
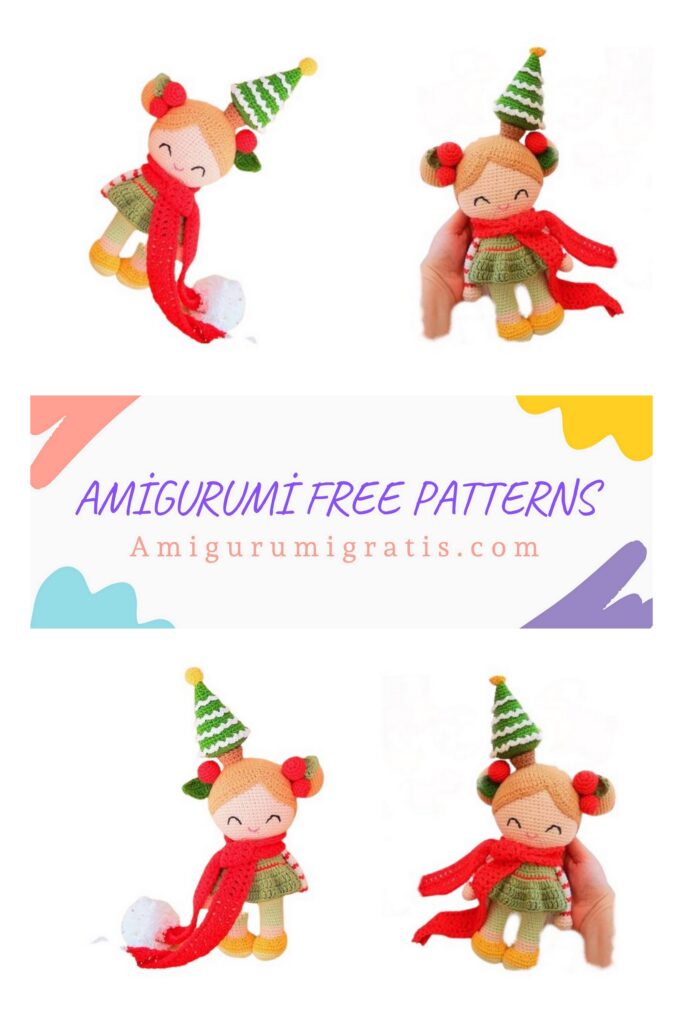
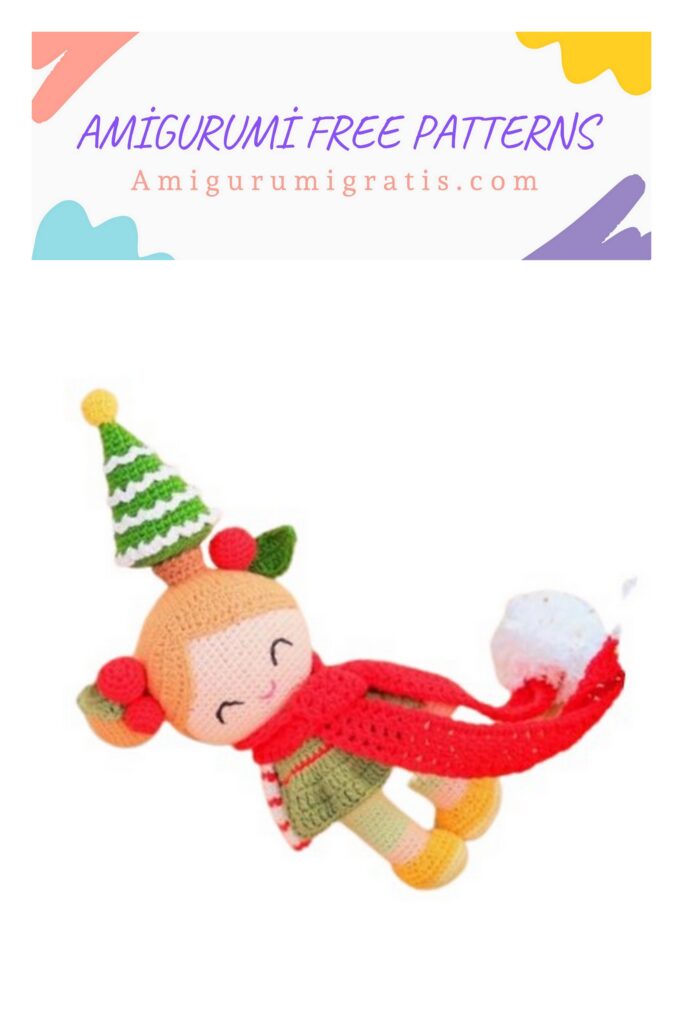
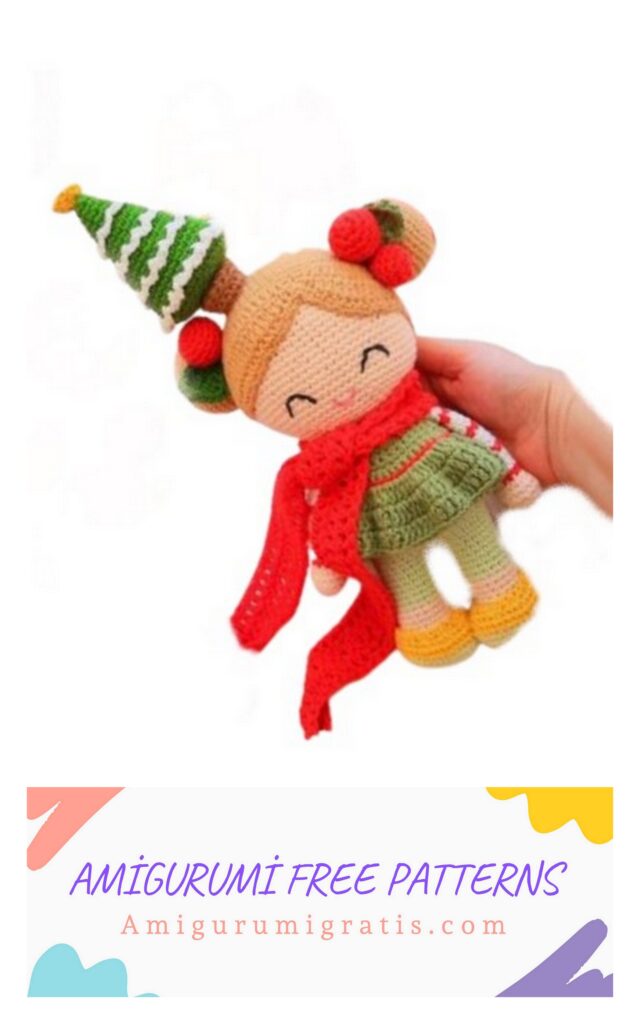
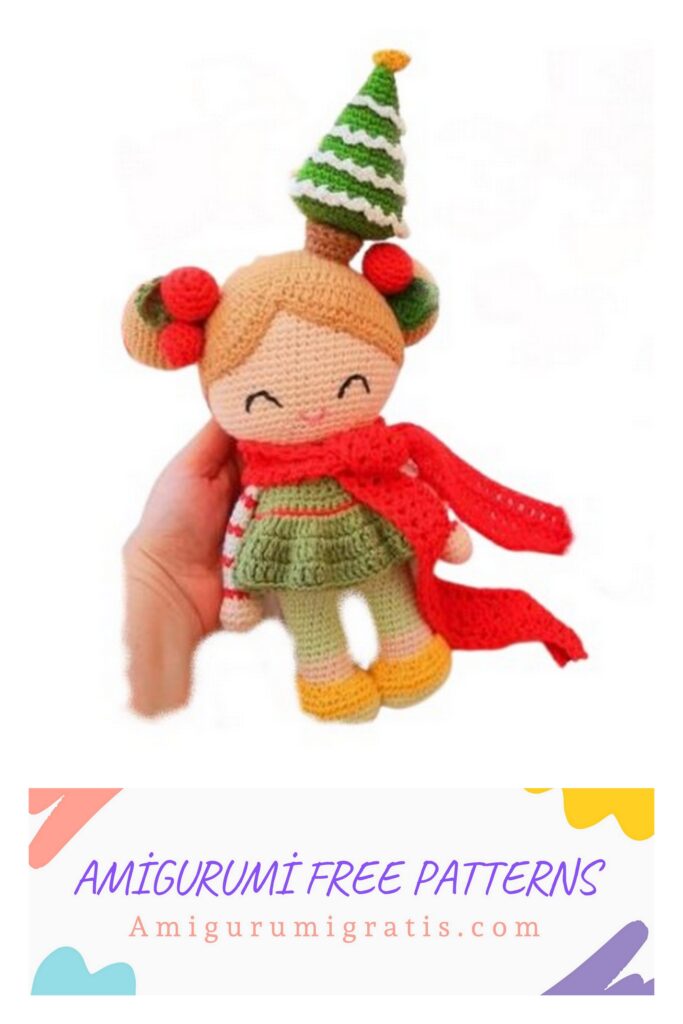
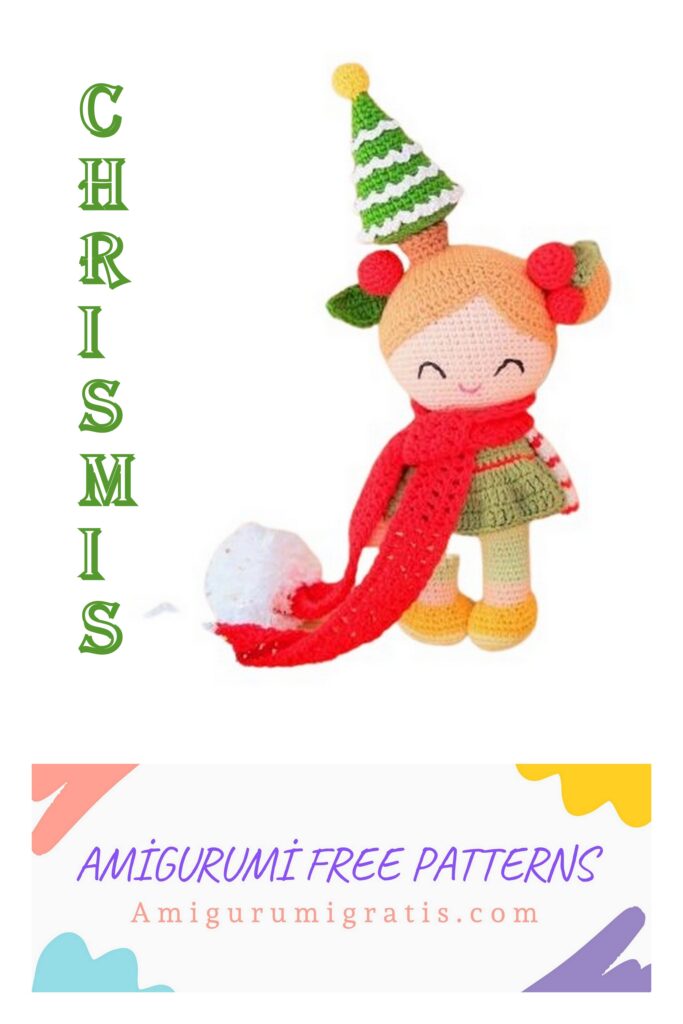
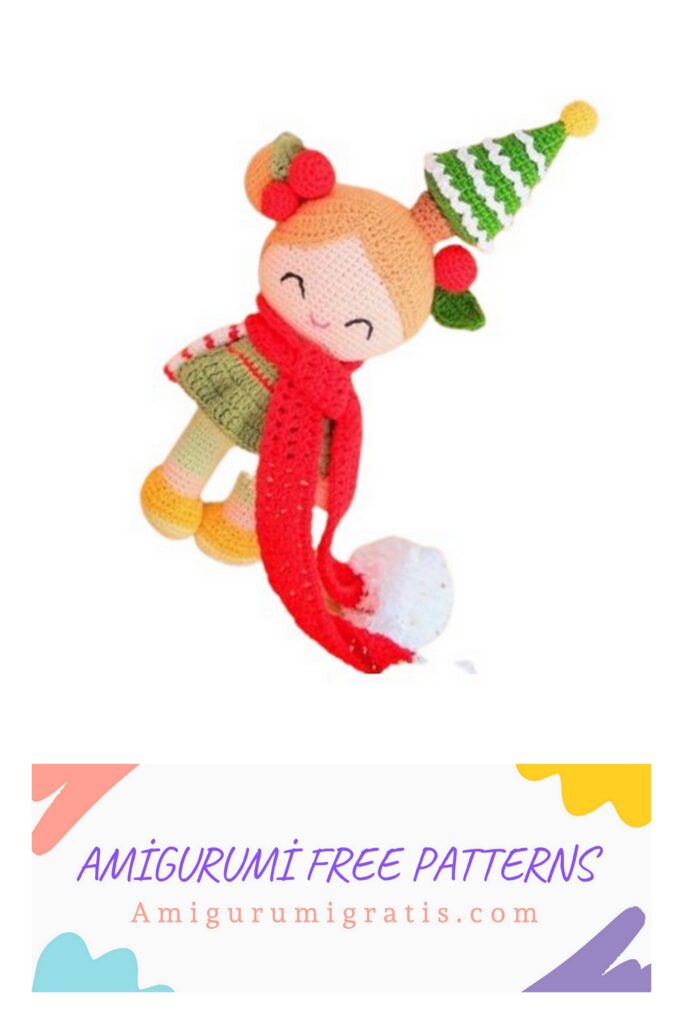
We continue to share the most beautiful amigurumi patterns. You can visit our website for the Amigurumi Christmas doll free pattern.
MATERIALS
Semi-thick cotton thread
8/6: flesh-colored, bright green, dark green, pistachio green, red, white, caramel brown, chocolate brown, yellow, white, bright yellow. Black thread for eye embroidery and another pink thread for mouth embroidery.
3mm and 4mm crochet hooks (the latter is only for knitting a scarf)
Fleece / padding
Stitch marker
Yarn needle
Scissors
Long pins and small
round head pins.
Pegovki 3 (pcs)
Cardboard is not very hard
REDUCTION
CH: chain loop
– SL-ST: connecting loop
– SC: single crochet
– HDC: half double crochet
-DC: Column with crochet
– İNC: add
– DEC: decrease
Head
We knit the head with a flesh color …
Row 1: İNTO MAGİC RİNG 6 SC
Row 2: 1 İNC in each loop (12 SC)
Row 3: 1 SC, 1 INC x 6 (18 SC)
Row 4: 2 SC, 1 INC x 6 (24 SC)
Row 5: 3 SC, 1 INC x 6 (30 SC)
Row 6: 4 SC, 1 INC x 6 (36 SC)
Row 7: 5 SC, 1 INC x 6 (42 SC)
Row 8: 6 SC, 1 INC x 6 (48 SC)
Row 9: 7 SC, 1 INC x 6 (54 SC)
Row 10: 8 SC, 1 INC x 6 (60 SC)
Row 11: 9 SC, 1 INC x 6 (66 SC)
Rows 12 to 27: 1 SC in each loop (66 SC)
Row 28: 9 SC, 1 DEC x 6 (60 SC)
Row 29: 8 SC, 1 DEC x 6 (54 SC)
Row 30: 7 SC, 1 DEC x 6 (48 SC)
Fill tightly as we knit
Row 31: 6 SC, 1 DEC x 6 (42 SC)
Row 32: 5 SC, 1 DEC x 6 (36 SC)
Row 33: 4 SC, 1 DEC x 6 (30 SC)
Row 34: 3 SC, 1 DEC x 6 (24 SC)
Row 35: Knit at the back of the hinge only, 24 SC.
Row 36: 2 SC, 1 DEC x 6 (18 SC)
Row 37: 1 SC, 1 DEC x 6 (12 SC)
Row 38: 6 DEC.
Cut the thread, leaving a long thread that will allow the head to be sewn onto the body of our doll later. Pass the thread through the yarn needle and close the hole that may have been left at the base.
Once the hole is closed, pass the thread inside the head and take it out through the first loop of row 35 (in the one in which we knitted behind the back wall of the loop). This will come in handy later when we need to sew the head to the body; I’ll tell you how later.
Hair
Now we will continue to knit the hair of our Little
May. To do this, we will knit a wig base and two caramel-colored bundles … Let’s find out how to do it!
The foundation
Row 1: Caramel: İNTO MAGİC RİNG 6 SC
Row 2: 1 İNC in each loop (12 SC)
Row 3: 1 SC, 1 INC x 6 (18 SC)
Row 4: 2 SC, 1 INC x 6 (24 SC)
Row 5: 3 SC, 1 INC x 6 (30 SC)
Row 6: 4 SC, 1 INC x 6 (36 SC)
Row 7: 5 SC, 1 INC x 6 (42 SC)
Row 8: 6 SC, 1 INC x 6 (48 SC)
Row 9: 7 SC, 1 INC x 6 (54 SC)
Row 10: 8 SC, 1 INC x 6 (60 SC)
Row 11: 9 SC, 1 INC x 6 (66 SC)
Hair
Rows 12 to 22: 1 SC in each stitch (66 SC)
Starting on the next rows, we will knit with a few different stitches to form our little May’s bangs.
Pay close attention to the following rows to avoid confusion.
Row 23: 16 SC, 3 HDC, 2 DC, 3 İNC-DC, 2 DC, 1 HDC, 1 SC, 1 SL-ST, 1 SC, 1 HDC, 3 DC, (1 İNC-DC, 1 DC) x 4, 1 İNC-DCetas, 4 DC, 2 HDC, 17 SC. If all went well, then you should have knitted only 74 stitches in this row.
Row 24: 16 SC, 3 HDC, 3 DC, 1 İNC-DC, 6 DC, 1 HDC, 1 SC, 1 SL-ST, 1 SC, 2 HDC, 17 DC, 3 HDC, 19 SC.
If all went well, you should have knitted 75 stitches in this row.
Row 25: 32 SC, 1 SL-ST, 42 SC (75 st)
Cut, leaving a very long thread to sew the wig to the head. Secure the wig to your head with pins, and sew it on.
Now we knit the bundles.
Bundle x 2
Row 1: caramel thread, 6 SC into magic ring
Row 2: 1 İNC in each loop (12 SC)
Row 3: 1 SC, 1 INC x 6 (18 SC)
Row 4: 2 SC, 1 INC x 6 (24 SC)
Row 5: 3 SC, 1 INC x 6 (30 SC)
Row 6: 4 SC, 1 INC x 6 (36 SC)
Rows 7 to 12: 1 SC in each loop (36 SC)
Row 13: 4 SC, 1 DEC x 6 (30 SC)
Row 14: 3 SC, 1 DEC x 6 (24 SC)
Cut the thread, leaving a long strand to sew on. Fill tightly. Repeat the same steps to create a second ball.
Now that we’re done, we’re going to place the wig and buns on May’s head. Take the base of your hair and place it over your head as if it were a hat.
Find the position you like best for the bangs, and once you find it, secure with a pin. Using a yarn needle, sew the base of the hair to the head, passing the thread through the loops of the last row of the wig.
Hair
When you are finished sewing the wig to your head, place the first bun from one side of your head in the position you like best. Help yourself with the pins to secure them in place while you sew it to Little May’s head. Repeat the same procedure with the second bundle on the other side of your wrist.
We embroider l ito
To create May’s super-sweet and happy expression, we’re going to embroider two inverted crescent eyes and a very small U-shaped mouth in the center. We will do this with an embroidery stitch known as “reverse stitch”, which is very easy to make using black eye thread, pink mouth thread, and an embroidery needle.
Before embroidering, mark the eyes and mouth with small pins with a round head, so that the embroidery is even and you like it.
Then take a pin and place it at the front center point of row 26. Place the pin 1 point to the right of this center point and 1 more point to the left. Now place 2 more pins under each of these pins, tilted slightly towards the center. Thus, we form the mouth.
After we have marked the small mouth that tells us where the center of the head is, we can mark the small eyes.
Mistletoe and cherry decoration
Face embroidery
Use pins to line the inverted crescent moon 3 points to the right of the mouth on the 24th and 25th rows of the head.
Do the same to lay out the eye on the left. Each eye should have a 5 point hole in the 25th row and 3 points in the 24th row. After your pins are set, you can start reverse stitching by inserting the embroidery needle through the locations indicated by the pins.
So the embroidery will be perfect!
We are now going to knit the mistletoe and cherry leaves that we will place on May’s buns.
Mistletoe Leaves x 2
I knitted a bright green leaf and another dark green leaf to place one on each bunch. But as I always urge you, fly with your imagination. You can create two, three or whatever you like best to decorate your doll’s hair.
See how to knit them …
Row 1: With selected green thread, knit 9CH. From the second loop from the hook: 1 SC, 1 HDC, 4 DC, 1 HDC. In the last loop 5 SC. On the other side of the chain, 1 HDC, 4 DC, 1 SC. Work 1 SL-ST in 1 SC of this row and cut the strand, leaving a very long strand.
Repeat this process to create another sheet or whatever else you need and set aside.

Cherry
I decided to knit three cherries to make a headdress for our little May. Two are the same size and the third is smaller. Let’s link them too!
Cherry x 2
Row 1: in red, 6 SC into magic ring.
Row 2: 1 İNC in (each loop 12 SC)
Row 3: 1 SC, 1 INC x 6 (18 SC)
Rows 4 and 5: 18 SC Fill.
Row 6: 1 SC, 1 DEC x 6 (12 SC)
Row 7: 6 DEC. Cut the thread, leaving a very long strand to sew. Close up any small hole that may have remained and set aside.
Repeat the same procedure to tie the second large cherry.
Cherry
small
Row 1: in red, 6 SC into magic ring.
Row 2: 1 İNC in each loop (12 SC)
Rows 3 to 5: 12 SC
Fill.
Row 6: 6 DEC. Cut and leave the thread for
sewing. Close up any small hole that might remain.
We are ready!!! Let’s create a hairstyle for our little girl …
Decorating the head
When the mistletoe and cherry leaves are ready, we can place them in our doll’s hair. As you can see in the photo of the finished doll, I placed a mistletoe leaf at the base of each bunch, then a large cherry on the leaf of one of the two bunches and two small cherries (the large one next to the small one) on the mistletoe leaf of the other bunch.
How do we do it?
Start by threading one of the two leaves with a green thread through a yarn needle and stitching to one of the tufts at the base. Wrap the thread tightly around the base of the bundle 2-3 times. cm.
Figure 31-33
To finish, return the needle through the base of the roll and also through the sheet, make an invisible knot and hide the excess thread. In the same way we sewed on the first mistletoe leaf, also sew on the cherry and the remaining mistletoe leaf to complete the head decoration on both bunches.
Footwear
We already have the head of our Little May, with eyes and a smile !! We are now going to create her shoes so that we can continue knitting the small body. You will understand why, first we knit shoes, not feet !!! We start …
Row 1: Start with a light yellow thread, knitting a 6 CH base. From 2 loops from the hook: 1 İNC, 3 SC. In the last loop 5 SC. On the back of the chain, 3 SC. and 3 SC in the last loop. If all went well, you should have knitted 16 SC in the first row.
Row 2: 2 İNC, 3 SC, 5 İNC, 3 SC, 3 İNC (26 SC)
Row 3: (1 SC, 1 İNC) x 2, 3 SC, 1 İNC, 1 SC, 1 İNC, 4SC, 1 İNC, 1 SC, 1 İNC, 3 SC, (1 İNC, 1 SC) x 2, 2 SC (34 SC)
Row 4: Knit only at the back of the hinge, 34 SC.
Rows 5 & 6: Change the color to bright yellow and work 1 SC in each stitch (34 SC)
Row 7: 5 SC, (1 DEC, 2 SC) x 3, (2 SC, 1 DEC) x 3.5 SC (28 SC)
Row 8: 5 SC, (1 DEC, 1 SC) x 3, (1 SC, 1 DEC) 42 43 44x 3, 5 SC (22 SC)
Cut the thread and hide the excess thread.
Repeat the same steps to create the second shoe.
Legs 2pcs
As soon as the shoes are ready, you can start knitting the calf. We will start with both legs, which we then connect to continue knitting the body. So, we are going to knit leg “A” first , and then the leg “B”, which we will attach to the first. Do we knit at the same time?
Leg
“A”
Row 1: In flesh, start with 4 CH main chain. From 2 loops from hook 1 İNC. In the next loop 1 SC, in the last one CH 5 SC. On the back of the chain. 1 SC into the next loop. In the last loop 3 SC.
If all went well, you should have cast only 12 SC in the front row.
Row 2: 1 SC, 1 INC x 6 (18 SC)
Row 3: 2 SC, 1 İNCx6 (24 SC)
Row 4: Knit at the back of the loop only, 24SC.
Rows 5 and 6: 24 SC
Row 7: 6 SC, 6 DEC, 6 SC (18 SC) 54
So far we have just tied the foot and continue to knit the leg.
Rows 8 through 11: Continue crocheting 18 SC flesh-colored in each row until you complete row 11.
Before proceeding, insert the leg you tied into the shoe and fill.
We put a small foot in the shoe before starting to fill to make it easier to fit inside.
Legs
Fill in the small leg already inside the shoe, and then fill in the legs as you knit them.
Starting from the next row, we will continue knitting with pistachio greens. So cut off the flesh color and change it to a new thread to continue knitting.
Rows 12 to 18: Pistachio, 1 SC in each stitch (18 SC)
Cut the thread and hide the tip. Place the stitch marker on the 12th stitch of the last row knitted and set aside.
Leg “B”
To create the second leg, repeat the same steps as for leg “A”, but do not cut the thread at the end, as we will continue to knit the body.
Body
Row 9: At leg B, which you are on, continue crocheting 9 more SC. Once at the point, keeping leg “B” on the hook, take leg “A” and knit 1 SC in the loop marked with a marker. Once you have done this, continue knitting over the remaining 17 SC to complete the row on Leg A, and at the end continue to Knit on Leg B for another 18 SC. You get 36 SC in total in this row, so we connect both legs. From here we will continue to knit the remaining rows of the calf.
Body
Row 20: 1 SC in each st (36 SC)
Row 21: 5 SC, 1 INC x 6 (42 SC)
Row 23: 6 SC, 1 INC x 6 (48 SC)
Rows 24 & 25: 48 SC
Row 26: 6 SC, 1 DEC x 6 (42 SC)
Remember to fill tightly.
Rows 27 to 29: 1 SC in each loop (42 SC)
Row 30: Change the color to white. Knit only at the back of the 42 SC loop.
Row 31: 42 SC
Row 32: Change to red. Knit only at the back of the loop, 42 SC.
Row 33: Change the color to white. 5 SC, 1 DEC x 6 (36 SC)
Row 34: 36 SC
Row 35: Change to red. Knit only at the back of the loop, 36 SC.
Row 36: Change the color to white. 36 SC
Row 37: 4 SC, 1 DEC x 6 (30 SC)
Row 38: Change to red. Knit only at the back of the 30 SC loop.
Row 39: Change to flesh color. 3 SC, 1 DEC x 6 (24 SC)
Row 40: 24 SC.
Cut the thread and hide the excess thread.
Set aside.
Hands 2pcs
Row 1: Flesh: 5 SC into magic ring
Row 2: 1 İNC in each loop (10 SC)
Row 3: 1 SC, 1 INC x 5 (15 SC)
Rows 4 & 5: 15 SC
Row 6: 1 SC, 1 DEC x 5 (10 SC)
Row 7: Change to red. 10 SC
Rows 8 and 9: 10 SC in white
Row 10: 10 SC in red
Rows 11 and 12: 10 SC in white
Row 13: 10 SC in red.
Rows 14 and 15: 10 SC in white
Row 16: 10 SC in red
Rows 17 and 18: 10 SC in white
Row 19: 10 SC in red
Rows 20 and 21: 10 SC in white.
Hands
Cut, leaving a long thread to sew on. Filling is optional, but if you want to do it, do it very little so that your hand does not lose mobility.
Close the arm hole by sewing with a yarn needle through the last row of stitches before sewing to the body.
Repeat the same steps to tie the other hand.
When both hands are ready, pin them to the sides of the doll’s body and sew them neatly.
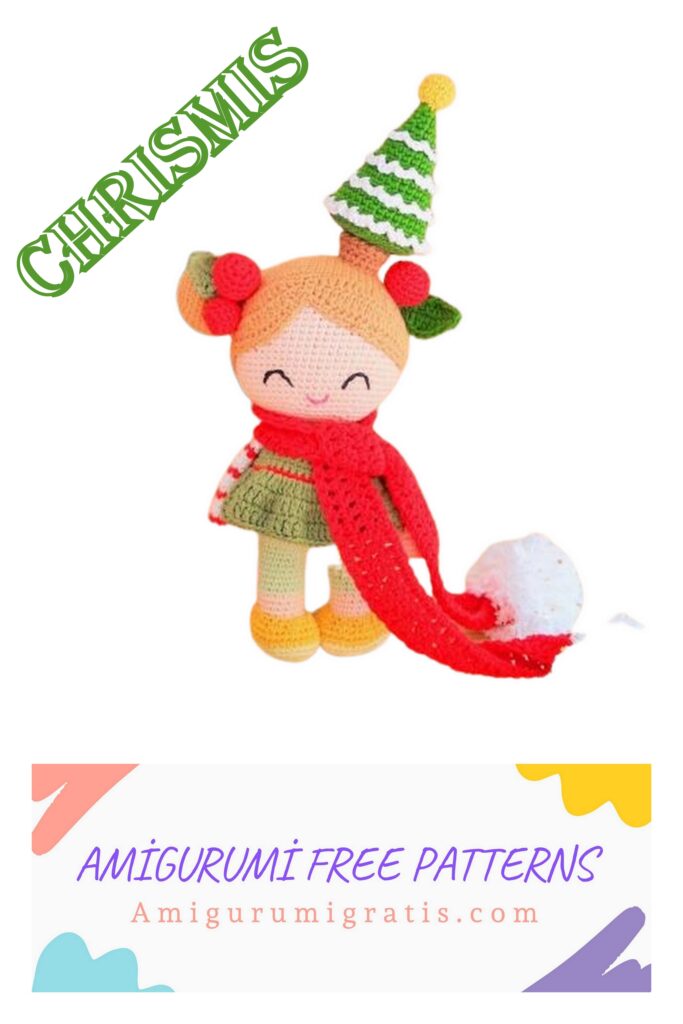
Very cool!!! We have already created the head, decorated it with cherries and created a happy smile on the face of our cute doll. We also have the little body ready. What is left for us? Yes, craft all your precious accessories. Let’s create them to finish building our Little May for Christmas …
Dress
To create a dress for Little May, we’ll start by knitting a yoke. Let’s see how to tie this …
Row 1: In dark green, cast on a chain of 31 CH. From 2 loops from the hook: 1 SC in each loop-30 SC. Knit 1 CH and turn work over.
Row 2: In this row we will form the sleeves of the dress.
To do this, start by knitting 4 SC, 1 İNC. 6 CH skip 5 SC, then knit (4 SC, 1 İNC) x 2. 6 CH skip 5 SC, 4 SC, 1 İNC. If all tied it should be 36 SC.
Knit 1 CH and turn work over.
Row 3: 1 SC into each stitch counting chains (36 SC) Work 1 CH and turn over work.
Row 4: 5 SC, 1 İNC x 6 (42 SC). Knit 1 CH and turn work over.
Row 5: 6 SC, 1 INC x 6 (48 SC). Knit 1 CH and turn work over.
Row 6: Change to red 1 SC in each stitch (48 SC).
We connect the row by knitting 1SL-ST in 1 loop of the row.
Thus, we have connected 2 parts. Next, we begin to knit a skirt.
Row 7: change to grass green and knit 2 CH, then knit DC in the same loop (1 DC, 1 İNC-DC) to the end of the row. You should have a half run 72 DC, SL-ST.
Dress
don’t worry if you don’t get that exact number because you missed a raise or two … At this point we don’t need the exact number of double crochets, we just need to make the skirt a little overhanging.
Bind off row SL-ST in 1st st.
Row 8: CH 2 then work DC in same st, (2 DC, 1 İNC-DC). You should get 96 DC, SL-ST. Remember, don’t worry if you skip the addition and don’t get that many stitches.
Row 9: CH 2 then DC into same st, DC into each st (96 DC)
Cut the thread and hide. The dress is ready !!!!
Do we knit a scarf?
Scarf
For this super lightweight scarf, we will use red yarn and a 4mm crochet hook or needles. You are ready? Let’s start!
Row 1: Dial 98CH.
From 3 loops from hook 1 DC to each loop 95 CH (95 DC) Work 2 CH and turn work.
Make 2 white pom-poms and sew on both ends of the scarf.
Rows 2 & 3: 1 DC in each loop (95 DC)
Finish and hide the thread.
Assembly
Now that all the parts of our doll are ready, we can connect the torso to the head and finish dressing her.
Before sewing the head to the body, put the Little May dress on the body with the opening on the back and pass both arms through the sleeves. If desired, you can put a small button to close the back opening of the dress.
Thread the thread we left for our doll’s head into your needle and sew each of the 24 stitches we leave available in row number 35 at the base of the head, with 24 stitches around the neck.
Pay particular attention to keeping the head well centered. When finished, close the seam with an invisible knot and hide the excess thread.
Wrap the scarf around the doll’s neck, tying it as you like.
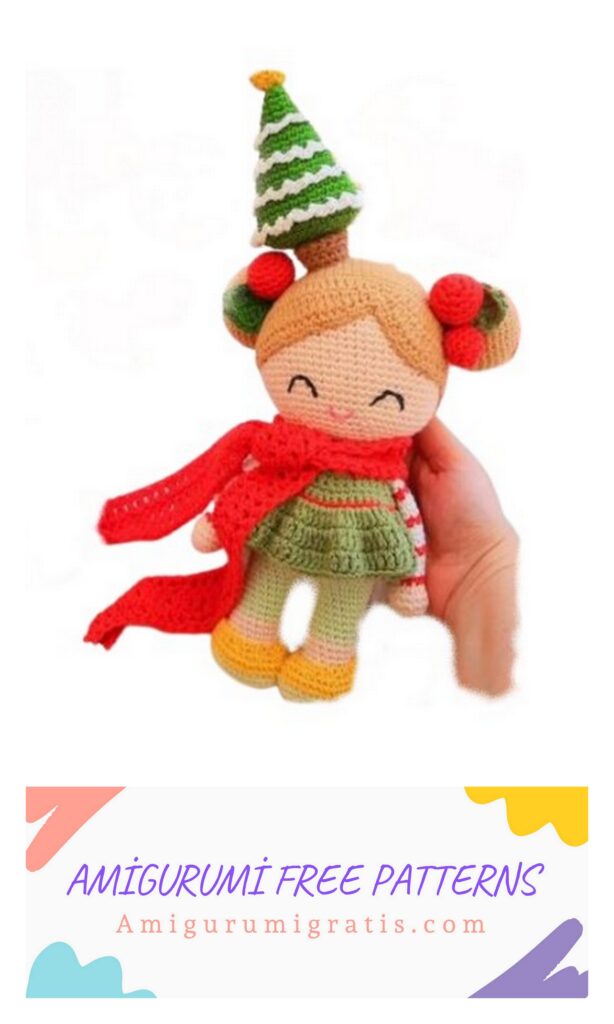
Our doll is ready! But we’re missing another little detail … and there’s no Christmas without a pretty little Christmas tree, right?
Little Herringbone
To knit the little Christmas tree that we will place on May’s head, we are going to create a cone in bright green and a small pot in chocolate. You will notice that along the rows that we will knit to create the cone of our herringbone, some of them will need to be knitted, just behind the back loop of our stitches. This is because when we finish knitting the herringbone in green, we will use the threads that we will leave available in some rows to later knit the snow decorating the tree in white.
At the base of the cone, after filling and before closing the last rows of decreases, we place a small circle of cardboard (you can use a piece of cardboard from a flake box, a notebook cover that is no longer used, etc.) of a circle similar to the length of the base of our cone. You can accurately measure the base of your pine tree after you knit its 19th row to cut the perfect size cardboard circle! A good idea for this would be to rim the knitted cone up to row 19 on cardboard with a pencil. Once the circle is marked, you can cut it to the size you want. Why do we put this cardboard in the base of the cone? We make it so that the Christmas tree keeps an even base.
Let’s start knitting !!
Cone
Row 1: In bright green, 5 SC into magic ring.
Row 2: 5 SC
Row 3: 1 İNC in each loop (10 SC)
Row 4: 10 SC
Row 5: 1 SC, 1 INC x 5 (15 SC)
Row 6: 15 SC
Row 7: Knit only at the back of the hinge, 2 SC, 1 İNC x 5 (20 SC)
Rows 8 y 9: 20 SC
Row 10: 3 SC, 1 INC x 5 (25 SC)
Row 11: Knit only at the back of the hinge, 25 SC
Row 12: 25 SC
Row 13: 4 SC, 1 INC x 5 (30 SC)
Row 14: 30 SC
Row 15: Knit only at the back of the hinge, 5 SC, 1 İNC x 5 (35 SC)
Rows 16 y 17:35 SC
Row 18: 6 SC, 1 INC x 5 (40 SC)
Row 19: Knit only at the back of the hinge, 40 SC
Now that you have knitted to the desired row, place the cone on a piece of cardboard and draw a circle around it.
Cut out a cardboard circle and insert it a few rows later.
Row 20: 6 SC, 1 DEC x 5 (35 SC)
Row 21: 5 SC, 1 DEC x 5 (30 SC)
Fill the cone tightly and place the cardboard in the base.
You will have to fold it down a bit to fit it in.
Herringbone
Row 22: 4 SC, 1 DEC x 5 (25 SC)
Row 23: 3 SC, 1 DEC x 5 (20 SC)
Row 24: 2 SC, 1 DEC x 5 (15 SC)
Row 25: Back panel 15 SC
Row 26: 1 SC, 1 DEC x 5 (10 SC)
Row 27: 5 DEC.
Cut the thread. Use a needle to close the small hole that may have remained and hide the excess thread.
Snow
To knit 4 rows of this little white ruffle, we will take a yarn of that color and start by joining it to any of the PSPs, which we will leave available in the 6th row from the top of the cone.
Knit SL-ST, 4 CH. Skip 1 stitch and knit 1 SL-ST into the next stitch.
We continue to repeat the pattern until the end of the row: 4 CH,
Skip 1 st, 1 SL-ST into the next loop.
Finish, cut the thread and hide. Before finishing, tie a knot between the starting thread and the ending thread. Hide the threads inside the herringbone with both threads with a needle.
Repeat knitting on PSP, according to the instructions, also on rows 10, 14 and 18.
Herringbone
Small pot
Now we will knit the pot on which our Christmas tree is located but.
Row 1: Chocolate brown, 5 SC into magic ring.
Row 2: 1 İNC in each loop (10 SC)
Row 3: 1 SC, 1 INC x 5 (15 SC)
Row 4: Knit only at the back of the loop, 15 SC
Rows 5 to 7: 15 SC
Row 8: 2 CH, 15 HDC knit only at the front wall of the loop. Close row 1 SL-ST.
Cut, leaving a long thread to sew on. Expand the last row of HDC we knitted to simulate the edge of our pot. Fill the pot.
Sew the pot to the base of the pot by joining each of the 15 stitches we left when we knit the 8th row of the pot with 15 stitches of PSP which we leave available at the 25th Row, the bottom of our cone. When you’ve finished connecting the tree to the pot, tuck the excess thread through the inside of the pot and take it out through row 3. If you remember, we left the PSP in this row. For these half-loops, we sew the tree to the hair of our doll.
Herringbone
Christmas decorations
To finish decorating our little tree, before placing it on our Little May’s head, we’re going to knit a little golden ball to sew on to the top of the tree.
Row 1: Bright Yellow: 6 SC into magic ring.
Row 2: 1 İNC in each loop (12 SC)
Rows 3 to 5: 12 sc in each st.
Row 6: 6 DEC.
Sew a small ball to the tip of the tree. If you need it, pin it to the tree with pins to keep it from moving while sewing.
The Christmas tree is ready! We’re going to place it on our doll’s head as a final touch …
Use the pins to secure the tree to Little May’s head. As you can see in the photographs of the finished doll, I decided to sew it with a slight slope to the right side of the head, very close to the bun that is on the right. Do this by connecting the stitches we left “Available in 3 Flower Pots Row” with the stitches in your doll’s hair. At the end, tie a knot and hide from the remaining thread. But you can not sew it, but put it in a basket or bag.