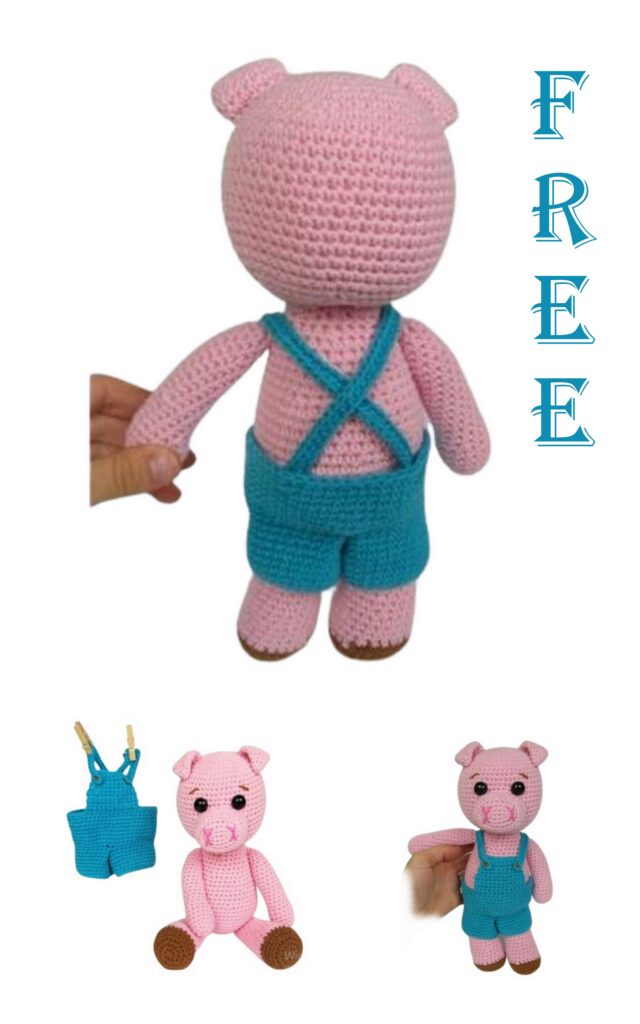
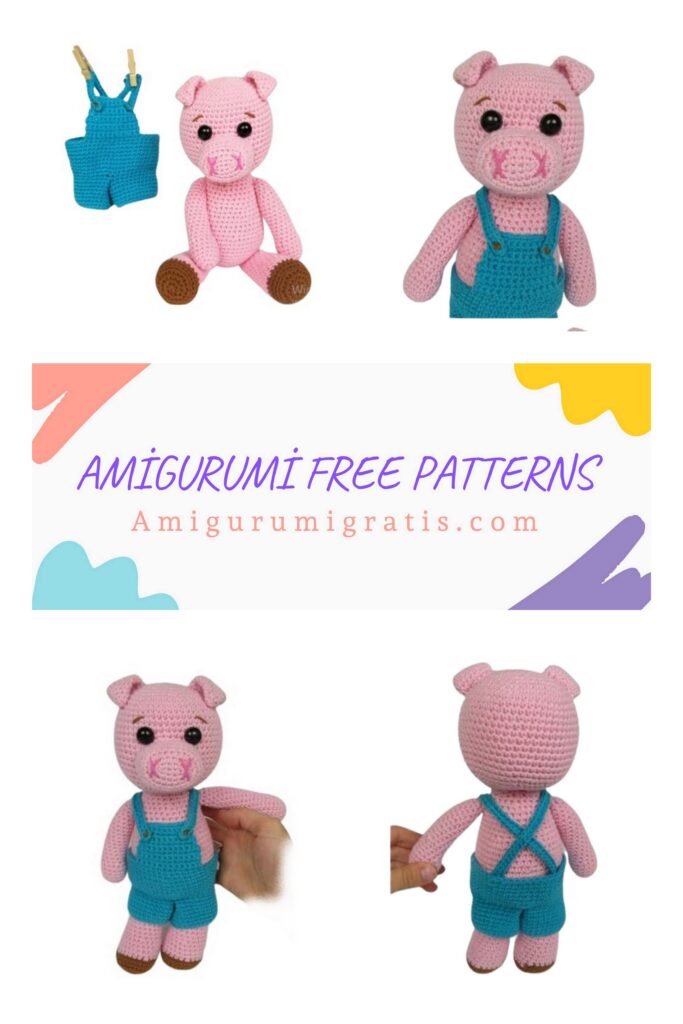
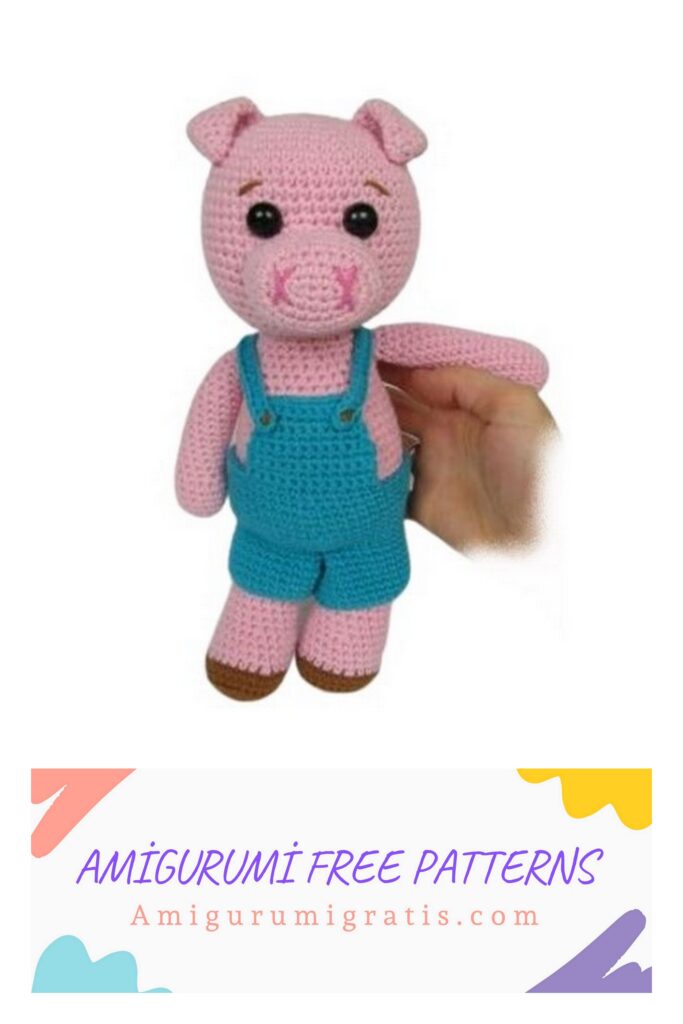
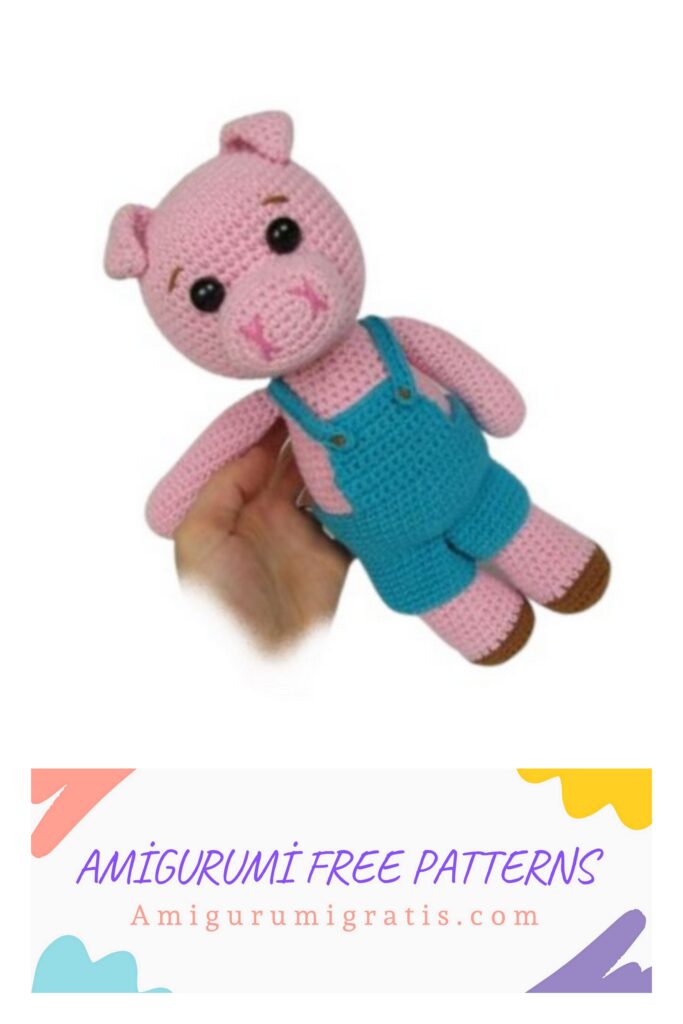
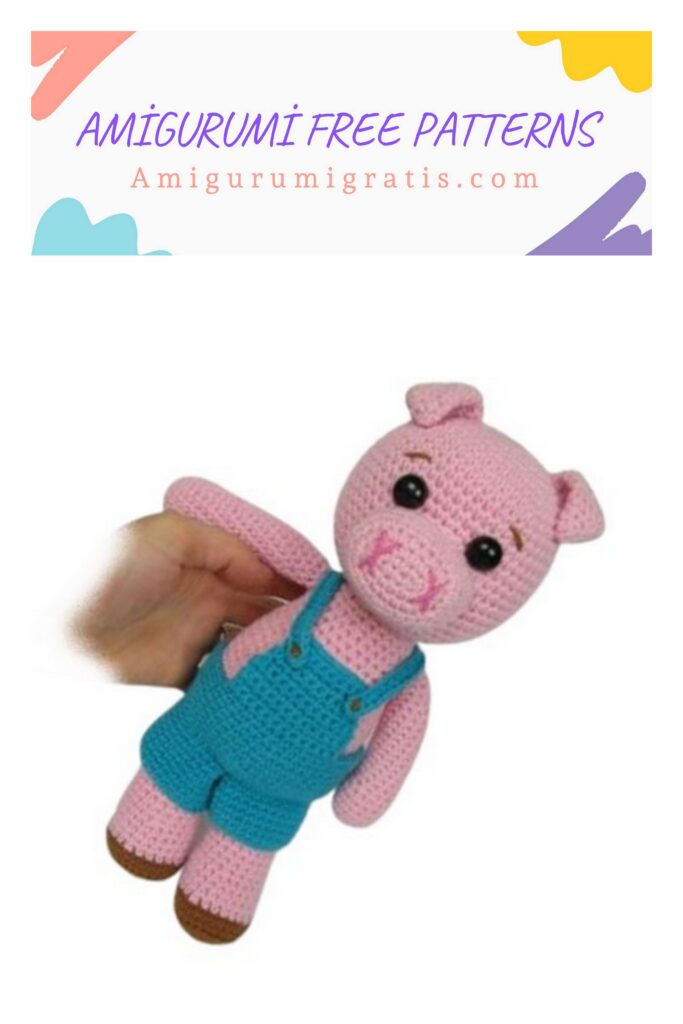
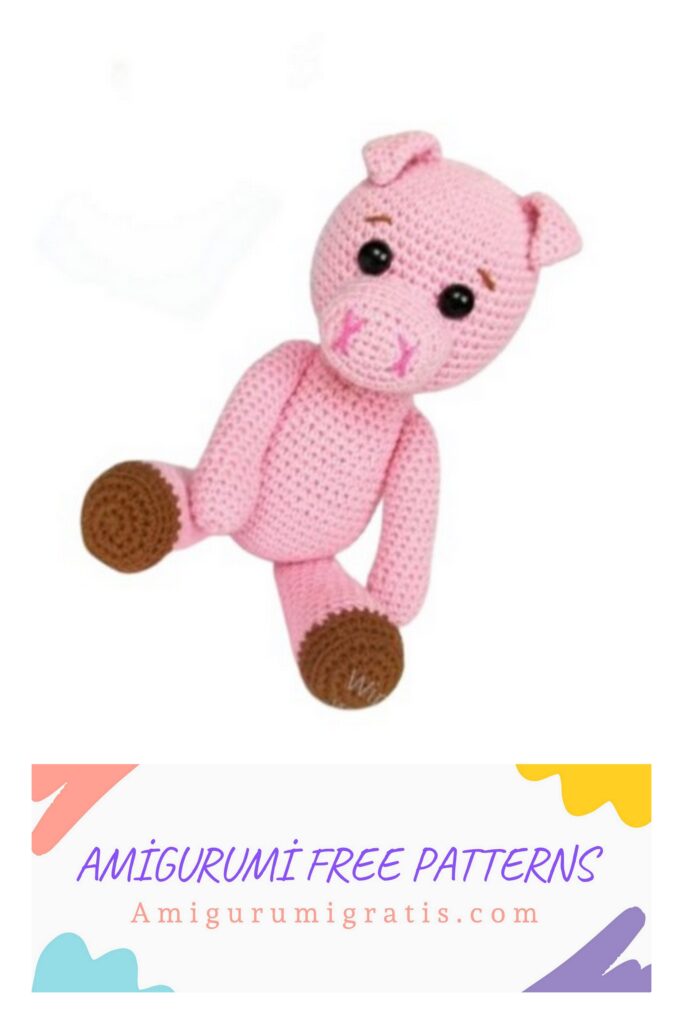
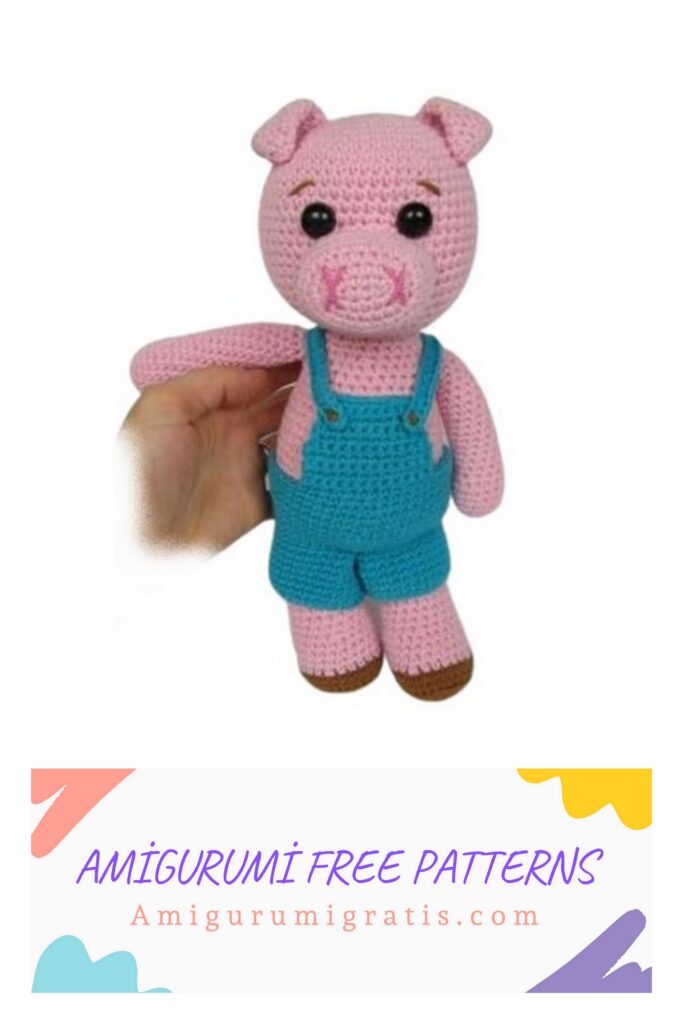
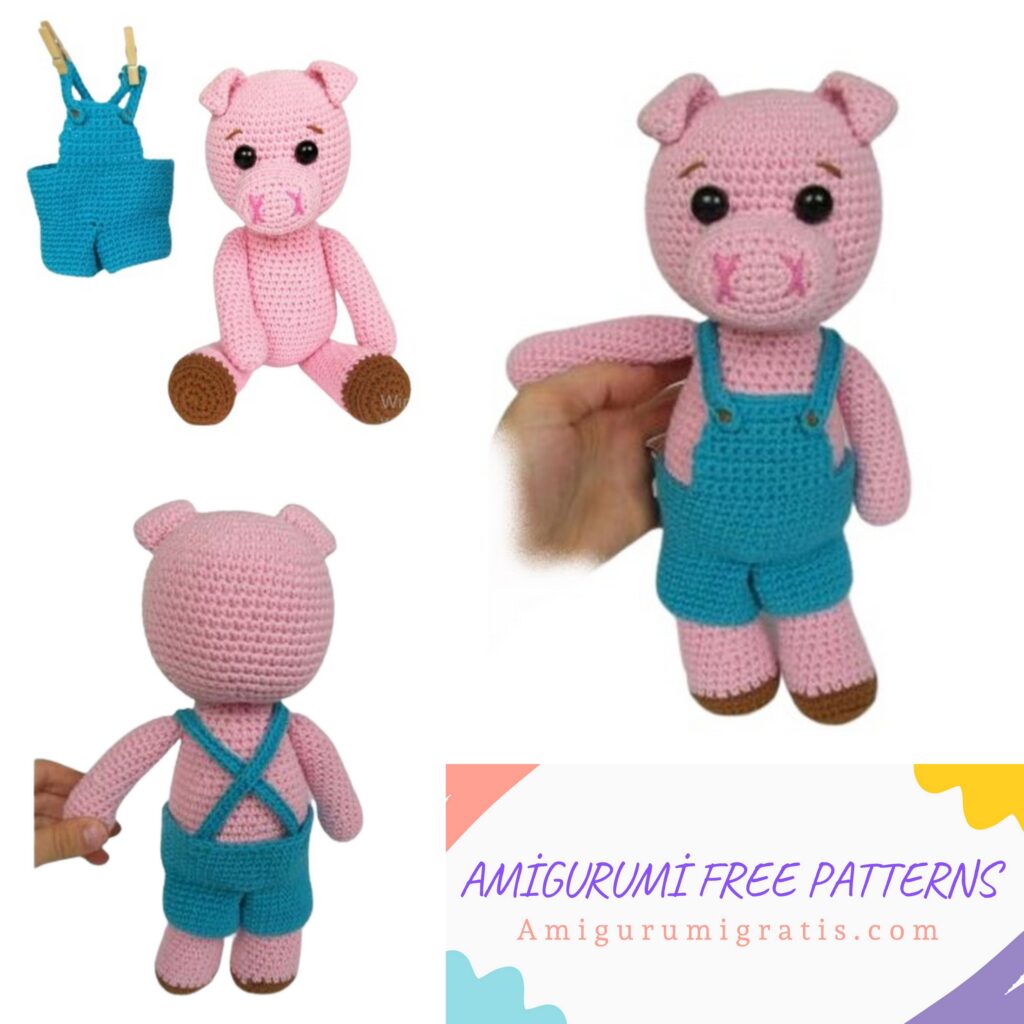
Pigy the Pig Crochet Pattern
We continue to share free amigurumi patterns. You can visit our website for the Amigurumi Piggy pattern.
Material and tools:
– Yarn with approx. 150m/50g (Polyacryl) or 120m/50g (Cotton) / Sport or DK weight yarn
o < 50g pink
o < 10g brown
o < 20g blue or turquoise
o piece of dark pink
– Stuffing (Polyester Filling)
– 2 plastic eyes with security lock (12-14mm) or two black beads or buttons
– Crochet hook size 3,5mm / E or F size, or as specified on the yarn
– Wool needle
Abbreviations
[brackets] – repeat instruction within brackets as often as given after brackets or to the end of the round or row
(round brackets) – count of stitches done in this round or row
Number in front of an abbreviation – number of stitches to crochet
CH – chain
SC – single crochet
ST – stitch(es)
HDC – half double crochet
DC – double crochet
TRC – treble crochet
SLST – slip stitch
Sc2tog – single crochet 2 together (1 stitch decreased)
Hdc2tog – half double crochet 2 together (1 stitch decreased)
Dc2tog – double crochet 2 together (1 stitch decreased)

General notes
Please read these instructions before working the pattern.
The beginning of each part
There are two options (I always use the second option. There are no holes at the beginning if you use the loop):
1. Start with chain 2 and work every first round into the first stitch made.
2. Start with a magic ring (adjustable loop) and work number of stitches in the first round into the loop.
Changing rounds
Do not replace crochet stiches by chain stiches at the beginning of each row. Instead make endless spiral. Crochet a first stitch of the row in first stitch of previous round. Use a stitch marker to remember of the beginning of the round. How to mark beginning of a row is demonstrated on pictures below.
Crocheting in back/front loops only
Unless noted otherwise always work the rounds/rows through both loops. Sometimes we need to crochet different
structures and we crochet some rows in back/fron loops only. The pictures below show how to crochet through the back
loops (left) or front loops (right) only.
Loose ends
At the beginning and the end of a piece leave a tail of at least 15 cm or even longer, because most of these can be used for sewing. Loose ends you do not use anymore can be pulled through some stitches on the inside of the piece and cut off.
Pattern
Head
Rd 1: work with pink, 6 SC in Magic Ring. (6)
Rd 2: 2 SC in each ST (12)
Rd 3: [2 SC in next ST, SC in next ST] 6x (18)
Rd 4: [2 SC in next ST, SC in next 2 ST] 6x (24)
Rd 5: [2 SC in next ST, SC in next 3 ST] 6x (30)
Rd 6: [2 SC in next ST, SC in next 4 ST] 6x (36)
Rd 7: [2 SC in next ST, SC in next 5 ST] 6x (42)
Rd 8: [2 SC in next ST, SC in next 6 ST] 6x (48)
Rd 9: [2 SC in next ST, SC in next 7 ST] 6x (54)
Rd 10: SC in each ST (54)
Rd 11-22: SC in each ST (54)
Rd 23: [SC in next 7 ST, Sc2tog] 6x. (48)
Rd 24: [SC in next 6 ST, Sc2tog] 6x. (42)
Rd 25: [SC in next 5 ST, Sc2tog] 6x. (36)
Rd 26: [SC in next 4 ST, Sc2tog] 6x. (30)
Rd 27: [SC in next 3 ST, Sc2tog] 6x. (24)
Now we attach the eyes (I recommend to put them in the 14th round and leave 8 stitches between the eyes) and we stuff the head
Rd 28: [SC in next 2 ST, Sc2tog] 6x. (18)
Rd 29: [SC in next ST, Sc2tog] 6x. (12)
Rd 30: [Sc2tog] 6x. (6)
Rd 31: [Sc2tog] 3x. (3). Cut off.
Body
Rd 1: work with pink, 6 SC in Magic Ring. (6)
Rd 2: 2 SC in each ST (12)
Rd 3: [2 SC in next ST, SC in next ST] 6x (18)
Rd 4: [2 SC in next ST, SC in next 2 ST] 6x (24)
Rd 5: [2 SC in next ST, SC in next 3 ST] 6x (30)
Rd 6: [2 SC in next ST, SC in next 4 ST] 6x (36)
Rd 7: [2 SC in next ST, SC in next 5 ST] 6x (42)
Rd 8: [2 SC in next ST, SC in next 6 ST] 6x (48)
Rd 9: SC in each ST (48)
Rd 10-14: SC in each ST (48)
Rd 15: [SC in next 6 ST, Sc2tog] 6x. (42)
Rd 16-19: SC in each ST (42)
Rd 20: [SC in next 5 ST, Sc2tog] 6x. (36)
Rd 21: SC in each ST (36)
Rd 22: [SC in next 4 ST, Sc2tog] 6x. (30)
Rd 23: SC in each ST (30)
Rd 24-25: SC in each ST (30)
Rd 26: [SC in next 3 ST, Sc2tog] 6x. (24)
Rd 27: [SC in next 10 ST, Sc2tog] 2x. (22)
Rd 28: SC in each ST (22). Cut off.
Now stuff the body.
Snout
Rd 1: Begin with creme make 5 CH and then work in accordance with the schema below 10 SC. Continue in rounds (10).
Rd 2: 2 SC in next ST, 1 SC in next 2 ST, 2 SC in next 3 ST, 1 SC in next 2 ST, 2 SC in last 2 ST.(16)
Rd 3: 2 SC in next ST, 1 SC in next 4 ST, 2 SC in next 4 ST, 1 SC in next 4 ST, 2 SC in next 3 ST (24)
Rd 4: [2 SC in next ST, SC in next 3 ST] 6x (30)
Rd 5: Work this round in back loops only. [SC in next 13 ST, Sc2tog] 2x. (28)
Rd 6: SC in each ST (28)
Rd 7: SC in each ST (28)
Rd 8: SC in next 14 ST. Cut off. (the last round makes the lower part of the snout )
Ears (work 2x)
Rd 1: work with pink, 4 SC in Magic Ring. (4)
Rd 2: [2 SC in next ST, SC in next ST] 2x (6)
Rd 3: SC in each ST (6)
Rd 4: [2 SC in next ST, SC in next ST] 3x (9)
Rd 5-6: SC in each ST (9)
Rd 7: [2 SC in next ST, SC in next 2 ST] 3x (12)
Rd 8: [2 SC in next ST, SC in next 3 ST] 3x (15)
Rd 9-10: SC in each ST (15)
Rd 11: SC in next 13 ST, Sc2tog (14). Cut off.
Legs (work 2x)
Rd 1: work with brown, 7 SC in Magic Ring. (7)
Rd 2: 2 SC in each ST (14)
Rd 3: [2 SC in next ST, SC in next ST] 7x (21)
Rd 4: [2 SC in next ST, SC in next 2 ST] 7x (28)
Rd 5: Work this round in back loops only. SC in each ST (28)
Rd 6: SC in each ST (28)
Rd 7: Change the color, continue with pink. [SC in next 5 ST, Sc2tog] 4x. (24)
Rd 8-10: SC in each ST (24)
Rd 11: [SC in next 4 ST, Sc2tog] 4x. (20)
Rd 12: SC in each ST (20)
Rd 13-15: SC in each ST (20)
Rd 16: [SC in next 3 ST, Sc2tog] 4x. (16)
Rd 17: SC in each ST (16)
Rd 18-22: SC in each ST (16)
Stuff the leg now.
Rd 23: [SC in next 2 ST, Sc2tog] 4x. (12)
Rd 24: [Sc2tog] 6x. (6)
Rd 25: [Sc2tog] 3x. (3). Cut off.
Arms (work 2x)
Rd 1: work with pink, 6 SC in Magic Ring. (6)
Rd 2: 2 SC in each ST (12)
Rd 3: [2 SC in next ST, SC in next 3 ST] 3x (15)
Rd 4: SC in each ST (15)
Rd 5-7: SC in each ST (15)
Rd 8: [SC in next 3 ST, Sc2tog] 3x. (12)
Rd 9: SC in each ST (12)
Rd 10-20: SC in each ST (12)
Rd 21: [SC in next 4 ST, Sc2tog] 2x. (10)
Rd 22: SC in each ST (10)
Rd 23-24: SC in each ST (10)
Stuff the arm now.
Rd 25: [Sc2tog] 5x. (5)
Rd 26: [Sc2tog] 2x. (2). Cut off.
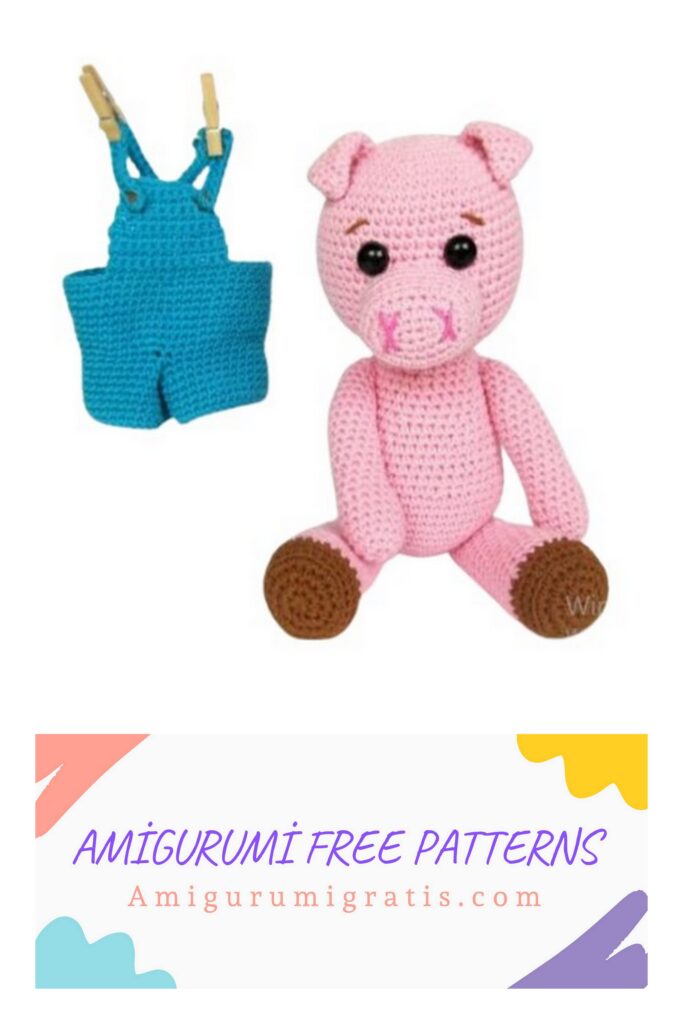
Pants
First we crochet the pantlegs.
Pantlegs (work 2x)
Rd 0: work with blue or turquoise 30 CH. Close a circle with 1
SLST in first CH, continue in rounds
Rd 1: SC in each CH (30)
Rd 2-5: SC in each ST (30)
Rd 6: [SC in next 13 ST, Sc2tog] 2x. (28)
Rd 7: SC in each ST (28)
Rd 8: SC in each ST (28). Cut off the first pantleg only.
The pantlegs are finished. The crochet hook is now in the last stitch of the second pantleg and we continue to crochet.
We put the first leg to the left and we work 1 SC in first ST after the termination (on the first leg). Then we work 1 SC in next 19 ST (20 ST together) – See pictures below.
On the second pant leg we have 8 ST to the end of the row. On the first pant leg we skip 8 ST (from the right) and in the ninth stitch we work 1 SC (see pictures below). Then we crochet 1 SC in next 19 ST (20 ST together). We have completed the ninth round, that has 40 ST in total (20 +20).
Now we take the needle and we sew the crotch. (see picture above on right). Now we continue in crocheting.
Rd 9: Already done, has 40 ST.
Rd 10: [2 SC in next ST, SC in next 4 ST] 8x (48)
Rd 11: [2 SC in next ST, SC in next 23 ST] 2x (50)
Rd 12: SC in each ST (50)
Rd 13-17: SC in each ST (50)
Rd 18: [SC in next 23 ST, Sc2tog] 2x. (48)
Rd 19: SC in next 7 ST (7). 2 CH and turn.
Continue in rows. At the end of each row make 2 CH and turn.
Rd 20: SC in next 12 ST (2 CH and turn) (12) (see pictures below)
Rd 21: SC in each ST (12)
Rd 22-24: SC in each ST (12)
Rd 25: Sc2tog, SC in next 8 ST, Sc2tog. (10)
Rd 26: SC in each ST (10)
Rd 27-29: SC in each ST (10). Cut off.
Braces (work 2x)
With blue of turquoise. Make 40 CH and then work 38 HDC (1 HDC in each CH). First HDC in third CH from the hook. Cut off.
Tail
With pink. Make 17 CH and then work 26 SC. First 2 SC in the third CH from hook. 2 SC in next 11 ST, 1 SC in next 4 ST.
(26) Cut off.
Sewign
Now we have all the parts ready and we can start sewing.
1. First we sew the head together with the body.
2. Then we sew the snout on the head. We sew the snout just below the eyes and we stuff the snout during the sewing.
3. After the snout we sew the ears on the head. (in the fourth row from the middle)
4. Now we sew the top of the ear to the head.
5. Then we sew the arms to the body.
6. We sew the legs to the body. We sew the legs between the fourth and the fifth row from the middle to fit in the pants.
7. Now we can sew the tail on the body and embroider nostrils with dark pink yarn.
Pants
We sew the braces on the pants. On the front side, we sew the braces with brown yarn so that the stitches look like buttons. Now we put on the pants. On the back, we cross the braces and sew to the inside of the pants.
Pigy the pig is finished!!!