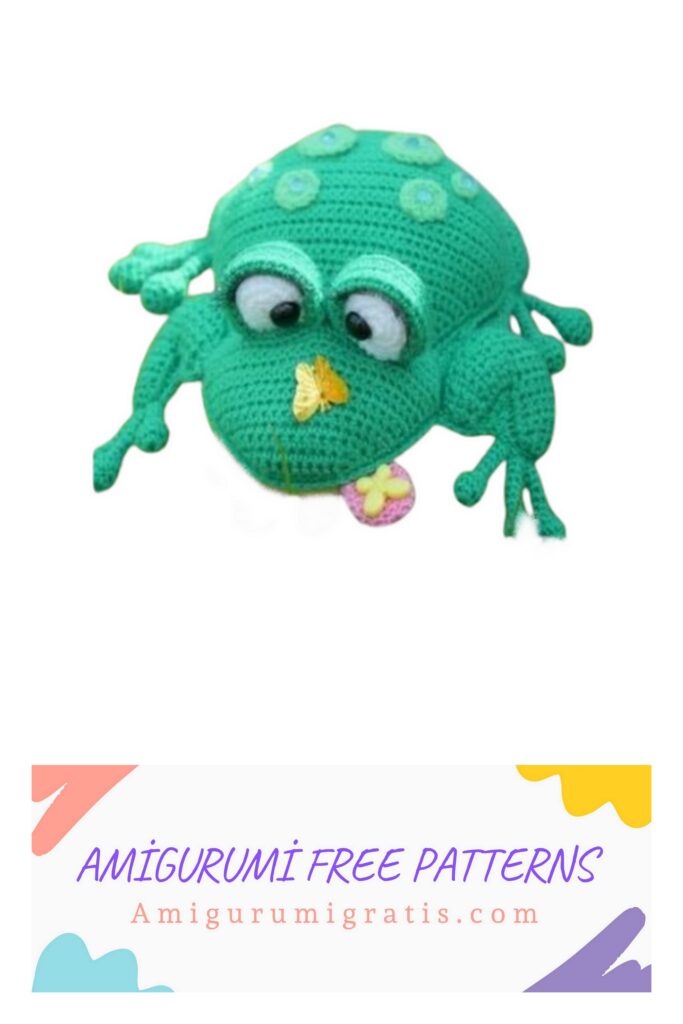
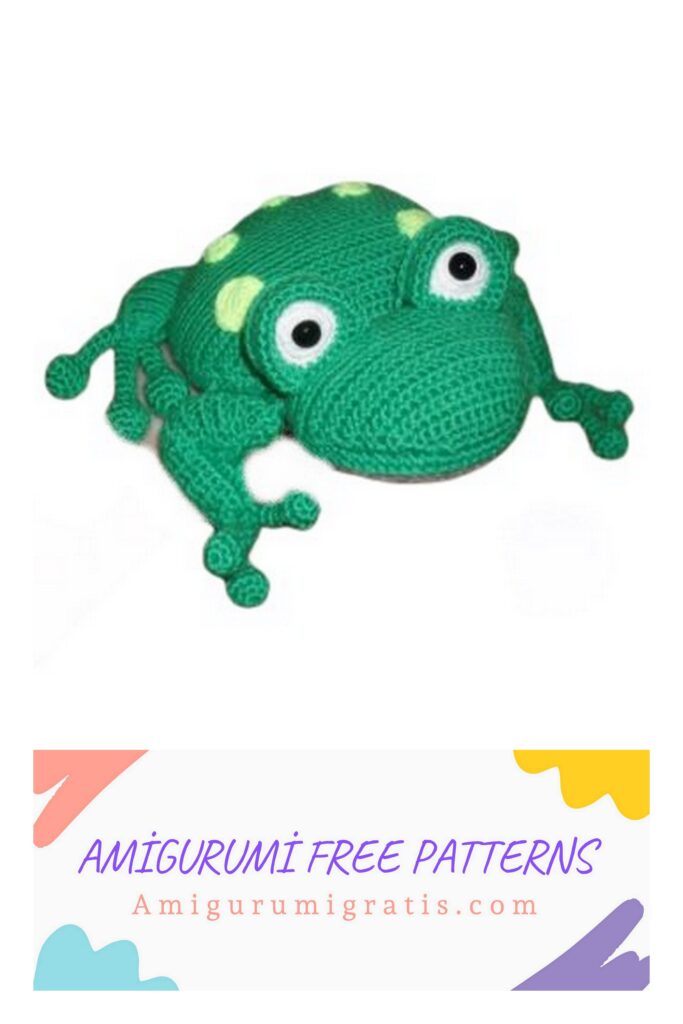
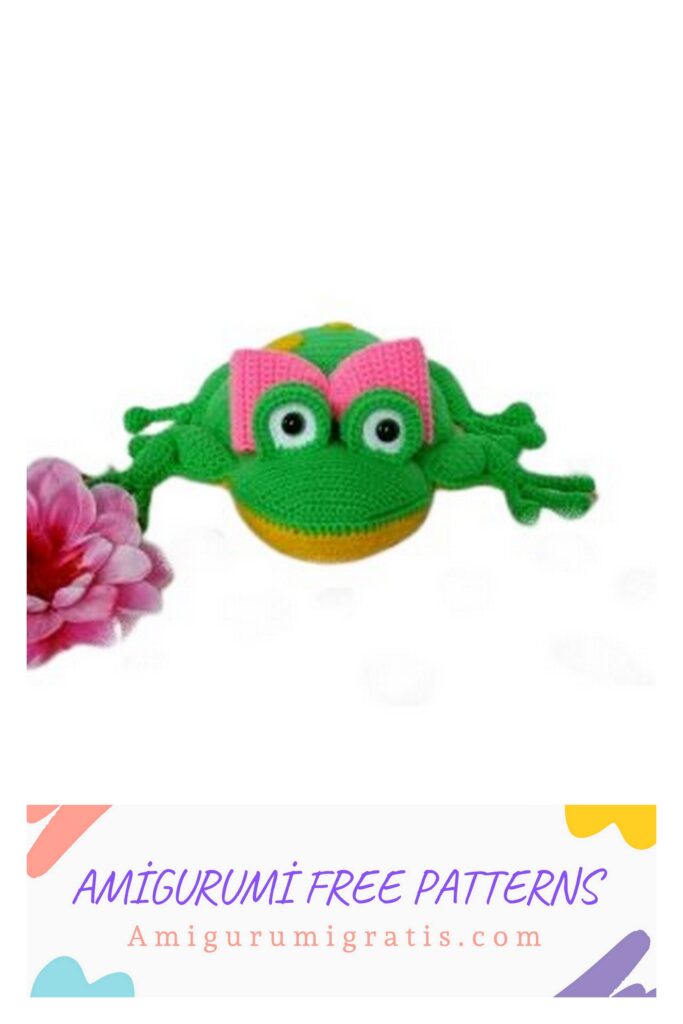
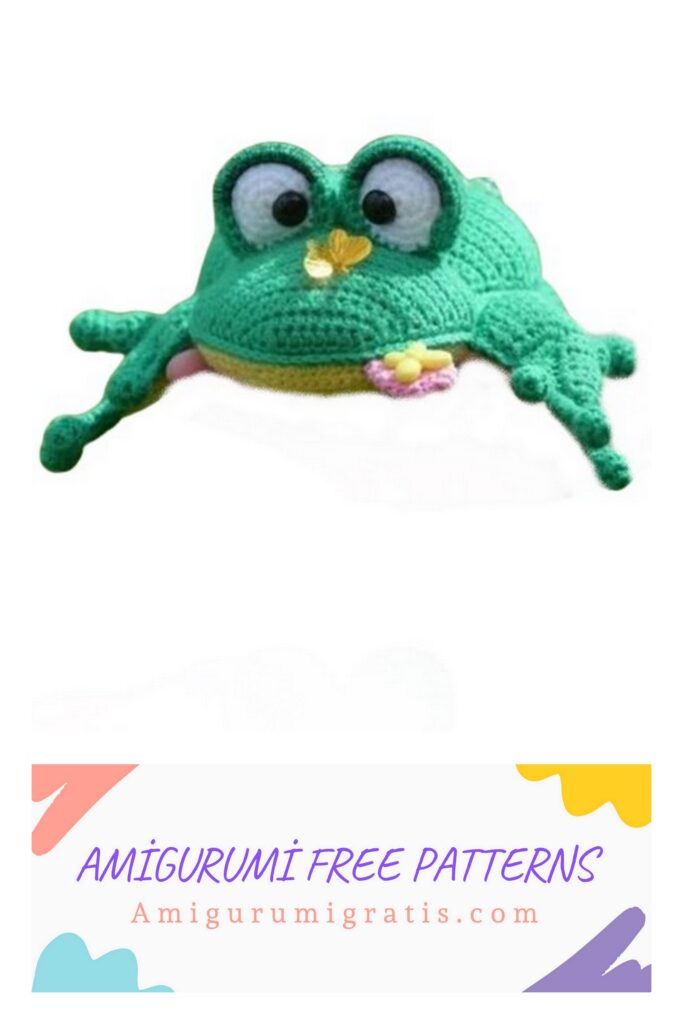
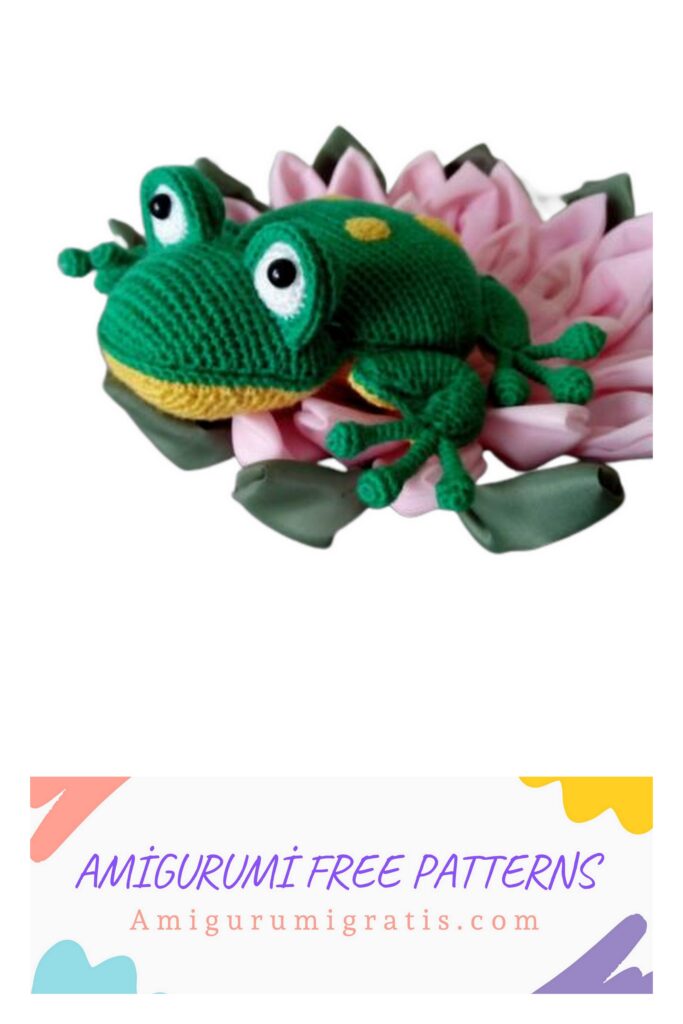
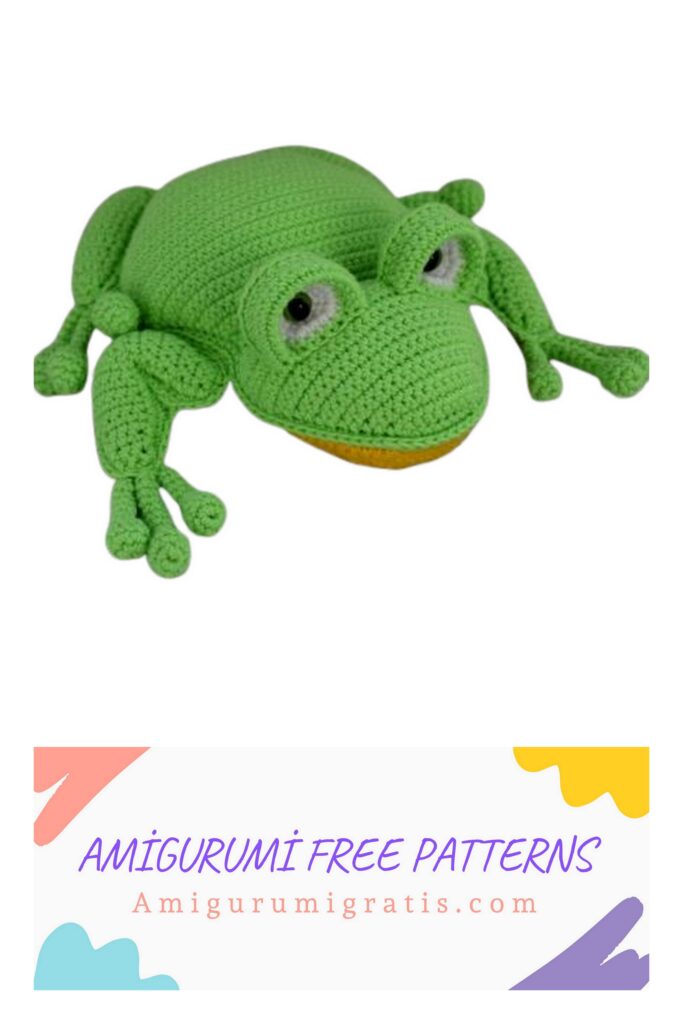
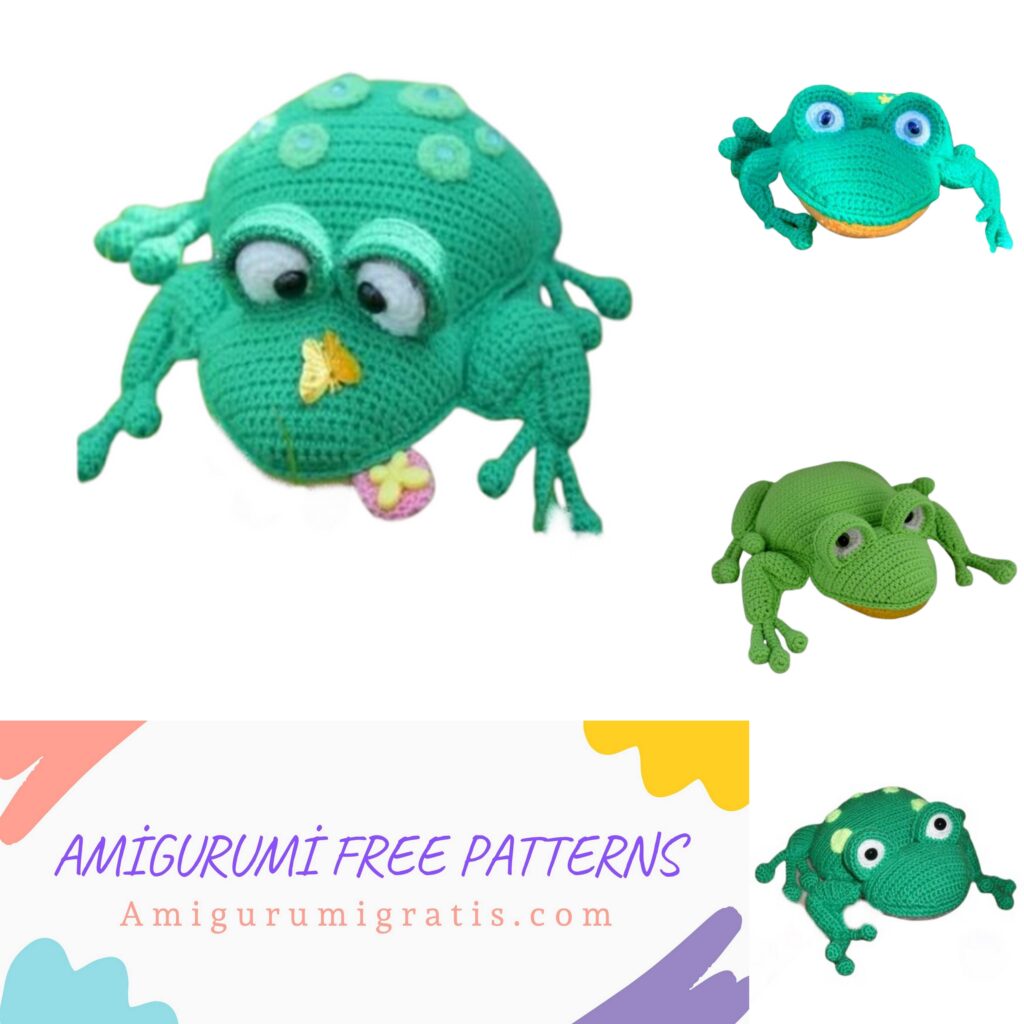
Amigurumi Cute Frog We have translated the amigurumi cute frog pattern for you, I hope you like it. You can browse our website for free new patterns.
The upper part (back). 1 item. We knit in straight rotary rows for both sides of the loop, except for 22 rows, we will knit it for the back half-loops!
1 row – 9 CH, start knitting 2 row in the 2nd loop from the hook
2 row – inc, 6 sc, inc, CH, turn (10)
3 row – inc, 8 sc, inc, CH, turn (12)
4 row – inc, 10 sc, inc, CH, turn (14)
5 row – inc, 12 sc, inc, CH, turn (16)
6 row – inc, 14 sc, inc, CH, turn (18)
7 row – inc, 16 sc, inc, CH, turn (20)
8 row – inc, 18 sc, inc, CH, turn (22)
9 row – inc, 20 sc, inc, CH, turn (24)
10 row – 24 sc, CH, turn (24)
11 row – inc, 22 sc, inc, CH, turn (26)
12 row – inc, 24 sc, inc, CH, turn (28)
13 row – (inc, 12 sc, inc) x 2 times, CH, turn (32)
14 row – inc, 12 sc, inc, 4 sc, inc, 12 sc, inc, CH, turn (36)
15 row – 36 sc, CH, turn (36)
16 row – 36 sc, CH, turn (36)
17 row – 36 sc, CH, turn (36)
18 row – sc, dec, 7 sc, dec, 12 sc, dec, 7 sc, dec, sc, CH, turn (32)
19 row – sc, dec, 8 sc, dec, 6 sc, dec, 8 sc, dec, sc, CH, turn (28)
20 row – sc, dec, 7 sc, dec, 4 sc, dec, 7 sc, dec, sc, CH, turn (24)
21 row – sc, dec, 6 sc, dec, 2 sc, dec, 6 sc, dec, sc, CH, turn (20)
Attention! 22 row knit for the rear walls of the loop!
22 row – inc, 18 sc, inc, CH, turn (22)
23 row – inc, 20 sc, inc, CH, turn (24)
24 row – inc, 22 sc, inc, CH, turn (26)
25 row – inc, 24 sc, inc, CH, turn (28)
26 row – inc, 26 sc, inc, CH, turn (30)
27 row – inc, 28 sc, inc, CH, turn (32)
28 row – inc, 30 sc, inc, CH, turn (34)
29 row – inc, 32 sc, inc, CH, turn (36)
30 row – inc, 34 sc, inc, CH, turn (38)
31 row – inc, 36 sc, inc, CH, turn (40)
32 row – inc, 38 sc, inc, CH, turn (42)
33 row – 42 sc, CH, turn (42)
34 row – 42 sc, CH, turn (42)
35 row – 42 sc, CH, turn (42)
36 row – 42 sc, CH, turn (42)
37 row – 42 sc, CH, turn (42)
38 row – 42 sc, CH, turn (42)
39 row – 42 sc, CH, turn (42)
40 row – 42 sc, CH, turn (42)
41 row – sc, dec, 36 sc, dec, sc, CH, turn (40)
42 row – sc, dec, 34 sc, dec, sc, CH, turn (38)
43 row – sc, dec, 32 sc, dec, sc, CH, turn (36)
44 row – sc, dec, 30 sc, dec, sc, CH, turn (34)
45 row – sc, dec, 28 sc, dec, sc, CH, turn (32)
46 row – sc, dec, 26 sc, dec, sc, CH, turn (30)
47 row – sc, dec, 24 sc, dec, sc, CH, turn (28)
48 row – sc, dec, 22 sc, dec, sc, CH, turn (26)
49 row – sc, dec, 20 sc, dec, sc, CH, turn (24)
50 row – sc, dec, 18 sc, dec, sc, CH, turn (22)
51 row – sc, dec, 16 sc, dec, sc, CH, turn (20)
52 row – sc, dec, 14 sc, dec, sc, CH, turn (18)
53 row – sc, dec, 12 sc, dec, sc, CH, turn (16)
54 row – sc, dec, 10 sc, dec, sc, CH, turn (14)
55 row – sc, dec, 8 sc, dec, sc, CH (12)
Do not cut the thread! Tie SC the entire part from this loop in a circle, in the photo the arrows indicate the direction. The last loop is the first loop of the last row. Do not skip rows and do not impose excess, the number of SC of the upper part must match the number of SC of the lower part.
After you have tied the part, do not cut the thread and do not close the knitting, we will continue to bind both parts with this thread.

Eyes.
First we knit squirrels – 2 circles.
1p 6 SC into magic ring = 6 SC
2p (İNC) x 6 times = 12 SC
3p (1 SC, İNC) x 6 times = 18 SC
4p (2 SC, İNC) x 6 times = 24 SC
Fasten the thread, cut.
Next we knit the main part of the eye. 2 pieces.
1p 6 SC into magic ring = 6 SC
2p (İNC) x 6 times = 12 SC
3p (1 SC, İNC) x 6 times = 18 SC
4p (2 SC, İNC) x 6 times = 24 SC
5p 24 SC
6p 24 SC
7p 24 SC
8p In this row we knit the first 18 SC FOR THE REAR HALF HALF, the remaining 6 SC for both sides of the loop = 24 SC
9p we connect the main part with protein. We knit both parts together 24 SC. Do not forget to fill, and
if you use safe eyes – install them before tying the parts.
Then we knit in straight rotary rows.
10р 19 SC, CH, turn (19)
11p 18 SC, CH, turn (18)
12p 18 SC, CH, turn (18)
13p 18 SC, CH, turn (18)
14p 18 SC, CH, turn (18)
Attach the protruding part of the 18 SC to the remaining half loops in the 8th row and tie them together 18 SC. Fasten the thread, leave the tail for sewing.
Fingers. The size of the front and hind legs is different.
Front thumbs, 2 pieces 12 rows. Front small fingers, 4 pieces up to 10 rows.
1p 6 SC into magic ring = 6 SC
2p (İNC) x 6 times = 12 SC
3p 12 SC
4p 6 DEC = 6 SC
5p 1 DEC, 4 SC = 5 SC
6-12r = 5 SC
Back thumbs. 2 pieces 13 rows. Back little fingers. 4 pieces of 11 rows.
1p 5 SC into magic ring = 5 SC
2p (İNC) x 5 times = 10 SC
3p (1 SC, İNC) x 5 times = 15 SC
4p 15 SC
5p (1 SC, DEC) x 5 times = 10 SC
6p 5 DEC = 5 SC
7-13r = 5 SC
We have this: a thumb in the center, small on the sides. You can sew together first, then sew to the foot, and you can immediately sew one at a time, as it is more convenient.
Hind legs. Lower part, 2 pieces. We knit in straight rotary rows.
1 row – 2 CH, start knitting 2 row in the 2nd loop from the hook
2 row – inc, CH, turn (2)
3 row – inc, 1 sc, CH, turn (3)
4 row – 2 sc, inc, CH, turn (4)
5 row – 4 sc, CH, turn (4)
6 row – 3 sc, inc, CH, turn (5)
7 row – 5 sc, CH, turn (5)
8 row – 5 sc, CH, turn (5)
9 row – 5 sc, CH, turn (5)
10 row – 5 sc, CH, turn (5)
11 row – 5 sc, CH, turn (5)
12 row – 5 sc, CH, turn (5)
13 row – dec, 3 sc, CH, turn (4)
14 row – 4 sc, CH, turn (4)
15 row – 4 sc, CH, turn (4)
16 row – 2 sc, dec, CH, turn (3)
17 row – 3 sc, CH, turn (3)
18 row – 1 sc, dec, CH, turn (2)
19 row – dec (1)
Bind both sc details in mirror image! Fasten the thread, cut it off.
Paws.
Hind legs. Top, 2 pieces. We knit in straight rotary rows.
1 row – 2 CH, start knitting 2 row in the 2nd loop from the hook
2 row – inc, CH, turn (2)
3 row – inc, 1 sc, CH, turn (3)
4 row – 2 sc, inc, CH, turn (4)
5 row – 4 sc, CH, turn (4)
6 row – 3 sc, inc, CH, turn (5)
7 row – 5 sc, CH, turn (5)
8 row – 4 sc, inc, CH, turn (6)
9 row – 6 sc, CH, turn (6)
10 row – 5 sc, inc, CH, turn (7)
11 row – 7 sc, CH, turn (7)
12 row – 7 sc, CH, turn (7)
13 row – dec, 5 sc, CH, turn (6)
14 row – 6 sc, CH, turn (6)
15 row – dec, 4 sc, CH, turn (5)
16 row – 3 sc, dec, CH, turn (4)
17 row – dec, 2 sc, CH, turn (3)
18 row – 1 sc, dec, CH, turn (2)
19 row – dec (1)
Next we tie the sc part, ATTENTION !!! All the details of all the legs (top, bottom, front, back) of the left and right parts of the legs are tied in a mirror image, see photo, arrows indicate the direction.
Because the top and bottom of the foot are joined by sc in the same way as the body, the thread does not need to be cut. First, collect one foot completely, then knit the top of the second foot.
Forelegs Lower part, 2 pieces. We knit in straight rotary rows.
1 row – 4 CH, start knitting 2 row in the 2nd loop from the hook
2 row – 3 sc, CH, turn (3)
3 row – 3 sc, CH, turn (3)
4 row – 3 sc, CH, turn (3)
5 row – 1 sc, inc, 1 sc, CH, turn (4)
6 row – 4 sc, CH, turn (4)
7 row – 4 sc, CH, turn (4)
8 row – 4 sc, CH, turn (4)
9 row – 4 sc, CH, turn (4)
10 row – 4 sc, CH, turn (4)
11 row – 4 sc, CH, turn (4)
12 row – 2 sc, dec, CH, turn (3)
13 row – 1 sc, dec, CH, turn (2)
14 row – 2 sc, CH, turn (2)
15 row – 2 sc, CH, turn (2)
16 row – we knit 4 sc without turning the knitting, i.e. 2 sc along the loops of the previous row and 2 sc we knit further along the side loops (4)
17 row – 4 sc, CH, turn (4)
18 row – 4 sc, CH, turn (4)
19 row – 4 sc, CH, turn (4)
20 row – 4 sc, CH, turn (4)
21 row – 2 sc, dec, CH, turn (3)
22 row – 3 sc, CH, turn (3)
23 row – 1 sc, dec, CH, turn (2)
24 row – 2 sc, CH, turn (2)
25 row – 2 sc, CH, turn (2)
Bind both sc details in mirror image! Fasten the thread, cut it off.
Forelegs Top, 2 pieces. We knit in straight rotary rows.
1 row – 4 CH, start knitting 2 row in the 2nd loop from the hook
2 row – 3 sc, CH, turn (3)
3 row – 3 sc, CH, turn (3)
4 row – 1 sc, inc, 1 sc, CH, turn (4)
5 row – inc, 3 sc, CH, turn (5)
6 row – 5 sc, CH, turn (5)
7 row – 4 sc, inc, CH, turn (6)
8 row – 6 sc, CH, turn (6)
9 row – 6 sc, CH, turn (6)
10 row – 6 sc, CH, turn (6)
11 row – 6 sc, CH, turn (6)
12 row – 4 sc, dec, CH, turn (5)
13 row – dec, 3 sc, CH, turn (4)
14 row – 2 sc, dec, CH, turn (3)
15 row – dec, CH, turn (2)
16 row – we knit 6 sc, without unrolling the knitting, i.e. 2 sc along the loops of the previous row and 4 sc we knit further along the side loops (6)
17 row – 6 sc, CH, turn (6)
18 row – 6 sc, CH, turn (6)
19 row – 4 sc, dec, CH, turn (5)
20 row – 5 sc, CH, turn (5)
21 row – 3 sc, dec, CH, turn (4)
22 row – 4 sc, CH, turn (4)
23 row – 2 sc, dec, CH, turn (3)
24 row – 3 sc, CH, turn (3)
25 row – 1 sc, dec, CH, turn (2)
Bind both sc details in mirror image! We do not cut the thread, we bind together the top and bottom of the sc.
After binding, fold the front paws at the elbow and stitch them along the inner sc. All paws are sewn to the body for the harness, over the edge.