
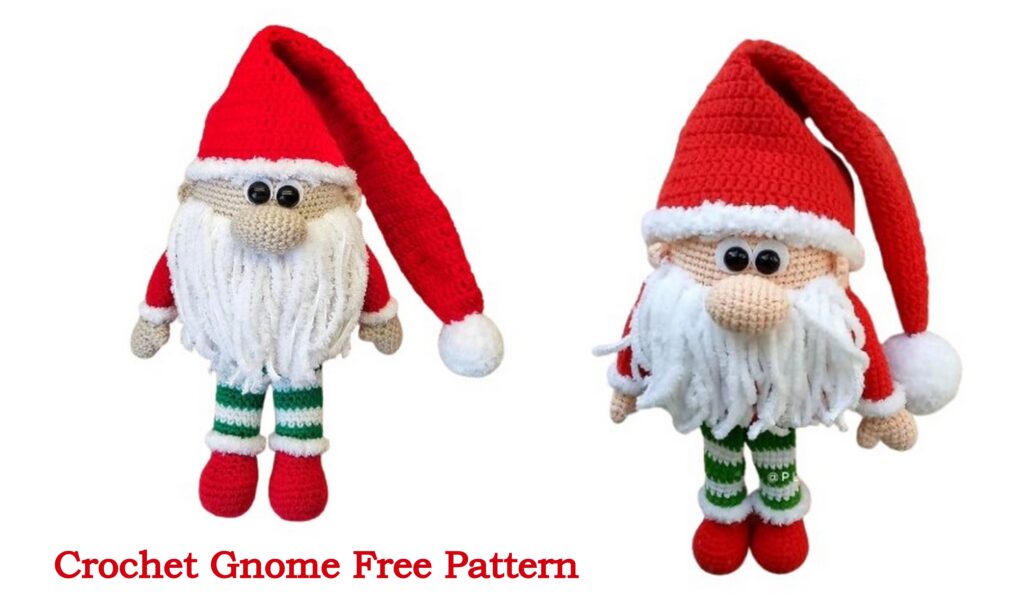
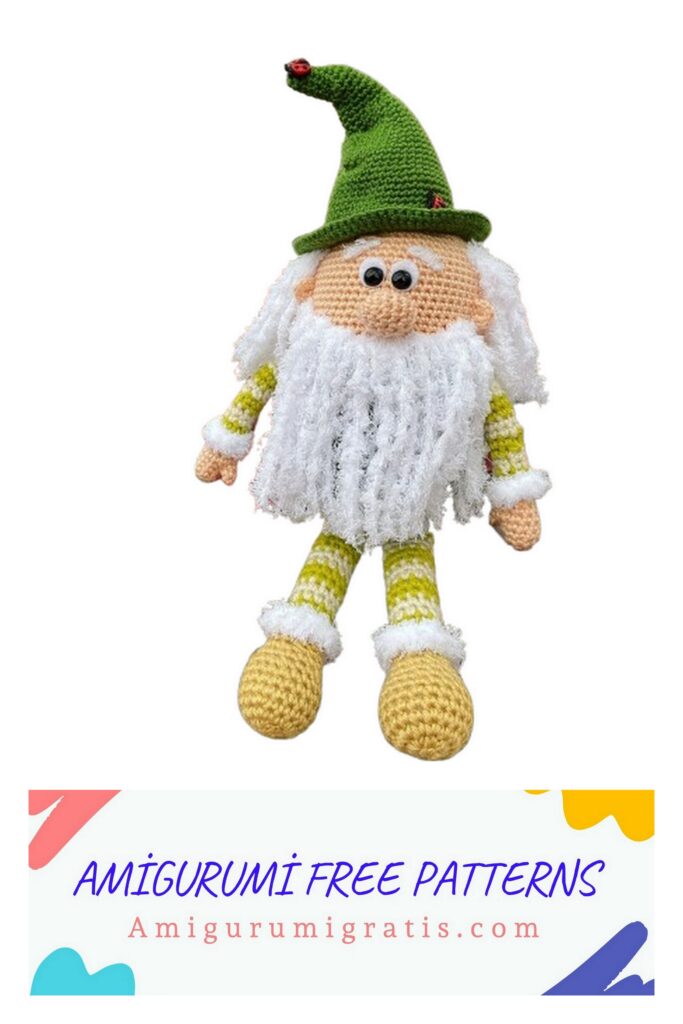
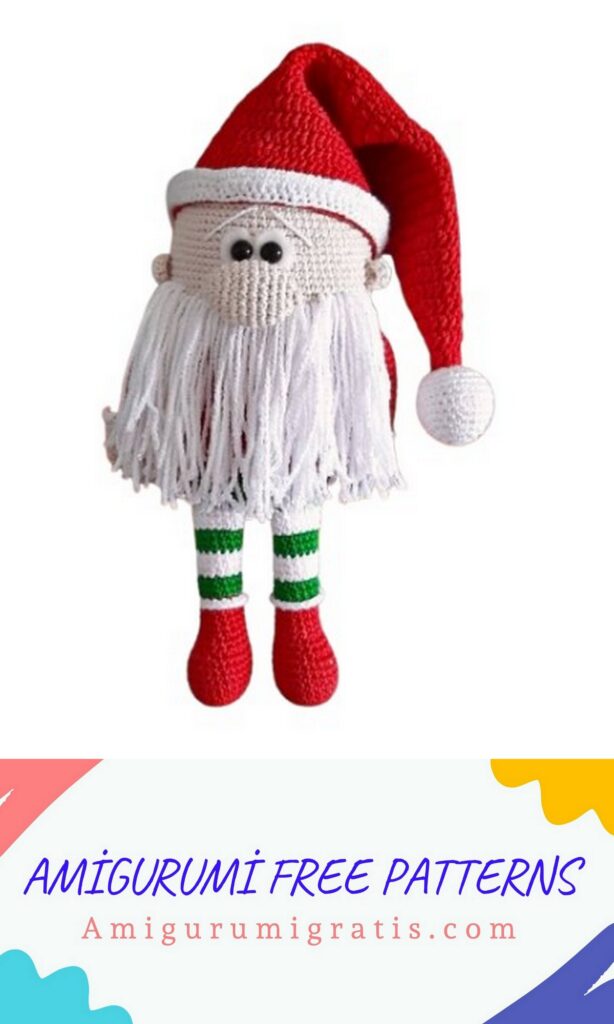
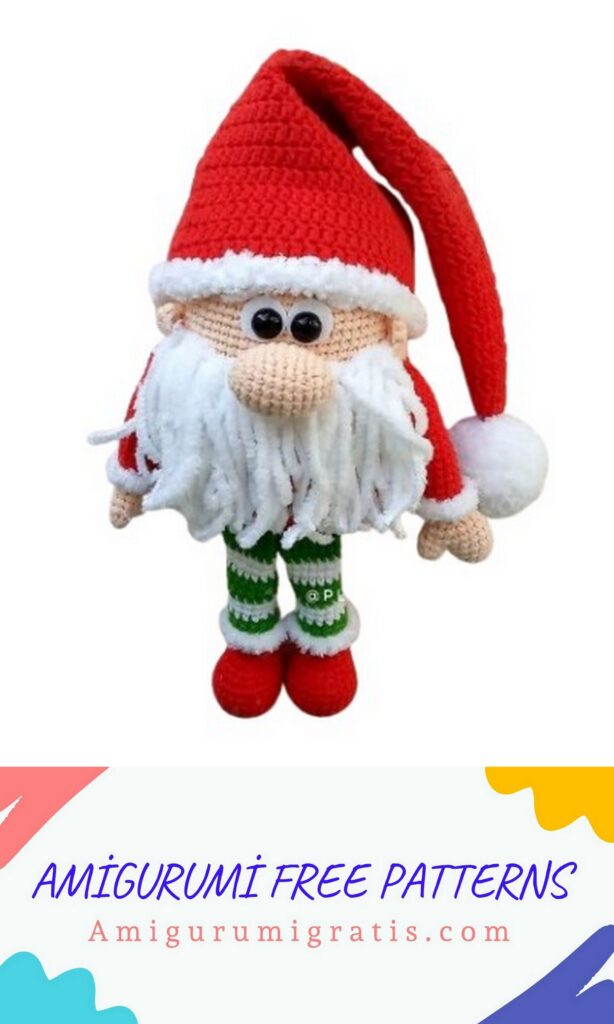
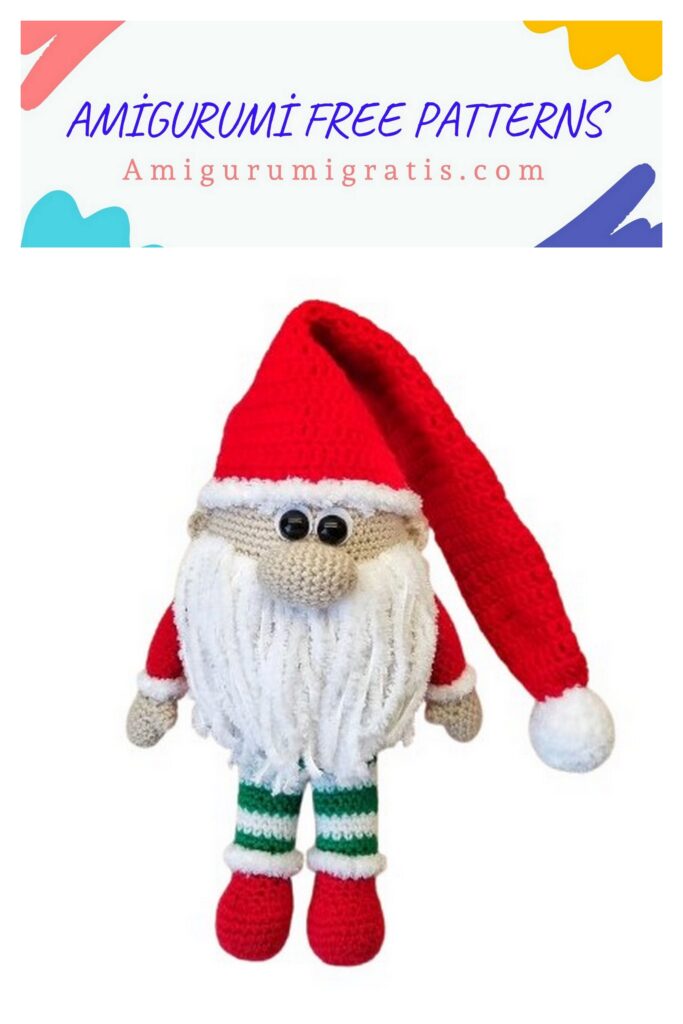
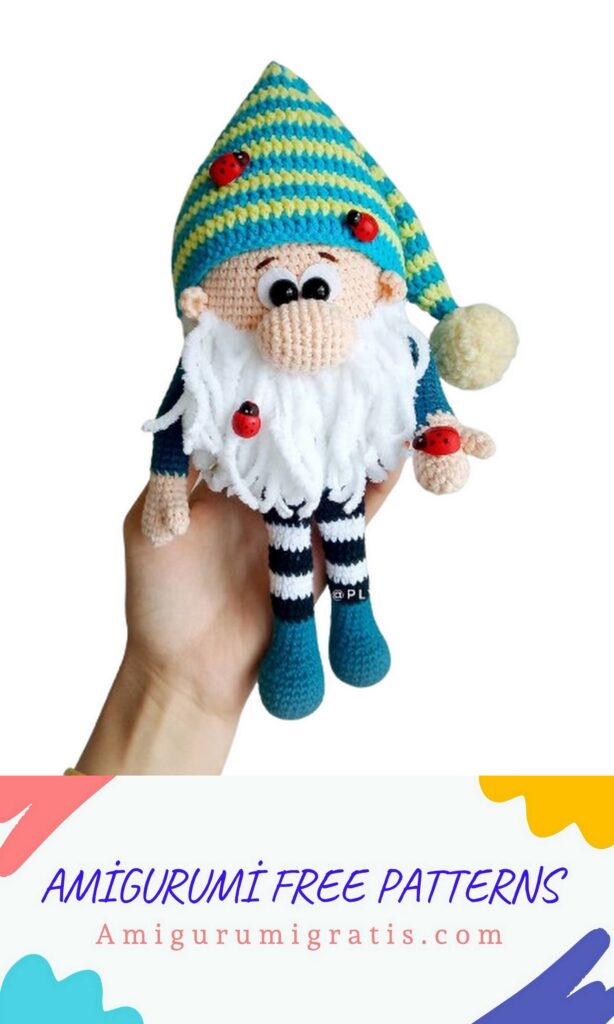
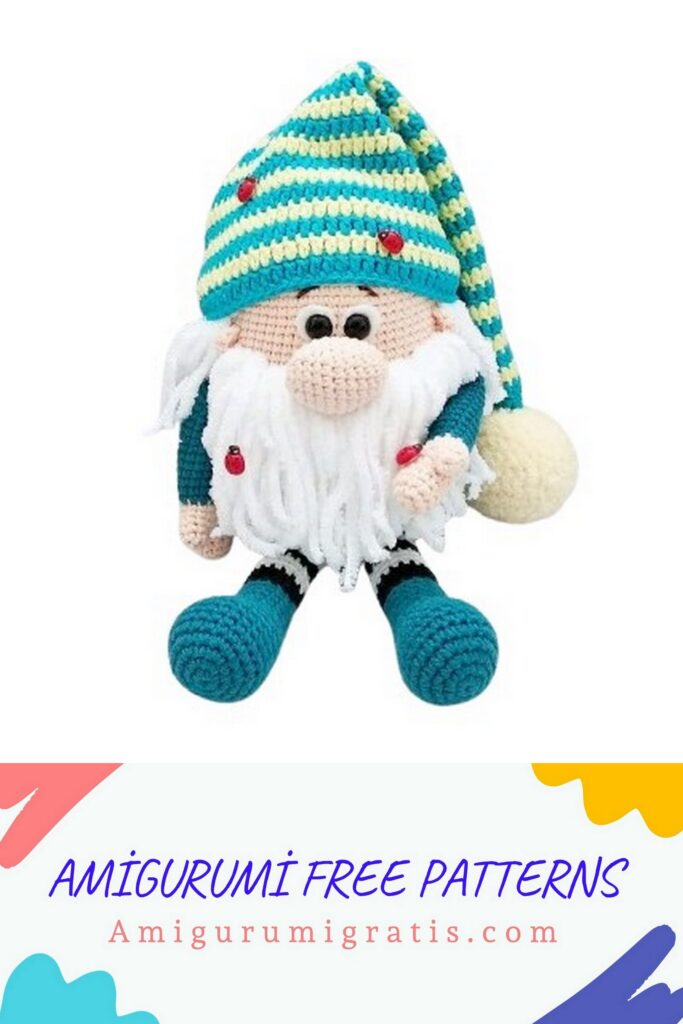
Looking for a fun and creative project? This Crochet Gnome Free Pattern is the perfect choice for beginners and advanced crocheters alike. With easy-to-follow instructions, you’ll have a charming gnome in no time! Using just a few basic materials, this Amigurumi Christmas allows you to create a whimsical character that’s perfect for gift-giving or decorating your home.
Whether you’re new to crochet or have been crafting for years, this Crochet Gnome Free Pattern is sure to bring a smile to your face as you bring your gnome to life.
Materials and tools:
1. Yarn:
- Yarnart Jeans 73 (peach),
- Alize Cotton Gold 243 (red, discontinued; you can use any other red cotton blend with the same yardage)
- Alize Cotton gold 55 (white),
- Alize Cotton gold 126 (green grass),
- Alize Softy 55 (white)
- Alize Softy Plus 55 (white)
2. Safety eyes or half beads 10 mm.
3. Felt circles with a diameter of 15 mm.
4. Crochet hook 2.25.
5. Tapestry needle, needles for marking.
6. Glue (if using half beads).
7. Optional: Aquarium glass beads (for weighting, helps the figure sit).
8. Stuffing material.
Abbreviations:
Ch – chain stitch
Sl-st – slip stitch
MR – amigurumi ring
Sc – single crochet
Dc – double crochet
İnc- increase
Dec – decrease
Sc cm- shift stitch
Arms (make 2)
Start knitting with peach-colored yarn.
Thumb
1. 6 Sc in MR
2. 6 Sc
Cut the thread, leave 15 cm.
Hand
6 Sc in MR
6 İnc – 12
3/5. 12 Sc
Do not cut the thread, continue knitting.
6. 6 Sc along the palm, attach the thumb – 6 Sc along the thumb, 6 Sc along the palm – 18
7. 2 Sc, Dec, (4Sc, Dec)x2, 2 Sc – 15
8. (3 Sc, Dec)x3 – 12
9. 12 Sc.
Fill the palm, fasten and hide the thread from the thumb, change the thread to red and knit the 10th row behind the back half loops. 10/24. 15 rows of 12 Sc + I knit 3 more Sc shifts so that the fingers are symmetrically located on both hands.
Fill the handle up to the 15th row, fold and knit 5 Sc behind both walls. Hide the thread, cut.
In the front half loops of row 10, knit 1 row of single crochet stitches with Alize Softy yarn to create a fluffy border.
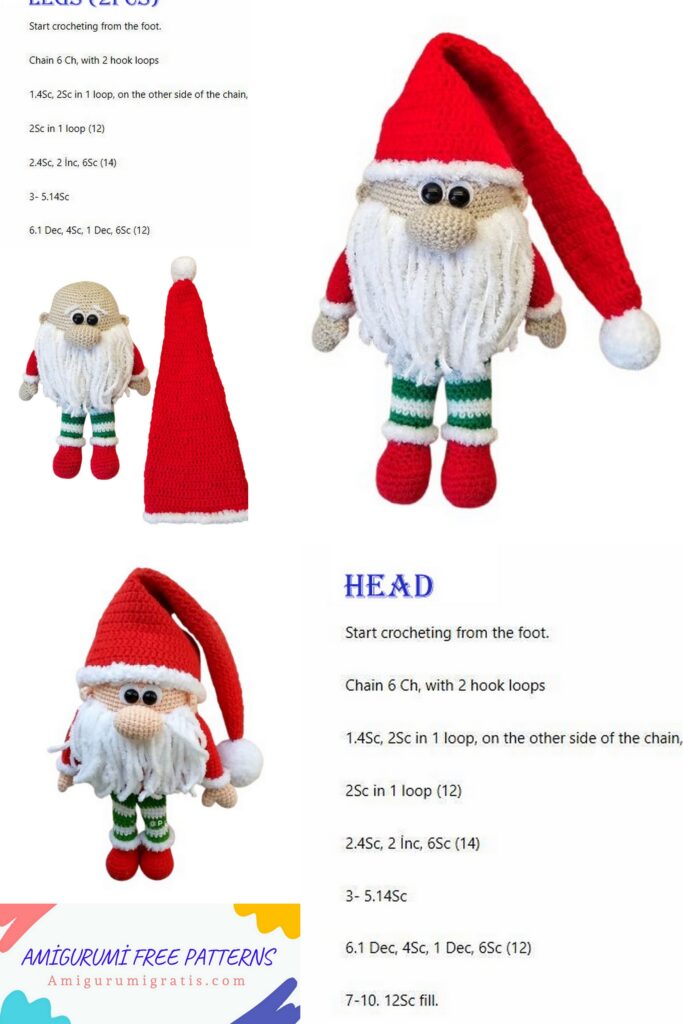
Legs
(make 2)
Start knitting with red yarn.
1.6 Sc in MR
2.6 İnc – 12
3. (1 Sc, İnc)х6 – 18
4. (2 Sc, İnc)x6 – 24
5/9. 5 rows of 24 Sc
10. 6 Sc, 6 Dec, 6 Sc – 18
11. 18 Sc
12. 6 Sc, Dec, 6 Sc – 15
13/16. 4 rows of 15 Sc
Fill the booties, change the thread to green and knit row 17 through the back half loops.
17/19. 3 rows of 15 Sc
Change the thread to white.
20/22. 3 rows of 15 Sc
Change the thread to green.
23/25. 3 rows of 15 Sc
Change the thread to white.
26/28. 3 rows of 15 Sc
Change the thread to green.
29/30. 2 rows of 15 Sc
31. 13 Sc, Dec – 14
Fill the leg up to the 23rd row, fold and make sure that in this position the toes of the boots look forward, knit 6 Sc for both walls. If there is no symmetry, then knit 1-2 Sc displacements and then only 6 Sc for both walls. Hide the thread.
In the front half loops of the 17th row, knit 1 row of single crochet stitches with Alize Softy yarn to create a fluffy border.
Crochet gnome (Nose)
Knit with peach-colored yarn.
1.6 Sc in MR
2.6 İnc – 12
3.(3 Sc, İnc)х3 – 15
4.(4 Sc, İnc)х3 – 18
5.18 Sc
6. (5 Sc, İnc)х3 – 21
7.21 Sc
8.(5 Sc, Dec)х3 – 18
9.18 Sc
10(4 Sc, Dec)х3 – 15
11(3 Sc, Dec)х3 – 12
Fill the nose.
12.6 Dec – 6
Tighten the hole, bring the thread out between the 5th and 6th rows of the nose, leave the thread for sewing.
Crochet gnome (Ears)
(make 2)
Knit with a peach-colored thread.
1.6 Sc in MR
Next, do not connect the knitting into a ring, but knit 1 Ch lift, turn
2. 6 Sc
If you want to use safety eyes, then make holes in the felt circles and insert black eyes there.
Insert the eyes with felt between the 40th and 41st rows of the head, make sure that they are located exactly in the middle between the handles.
I have 2 Sc between the rods of the eyes.
If you are going to glue the eyes, just continue knitting the head.
46. (7 Sc, Dec)х8 – 64
47. 64 Sc
We add stuffing to the gnome and continue to stuff it while decreasing the head loops. I put 2 glass aquarium balls in it. With them, the gnome will sit steadily.
48. 3 Sc, Dec, (6 Sc, Dec)х7, 3 Sc – 56
49. 56 Sc
50. (5 Sc, Dec)х8 – 48
51. 48 Sc
52. 2 Sc, Dec, (4 Sc, Dec)х7, 2 Sc – 40 53. 40 Sc
54. (3 Sc, Dec)х8 – 32
55. 32 Sc
56. 1 Sc, Dec, (2 Sc, Dec)х7, 1 Sc – 24
57. 24 Sc
58. (1 Sc, Dec)х8 – 16
59. 16 Sc
60. 8 Dec -8
Pull the hole together, hide the thread.
Crochet gnome (Body and head)
Start knitting with red thread.
1.8 Sc in MR
2.8 İnc – 16
3. (1 Sc, İnc)х8 – 24
4. (2 Sc, İnc)x8 – 32
5.(3 Sc, İnc)х8 – 40
6.(4 Sc, İnc)х8 – 48
7. (5 Sc, İnc)х8 – 56
In the next row we will knit the legs.
8. (6 Sc, İnc)х3, 6 Sc with leg loops, İnc. 6 Sc with leg loops, İnc. (6 Sc, İnc)х3-64
9. (7 Sc, İnc)x8 – 72
10/14. 5 rows of 72 Sc
15. (8 Sc, İnc)х8 – 80
16/24. 9 rows of 80 Sc
25. (8 Sc, Dec)х8 – 72
26/31. 6 rows of 72 Sc
In the next row we will knit the handles. For this, it is necessary that the marker thread be at the back in the center of the back – so I knit 2 Sc offsets. You may need a different number of Sc, focus on your knitting.
32. 20 Sc, 5 Sc with handle loops, 22 Sc, 5 Sc with handle loops, 20 Sc 72
Change the thread to peach, we will knit the head.
33/45. 13 rows of 72 Sc.
The beard threads themselves need to be secured with knots: fold the thread in half, hook it under the post outward, pull the free ends through the formed loop and tighten. I use the second row of the beard to make it thicker. Use the colored mats as a guide. rkers.
When the beard is ready, you need to sew on the nose, ears, glue on the eyes (if they are not inserted earlier), embroider the eyebrows.
Sew the nose 1 row above the beard. With Alize Softy thread, embroider the eyebrows directly above the eyes. Do not try to embroider them higher, because then they will hide under the cap.
Pompom for the cap
We knit with white Alize Softy yarn.
1.6 Sc in MR
2.6 İnc – 12
3. (1 Sc, İnc)х6 – 18
4. (2 Sc, İnc)x6 – 24
5. (3 Sc, İnc)х6 – 30
6/9. 4 rows of 30 Sc
10. (3 Sc, Dec)х6 – 24
11. (2 Sc, Dec)х6 – 18
12. (1 Sc, Dec)х6 – 12
Fill the pompom.
13. 6 Dec -6
Tighten the hole, hide the thread.
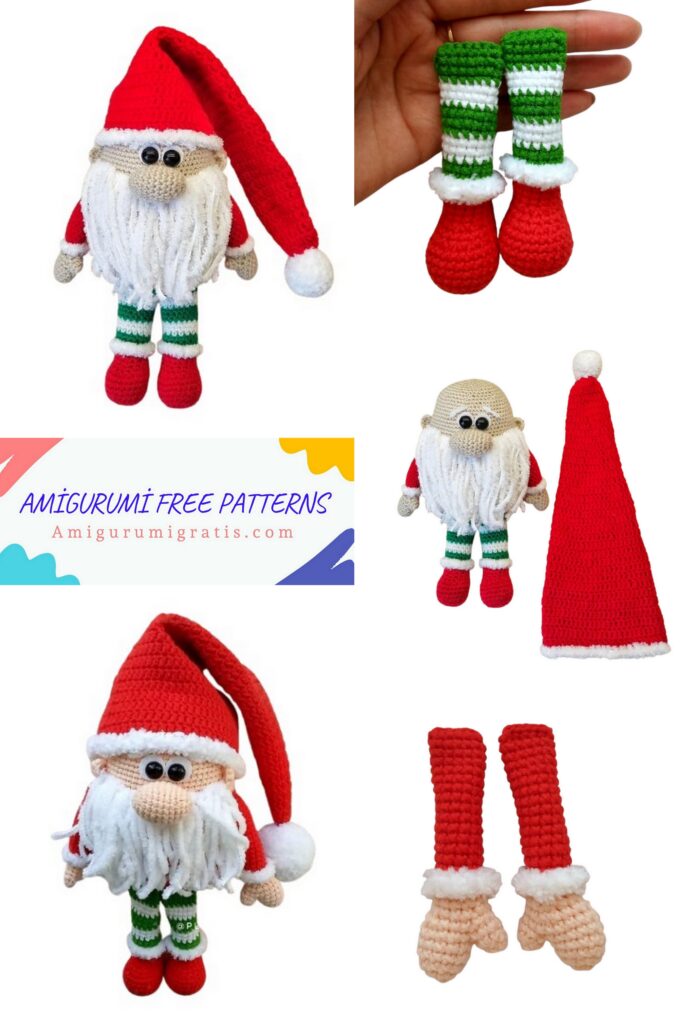
Crochet gnome (Cap)
Knit with red thread.
1. Cast on a chain of 64 Ch, close it in a circle with a slip stitch, knit 3 Sc lift, 64 Dc, Sl-st.
Start each row with 3 Ch lift, finish with Sl-st
2/6. 5 rows of 64 Dc
7. (Dec, 30 Dc)x2 – 62
8. 14 Dc, Dec, 29 Dc, Dec, 15 Dc – 60
9. (Dec, 28 Dc)x2 – 58
10. 13 Dc, Dec, 27 Dc, Dec, 14 Dc – 56
11. (Dec, 26 Dc)x2 – 54
12. 12 Dc, Dec, 25 Dc, Dec, 13 Dc – 52
13. (Dec, 24 Dc)x2 – 50
14. 11 Dc, Dec, 23 Dc, Dec, 12 Dc – 48
15. (Dec, 22 Dc)x2 – 46
16. 10 Dc, Dec, 21 Dc, Dec, 11 Dc – 44
17. (Dec, 20 Dc)x2 – 42
18. 9 Dc, Dec, 19 Dc, Dec, 10 Dc – 40
19. (Dec, 18 Dc)x2 – 38
20. 8 Dc, Dec, 17 Dc, Dec, 9 Dc – 36
21. (Dec, 16 Dc)x2 – 34
22. 7 Dc, Dec, 15 Dc, Dec, 8 Dc – 32
23. (Dec, 14 Dc)x2 – 30
24. 6 Dc, Dec, 13 Dc, Dec, 7 Dc – 28
25. (Dec, 12 Dc)x2 – 26
26. 5 Dc, Dec, 11 Dc, Dec, 6 Dc – 24
27. (Dec, 10 Dc)х2 – 22
28. 4 Dc, Dec, 9 Dc, Dec, 5 Dc – 20
29. (Dec, 8 Dc)х2 – 18
30. 3 Dc, Dec, 7 Dc, Dec, 4 Dc – 16
31. (Dec, 6 Dc)х2 – 14
32. 2 Dc, Dec, 5 Dc, Dec, 3 Dc – 12
33. (Dec, 4 Dc)х2 – 10
34. 1Dc, Dec, 3 Dc, Dec, 2 Dc – 8
Sew pompom to cap
Tie the edge of the cap with 1 row of Sc, yarn alize Softy.
In conclusion, this Crochet Gnome Free Pattern is a delightful project that anyone can enjoy. With its simple stitches and charming design, you’ll have a cute gnome ready in no time.
Whether you’re making it for yourself or as a gift, this Crochet Gnome Free Pattern is sure to bring joy to anyone who sees it. Don’t forget to share your finished gnome and inspire others to try this fun and creative Crochet Gnome Free Pattern!