List of required materials:
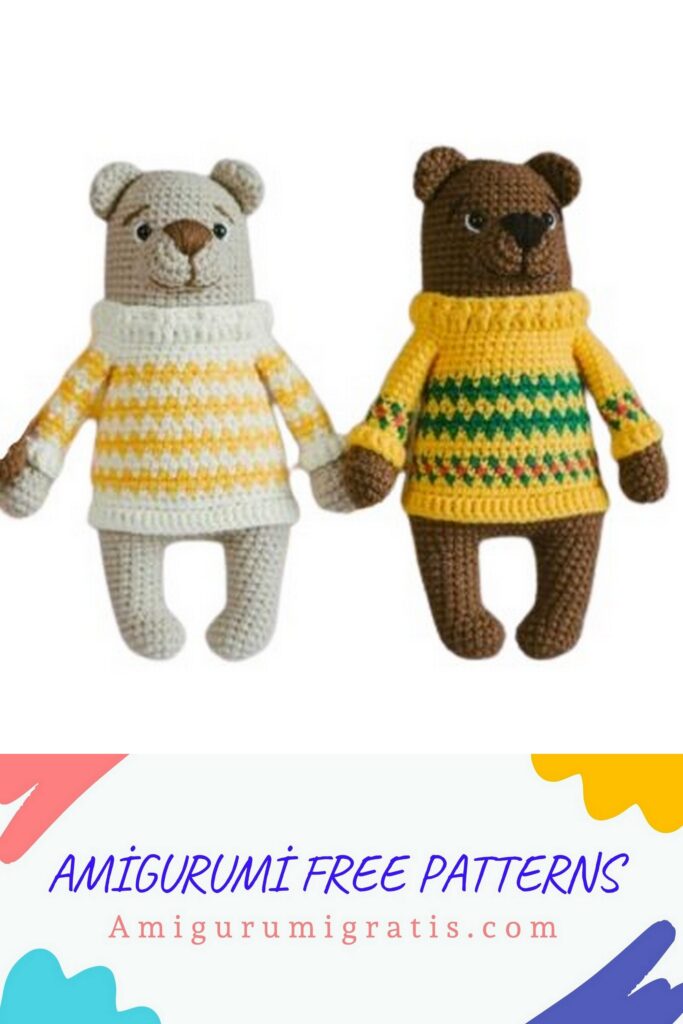
– The first version of the sweater:
– The second version of the sweater:
– yarn for knitting a bear with the first version of the sweater: for the body: Yarn Art Jeans 40 (brown), a little black for the nose and head decoration
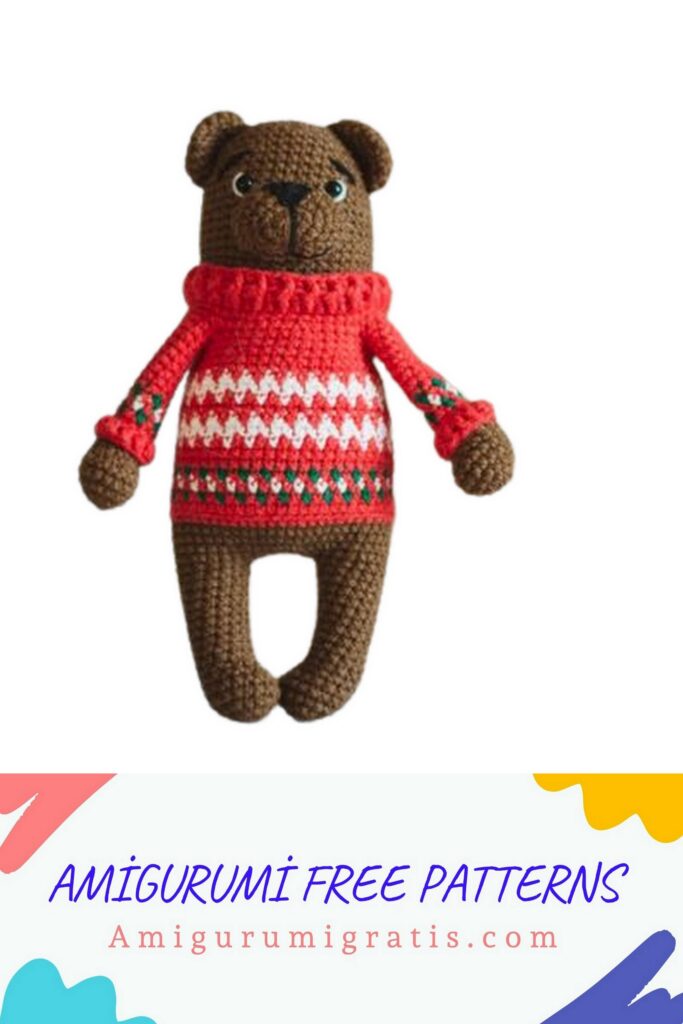
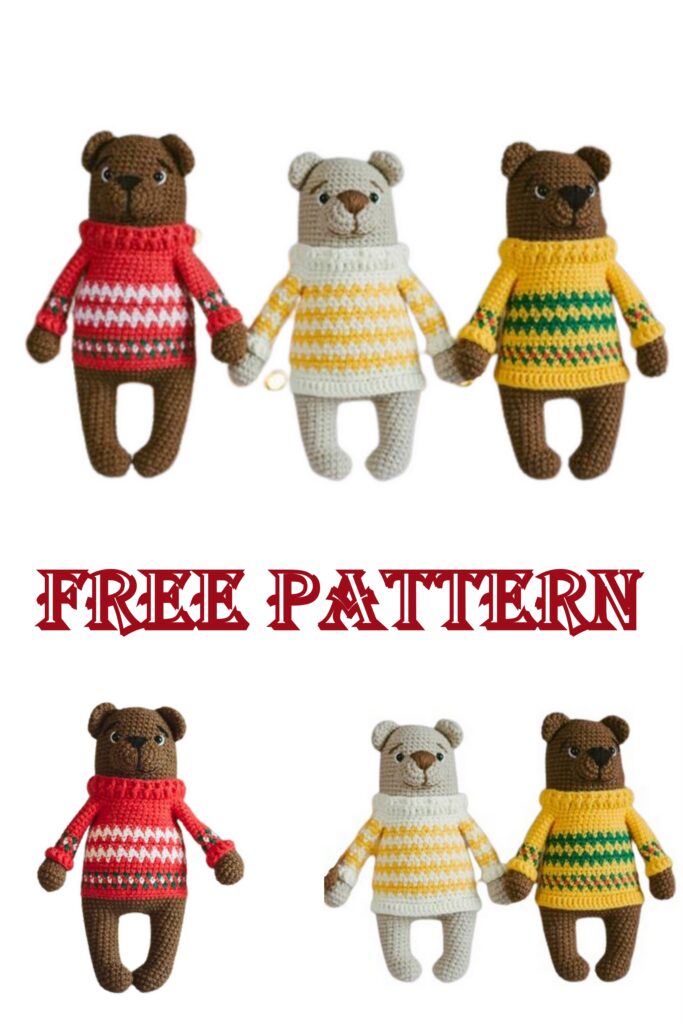
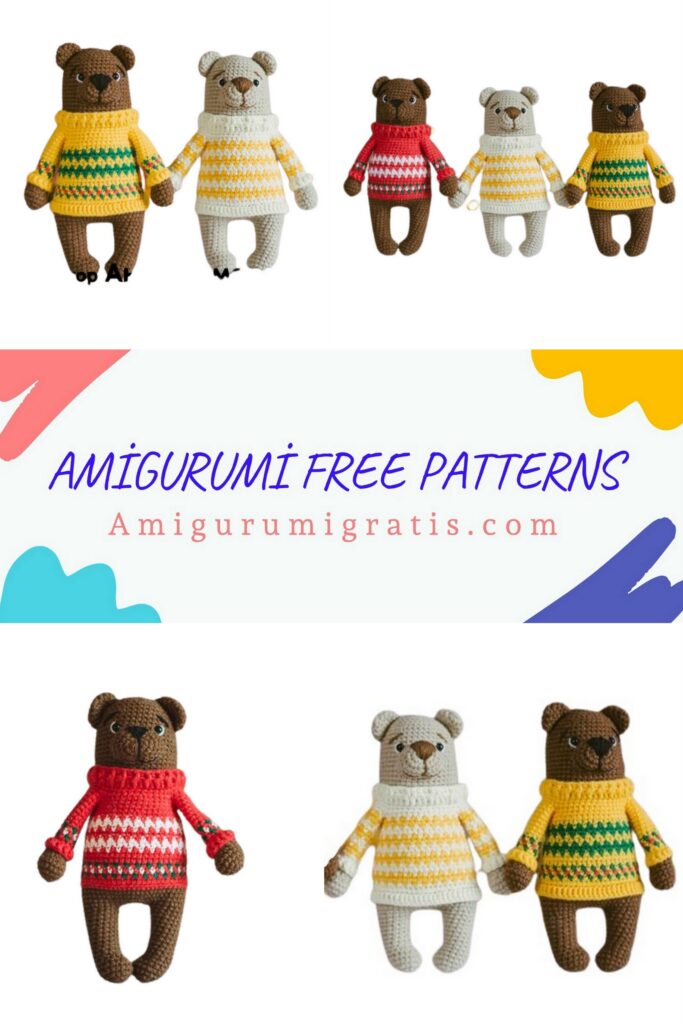
– a little white yarn to decorate the eyes; for a sweater: basic 35 (yellow), additional colors 26 (red) and 52 (green) or main 26 (red), secondary colors 52 (green) and 01 (white)
For the bear with the second version of the sweater, colors were used: 48 (beige) for the body, 86 (milky) and 35 (yellow) for the sweater.
Nose and eyebrows – 40 (brown)
You can use absolutely any yarn in color and texture.
Jeans yarn consumption: one skein of the main color is enough for two or three bodies, it takes about a quarter of a skein of the main color of the sweater and quite a bit of an additional one to knit a sweater.
– a thin contrast thread – a marker. Be sure to use a marker!
– a hook of the right size for your yarn, I have it No. 2;
– filler (holofiber, sintepukh);
– eyes on a secure mount 6-8mm;
– a needle for stitching parts;
– scissors;
The growth of the finished toy, with the specified materials 18cm.
Abbreviations
sc – single crochet, knit for both walls of the loop, unless otherwise indicated in the description;
ch – air loop;
sl-st – connecting column, do not knit it too tight;
Dec – decrease (2 sc together for the front walls)
İnc – increase (2 sc from one loop)
HDC – half double crochet
DC – double crochet
* – after this asterisk, the number of repetitions of knitted loops is indicated
General recommendations for knitting toys:
– I recommend that you first carefully read the description of the toy, then start knitting.
– Choose a hook according to your density! There should be no distance between the columns, the filler should not shine through, but you don’t need to knit too tightly, the canvas should
turn out plastic, and not be wooden.
– Use a good filler to prevent bumps and bumps when filling the toy.
– All parts are knitted in a spiral, the lifting loop at the beginning of the row and the connecting loop at the end of the row are not used.
– All loops, except for the decrease loop, are knitted behind both walls of the loop. Knitting loops for the front or back wall indicated in the row description.
– The marker is not aligned during knitting, but if necessary, knit an offset loop to get into the description. When knitting the body, the marker runs exactly in the middle, pay special attention to it when attachment of paws.
– Please note that the connecting column is not knitted tight.
– Use a thin, contrasting marker thread to mark the beginning of the row. Before knitting the first loop of the row, throw it alternately: before knitting and after knitting.
– The toy is knitted face out, fig.1.
– The thread is changed as follows:
You knit the last sc not to the end, i.e. insert the hook behind both walls of the loop (when knitting a decrease, we insert the hook behind the two front walls), bring the thread out – there are two loops on the hook, then take a thread of a different color and knit these loops in a new color.
– When making the head, enter and exit all the threads from the top of the head, in an open hole, so that it is convenient to fix and hide them.
– Only the muzzle and ears are sewn on, the upper paws are knitted, the head and body are knitted.
– You can knit a toy without clothes, come up with an outfit for it yourself, change the color scheme. This master class describes knitting only a non-removable sweater with a pattern of two types. In the first version of the sweater we use two patterns, in the second version of the sweater we use only one pattern. For convenience, I made plates for knitting the body.
The yellow color in the pictures is the main color of the sweater.
Upper paws:
We knit two identical parts.
We fill only the palm.
The marker passes behind the paw, the marker is not aligned.
We start knitting with body color.
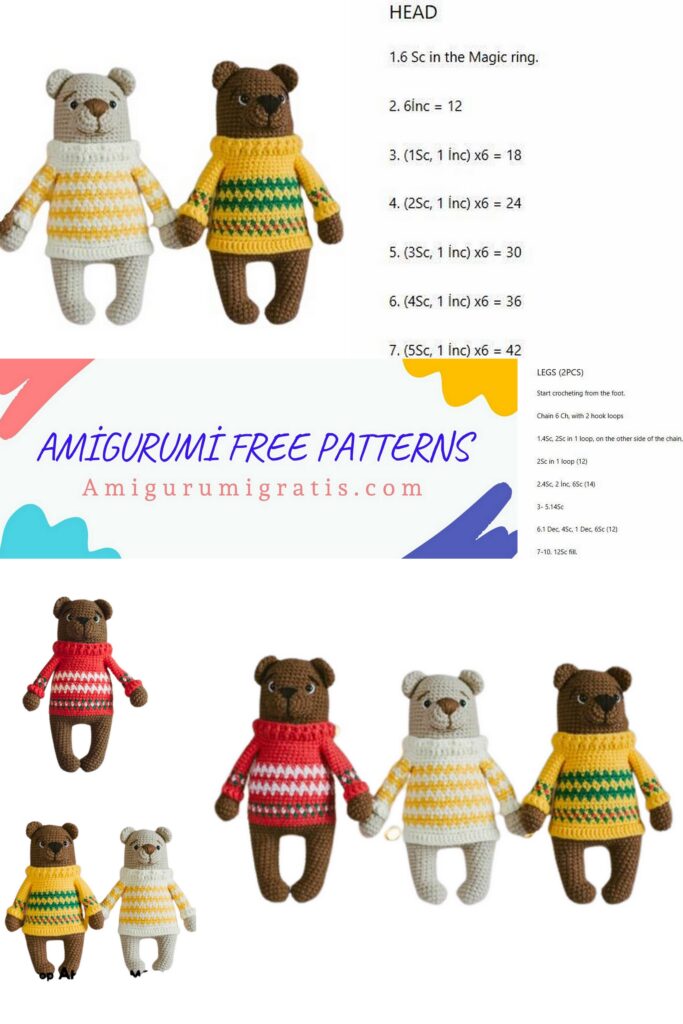
1. 6 sc into magic ring – 6 sc
2.6inc – 12sc
3. ( sc, inc) * 6 – 18 sc
4-5. 18 sc
6. 5 sc, dec*4, 5 sc – 14 sc
7. 5 sc, dec*2, 5 sc – 12 sc
8. 12 sc, change the thread to the main color of the sweater
9.12 sc
10. behind the back wall 12 sc
If you knit a sweater with the first version of the pattern, then knit pattern No. 1 in rows 11-13, alternating colors as shown in the figure, where yellow is the main color. Further, from the 14th row, knit only with the main color.
If you knit a sweater with the second version of the pattern, then from 11 to 21 rows (11 rows) knit according to pattern No. 2, below is a plate for alternating colors in the rows.
11-21. (11 rows) 12 sc
We fasten the thread and cut it off.
Attach the yarn in the color of the sweater to the 10th row and work 12dc behind the front walls of the row, holding the paw up with the palm of your hand. Cut the thread, fasten and hide.
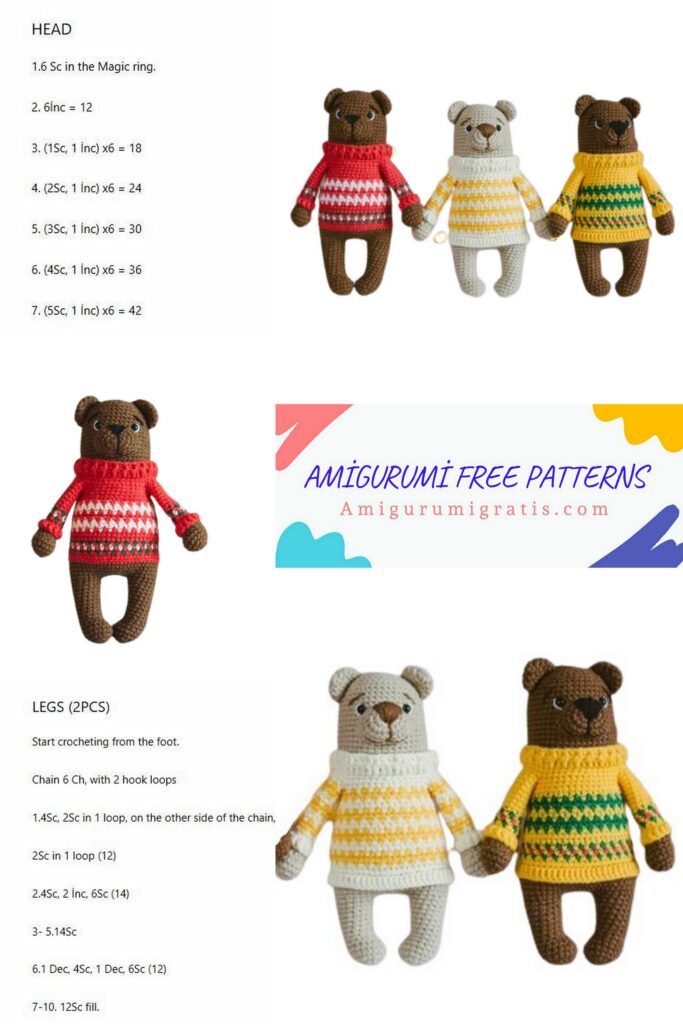
Lower paws:
We knit paws with body color, the marker passes on the side of the paw.
We stuff as we knit quite tightly.
1. 6 sc into magic ring – 6 sc
2.6inc – 12sc
3. ( sc, inc) * 6 – 18 sc
4-5. 18 sc
6. 4 sc, dec*3, 8 sc – 15 sc
7. 3 sc, dec*3, 6 sc – 12 sc
8.12 sc
9. 4 sc, inc, 7 sc – 13 sc
10.13 sc
11. 5 sc, inc, 7 sc – 14 sc
12.14 sc
13. 5 sc, inc, 8 sc – 15 sc
14.15 sc Then knit another 5-6 sc so that the knitting ends in the middle of the front of the leg. Finish knitting with one sl-st, fasten and cut the thread on the first paw, knit 6 ch from the second paw, connect the chain with a connecting column in the sl-st of the first paw.
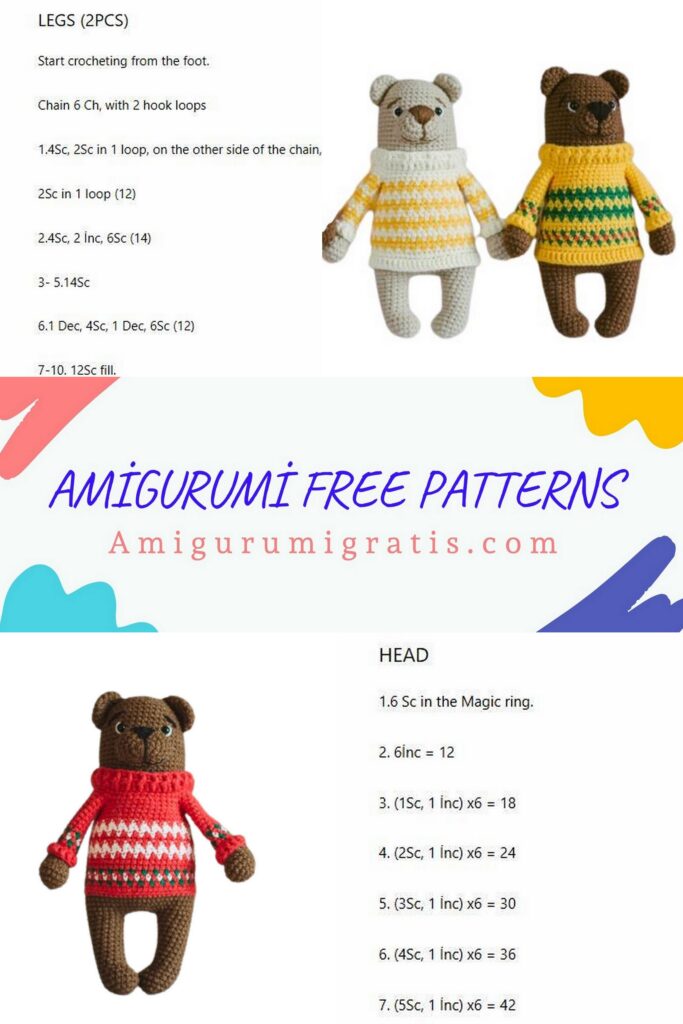
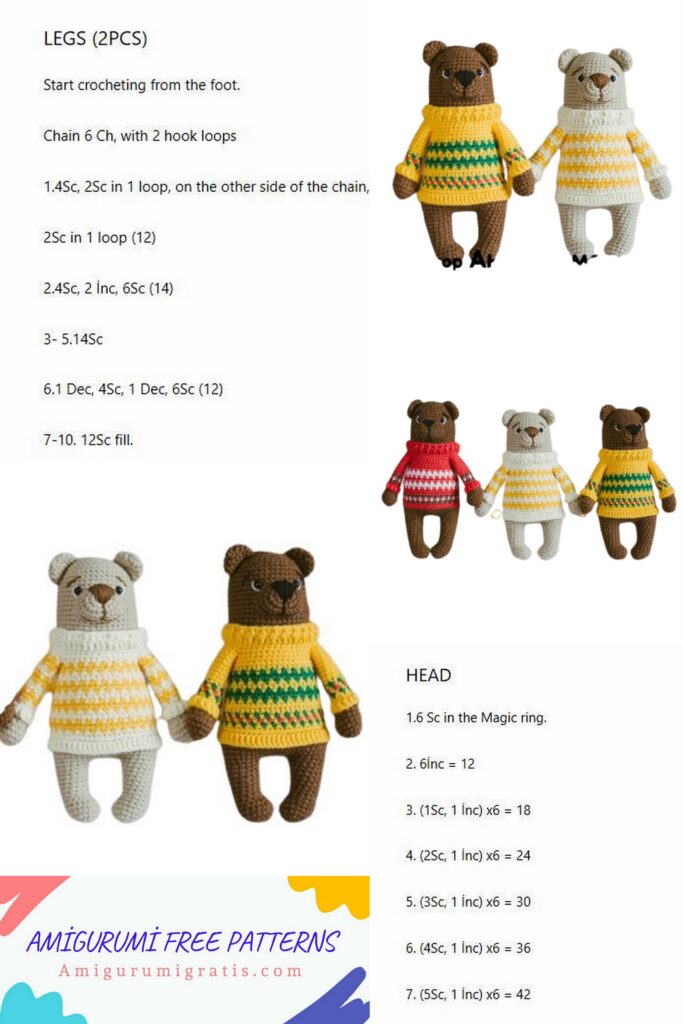
body-head:
We start knitting with the color of the body, the marker runs along the back, the marker can not be aligned, but when attaching the paws to the body, we will be guided exactly in the middle of the back.
Fill tightly as you knit.
1. (15 sc in leg, 6 sc in ch)*2 – 42 sc
2. 3 sc, inc, (6 sc, inc) * 5, 3 sc – 48 sc
3. (7 sc, inc) * 6 – 54 sc
4-6. (3 rows) 54 sc
Next, change the thread to the main color of the sweater.
7.54 sc
8. behind the back wall 54 sc
Further, when knitting according to the color alternation pattern, do not forget about the decreases in the rows!
When knitting the first version of the sweater:
in rows 9-11, knit pattern No. 1, the same as on the cuffs of the sleeves, then 12 and 13 rows with the main color of the sweater and from the 14th to the 20th row (7 rows) knit the pattern indicated in the diagram, then go to the main color of the sweater.
When knitting the second version of the sweater from the 9th row, knit with the pattern shown in the diagram below, where yellow is the main color. Finish the pattern in the 24th row with the main color of the sweater, while in the 23rd row, when attaching the paws to the body, knit in one color for convenience, and when knitting the body, alternate the color again.
9-15. (7 rows) 54 sc
16. (7 sc, dec) * 6 – 48 sc
17-21. (5 rows) 48 sc
22. 3 sc, dec, (6 sc, dec) * 5, 3 sc – 42 sc
In the next row we attach paws. We attach the paws to the body so that they look slightly inward. Place the parts face to face. We pick up the paw loops from the inside of the part. The marker runs exactly down the middle of the back.
23. 10 sc, 3 sc with foot, 16 sc, 3 sc with foot, 10 sc – 42 sc
Tip: because we knit a pattern, and in the second version of the sweater it is inconvenient to make an offset loop, then you can not shift the marker, but count the loops from the middle of the back. To do this, you can use an auxiliary thread, stretch it exactly along the center of the body and count 10 sc of the body from it until the paws are attached.
We stretch the auxiliary (I have brown, and the marker of the beginning of the row is blue) thread exactly in the middle of the body, determine the central loop, so as not to move the marker, we can subtract the number of loops to the marker from the number of loops knitted before joining with the paw, in my case this is one loop, those. before joining the legs, I knit 9 loops, not 10, and 11 sc, not 10 at the end of the row.
Advice! Holes may appear at the point of attachment of the paws, after knitting the row following the attachment of the paws, in order to avoid these holes, you can knit like this:
We knitted the required number of loops of the body, now we hook the front wall of the already knitted loop of the body (connection with the paw) and the first loop of the paw for both walls and knit the usual sc – this will be the first loop of the paw. Then they knitted the required number of loops of the paw, picked up the loop of the paw already knitted in the previous row for the front wall and the first loop of the body for both walls and knitted it with the usual sc, this is the first loop of the body after the paw. With second paw
do the same. Just be careful and count the loops so as not to knit an extra loop.
24. 10 sc, 9 sc on the paw, 16 sc, 9 sc on the paw, 10 sc – 54 sc
25. (7 sc, dec) * 6 – 48 sc
26.48 sc
We change the thread to the color of the body, we knit the next row behind the back wall, while not breaking the thread of the sweater and leave it outside.
27. 8 sc, dec, (2 sc, dec)*2, 12 sc, (dec, 2 sc)*2, dec, 8 sc – 42 sc
28-42. (15 rows) 42 sc
43. (5 sc, dec) * 6 – 36 sc
44.36 sc
Insert eyes on a secure fastening between 38 and 39 rows, between the eyes a distance of 7-8 sc. Focus on the thread stretched exactly in the middle of the head.
Determine the line in which
eyes are inserted, mark it, then stretch the auxiliary thread exactly in the middle of the front, determine the center of the face. From the center
step back to the sides for 3-4 sc,
45. 2 sc, dec, (4 sc, dec) * 5, 2 sc – 30 sc
46.30 sc
47. (3 sc, dec) * 6 – 24 sc
48. sc, dec, (2 sc, dec) * 5, sc – 18 sc
49. ( sc, dec) * 6 – 12 sc
50.dec*6 – 6 sc
Fasten the thread, leave a long tip to tighten the hole, cut the thread.
!Tighten the opening of the head when you embroider the whites of the eyes, nose and
eyebrows to the bear, insert all the threads into the hole in the head and fasten them there.
In the 27th row, knit behind the front walls of row 2 of row 54 dc, the second row – 54 embossed dc, alternating convex and concave dc.
To the 8th row of the body, attach the thread of the main color of the sweater and knit 54dc.
Muzzle:
We knit the detail with the color of the body.
1. 6 sc into magic ring
2. inc*6 – 12 sc
3 ( sc, inc) * 6 – 18 sc
4. inc, 7 sc, inc*2, 7 sc, inc – 22 sc
5. inc, 9 sc, inc*2, 9 sc, inc – 26 sc
6.26 sc
Fasten the thread, leave a long end for sewing.
Sew so that the corners resulting from the increase are on the side of the muzzle, under the eyes. Fix the muzzle on the face with pins, between 33 and 38 rows of the head, sew half, fill and then sew the rest faces.
Embroider a nose on the muzzle with black thread. Insert a needle with a thread into an open hole in the head, pull the thread out at the CA point of the muzzle, from KA stretch the thread up to the 5th row of the muzzle, then step back from the center of the nose on the sides by 2-4 sc and completely fill the nose with embroidery.
Down from the nose, exactly in the center, stretch the thread to the fifth row
muzzles, embroider a smile to the bear. Embroider the eyebrows and the whites of the eyes.
Pull the hole on top of the head.
Ears:
We knit two identical parts with the color of the body.
1. 6 sc into magic ring
2. inc*6 – 12 sc
3. (inc, 5 sc)*2 – 14 sc
4. (inc, 6 sc)*2 – 16 sc
5.16 sc
Leave a long tip for sewing, fold the ear in half and sew behind the front walls of the loop. Next, sew the ears to the head, choosing the most successful position in your opinion, sew symmetrically, focusing on the eyes or on the thread drawn in the middle of the face.
sew the edges of the ear hinge front walls
Hide all ends. Your bear Sever is ready!
This bear is crocheted from semi-woolen yarn No. 2.5,
yarn consumption about 60g.