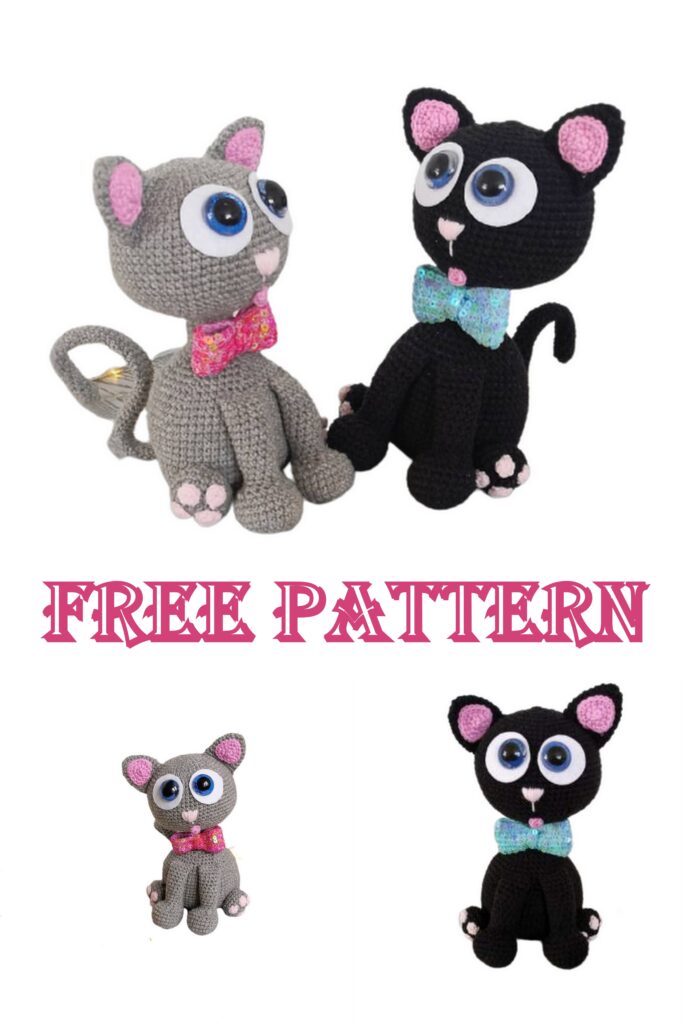
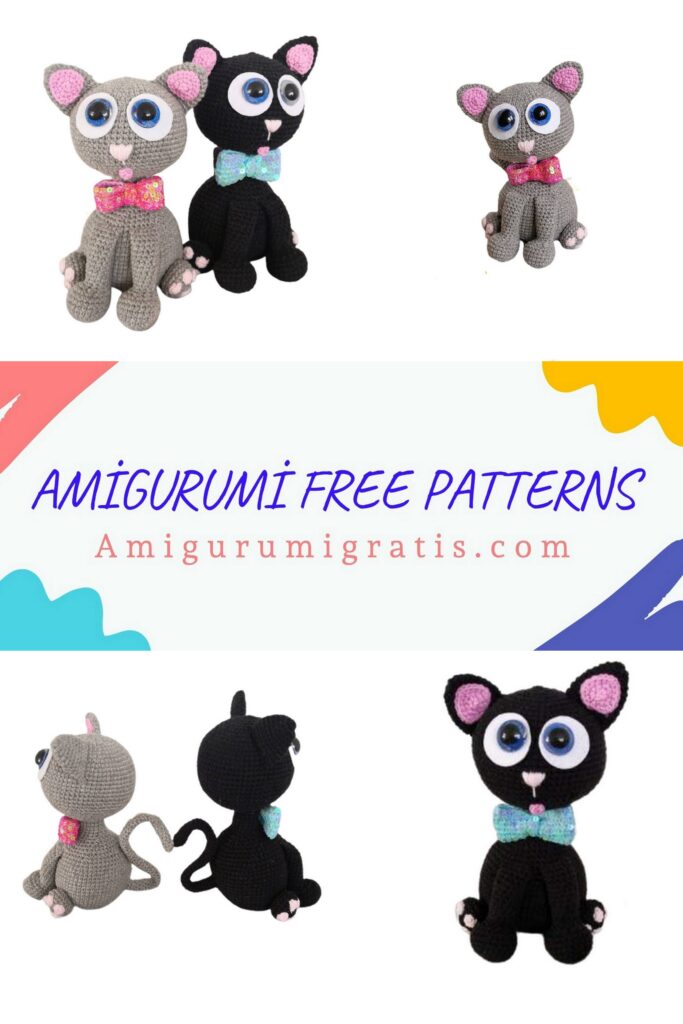
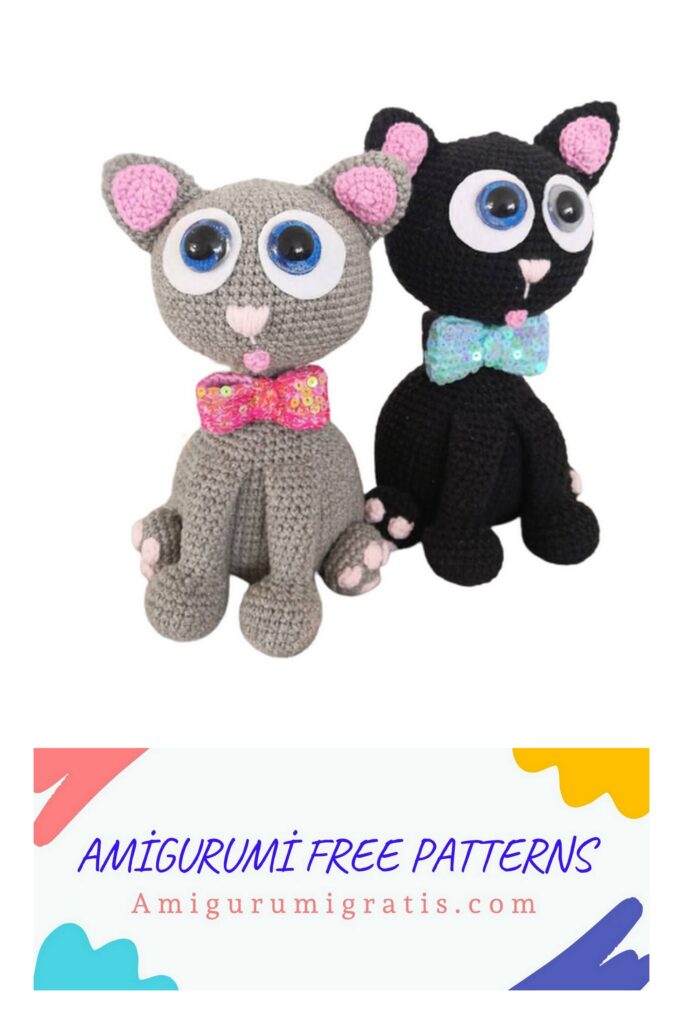
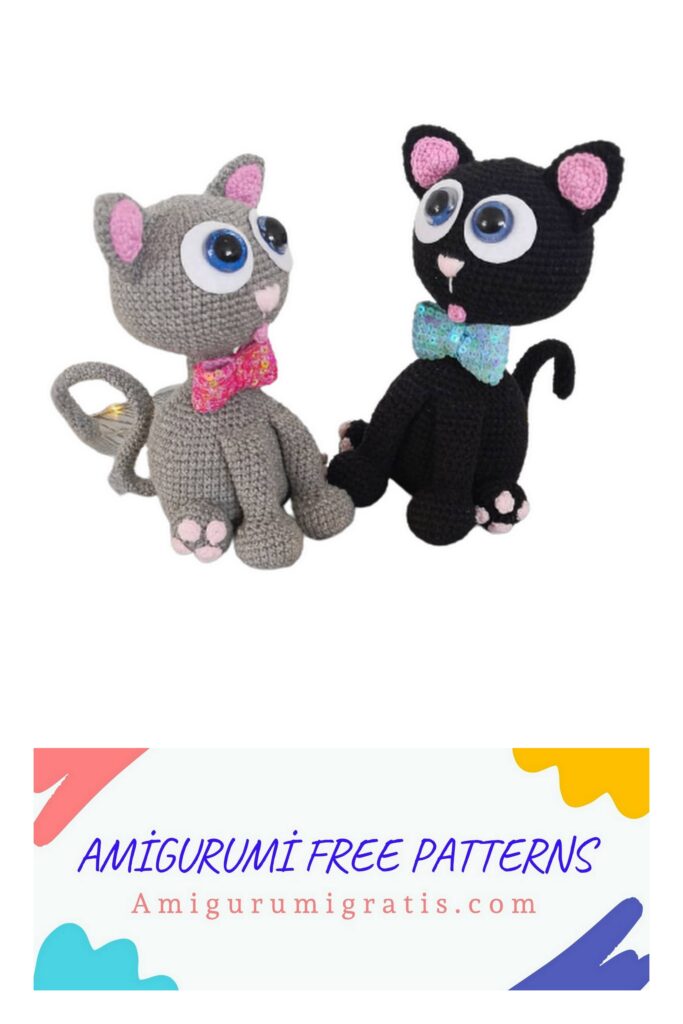
March kitten We continue to share the most beautiful and free amigurumi patterns for you. You can visit our website for Amigurumi March Kitten Free Pattern.
Conventions
ch – air loop
sc – single crochet
inc – increase
dec – decrease
blo – rear half loop
sl-st – connecting post
× 6 – the number of repetitions of the report
(12) – total number of tables in a row
Necessary materials
1. Yarn Alize Cotton gold 100g 330m
black 60
2. Yarn Art jeans 50gr 165m
Pink 20
Light pink 74
Blue 76
3. Hook 2
4. White felt
5. Eyes with a diameter of 20 mm
6. Sequins (optional)
7. Filler holofiber
8. Sushi stick
9. Stitching needle
10. Scissors
When using this yarn, the size of the toy is 19 cm.
Body
1. Dial 12ch. In the second loop from the hook, knit 10sc, knit 3sc in the last loop. On the second side, knit 9sc, inc (24)
2. İnc, 9sc, 3inc, 9sc, 2inc (30)
3. 1sc, inc, 9sc, (1sc, inc) × 3, 9sc, (1sc, inc) ×2 (36)
4. 2sc, inc, 9sc, (2sc, inc) × 3, 9sc, (2sc, inc) ×2 (42)
5. 3sc, inc, 9sc, (3sc, inc) × 3, 9sc, (3sc, inc) × 2 (48)
Trace the part along the contour on plastic or cardboard and cut it out.
6. (7sc, inc) × 6 (54) knit for blo
7. (8sc, inc) × 6 (60) knit for both walls
8-18. 60sc
19. (8sc, dec) × 6 (54)
20.54sc
21. (7sc, dec) × 6 (48)
22.48sc
Insert the plastic base. In the course of knitting, we fill the part.
23. (6sc, dec) × 6 (42)
24. (5sc, dec) × 6 (36)
25. (4sc, dec) × 6 (30)
26. (3sc, dec) × 6 (24)
We fill the part quite tightly.
27. (2sc, dec) × 6 (18)
28-33. 18sc, sl-st. Cut the thread, leave for sewing.
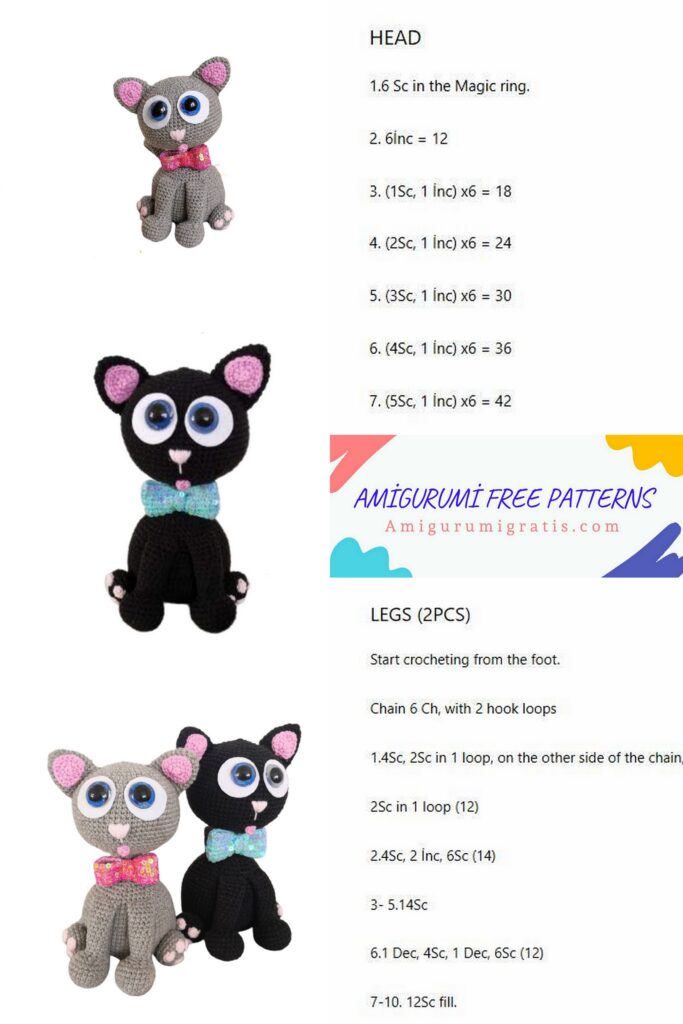
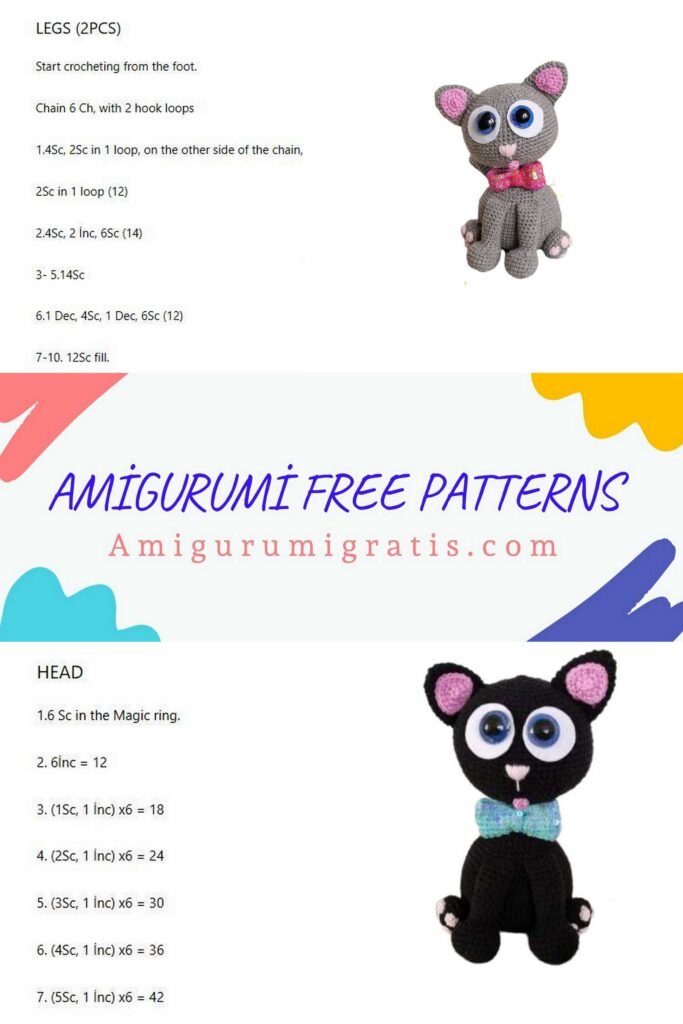
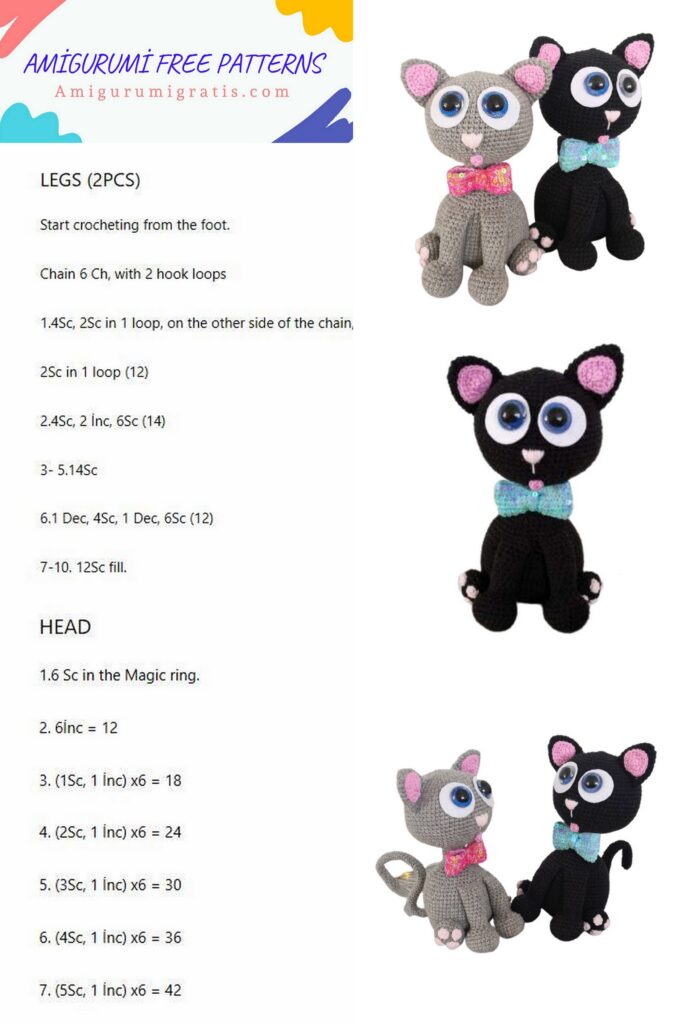
Head
1. 6 into magic ring
2.6inc (12)
3. (1sc, inc) × 6 (18)
4. (inc, 2sc) × 6 (24)
5. 2sc, inc, (3sc, inc) × 5, 1sc (30)
6. (inc, 4sc) × 6 (36)
7. 3sc, inc, (5sc, inc) × 5, 2sc (42)
8. (inc, 6sc) × 6 (48)
9. 4sc, inc, (7sc, inc) × 5, 3sc (54)
10. (inc, 8sc) × 6 (60)
11. 5sc, inc, (9sc, inc) × 5, 4sc (66)
12-22. 66sc
23. (dec, 9sc) × 6 (60)
24. 4sc, dec, (8sc, dec) × 5, 4sc (54)
25. (dec, 7sc) × 6 (48)
26. 3sc, dec, (6sc, dec) × 5, 3sc (42)
27. (dec, 5sc) × 6 (36)
28. 2sc, dec, (4sc, dec) × 5, 2sc (30)
29. (dec, 3sc) × 6 (24)
Filling the detail
30. 1sc, dec, (2sc, dec) × 5, 1sc (18)
31. (dec, 1sc) × 6 (12)
32.6dec(6)
Cut the thread and hide the ends inside the toy.
Ears
1. 6 into magic ring
2.6inc (12)
3.12sc
4. (2sc, inc) × 4 (16)
5. (3sc, inc) × 4 (20)
6-9. 20sc
Fold eyelet in half and knit 10sc.
Cut the thread, leave for sewing.
Inner lugs
1. 6 into magic ring
2. (1sc, 3sc in one loop) × 3 (12)
3. 2sc, (3sc in one loop, 3sc) × 2, 3sc in one loop, 1sc (18)
Cut the thread, leave for sewing
front paws
1. 6 into magic ring
2.6inc (12)
3. (1sc, inc) × 6 (18)
4. (2sc, inc) × 6 (24)
5-8. 24sc
9.6sc, 6dec, 6sc (18)
10. 3sc, 6dec, 3sc (12)
Detail fill
11-22. 12sc
Do not fill the leg too much, fold in half and knit 6sc. Cut the thread, leave for sewing.
hind legs
1. 6 into magic ring
2.6inc (12)
3. (1sc, inc) × 6 (18)
4. (2sc, inc) × 6 (24)
5-6. 24sc
7. (2sc, dec) × 6 (18)
8. (1sc, dec) × 6 (12)
Detail fill a little
9.6dec(6)
Cut the thread, leave for sewing.
Paw pads
Work 6 pcs small size 5 into magic ring, sl-st. Fasten the thread and cut
Tie 2 pieces in a larger size 7 into magic ring, sl-st. Fasten the thread and cut
Tongue 4 into magic ring, sl-st.
Cut the thread, leave for sewing
Tail
1. 4 into magic ring
2.4inc(8)
We knit the tail of the length you need. I have 15 cm.
At the end we knit sl-st, cut the thread, leave it for sewing. We do not fill out the details. We insert a wire into the tail. Before inserting the wire into the tail, I wrapped it on both sides with masking tape.
Bow
We dial 30 ch, close in a ring. Work 5-6 rows in 30sc, sl-st. Cut more thread. We fold the part in half and with the remaining thread we make several windings along the bow. We fasten the thread, leave the remaining tip of the thread for sewing.
Optionally, you can embroider a bow with sequins.
Eyes
We cut out 2 white circles from felt, 3 cm in diameter. We insert or glue eyes with a diameter of 20 mm into them.
Assembly
We take a sushi stick, insert it into the head and into the body so that the head holds well. Sew the body to the head.
Sew the inside of the ear to the ear itself.
Next, sew them to the head between 5-14 rows
We sew the front paws to the body on the 21-22nd row. The interval between the legs is 1-2 loops.
We sew pads to the hind legs.
After that, we sew the paws themselves to the body.
We sew a tail on the back, approximately between 8-11 rows. We bend the tail as you like.
We insert or glue the eyes between 10-18 rows, the interval between the eyes is 1-2 loops.
Under the eyes, retreat 1 row and embroider the nose.
Sew on the tongue and bow.