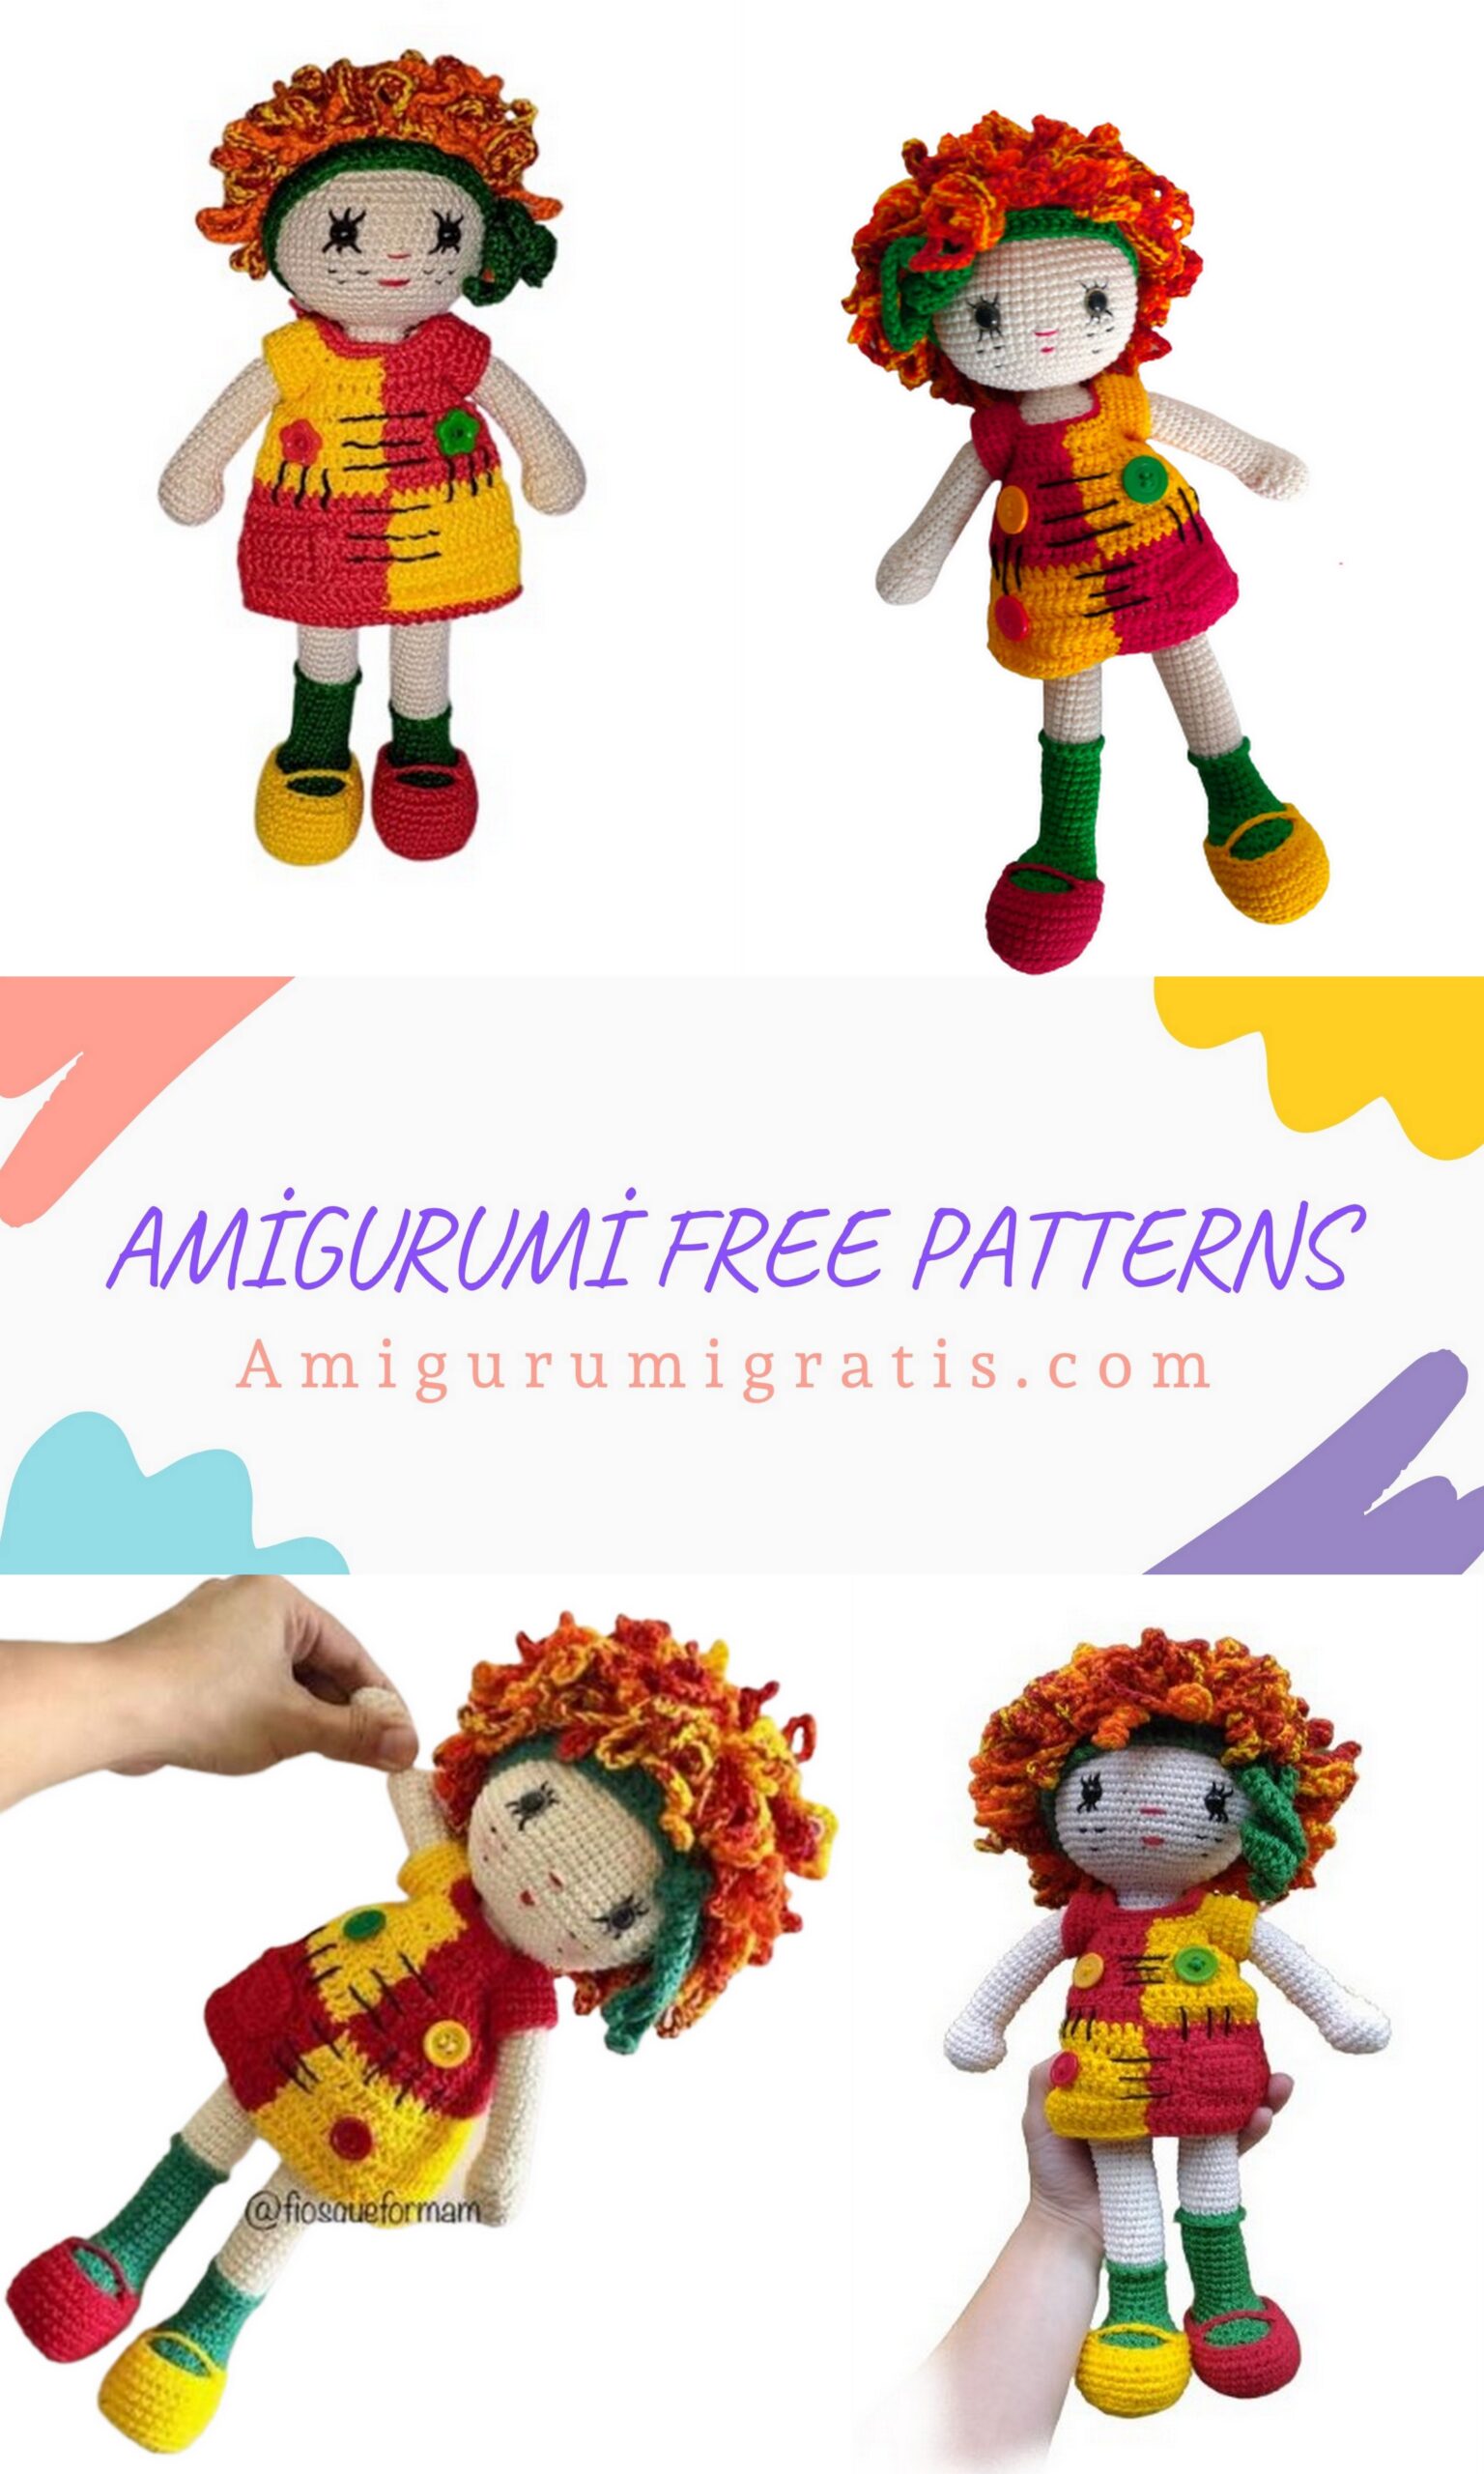
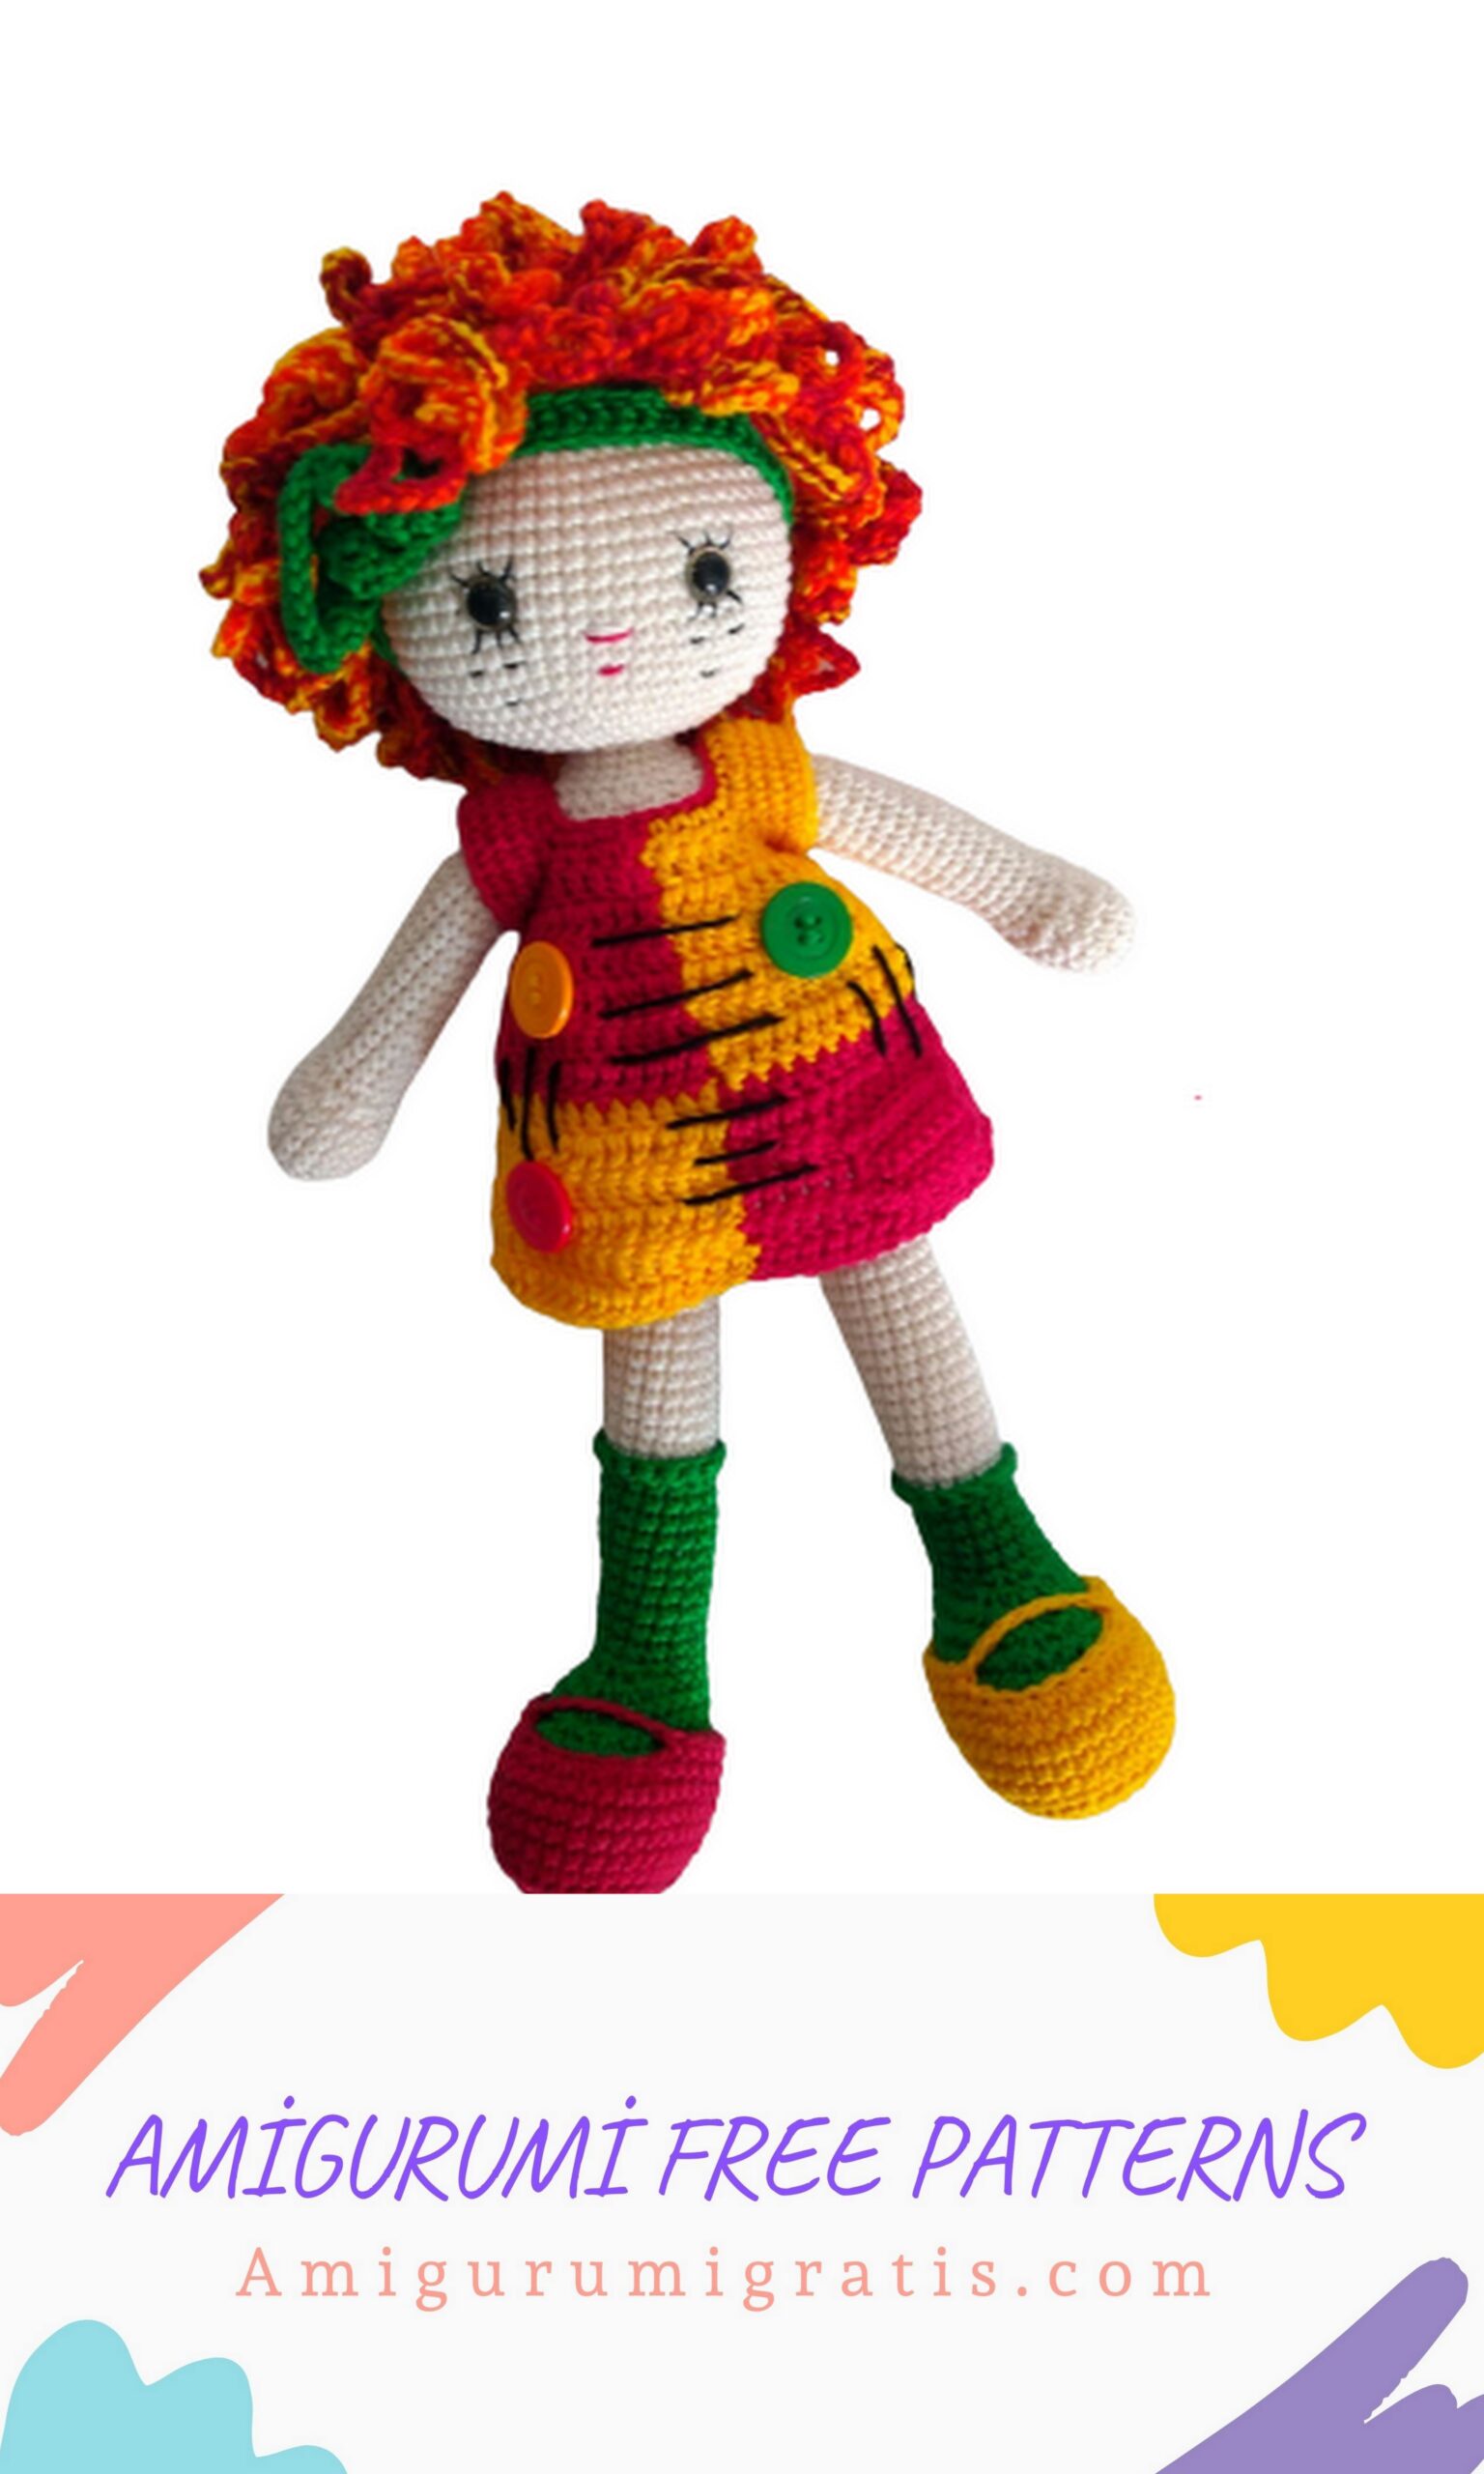
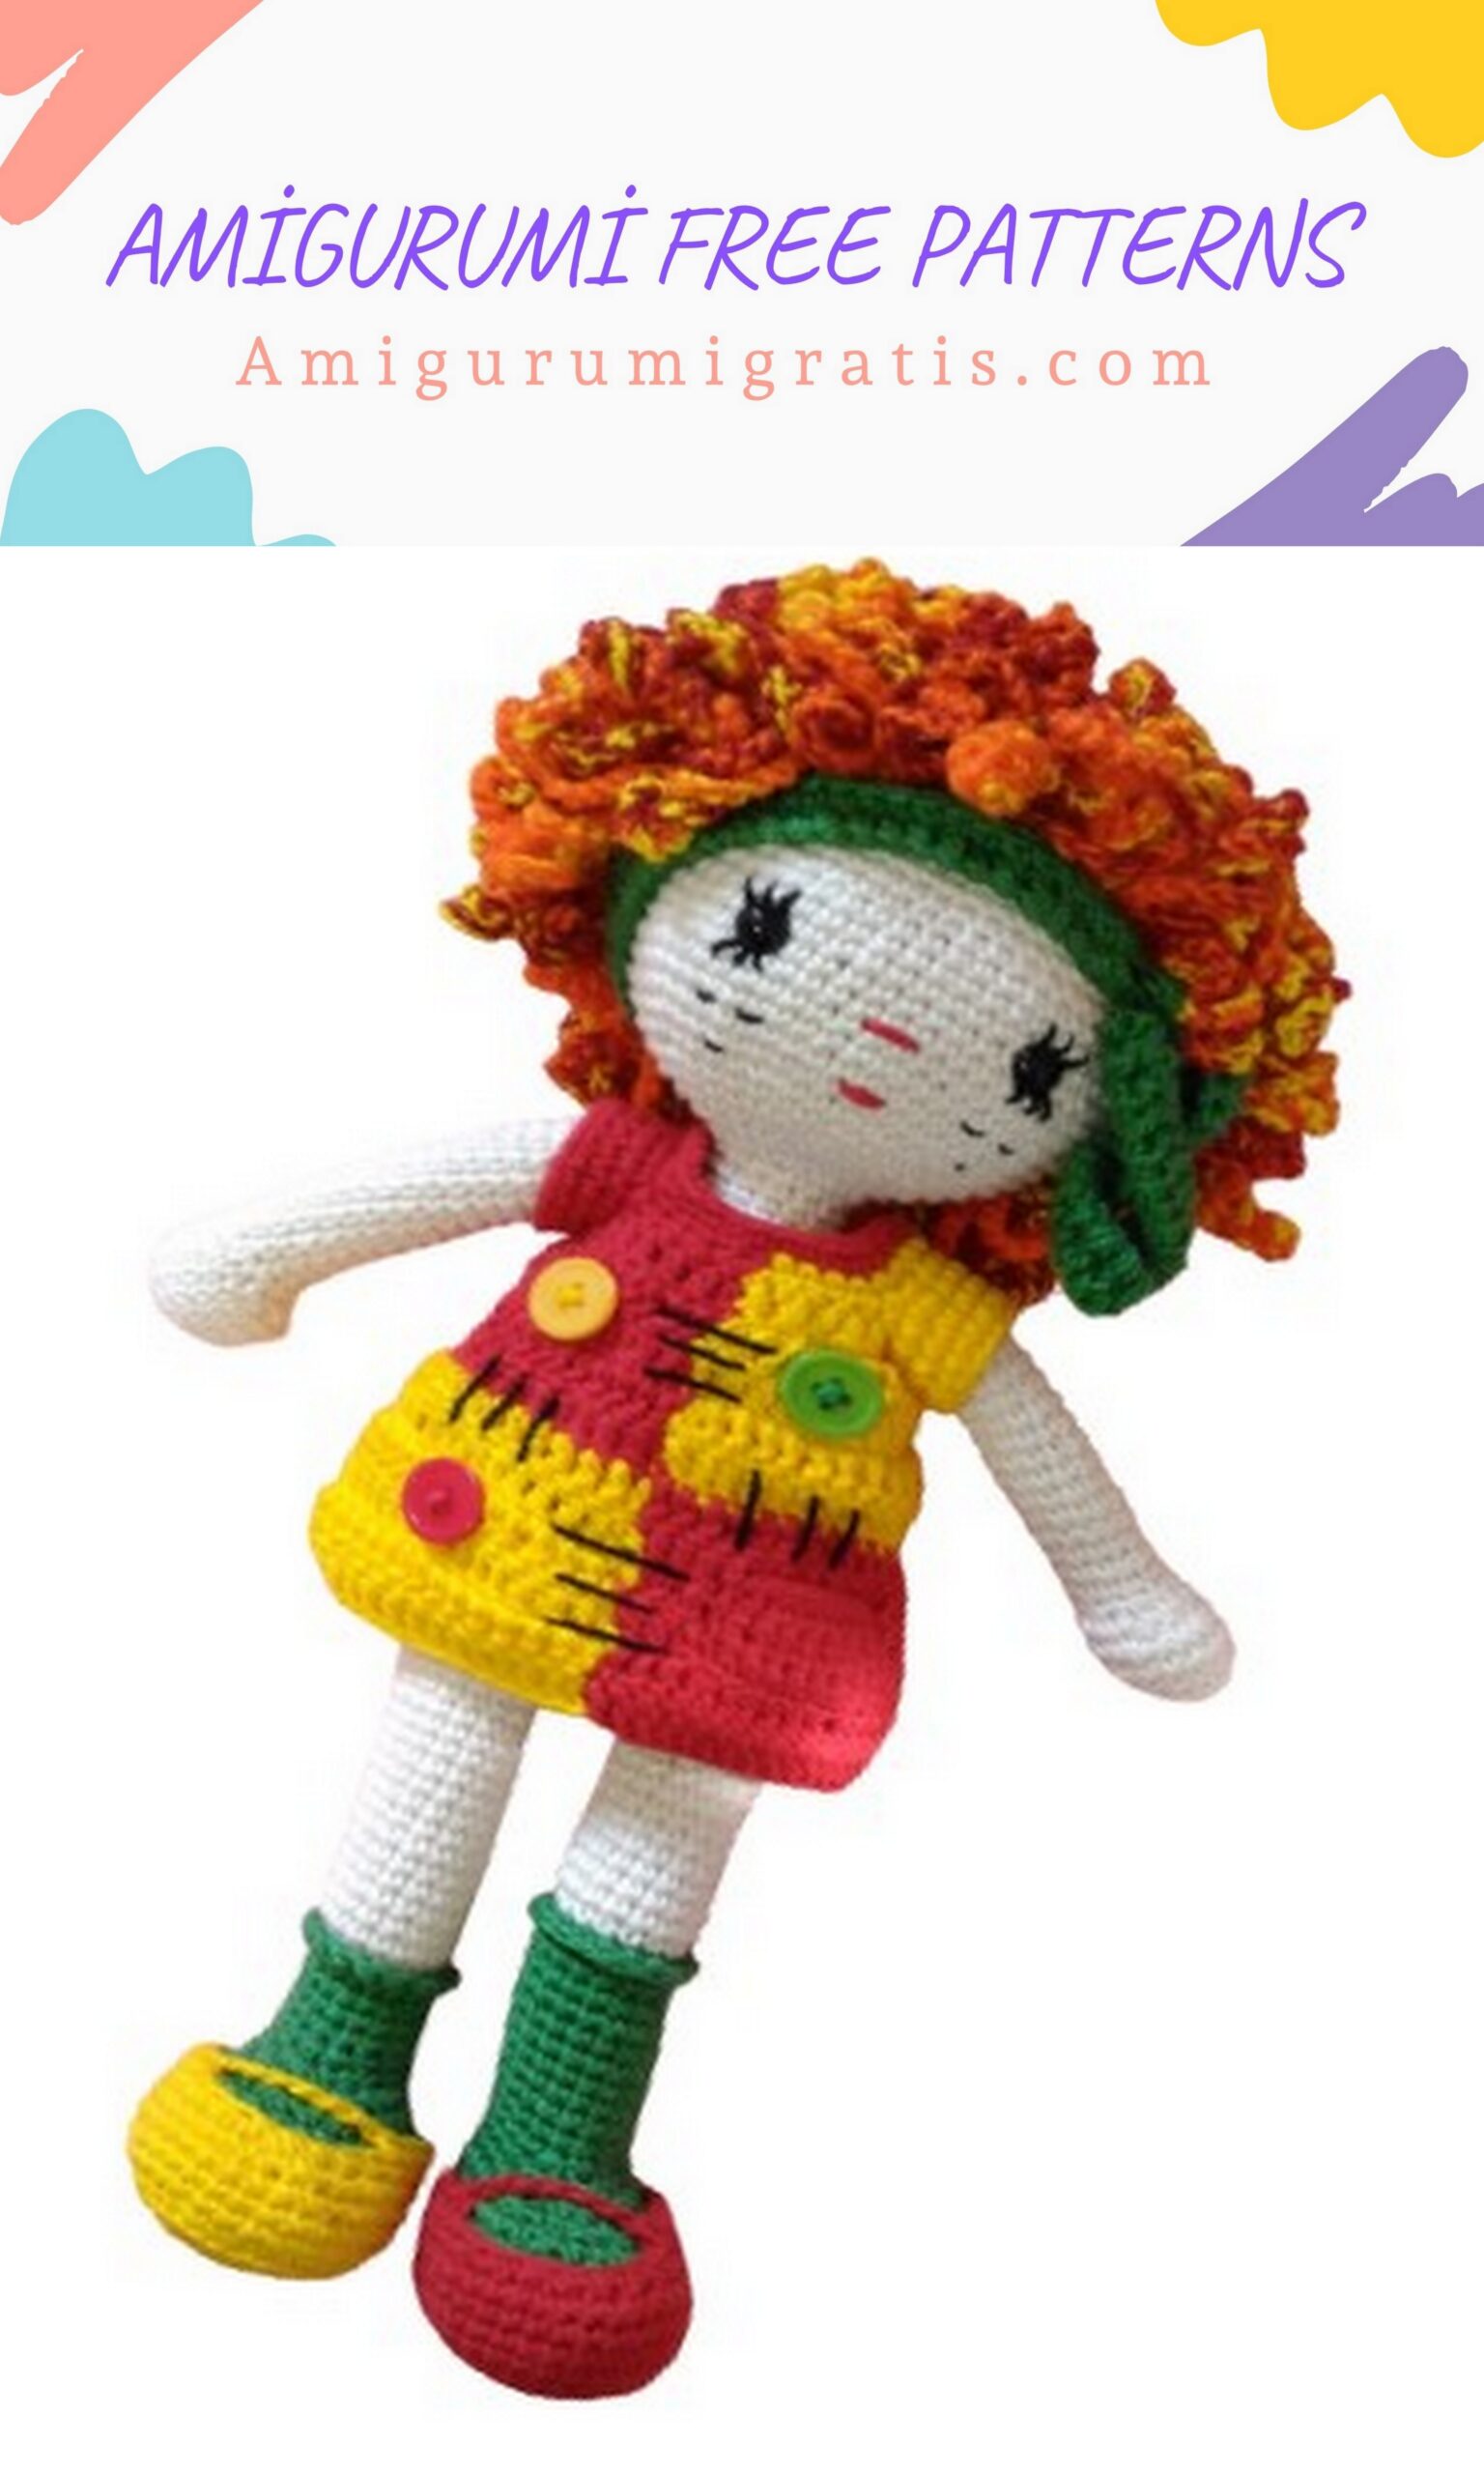
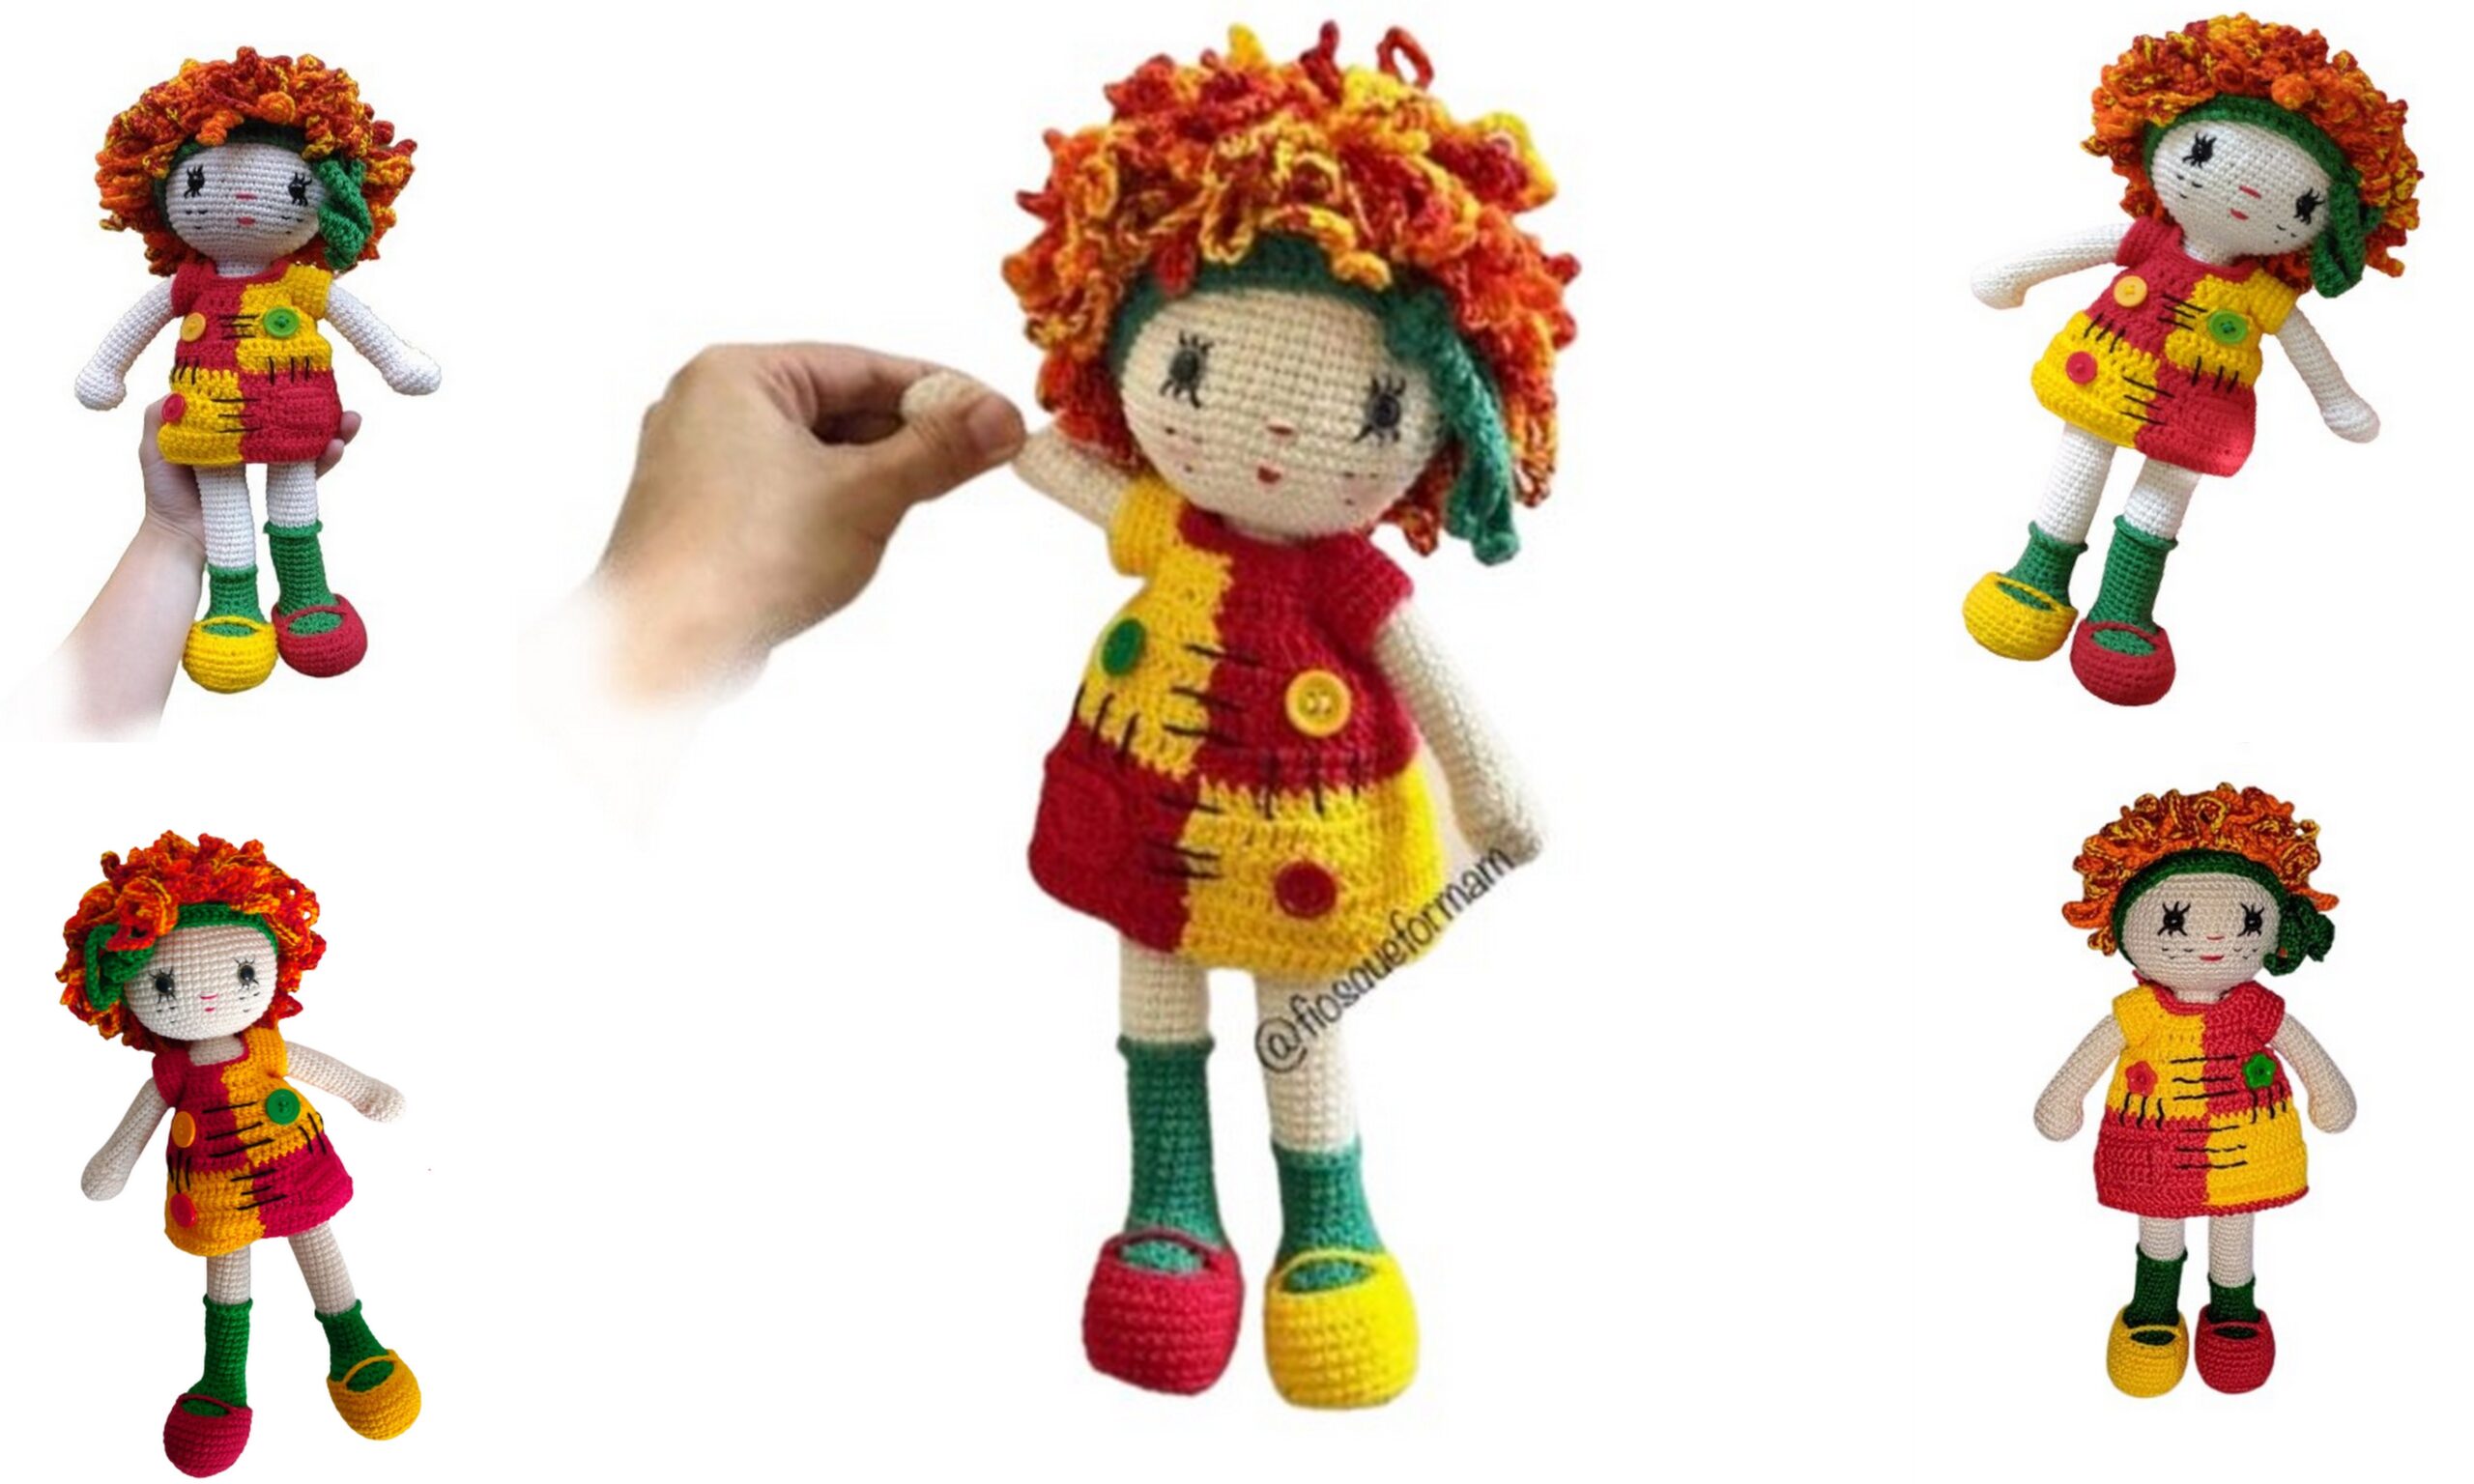
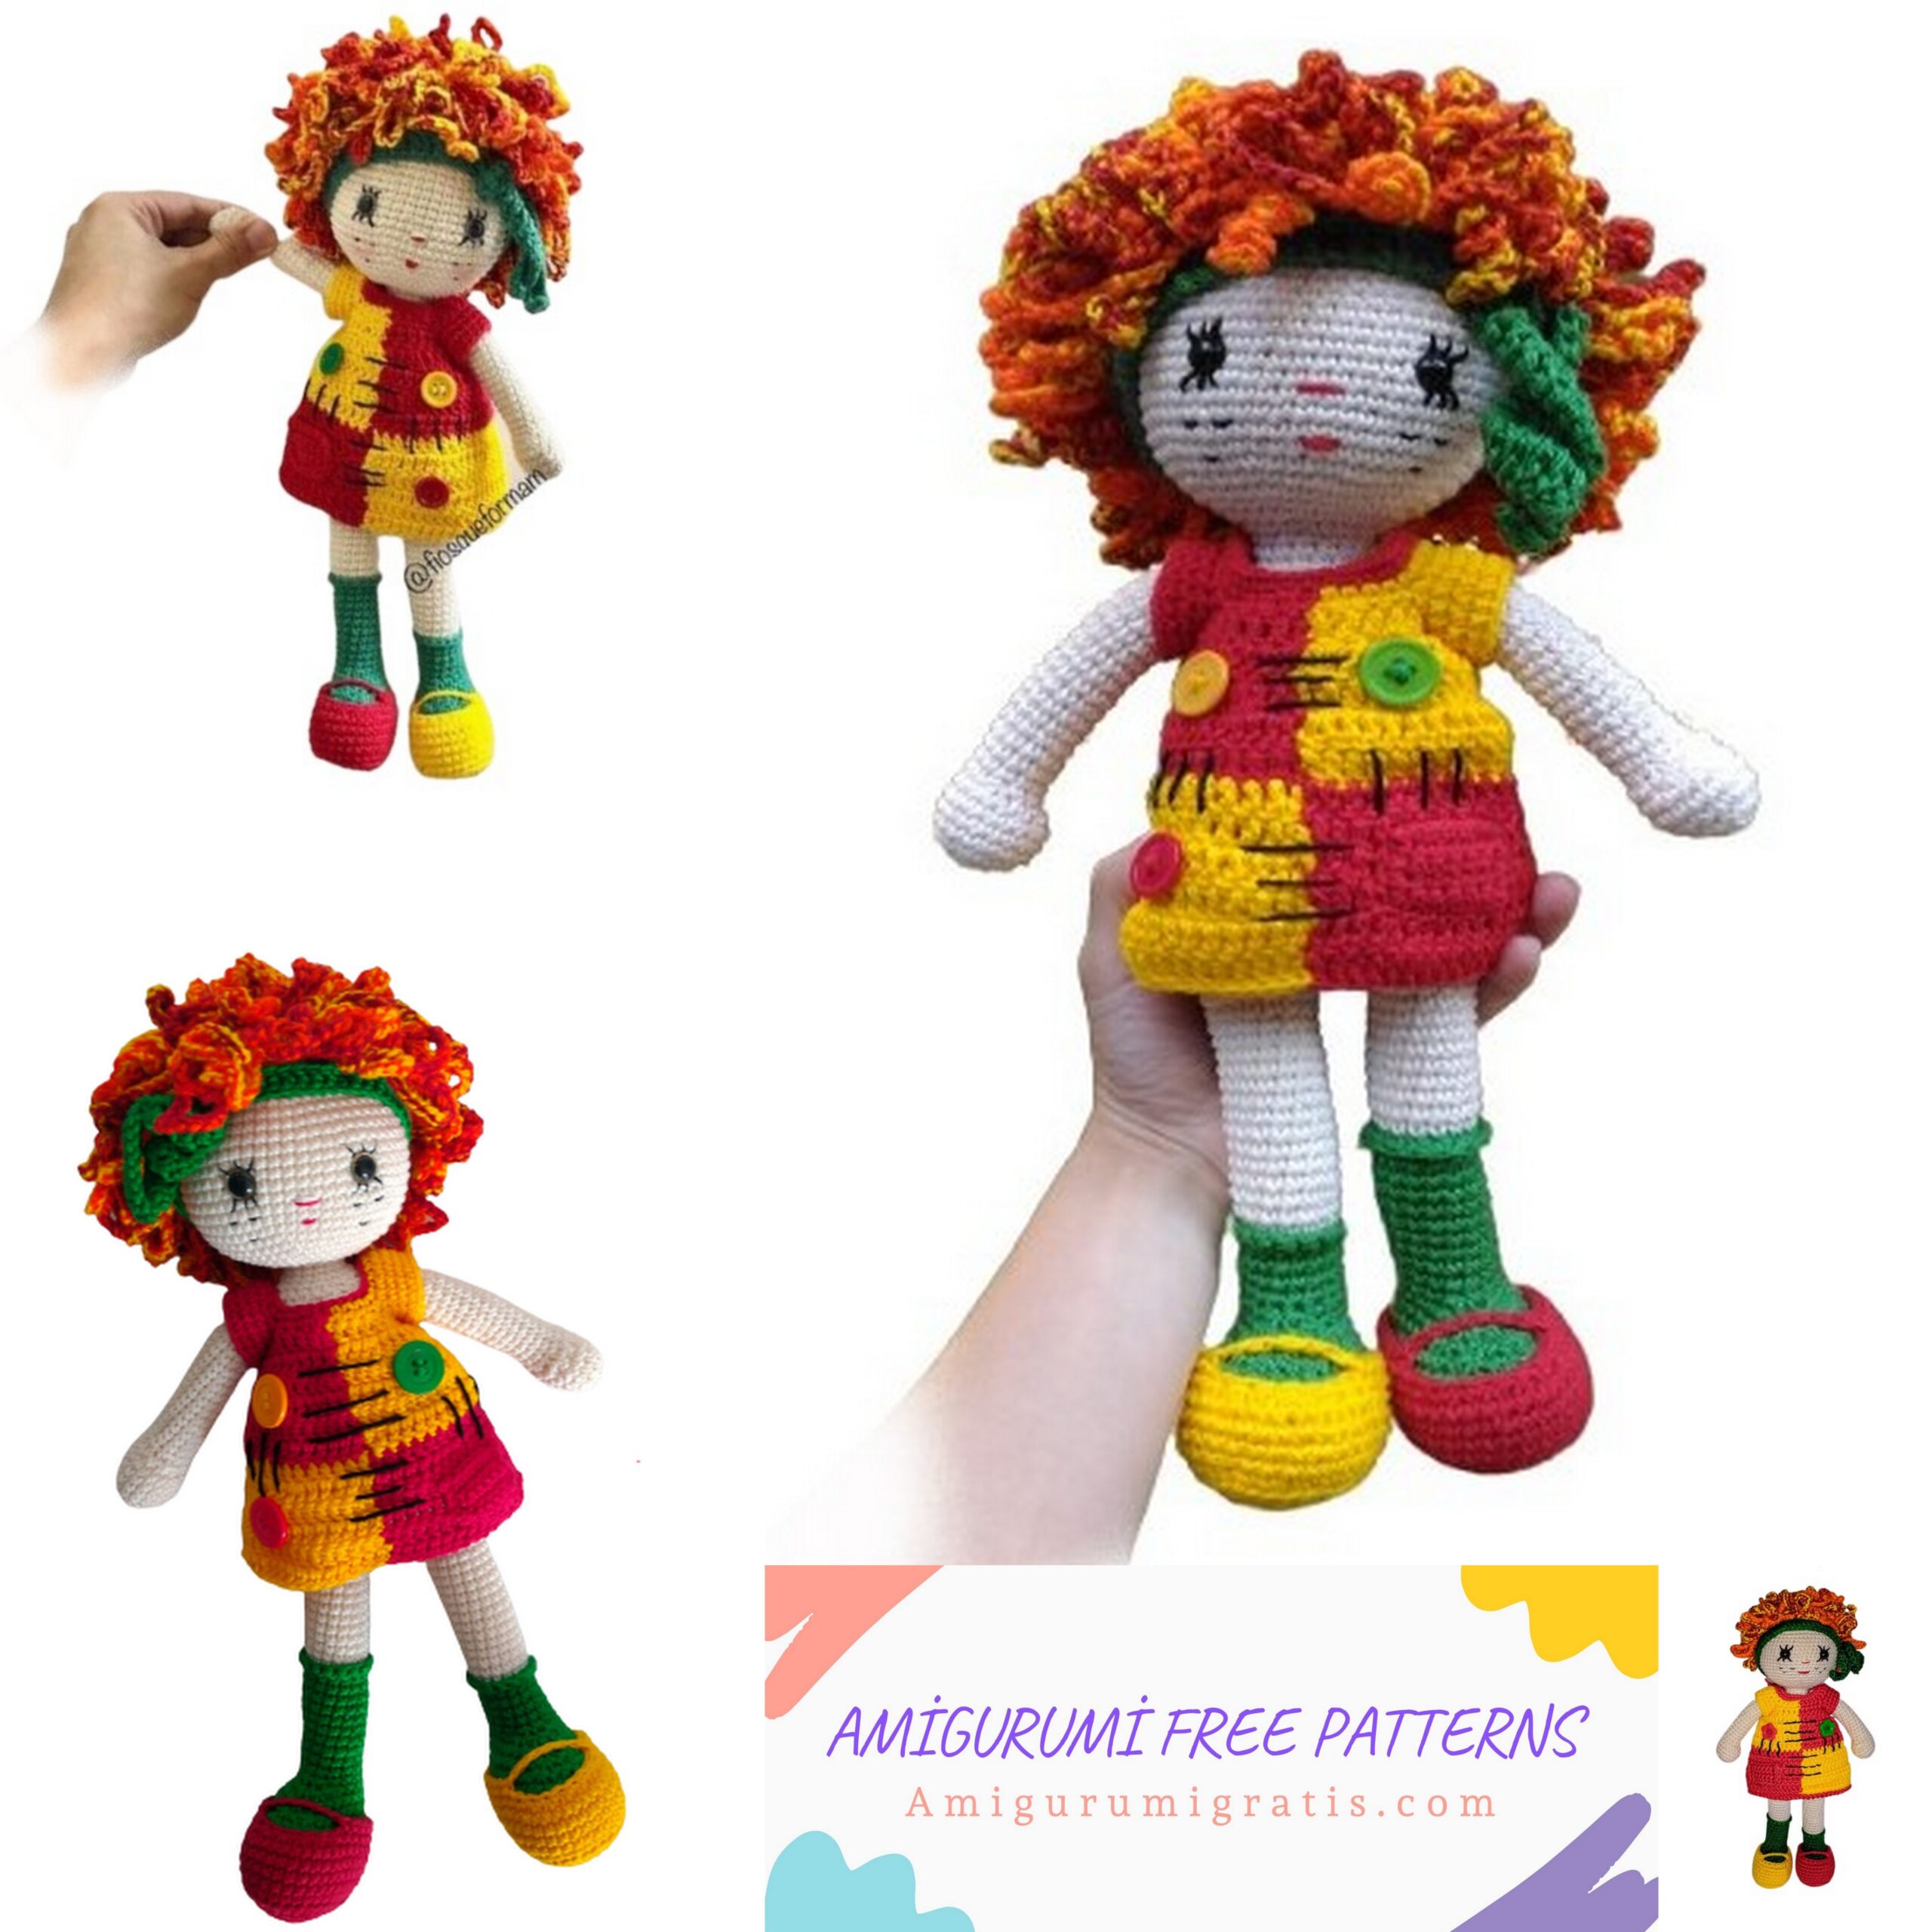
Emilia doll
MATERIALS
*1 pair of eyes with 1cm safety locks
• acrylic fiber (filler)
• crochet hooks (3mm)
• needles for upholstery and for embroidery nose, eyelashes and mouth, and finishing.
15 cm needle for sewing the arms to the body.
• Amigurumi line in colors:
White color 8001
Off White 8176 – body
Red Carmine 3528
Canary yellow 1289
Green flag 5767
Anne or your preferred black thread is thinner than amigurumi to embroider the details
9165 red/yellow/orange blended Anne line for hair (use two strands)
• Acetate for the sole of the shoe. (if you don’t have acetate you can use any plastic)
• Thickest hot glue stick for head support. (one stick measures 30cm, divides by
kinda useable on two dolls )
DOLL SIZE – 35 CM (Size may vary according to the tension of each person’s stitch)
ABBREVIATIONS
Sc – low point
Sl-st – very low point
A.D. – Hight point
ch. – chains
BLO – taking the back current
DOLL
Sleeveless ARMS
1) 6sc. magic ring (06)
2) Onc. All around (12)
3) 1sc. 1 inc (18)
4 to 6) sc all around (18)
7) 3dec in a row – 12 sc (15)
8) 3 dec. In a row – 9 sc (12)
9 to 25) sc all around (12)
* fill with fiber
26) only decrease and finish
• On the first arm, after you bind it, it hides the thread and binds it, on the second arm it leaves a thread
long about 40 cm for sewing.
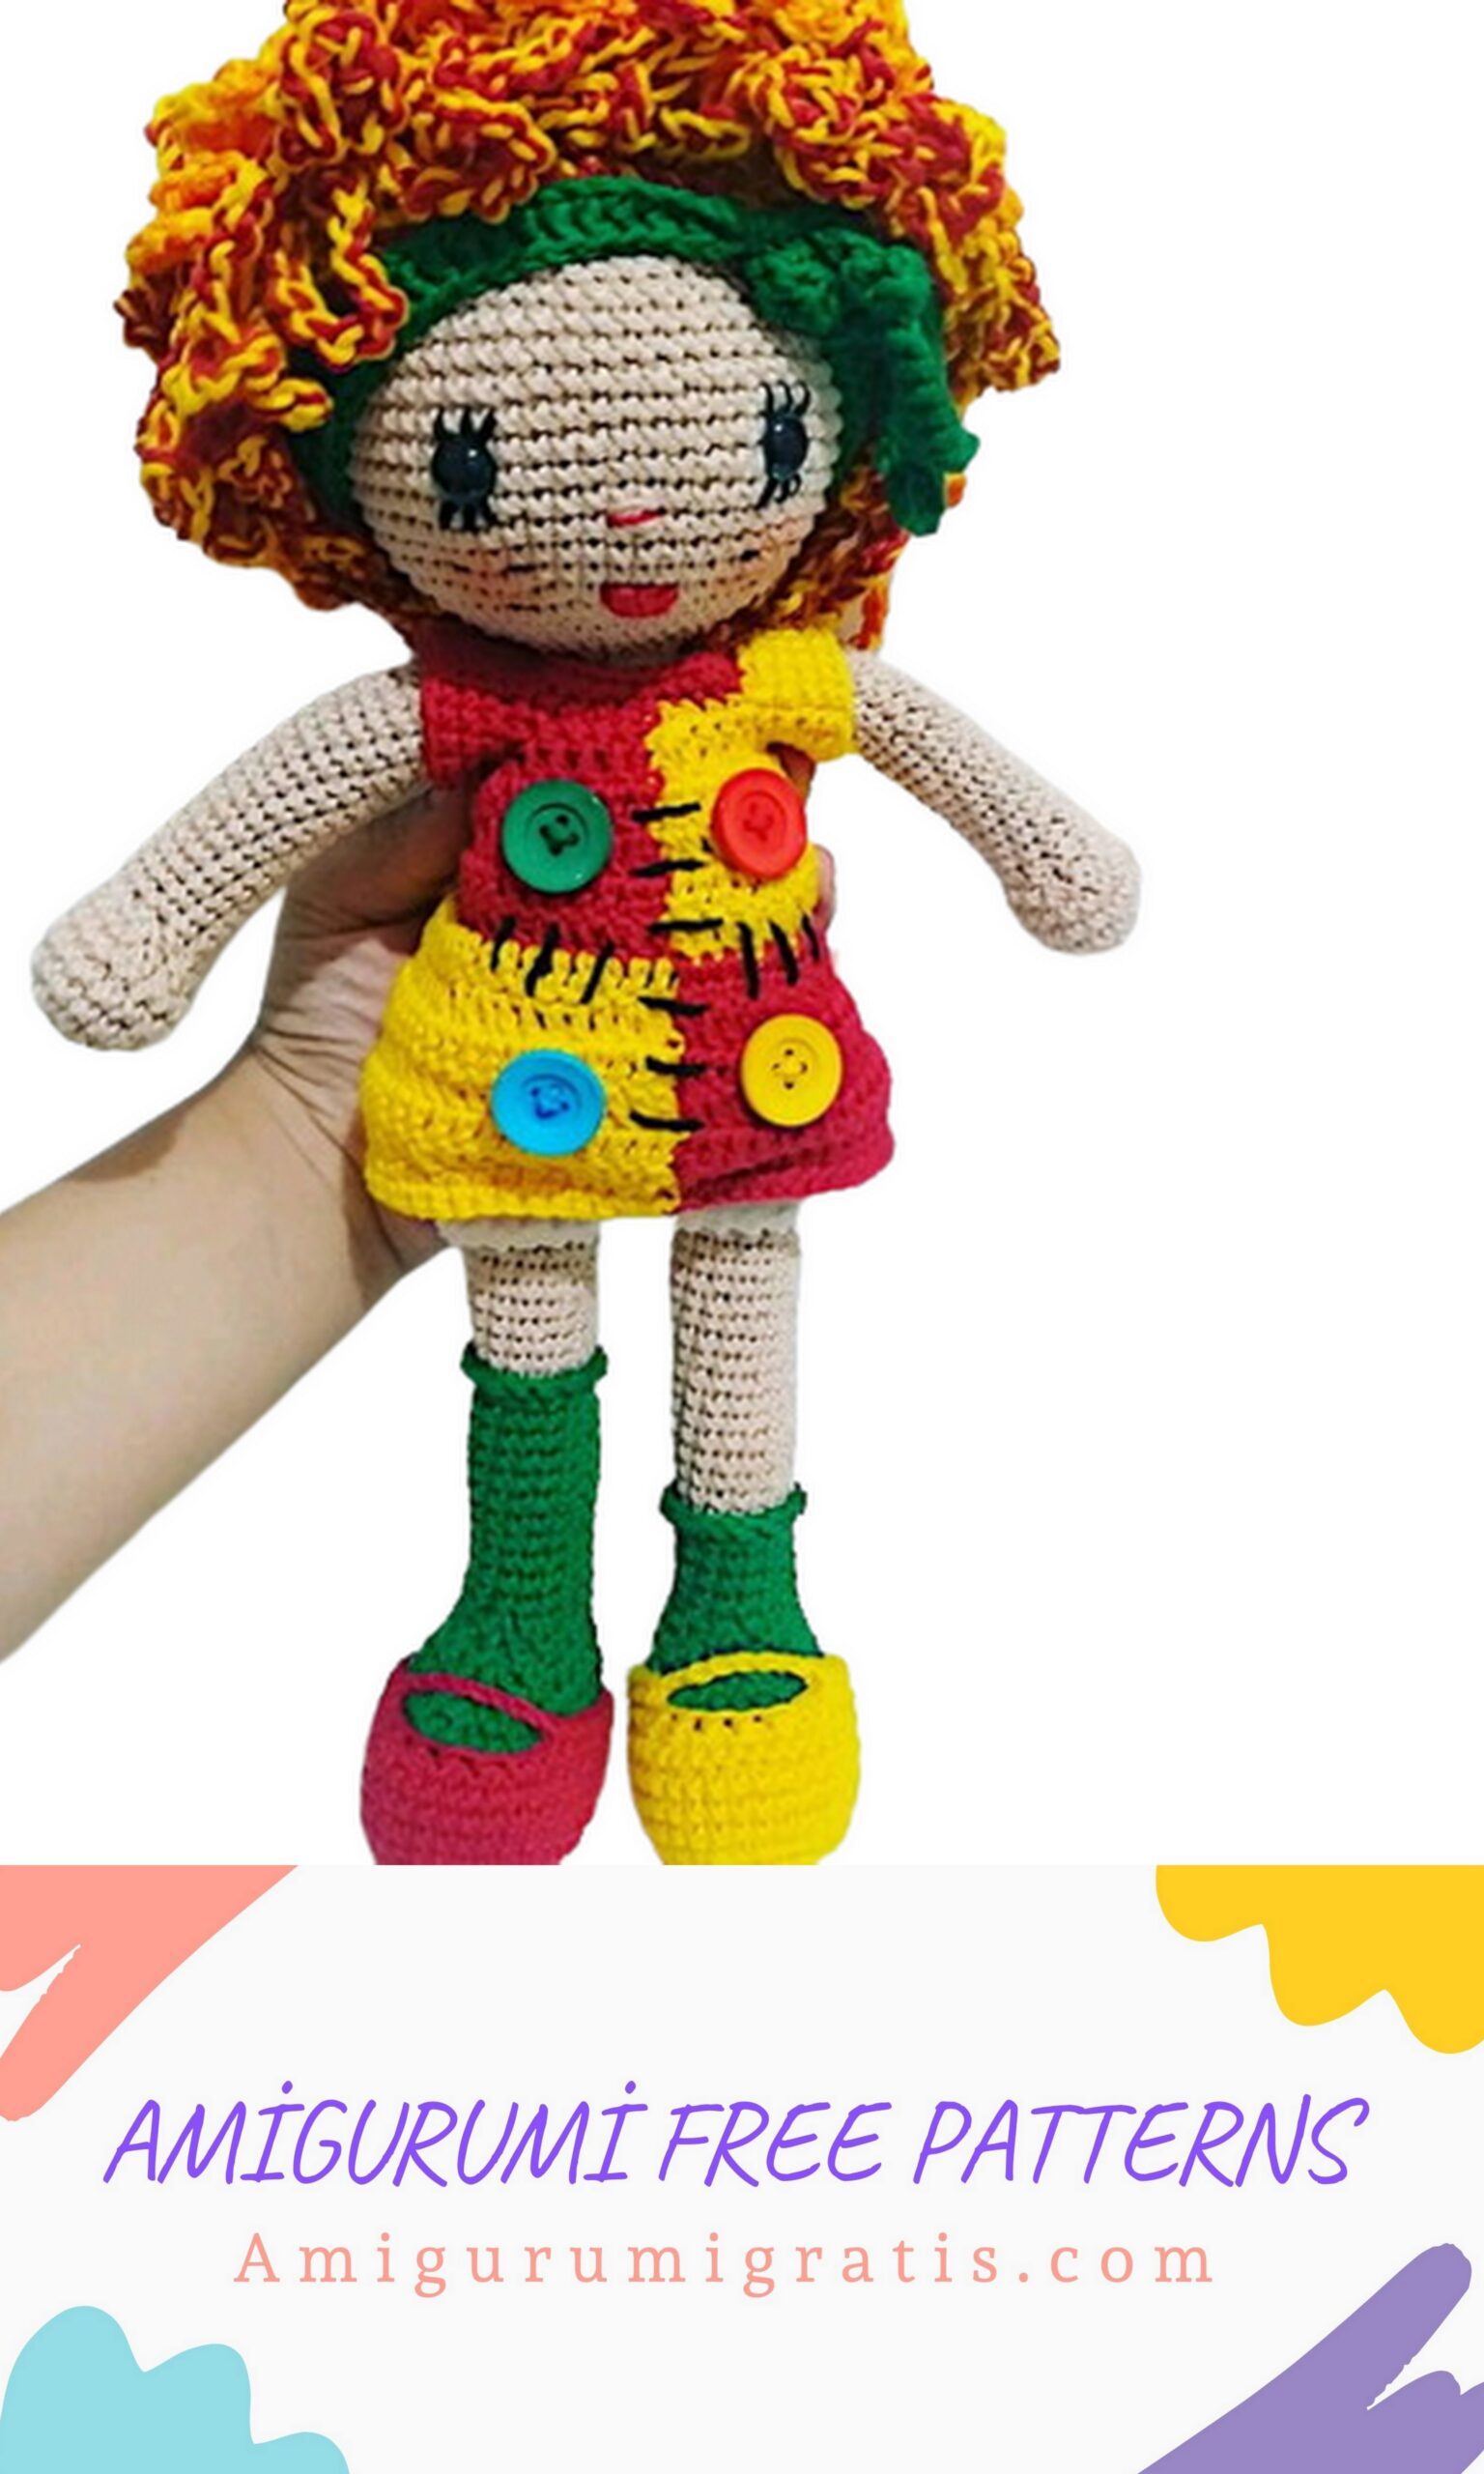
SHOES – 1 red / 1 yellow
• 7 corrects
1) 6sc – crochet crochet in the other part of the core – 1 inc. – 4 sc – 1 inc. (14)
2) 1 inc. – 4sc – 3inc. – 4sc – 2 inc. (20)
3) 2inc. 4sc-2 inc. – 2sc – 2inc. -4sc – 2inc – 2sc (28)
4) 1inc. – 1sc – 1inc – 6sc – (1inc – 1sc) 2x – (1sc-1inc) 2x – 6sc-(1inc – 1sc) 2x – 1sc (36)
5) Sc taking the rear chain (36)
6 to 9 ) sc all around (36)
10) 12 sc – 6 dec. In a row – 12sc. (30) * You can now cut the acetate and put it on the sole
11) 11sc – 7 chains – skip 8 stitches, insert the needle in the next stitch and make 11 sc.

LEGS/BODY/HEAD
Legs starts with green color
• 7 corrects
1) 6sc – 1 inc. – 4 sc – 1 inc. (14)
2) 1 inc. – 4sc – 3inc. – 4sc – 2 inc. (20)
3) 2inc. 4sc-2 inc. – 2sc – 2inc. -4sc – 2inc – 2sc (28)
4) 1inc. – 1sc – 1inc. – 6sc (1inc – 1sc )2x – (1sc-1inc)2x – 6sc – (1inc-1sc)2x – 1sc (36)
5) Sc taking the rear chain (36)
6 to 8) sc all around (36)
9) 13 sc. – (1dec– 1 sc) 3x – 14 sc (33)
10) 10sc – (1dec – 1sc) 4x – 11sc (29)
11) 9sc – 6 dec. In a row – 8sc (23)
12) 7sc – 5 dec. In a row – 6sc (18)
13) 7sc – 2dec in a row – 7 sc (16)
On the first leg:
14 to 17 ) sc all around (16)
Changes to skin color by taking the back current
18 to 37 ) sc all around (16)
On the second leg:
14 to 23 ) sc all the way around (16)
Changes to skin color by taking the back current
24 to 37 ) sc all the way around (16)
• Before you finish raising the leg, put it inside the shoe.
• Finish the socks with sc at each point of the color change row
join legs
• 8sc joining the first leg
• 4 chains
• 8sc joining the second leg
• Make 40 sc by rounding the entire piece onto the front chain.
38) 19sc – 1 inc. (42)
39 to 43) sc all around (42)
44) sc all around taking the rear chain (42)
45) 12 sc – 1 dec (39)
46) sc. All around (39)
47) 11 sc – 1dec (36)
48) sc all the way around (36)
49) 10sc – 1dec (33)
50 to 58) sc all around (33)
59) 6sc – (1dec – 1sc) 2x – 1 dec – 8sc – (1 dec -1sc) 2x – 1dec – 3sc (27)
60) 1sc -1 dec of 3points together – 4 sc – 1dec – 4 sc – 1dec of 3points together – 1sc-1dec- 2sc
1dec – 1sc – 1dec (19)
61) 1 dec of 3 points together – 7sc – 1 dec of 3 points together – 6sc (15)
62) 1dec – 13 sc (14)
63) sc all around (14)
• At this point you can insert the hot glue stick and add filling.
Continues with the skin color to make the HEAD
64) inc. All around (28)
65)13 sc – 1 inc. (30)
66) 4sc – 1 inc. (36)
67) 5sc – 1 inc. (42)
68) 6sc – 1 inc. (48)
69) 7sc – 1 inc, (54)
70) 8sc – 1 inc (60)
71 to 82) sc all around (60)
• Insert eyes on row 75 with 9 stitches between them
• Embroider the eyelashes before putting the lock on the eyes
83) 8sc-1 dec (54)
84) 7sc – 1 dec (48)
85) 6sc – 1 dec. (42)
86) 5sc. 1 dec (36)
87) 4sc – 1 dec. (30)
88) 3sc-1 dec. (24)
89) 2sc – 1 dec. (18)
90) 1 sc – 1 dec (12)
91) only decrease and finish
* Make nose by tacking two stitches in the middle of the eyes, the mouth 2 rows under the nose.
* Embroider the dots on the cheeks.
Panty
On row 44 of the body where the chain was visible take the back in the center of the back and start crochet.
1) Low point at each point of the row (42)
2) (9 sc – 1 inc) 4 x – 2sc (46)
3 to 10) sc all laps (46)
11) Divide the piece in half and make 23 sc on each leg one at a time.
• If your division doesn’t give the 23 points for each side, there’s no problem, you can continue
normally, the important thing is to divide equally for each leg.
12) (3sc – 1dec) 4x – 3sc (19) in each leg
• Then pout
• 2 chains – sc at the next point – 2 chains up – sc at the next point .. follows the sequence.
• Sew the arms. with the 15 cm needle insert the thread of the second arm that you leave in a good amount, remember?
• Pass from side to side, taking the other arm that will be in the place to be sewn.
• Then put the thread back and tie off, then hide the thread and cut.

HAIR in mixed color
BLO – means picking up the rear current
1) 6sc magic ring (6)
2) Onc. Every lap (12) BLO
3) 1sc-1 inc (18)
4) 2sc – 1 inc (24) BLO
5) 3sc – 1 inc. (30)
6) 4sc – 1 inc. (36) BLO
7) 5 sc – 1 inc. (42)
8) 6sc – 1 inc (48) BLO
9) 7 sc – 1 inc. (54)
10) 8 sc – 1 inc. (60) BLO
11) SC (60) NORMAL
12) SC (60) BLO
13) SC (60) NORMAL
14) SC (60) BLO
15) SC (60) NORMAL
16) SC (60) BLO
17) SC (60) NORMAL
18) SC (60) BLO
Now let’s crochet the hair strands
On the first row that was made in BLO at the top of the wig , insert the needle with the thread and 30
chains and secure at the next point with sc , go up another 30 chain and follow this sequence for
all career.
2nd to 5th lap
Makes 30 chains – sc in the next point – sl-st in the next – sc in the next and 30 chains go up and
follows the sequence – 30 ch. – sc – sl-st –sc.- 30 ch. ……
on the 6th round
Makes 25 chains and follows the same sequence- 25ch. – sc – sl-st – sc and rises 25 ch, …..
on the 7th round
Do 20 coreentes and follow the sequence of the others
On the 8th and 9th lap
Make 15 chains and follow the same sequence as the others
At the end, finish the thread and leave it long for sewing on the head
Low point
Low point
Extremely low point
HAIR BAND – GREEN COLOR
• 100 chains and loop with high point
• Sewing around the head leaving the ends to the side to tie the knot
• If you prefer, after sewing, you can use silicone glue or cloth glue for better safety.
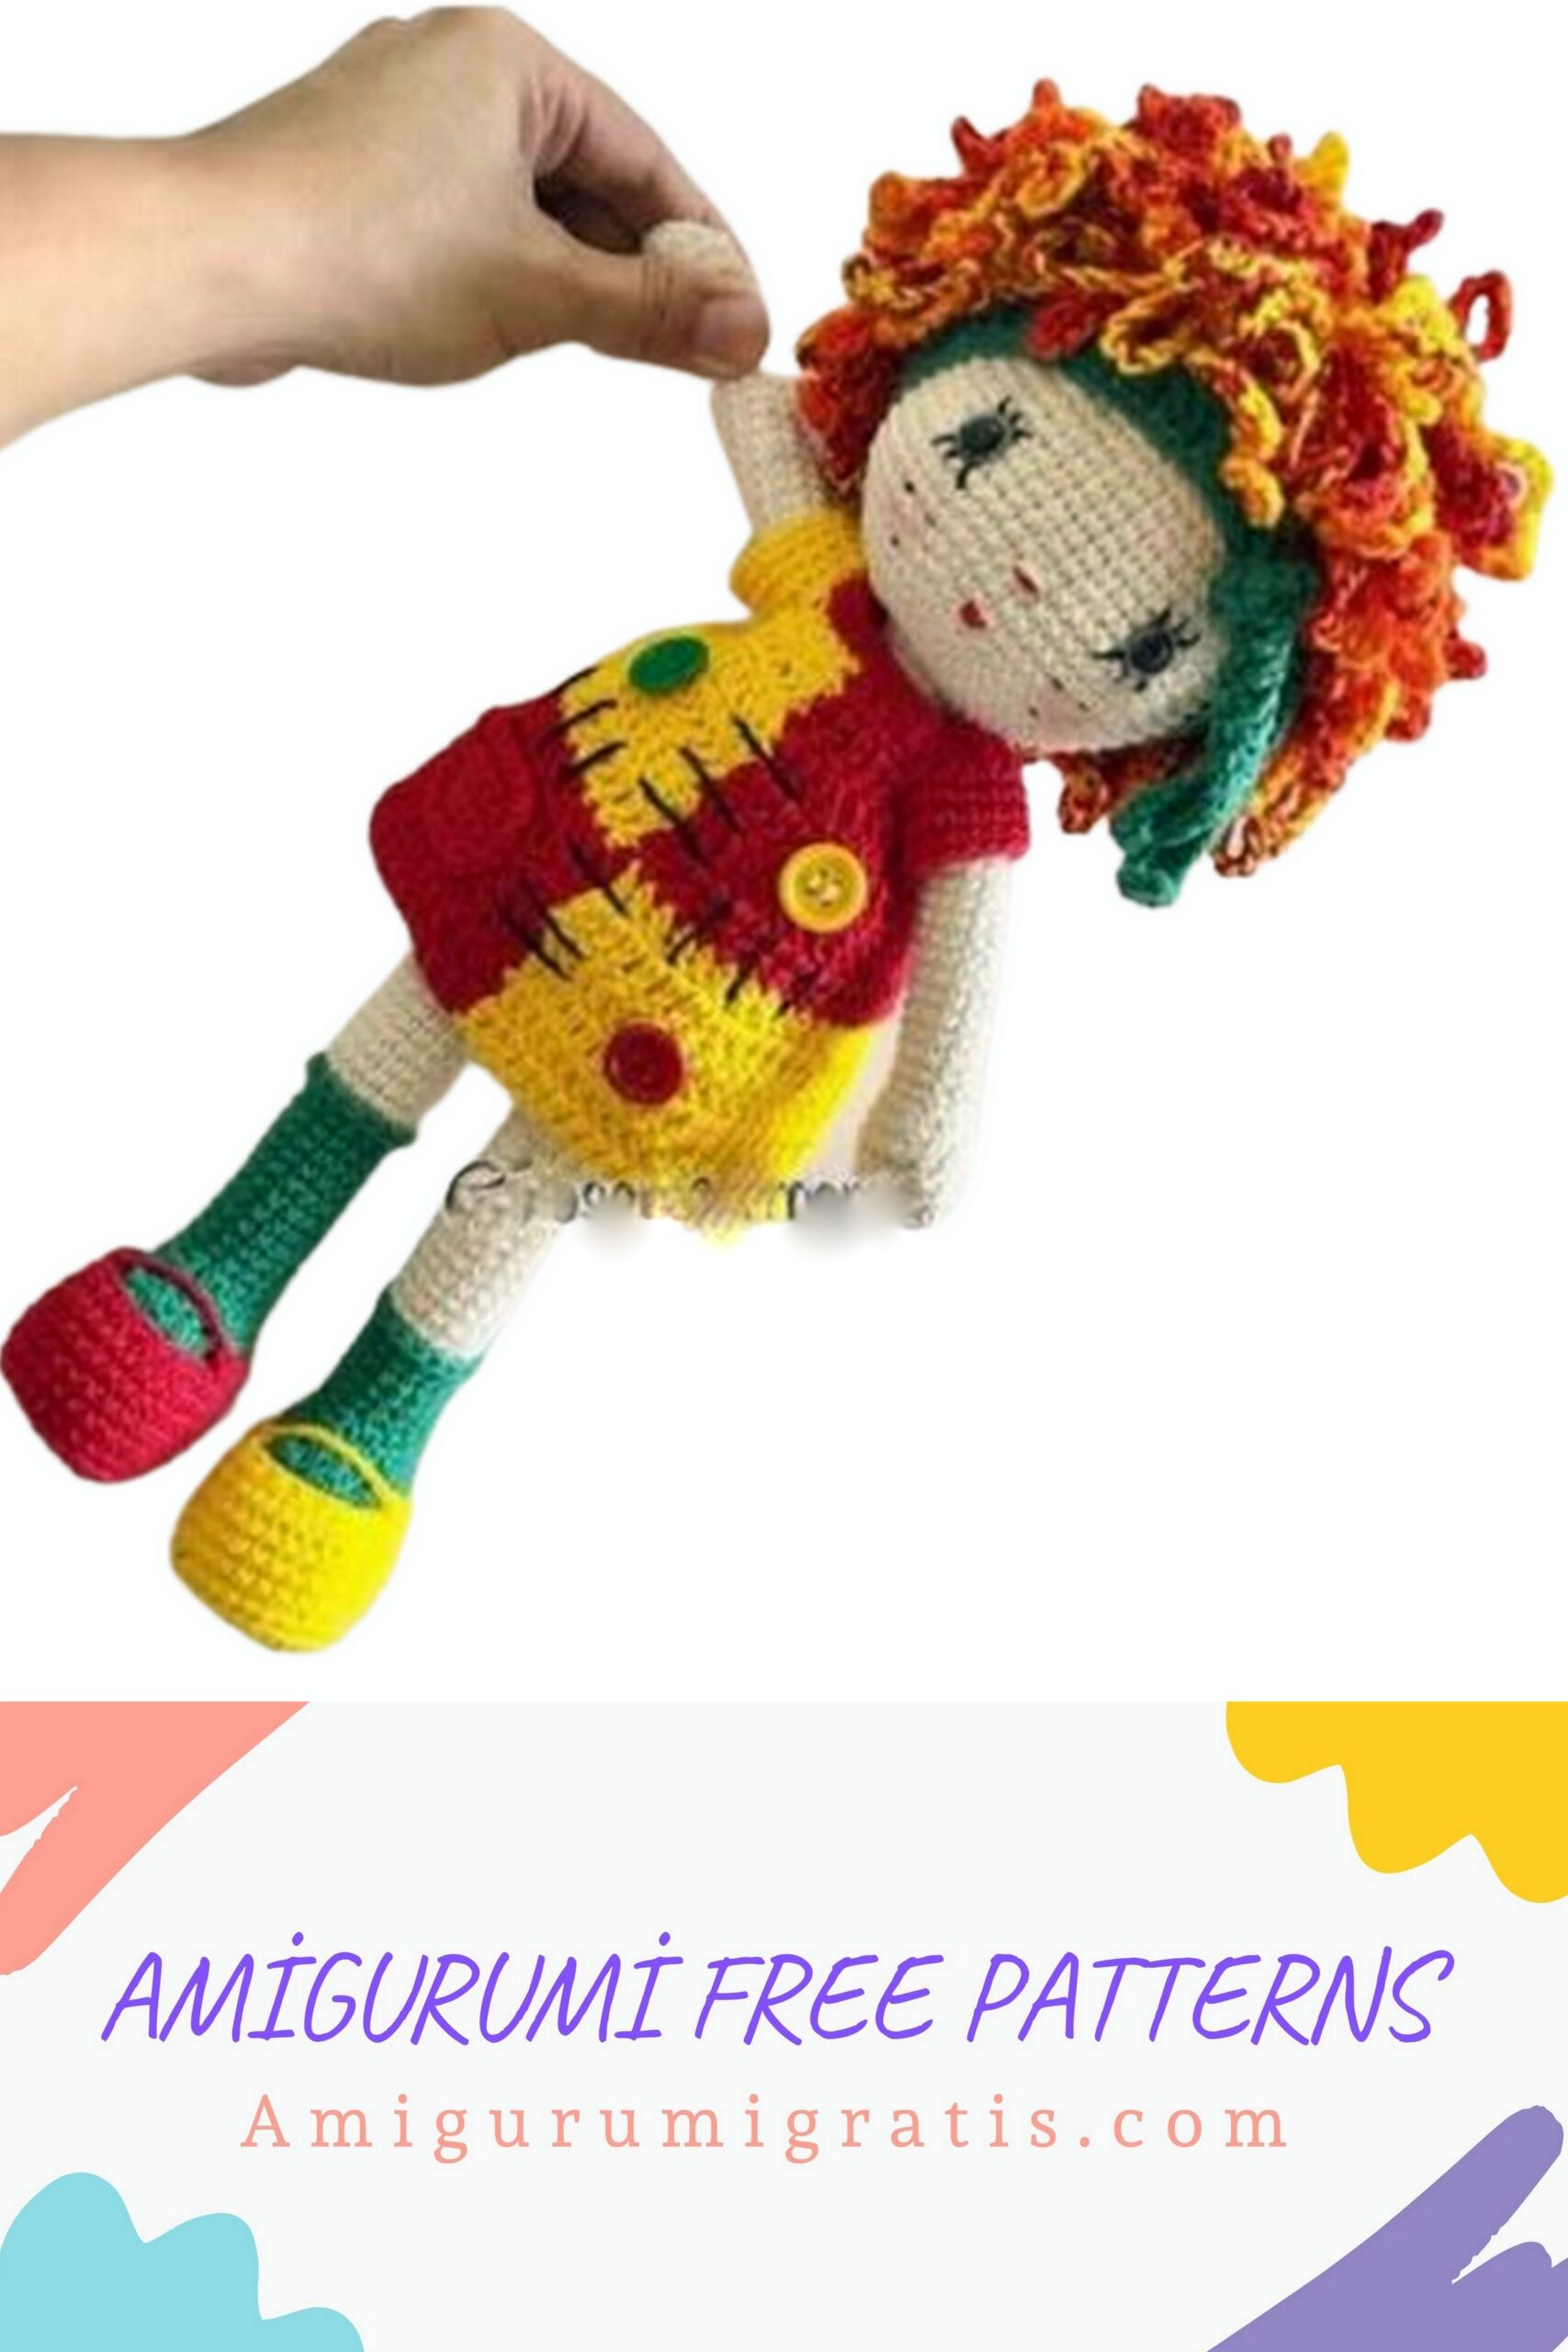
DRESS – YELLOW AND RED
1) 35 chains with red color
2) 17 sc red – 17 sc yellow – turns
3) Continues with yellow – 4sc – 7 chains – skips 8 points – 5 sc
Changes to red – 5sc – 7 chains – skips 8 stitches – 4 sc – 3 ch. and turns
4) (red) 1 inc. A.D. – 3dc. – 7 AD within 7 ch. – 5dc.
(yellow) 5dc. – 7dc. within 7 ch. – 3dc. – 1inc dc. – 3 ch, and turns
Remember when you get to the color change.
5) (4dc. – 1 inc) 6x – 4dc. – 3ch, and turns
6) 4dc. – 1 inc all around – 3ch, and turns
7) and 8) dc. in all turns – 3 ch, and turns
In this next row, change the side of the colors – red is under yellow and yellow
under red
9) dc. all the way around – 3ch, and turns
10) 5dc. – 1 inc. All around – 3 ch, and turns
11 to 14) dc. in all turns, 3ch, and turns
Leave a long thread to sew closing the dress at the back
MANGO
From any stitch of your choice make 4 rows of low stitch.
POCKET – RED
7 chains
1) 6 sc inside each chain – turns
2) A 4) sc. in all careers – turns
At the end do sc. surrounding the entire piece and leaving a thread to sew on the dress
You can now make the details in black color on the dress and sew the buttons too.
• If your dress is too low at the neck, you can make a row of low stitches at the top. then dresses the doll and sews at the back.