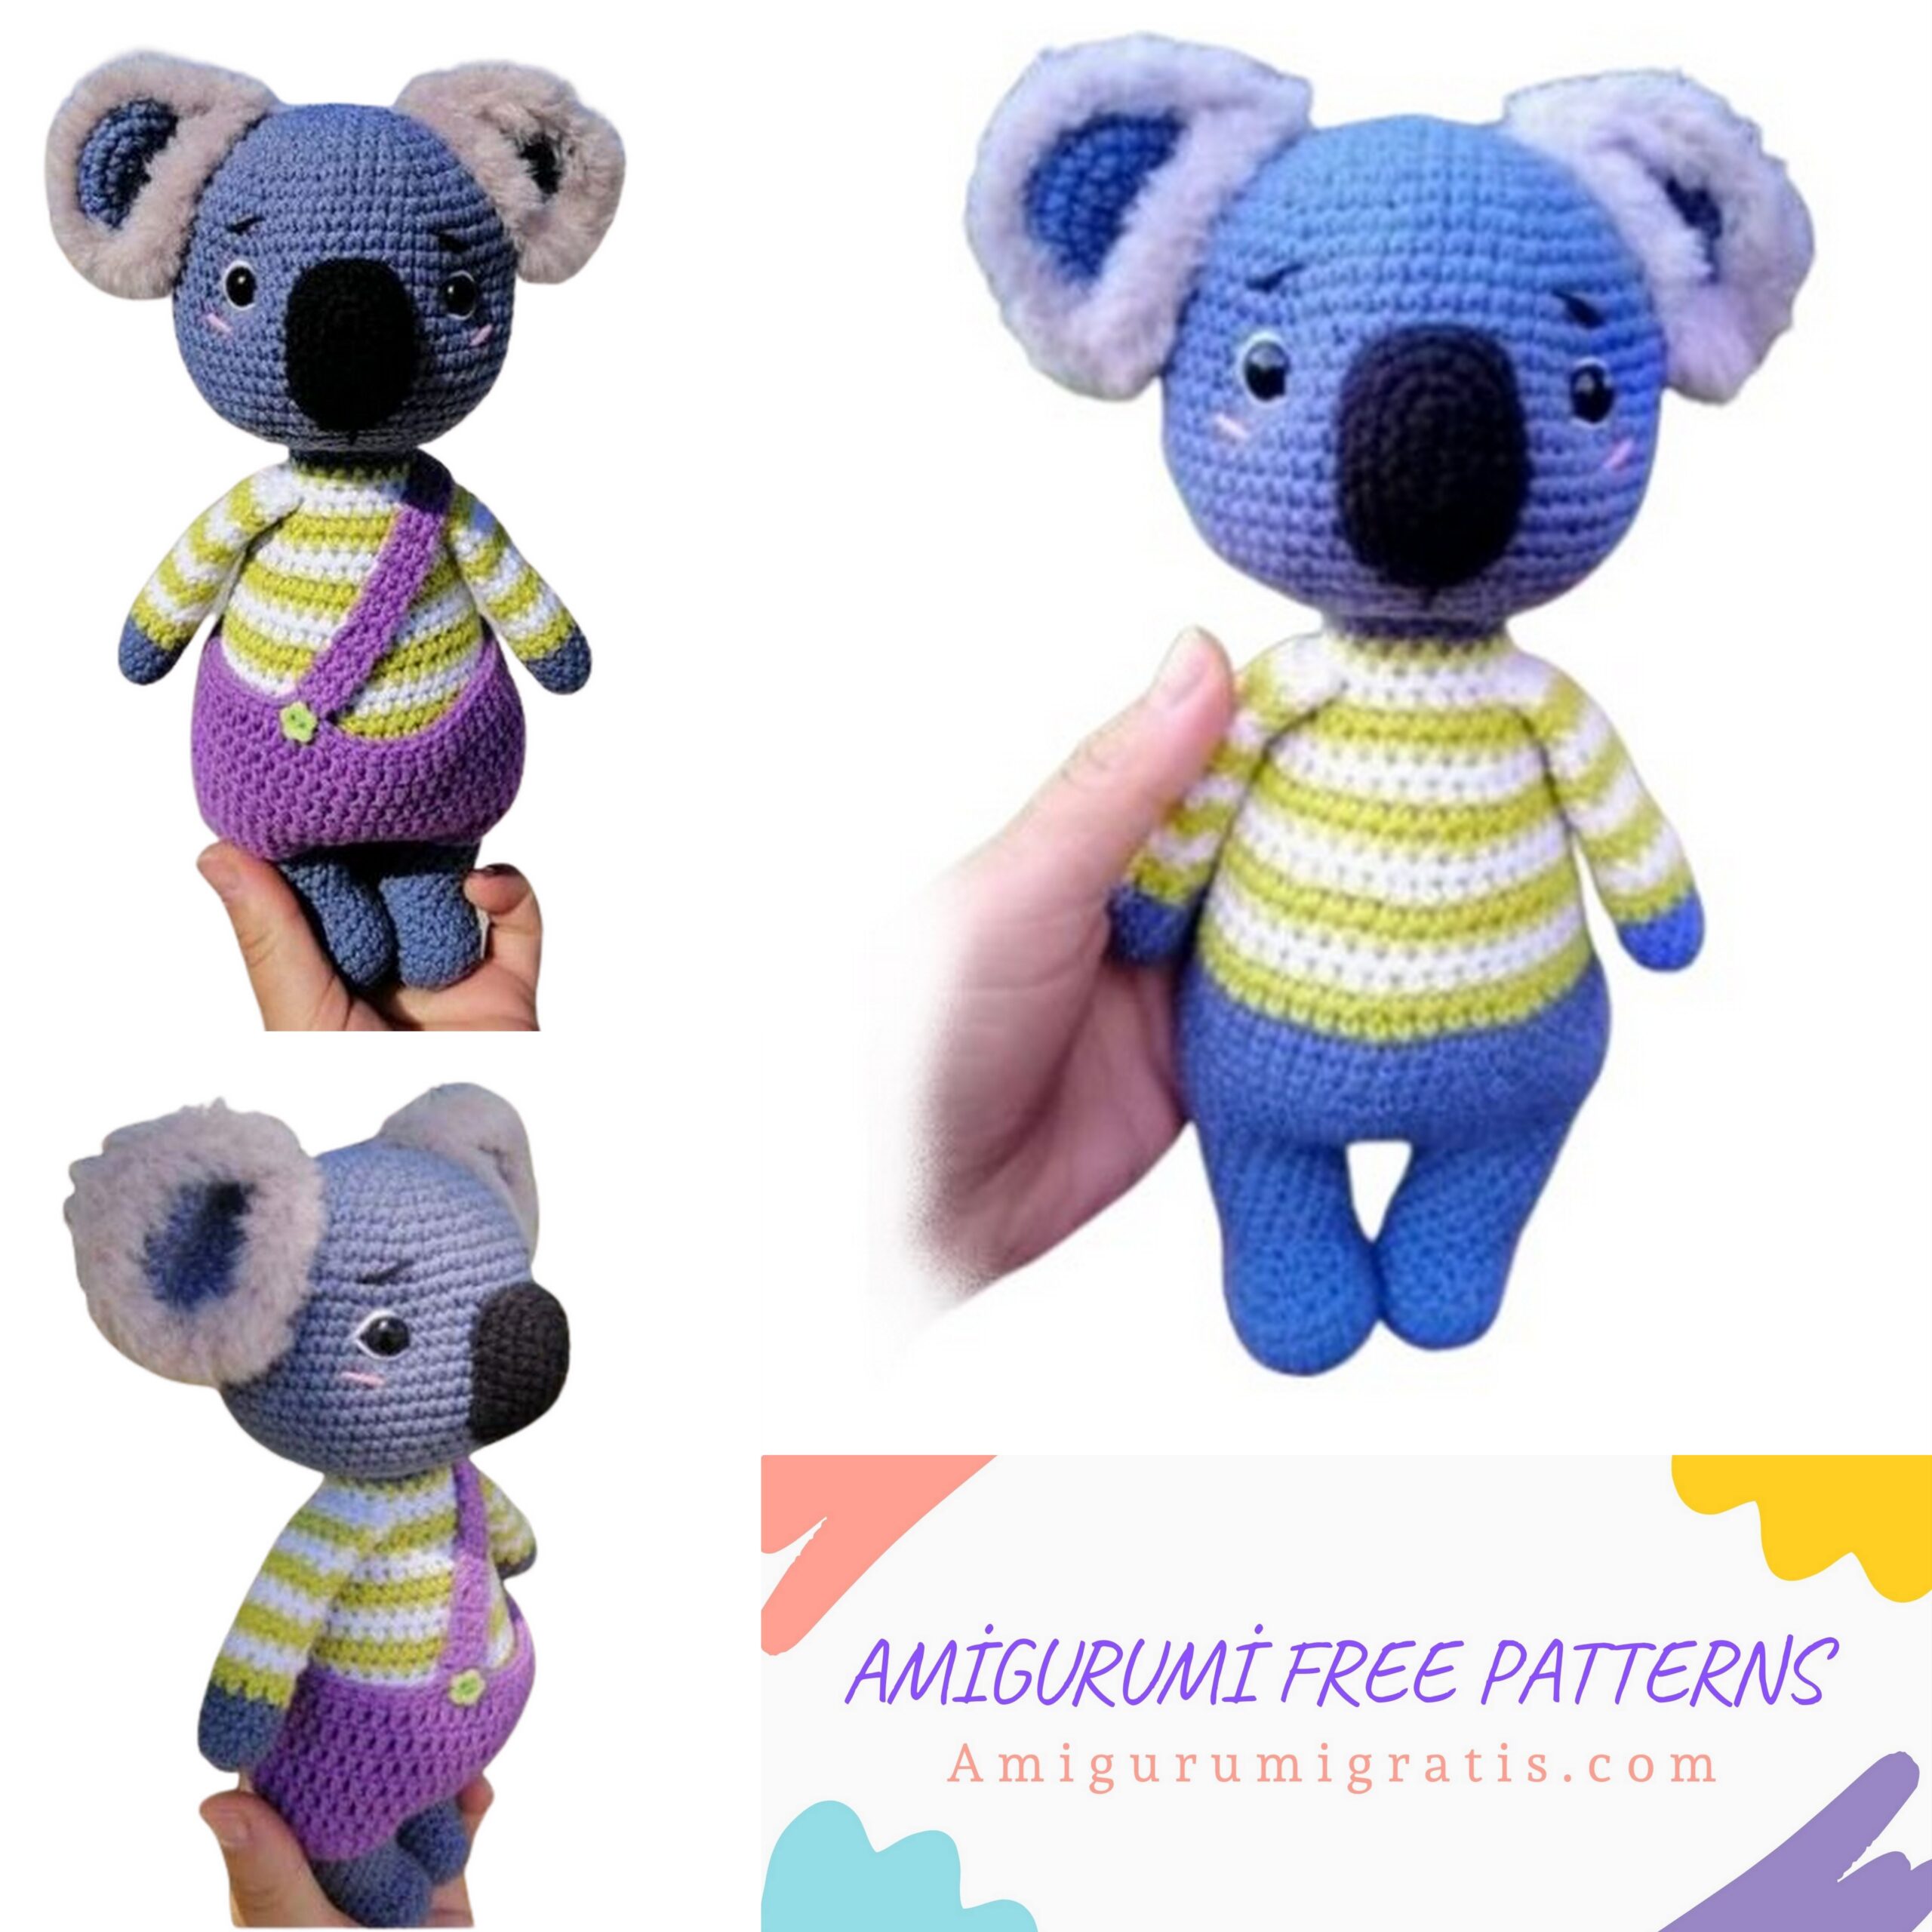
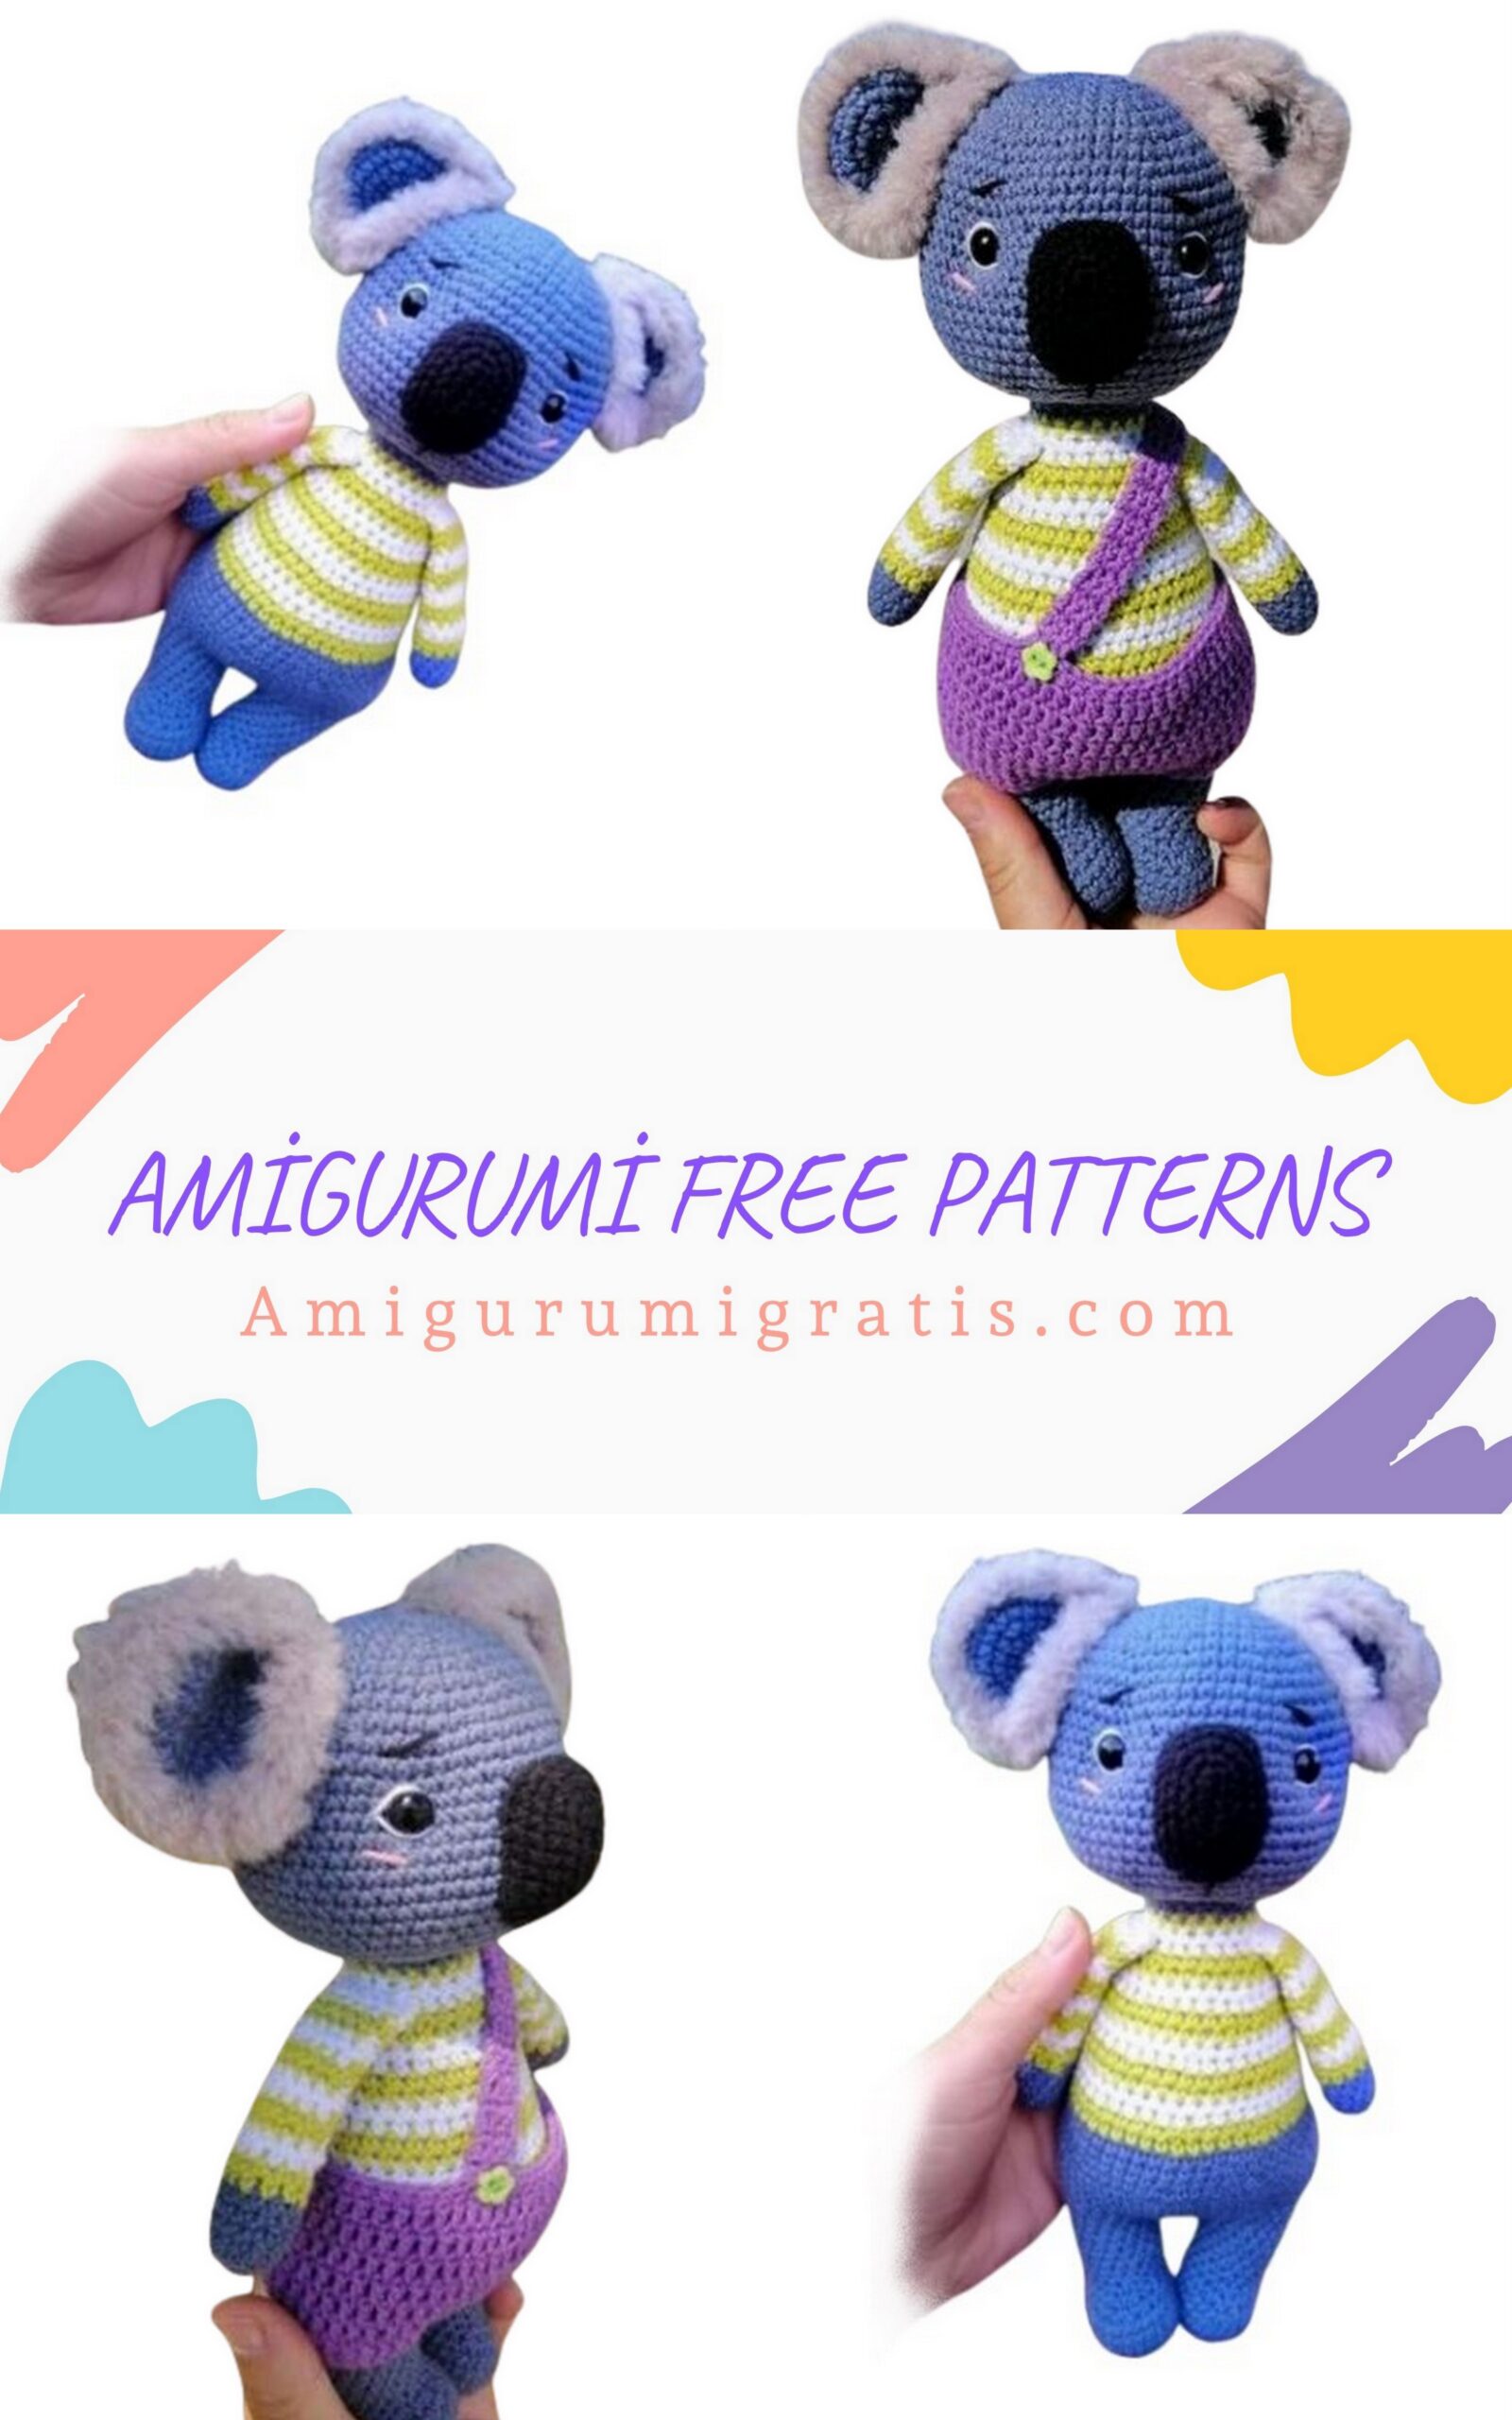
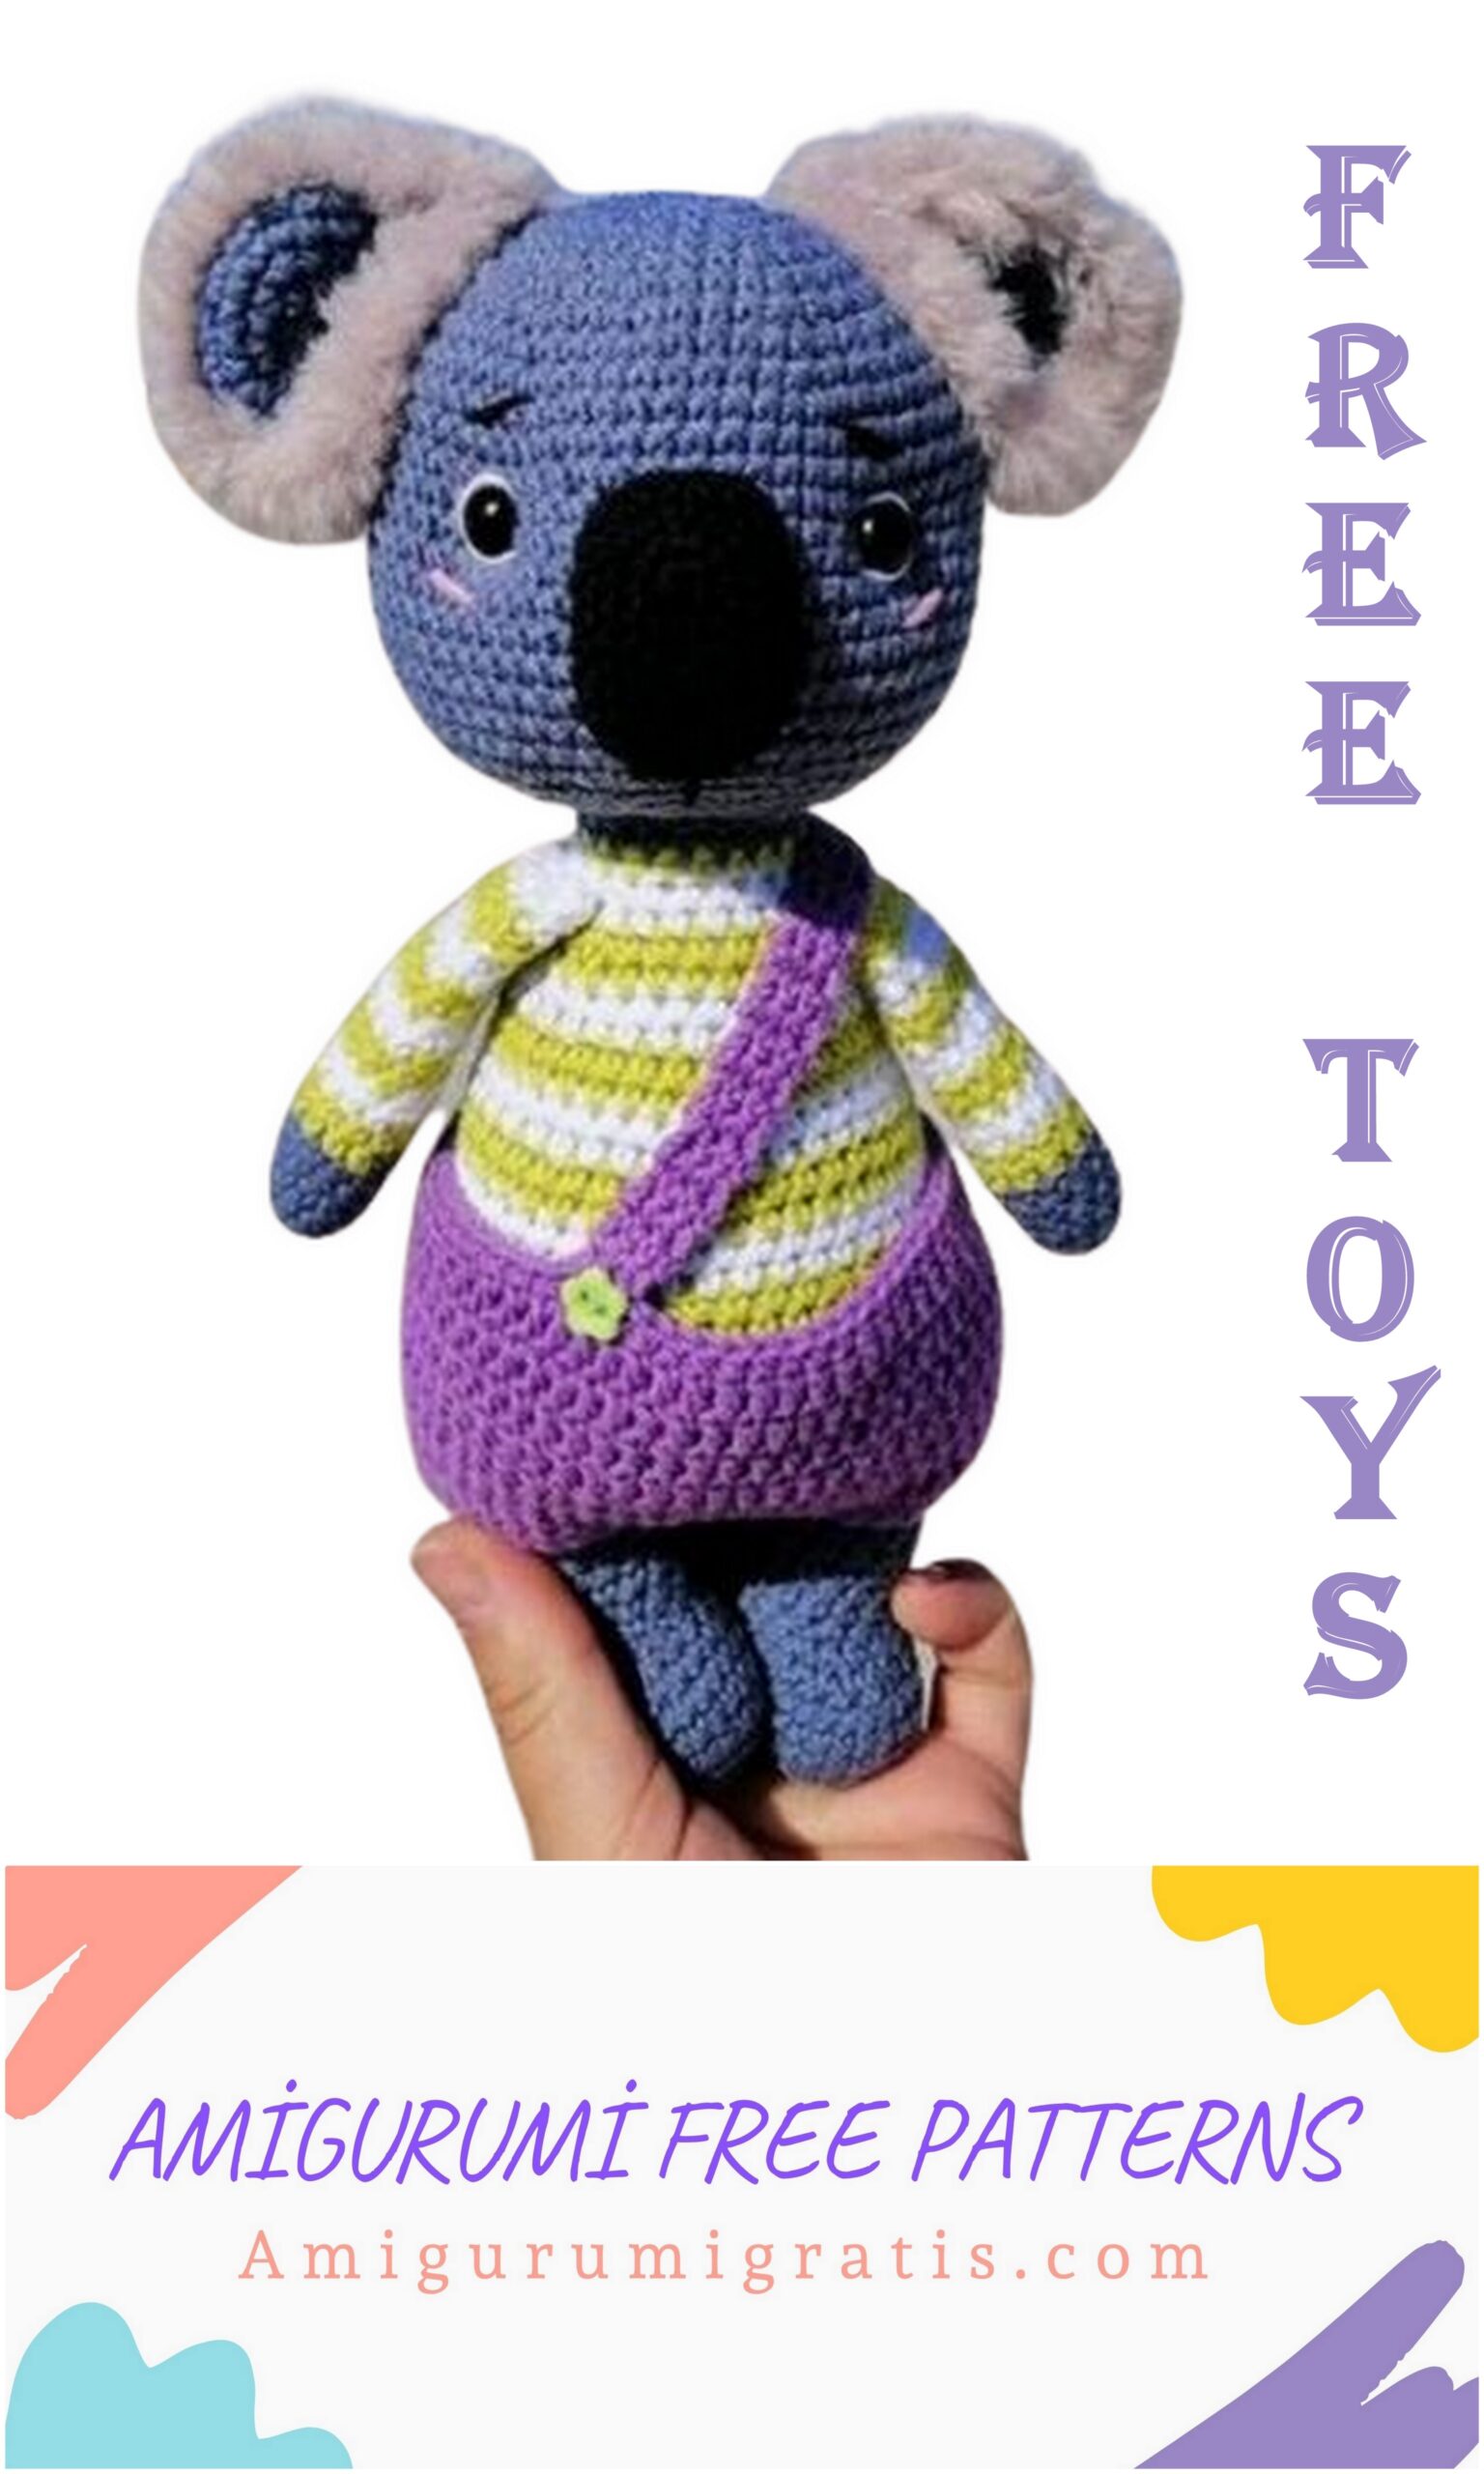
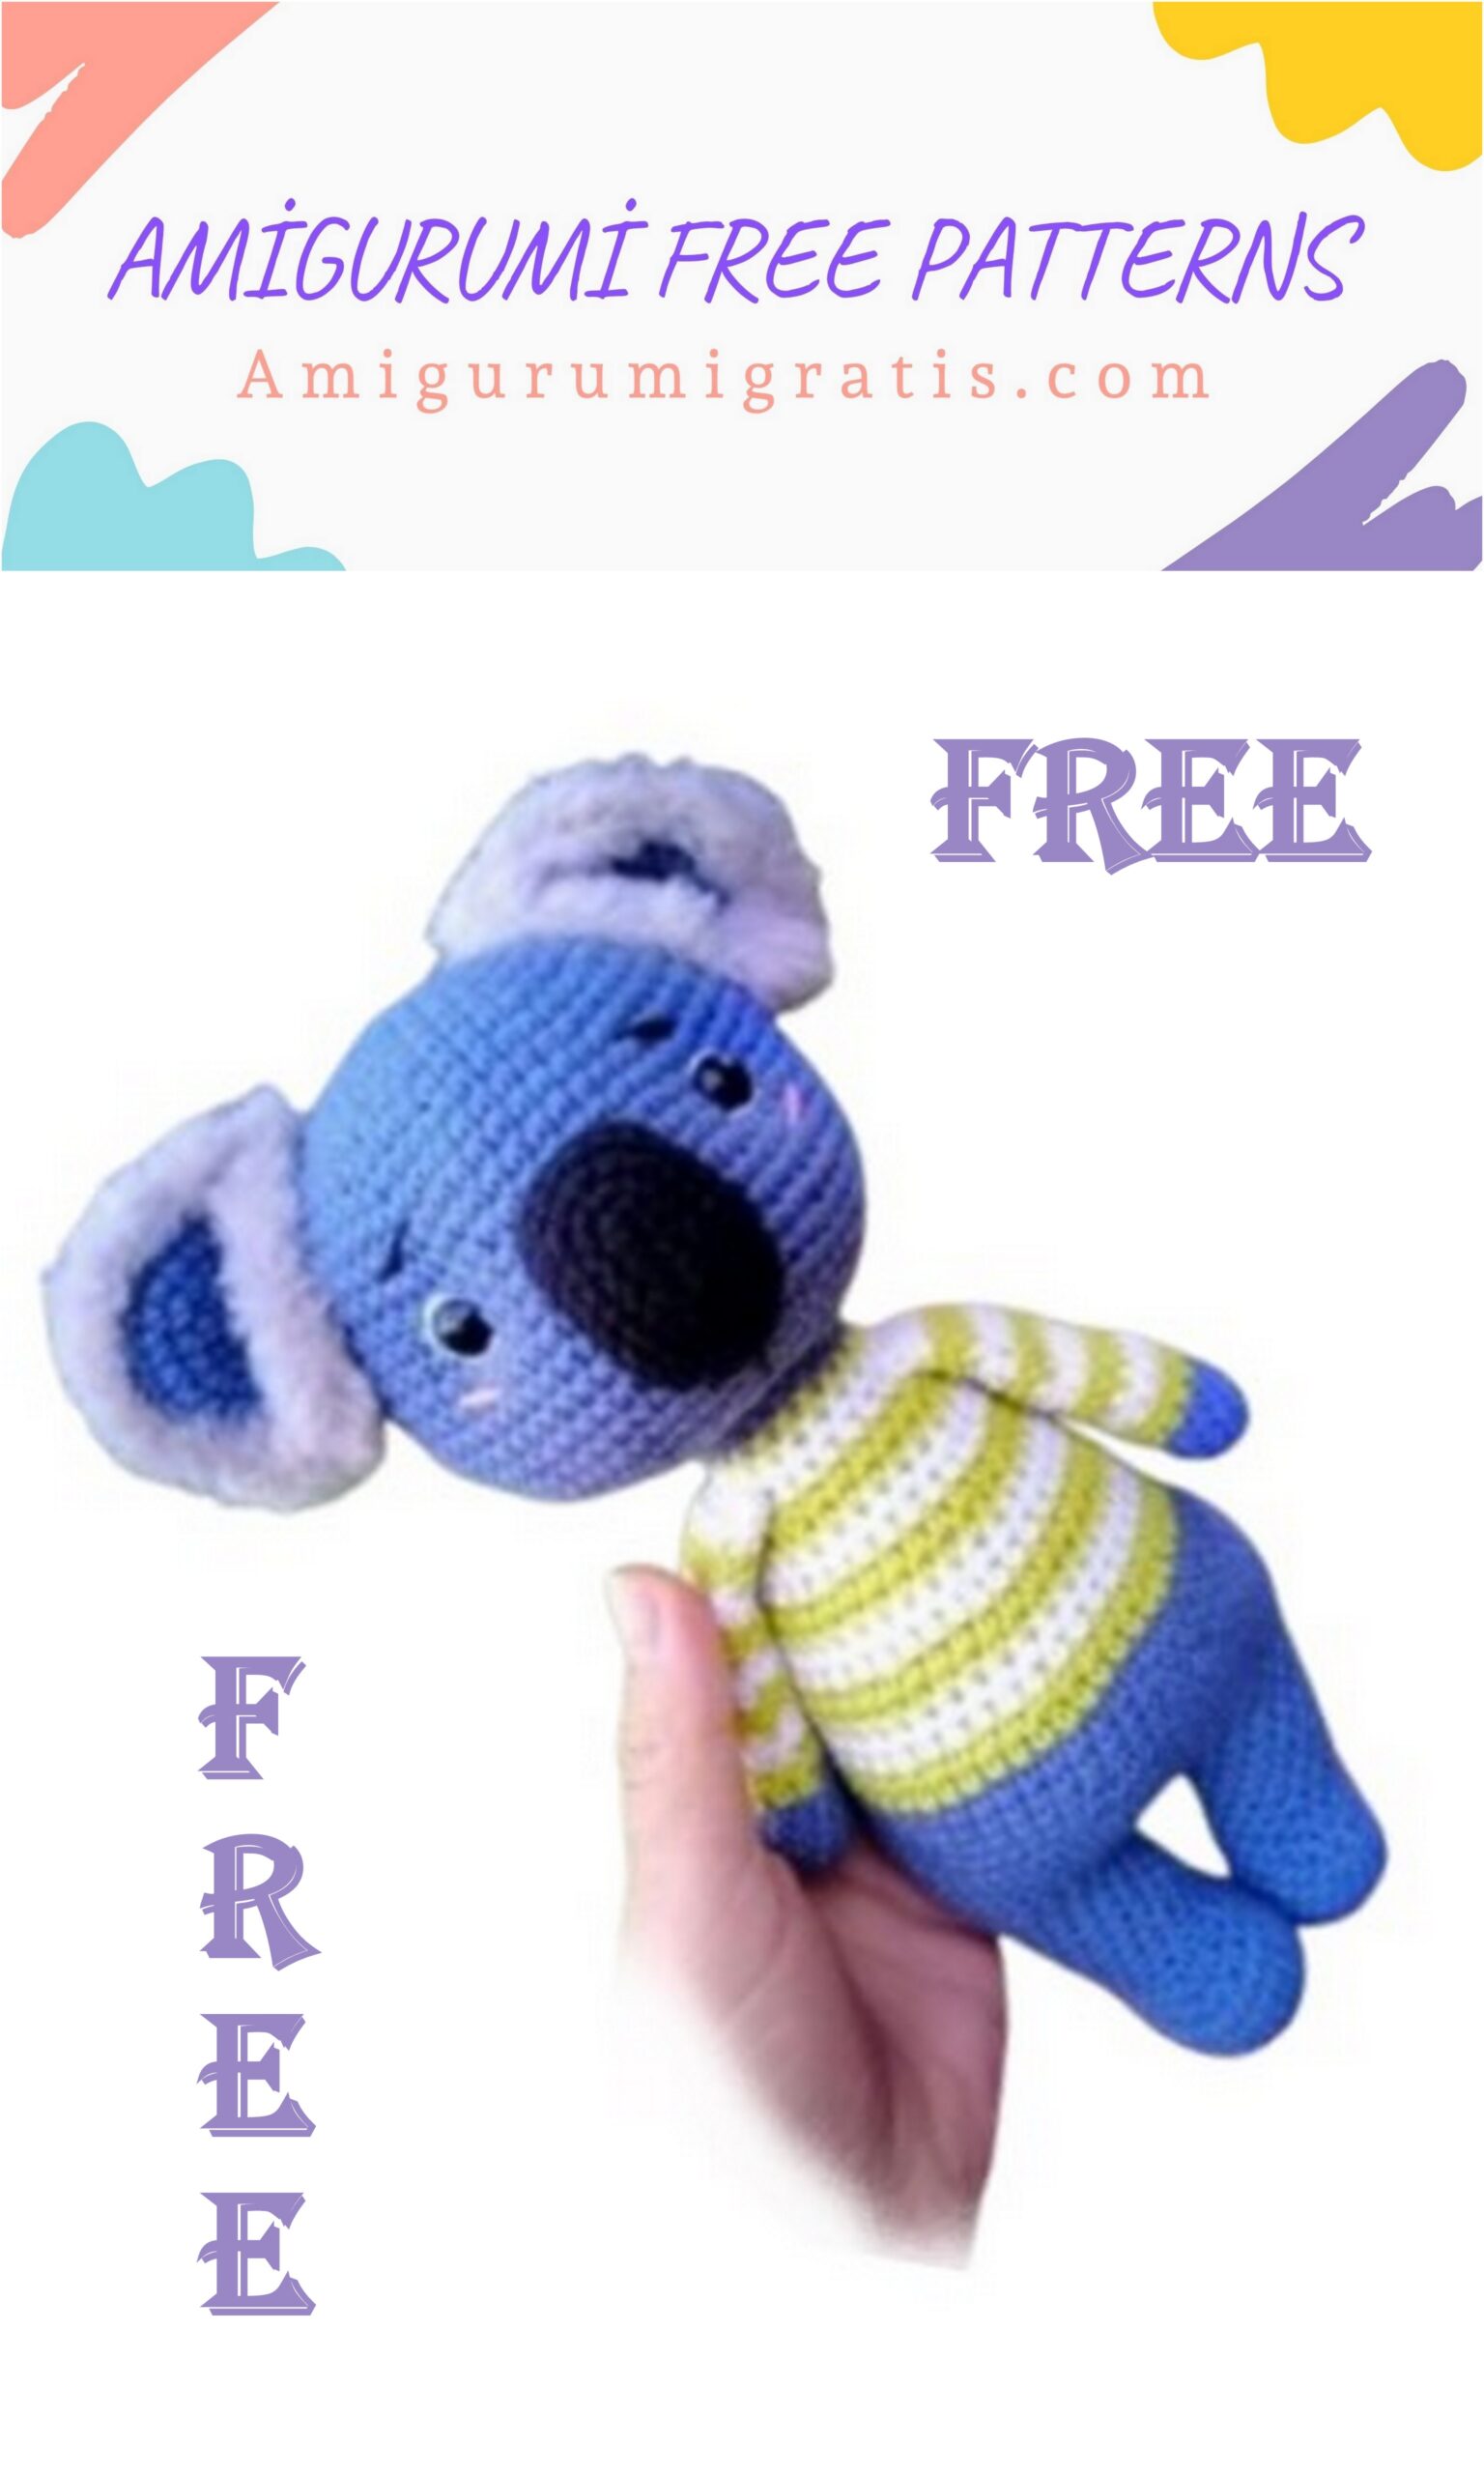
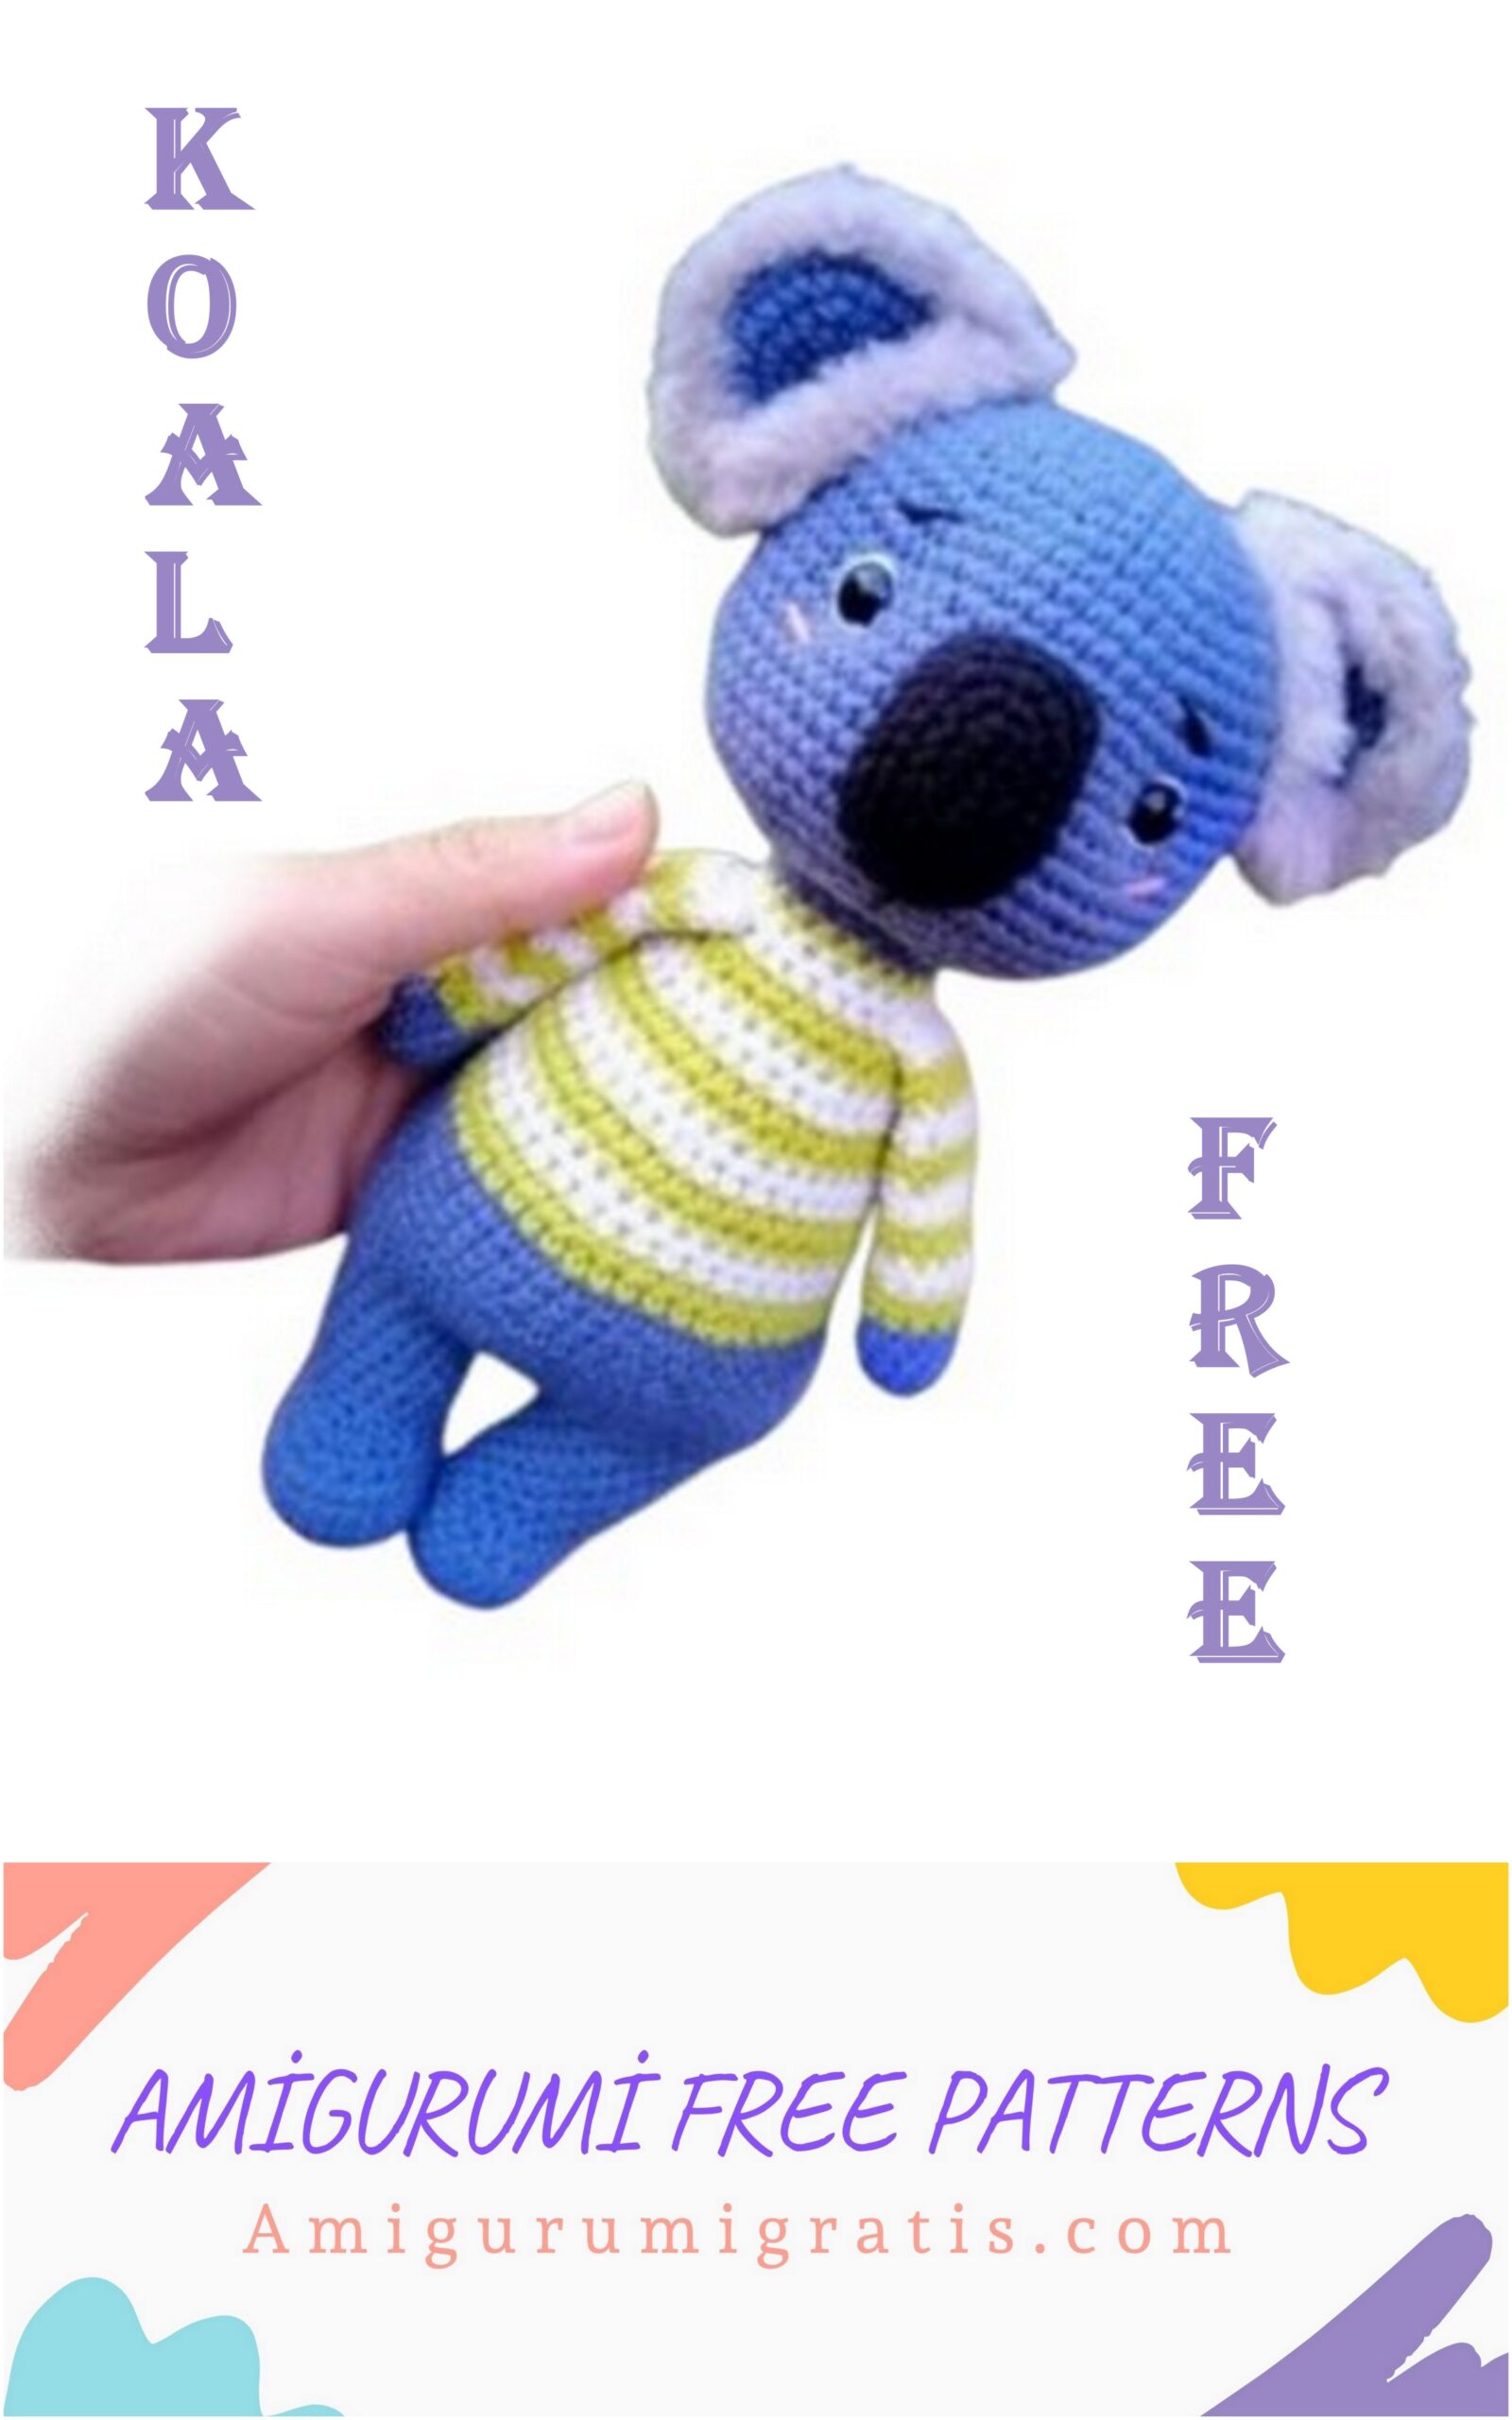
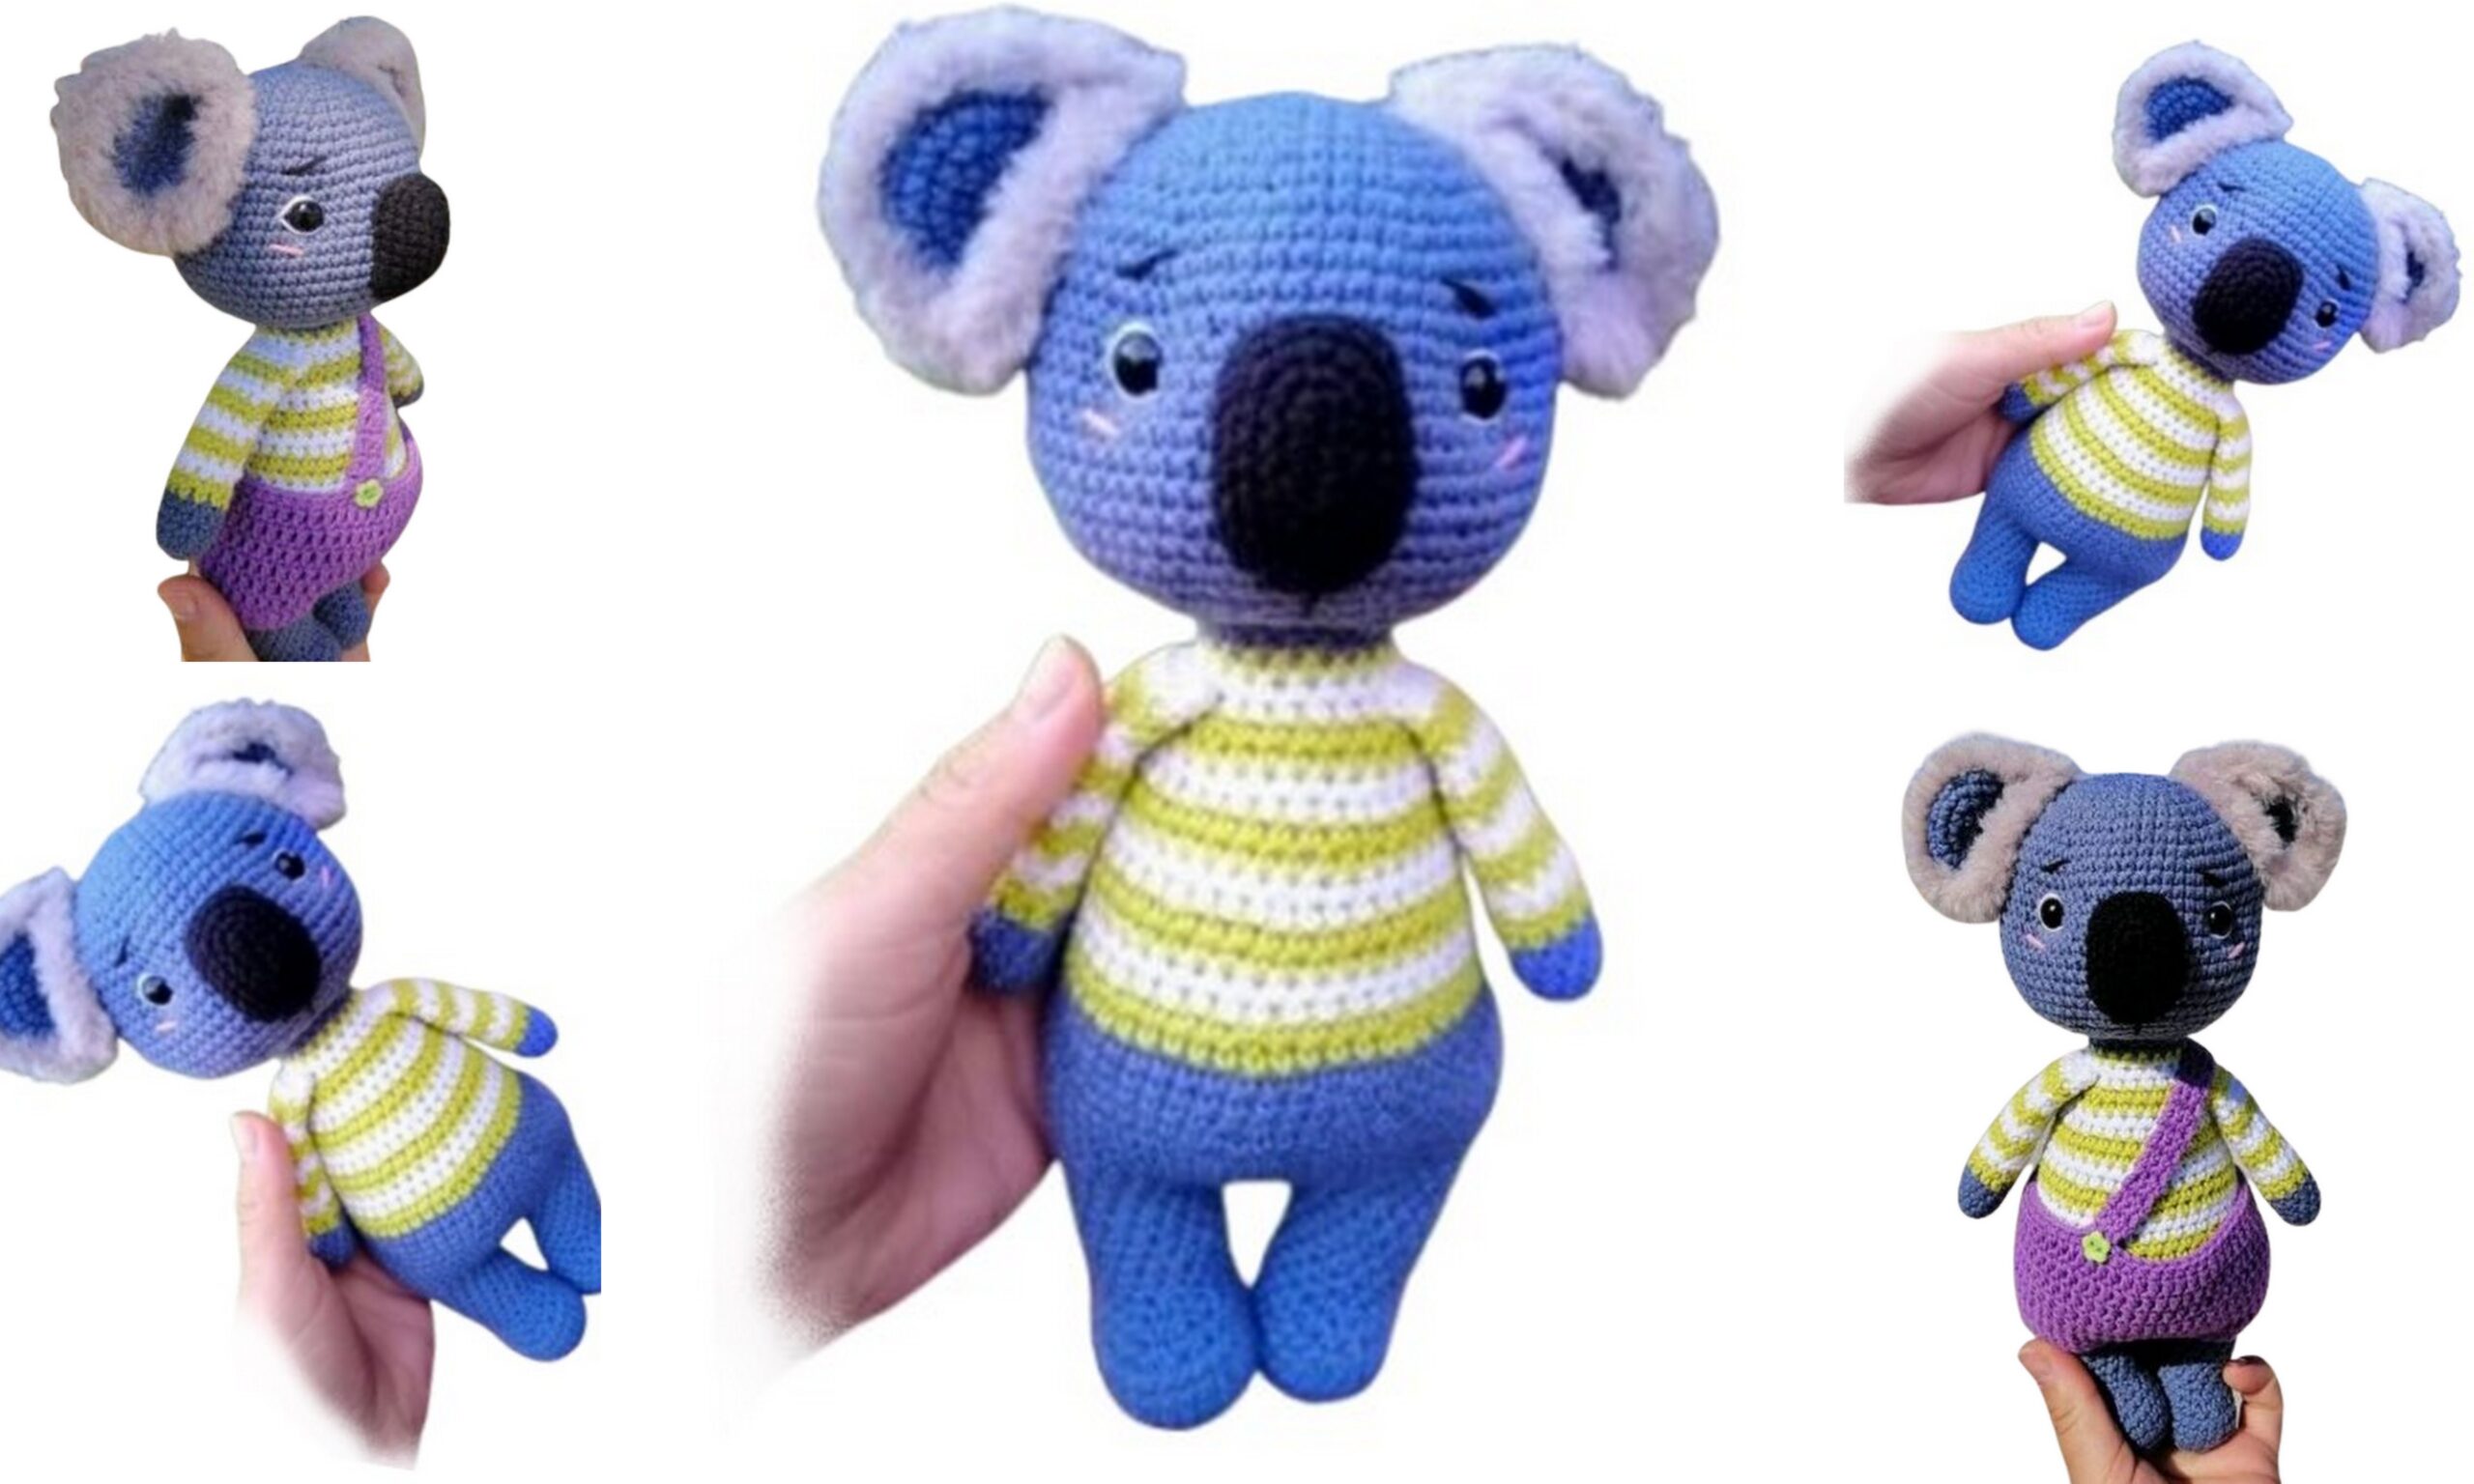
We continue to publish the most beautiful free amigurumi patterns. You want to knit a koala wearing shorts, this is the pattern for you. Click for free amigurumi koala pattern.
Necessary materials:
1. YarnArt JEANS yarn color 16;
2. YarnArt JEANS yarn color 53;
3. YarnArt JEANS yarn color 01;
4. YarnArt JEANS yarn color 29;
5. YarnArt Mink yarn color 334 or 335;
6. Filler (holofiber, synthetic winterizer, or synthetic winterizer);
7. Hook 1.75 cm;
8. Eyes for toys 10 mm (safe attachment is possible);
9. Long needle for sewing and tightening toys;
10. Additionally threads: white for the whites of the eyes, pink for the cheeks;
11. Strong thread for tightening;
12. Button for shorts.
Legend:
Ch – air loop;
Ch – lifting air loop;
Sc – single crochet;
İnc – increase (2 sc in one loop);
Dec – decrease (knit 2 sc together);
Sl-st – connecting post;
Dc – double crochet;
* – number of loops;
** – the number of rows of repetitions.
Helpful hints:
1. We start knitting with an amigurumi ring.
2. When knitting a piece, use a different color of thread as a marker. This will make it easier for you to keep an eye on the symmetry of the knitting. If symmetry is broken, knit an offset loop. The offset loop is always the first loop of the row (knit like a regular sc.), But then the second loop that follows it is considered the first loop.
3. Knit the parts in a spiral. Do not use a connecting post at the end, an air lift loop at the beginning of the row.
4. Fill the toy tightly so that it does not lose its shape later.
Head
We knit with gray yarn.
1 row. İNTO MAGİC RİNG knit 6 sc. (6) *
2 row. (İnc) x 6 (12)
3 row. (1 sc, inc) x 6 (18)
4 row. 1 sc, inc, (2 sc, inc) х 5, 1 sc (24)
5 row. (3 sc, inc) x 6 (30)
6 row. 2 sc, inc, (4 sc, inc) х 5, 2 sc (36)
7 row. (5 sc, inc) x 6 (42)
8 row. 3 sc, inc, (6 sc, inc) х 5, 3 sc (48)
9 row. (7 sc, inc) x 6 (54)
10 row. 4 sc, inc, (8 sc, inc) х 5, 4 sc (60)
11-22 row. 60 sc (12 rows) **
23 row. 4 sc, dec, (8 sc, dec) x 5, 4 sc (54)
24 row. (7 sc, dec) x 6 (48)
Row 25. 3 sc, dec, (6 sc, dec) x 5, 4 sc (42)
26 row. (5 sc, dec) x 6 (36)
27 row. 2 sc, dec, (4 sc, dec) x 5, 2 sc (30)
Row 28. (3 sc, dec) x 6 (24)
Row 29. 1 sc, dec, (2 sc, dec) x 5, 1 sc (18)
30 row. (1 sc, dec) x 6 (12)
31 row. (dec) x 6 (6)
!!! The detail is stuffed tightly. We do not tighten the hole, we will tighten it through it.
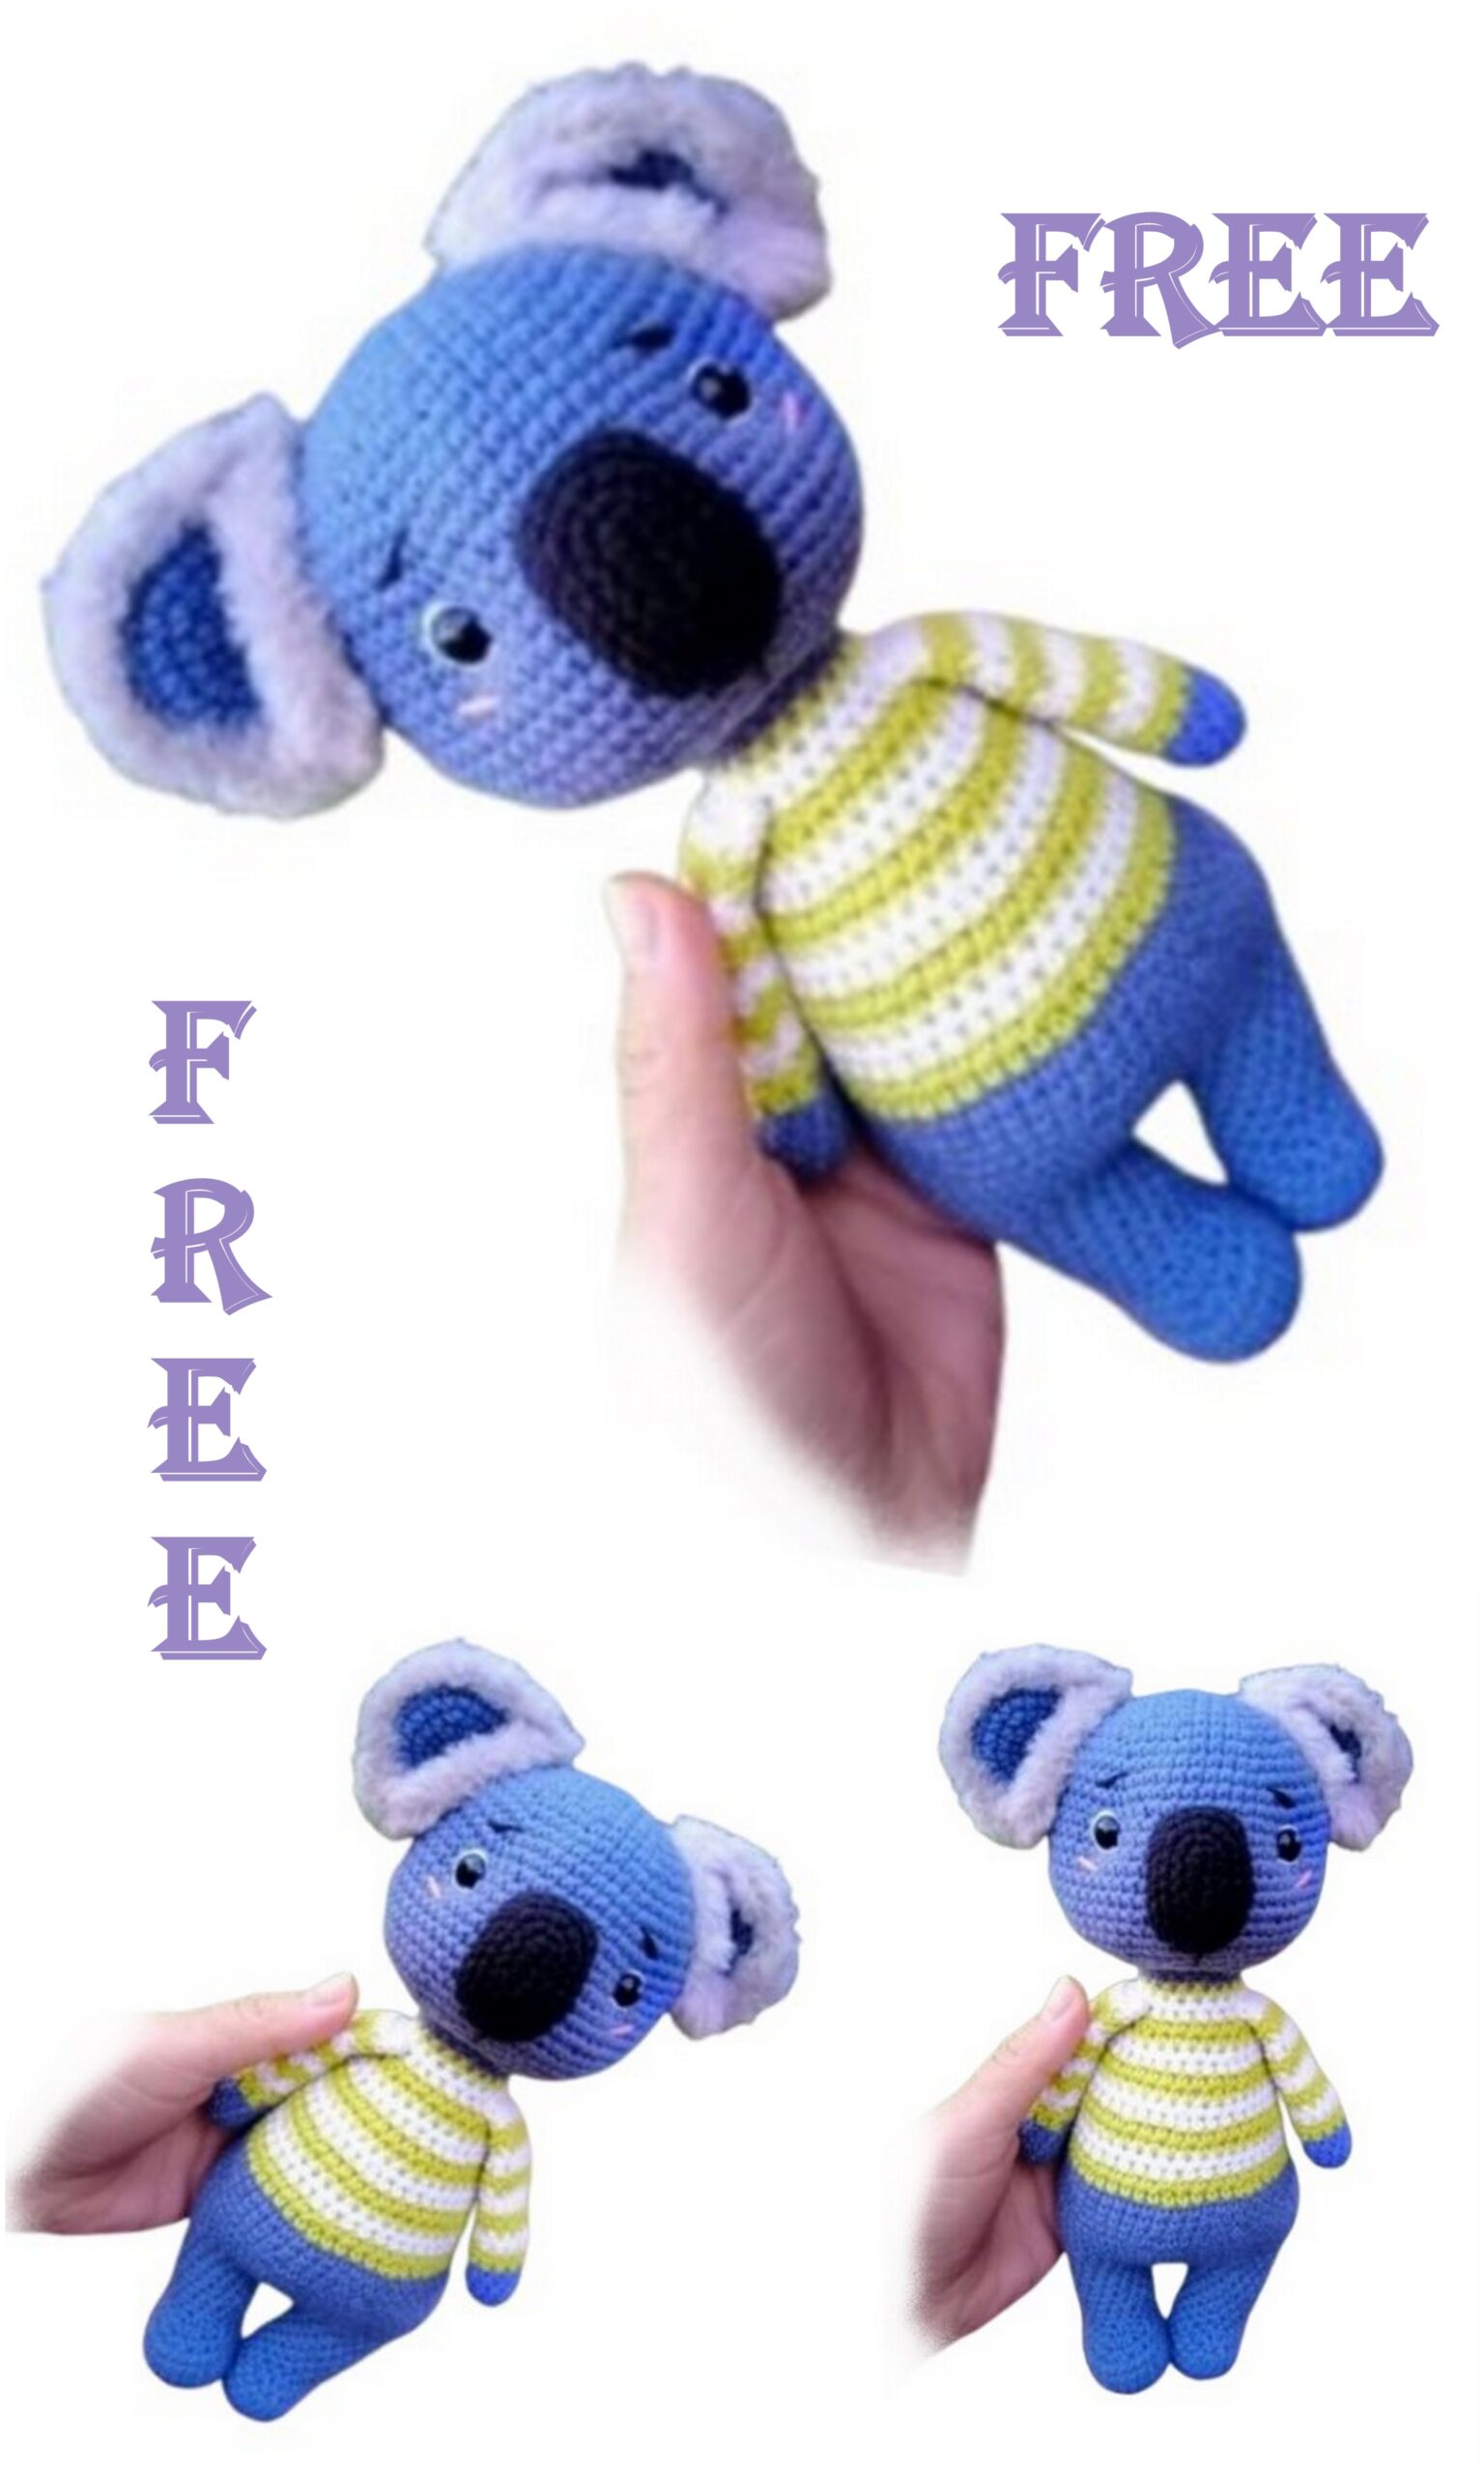
Nose
We knit with black yarn.
1 row. Chain of 7 ch. In the 2nd loop from the hook, knit 5 sc,
3 sc in 1 st, 4 sc, inc. (fourteen)
2 row. İnc, 4 sc, (inc) х3, 4 sc, (inc) х2 (20)
3 row. 1 sc, inc, 4 sc, (1 sc, inc) х 3, 4 sc, (1 sc, inc) х 2 (26)
4-5 row. 26 sc (2 rows).
We leave a long thread for sewing on the nose.
Tightening
Sew the nose to the head between rows 13 and 23. Without sewing
fill the spout to the end (not very tightly) and sew up the remaining hole.
Further stepping back from the nose 3 sc to the right and to the left, place a marker.
Into the hole that we did not pull together at the end of the knitting of the head, we introduce the needle and bring it out to the place where the marker is.
Then we retreat 2 loops to the left, as shown in the photo, insert the needle and bring it back into the hole. We tighten the threads, making a tightening. We tie knots. For reliability, you can repeat it a couple of times.
Then we again insert the needle into the hole and bring it out a row above the marker and insert it on the row below the marker. We withdraw the thread into the hole. We tighten the threads, making a tightening. We tie knots.
Thus, we get the threads crosswise.
!!! Make sure that when tying knots, the tightening does not loosen.
In the same way, we make a tightening under 2 eyes.
Cut the threads and hide them inside.
We glue the eyes and embroider squirrels, eyebrows and blush.

Ears
We knit with a gray thread.
1 row. 6 sc into magic ring (6)
2 row. (İnc) x 6 (12)
3 row. (1 sc, inc) x 6 (18)
4 row. 1 sc, inc, (2 sc, inc) х 5, 1 sc (24)
5 row. (3 sc, inc) x 6 (30)
6 row. 2 sc, inc, (4 sc, inc) х 5, 2 sc (36)
!!! We knit 4 parts.
On 2 parts, leave a long thread for sewing the ears.
7 row. We take 2 parts each and fold them to each other with the wrong side.
And now we tie them with YarnArt Mink 36 sc.
Capturing the loops of 2 pieces.
!!! We do not stuff the part.
Fold the ears in half and sew the base.
Pens
We begin to knit with gray yarn.
1 row. İNTO MAGİC RİNG knit 6 sc. (6)
2 row. (İnc) x 6 (12)
3 – 6 row. 12 sc (3 rows)
Change the thread color to the olive color of the sweater:
7-8 row. 12 sc olive
9 – 10 row. 12 sc in white
11 – 12 row. 12 sc olive
13-14 row. 12 sc in white
15-16 row. 12 sc olive
17 – 18 row. 12 sc in white
19 – 20 row. 12 sc olive
21 – 22 row. 12 sc in white.
!!! We fill the part not very tightly up to the 9th row. We leave a long thread for sewing.

Legs + body
Left leg
We knit with a gray thread.
1 row. İNTO MAGİC RİNG knit 6 sc. (6)
2 row. (İnc) x 6 (12)
3 row. (1 sc, inc) x 6 (18)
4 row. 1 sc, inc, (2 sc, inc) х 5, 1 sc (24)
5 – 7 row. 24 sc (3 rows)
8 row. 8 sc, (dec) x 4, 8 sc (20)
9 row. 8 sc, (dec) x 2, 8 sc (18)
10 row. 7 sc, (dec) x 2, 7 sc (16)
11 – 17 row. 16 sc (7 rows)
!!! Make sure the marker is exactly in the middle of the back of the leg.
Row 18. 13 sc.
We fasten the thread with SL-ST and cut it off.
!!! We fill the part in the knitting process as much as possible raft her.
Right leg
We knit with a gray thread.
1 row. İNTO MAGİC RİNG knit 6 sc. (6)
2 row. (İnc) x 6 (12)
3 row. (1 sc, inc) x 6 (18)
4 row. 1 sc, inc, (2 sc, inc) х 5, 1 sc (24)
5 – 7 row. 24 sc (3 rows)
8 row. 8 sc, (dec) x 4, 8 sc (20)
9 row. 8 sc, (dec) x 2, 8 sc (18)
10 row. 7 sc, (dec) x 2, 7 sc (16)
11 – 17 row. 16 sc (7 rows)
!!! Make sure the marker is exactly in the middle of the back of the leg.
!!! We stuff the part in the knitting process as tightly as possible.
Row 18. 16 sc
19 row. 3 sc.
!!! The thread is not cut, we continue to knit the body.
1 row. Chain of 6 ch, attach the chain to the left leg where we finished knitting with sc, 15 sc along the left leg, 6 sc along the chain, 16 sc along the right leg, 6 along the chain. We put a marker, and this will now be a new beginning of the row.
2 row. 44 sc
3 row. (3 sc, inc) x 11 (55)
4 row. 55 sc
5 row. 19 sc, (inc) x 9, 27 sc (in this row, see that the increments are in the center – this will be a belly) (64)
6 – 8 row. 64 sc (3 rows)
9 row. (6sc, dec) x 8 (54)
10 row. (5 sc, dec) x 8 (48)
11 – 12 row. 48 sc (2 rows)
!!! Change the color to the color of the sweater olive.
13 row. 48 sc
Row 14. (4 sc, dec) x 8 (40)
!!! Change to white and so alternate every 2 rows until the end of knitting.
!!! We stuff the part tightly during the knitting process.
15 – 19 row. 40 sc (5 rows)
20 row. (8 sc, dec) x4 (36)
21 row. 36 sc
Row 22. (7 sc, dec) x4 (32)
23 row. 32 sc
24 row. (6 sc, dec) x4 (28)
Row 25. 28 sc
26 row. (5 sc, dec) x4 (24)
27 row. 24 sc
Row 28. (4 sc, dec) x4 (20)
Row 29. 20 sc
Change the thread to gray
30 – 31 rows. 20 sc.
We fasten the thread and leave a long tip for sewing.
!!! Fill your neck tightly so that your head does not dangle later.
Assembly
We sew the ears to the head, stepping back from the crown of the 4 rows. Seam # 1 runs between rows 6 and 7.
Seam # 2 runs between rows 4 and 5 Look at the photo.
Sew the head tightly to the body. For reliability, it is better to walk a couple of times.
Sew the handles between 28 and 27 rows.
Now let’s get down to shorts
We collect a chain of 58 ch and close it in a ring. Next, knit 8 rows of 58 DC.
Row 9 knit 58 sc. We do not cut the thread, we will knit a strap.
Knit row 10 with 4 sc, then knit in pivoting rows of 4 sc at the end of the row, use ch 38 rows.
Fold the shorts in half, find the center and count 25 loops on the idle, sew the middle by grabbing 4 loops on both sides.
Thus, we get 25 loops for the holoshe.
Sew the strap, stepping back a little to the left.
Sew on a button.
Have fun knitting Liam !!!!
Success!