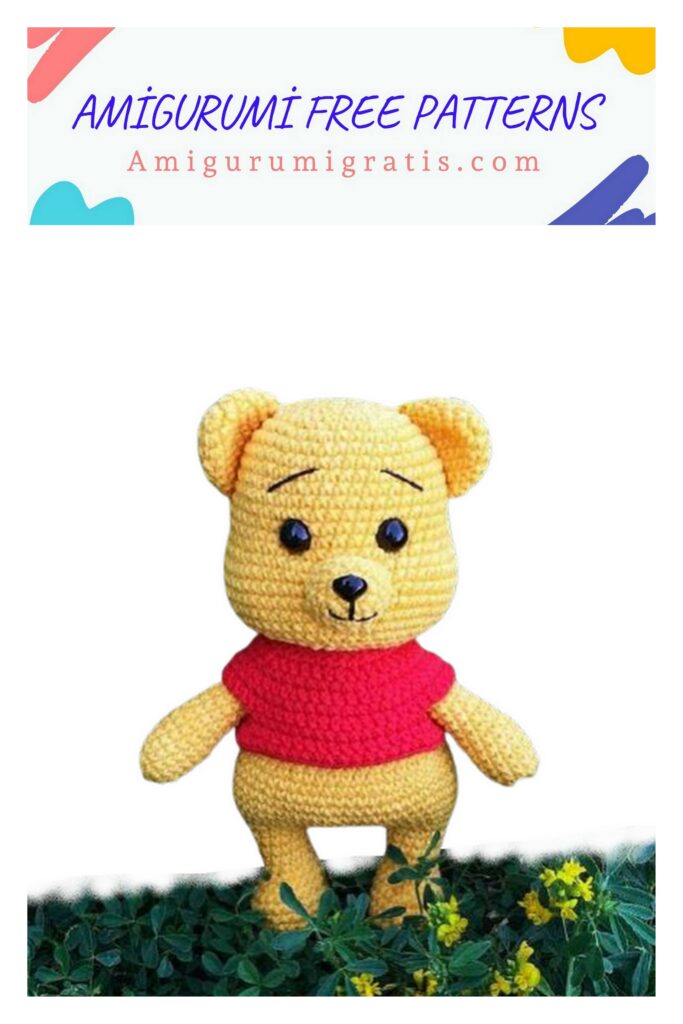
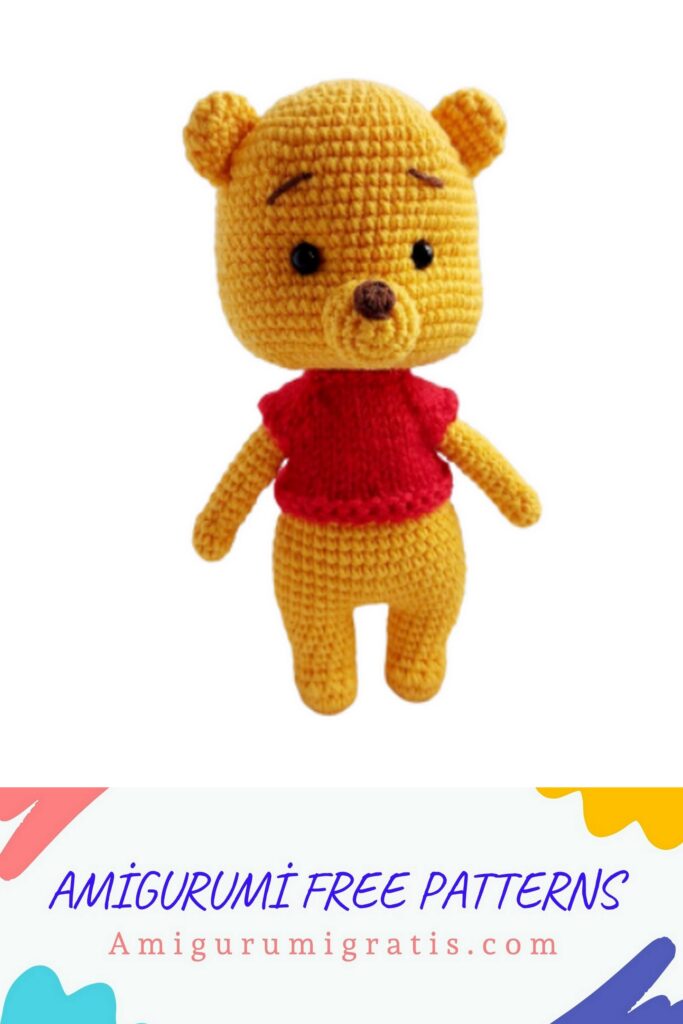
“Winnie the Pooh”
We continue to share the most beautiful amigurumi patterns. Now we are sharing the amigurumi free winnie the pooh pattern. You can browse our website for free crochet patterns.
Materials (edit)
1. YarnArt Jeans 35-grit, main color, slightly less than a skein
2. Alize Cotton Gold 56-red, just a little for a blouse
3. Black thread for eyebrow and smile embroidery
4. Hook number 2
5. Black eyes on the safety mount 10 mm
6. Spout for gluing 7mm x 9mm
7. Two buttons 9-10 mm
8. Filler
9. Glue
10. Needle for stitching parts
abbreviations
• ch. – air loop
• sc – single crochet
• inc- increment
• dec – decrease
Let’s start knitting)))
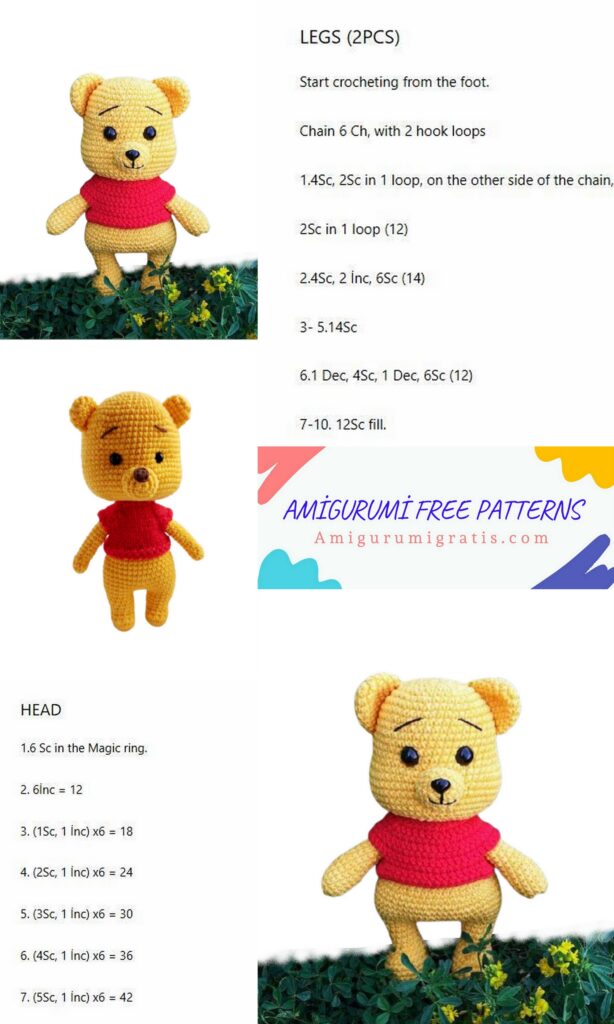
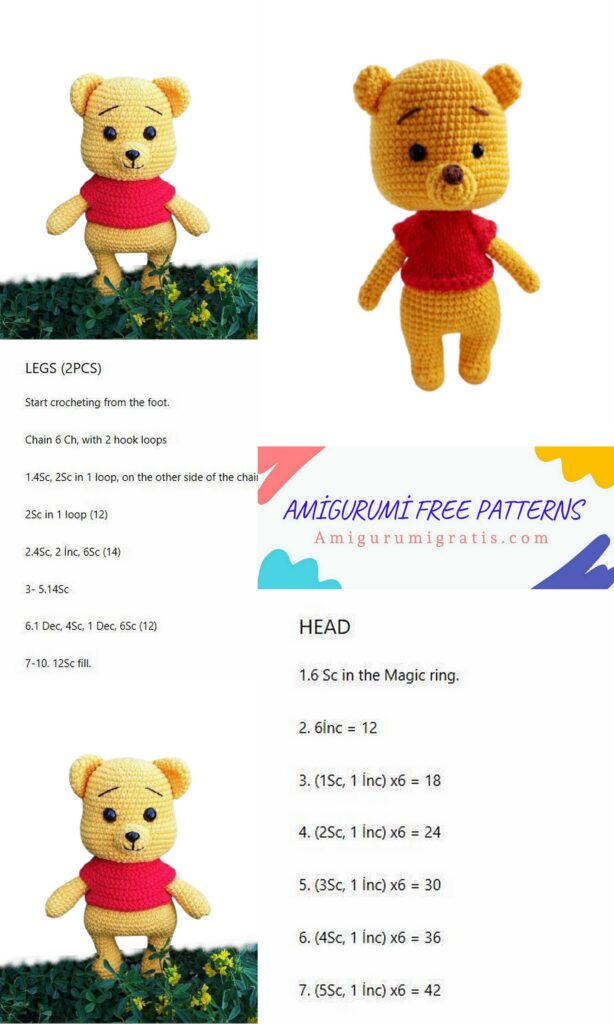
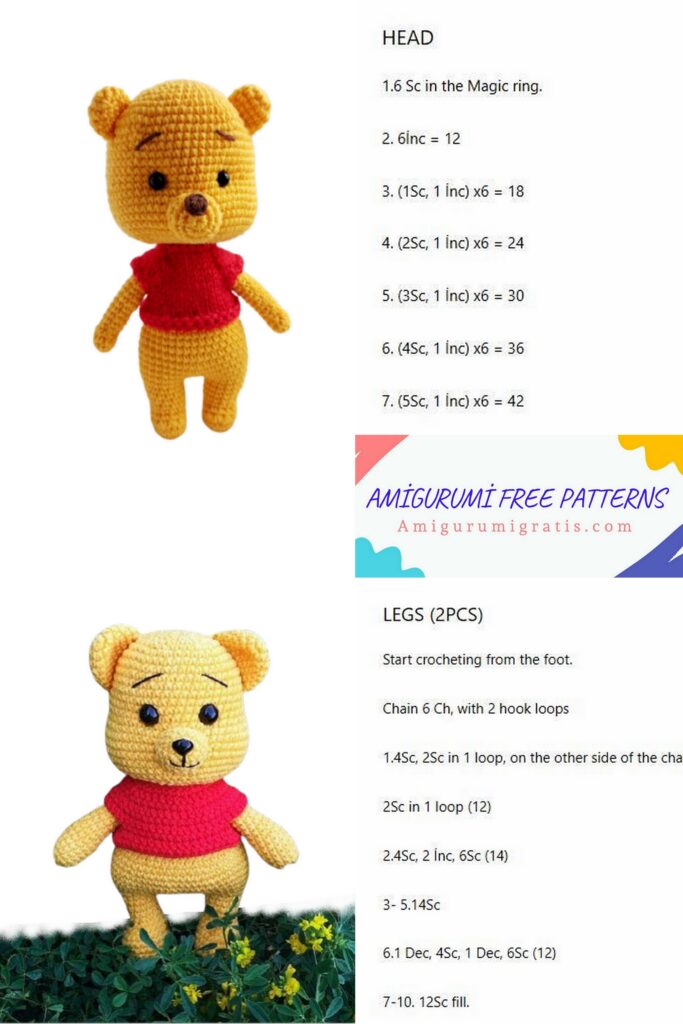
Head
1) 6 sc into magic ring
2) 6 inc = 12 sc
3) (1 sc, inc) х6 = 18 sc
4) 1 sc, inc, (2 sc, inc) х5, 1 sc = 24 sc
5) (3 sc, inc) x6 = 30 sc
6) 2 sc, inc, (4 sc, inc) х5, 2 sc = 36 sc
7) (5 sc, inc) x6 = 42 sc
8) 3 sc, (6 sc, inc) х5, 3 sc = 48 sc
9-16) 48 sc (8 rows)
17) 6 sc, 6 inc, 14 sc, 6 inc, 16 sc = 60 sc
18-21) 60 sc (4 rows)
22) 4 sc, dec, (8 sc, dec) х5, 4 sc = 54 sc
23) (7 sc, dec) х6 = 48 sc
Insert eyes between 14-15 rows at a distance of 7 sc, centered between the cheeks
24) 3 sc, dec, (6 sc, dec) х5, 3 sc = 42 sc
25) (5 sc, dec) x6 = 36 sc
26) 2 sc, dec, (4 sc, dec) х5, 2 sc = 30 sc
27) (3 sc, dec) х6 = 24 sc, ss, cut the thread and hide
Ears (2 parts)
1) 6 sc into magic ring
2) 6 inc = 12 sc
3) (1 sc, inc) х6 = 18 sc
4-7) 18 sc (4 rows)
Fold the piece in half, knit by both sides 9 sc, leave the thread to sew on
Muzzle
1) 6 sc into magic ring
2) 6 inc = 12 sc
3) (3 sc, inc) х3 = 15 sc
4) 15 sc
5) (4 sc, inc) х3 = 18 sc, ss, leave thread for sewing
Glue the nose to the muzzle
Sew on the muzzle, stuffing it (at the level of 17-22 rows)
Tightening (see photo, we do it symmetrically on both sides)
Sew on the ears
We embroider eyebrows and a smile
Legs + body
First we knit two legs
1) 5 ch., Starting from 2nd: 3 sc, 3 sc in 1 loop, 2 sc, inc = 10 sc
2) İnc, 2 sc, 3 inc, 2 sc, 2 inc = 16 sc
3) 1 sc, inc, 2 sc, (1 sc, inc) х3, 2 sc, (1 sc, inc) х2 = 22 sc
4) 22 sc for back sts 3 rows
5-7) 22 sc (3 rows)
8) 6 sc, 4 dec, 8 sc = 18 sc
9) 5 sc, 3 dec, 5 sc, dec = 14 sc
10-13) 14 sc (4 rows)
We do not cut the thread on the right leg, knit another 4 sc, dial 7 ch. and
connect with the left leg
Now we knit the body
14) 14 sc on the left leg, 7 sc along the chain of ch., 14 sc along the right leg, 7 sc along the chain of ch. = 42 sc
15) (6 sc, inc) x6 = 48 sc
16) 12 sc, (inc, 1 sc) х8, 20 sc = 56 sc
17-20) 56 sc (4 rows)
21) (5 sc, dec) х8 = 48 sc
22) 48 sc
23) (6 sc, dec) x6 = 42 sc
24-27) 42 sc (4 rows)
28) (5 sc, dec) x6 = 36 sc
29-32) 36 sc (4 rows)
33) (4 sc, dec) х6 = 30 sc
34) (3 sc, dec) x6 = 24 sc
Fasten the thread, leave a long end for sewing
Tail
1) 6 sc into magic ring
2) 6 inc = 12 sc
3-4) 12 sc
Upper legs (2 parts)
1) 6 sc into magic ring
2) 6 inc = 12 sc
3) (5 sc, inc) х2 = 14 sc
4-7) 14 sc (4 rows)
8) (5 sc, dec) x2 = 12 sc
7-13) 12 sc (7 rows)
Fold in half, knit 6 sc on both sides, leave thread to sew
Sew on the tail at the back in the center Sew on the upper legs

Blouse
We knit in rotary rows
1) 44 ch. Starting from 9th loop: 36 sc
2) 1 ch., (5 sc, inc) х6 = 42 sc
3) 1 ch., 42 sc
4) 1.ch., 3 sc, inc, (6 sc, inc) х5, 3 sc = 48 sc
5) 1 ch., 48 sc
6) 1 ch., (7 sc, inc) х6 = 54 sc
7) 1 ch., 9 sc, 8 ch., Skip 10 sc, 16 sc, 8 ch., Skip 10 sc, 9 sc = 50 sc
8) 1 ch., 50 sc
9) 8 ch, 50 sc.
Sew on two buttons