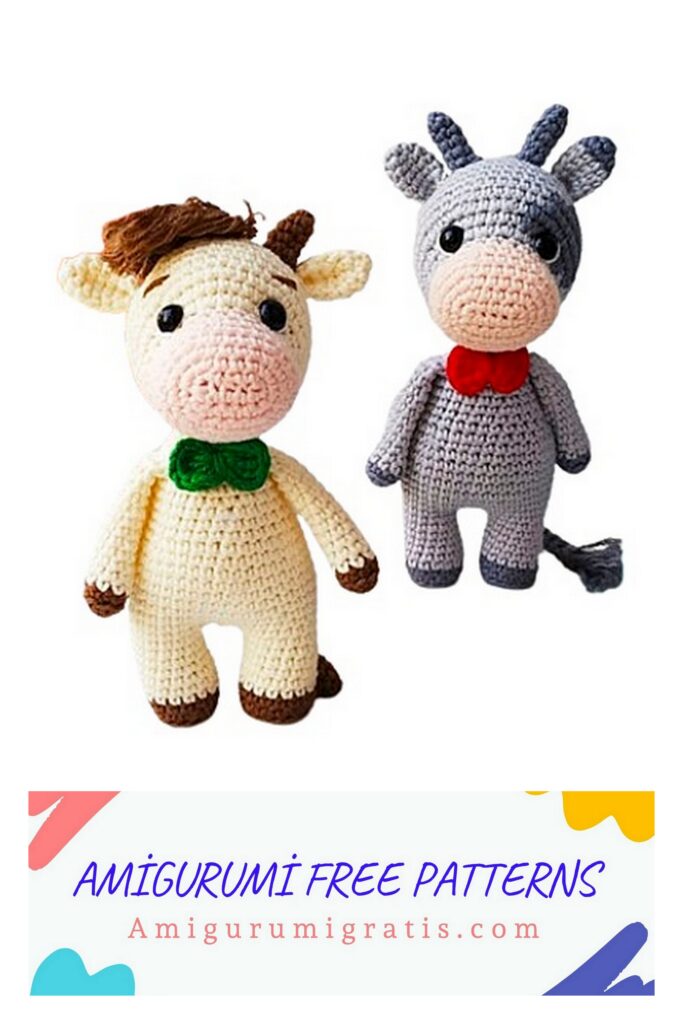
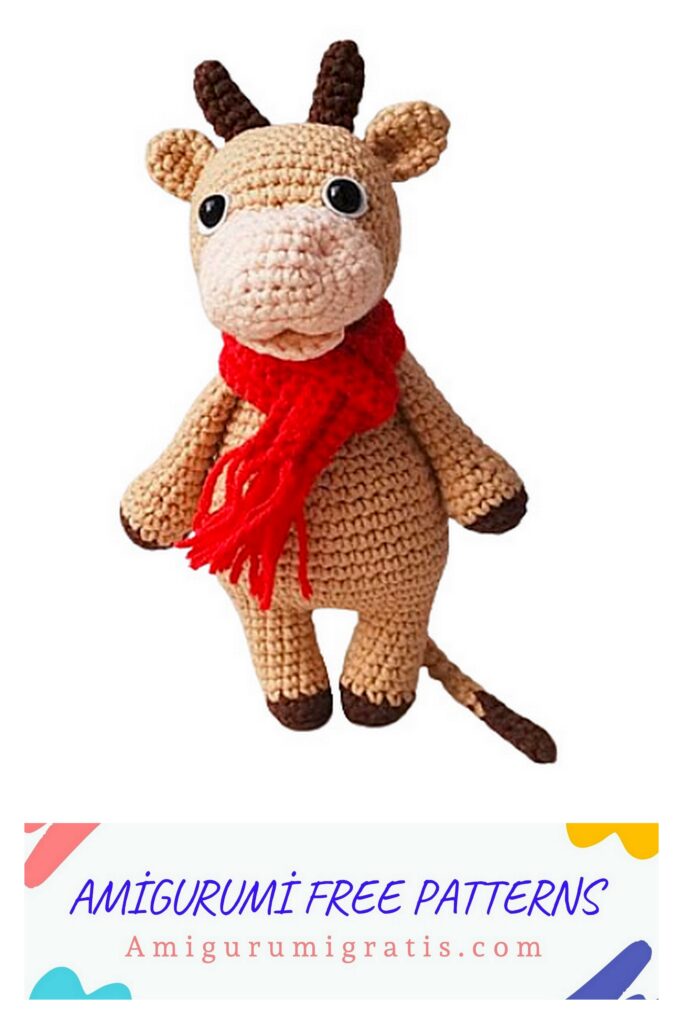
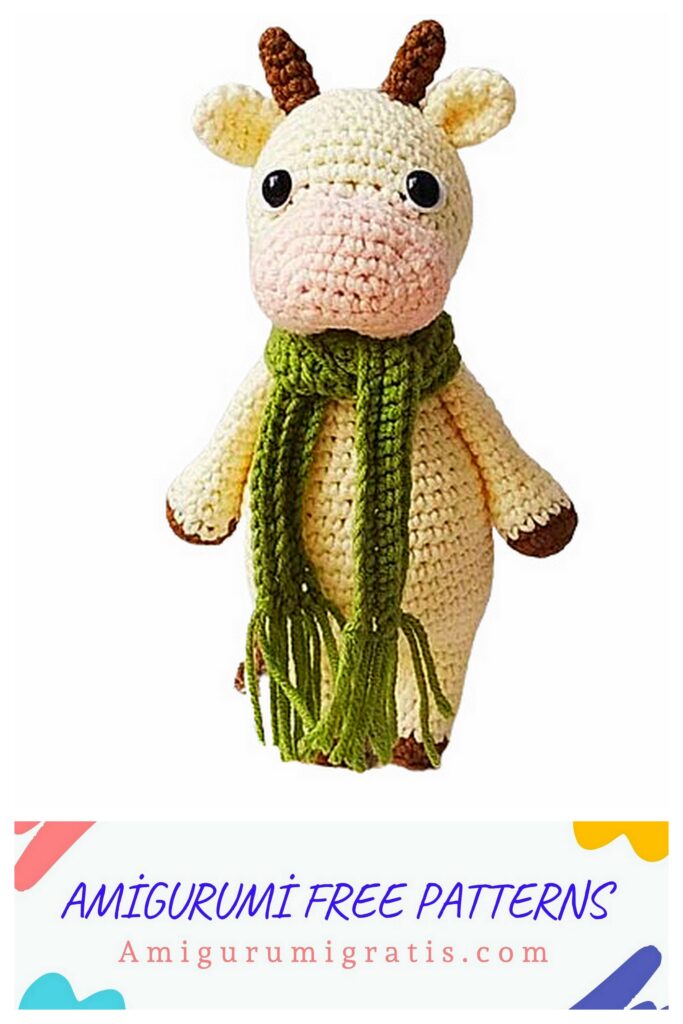
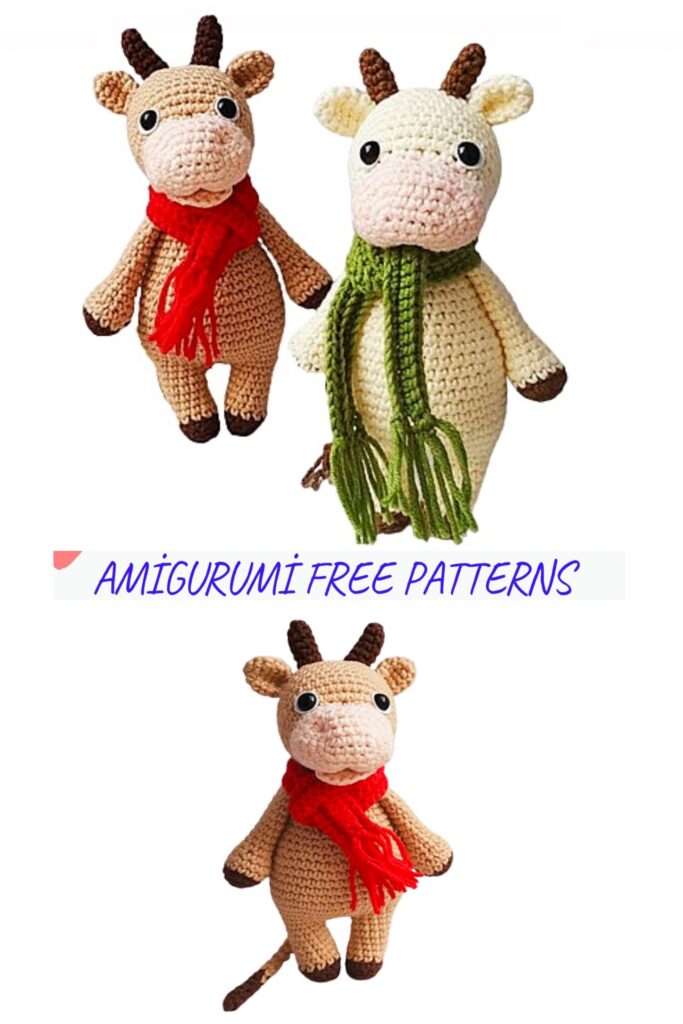
Embrace the strength and charm of the Amigurumi Bull with our free crochet pattern! If you’re a fan of unique and symbolic crochet creations, you’re in for a treat. This amigurumi bull isn’t just a project; it’s a representation of resilience and determination. Whether you’re a seasoned crocheter or a beginner, our free pattern provides step-by-step instructions to bring this powerful and lovable bull to life.
Our Amigurumi Bull crochet pattern is designed to be accessible for creators of all skill levels, offering a rewarding and enjoyable experience. With clear instructions and accompanying images, crafting your own amigurumi bull has never been more delightful.
Required materials and tools:
You can choose any colors, as well as the type of yarn.
-Yarn for knitting a bull – semi-cotton YarnArt Jeans for the body color No. 86 (cream), color No. 40 (brown) and pink No. 73 for the muzzle,
– for horns color No. 40 (brown)
– for a scarf color number 69 (green), you can number 29 (light green).
-hook number 2 (you can 2.5)
-filling – holofiber
– eyes on a secure mount 8 mm
– white felt for the white of the eyes,
-Sewing needle, scissors, pins, knitting marker (you can just yarn in a contrasting color)
Abbreviations
AR – Amigurumi Magic ring
MR – Amigurumi Magic ring
App – application
ll – lift loop
sc : Single Crochet
inc : Increase
ol: ofset loops
dec : Decrease
tr : Triple Crochet/ Treble Crochet
st: Stitch
dc : Double Crochet
hdc: Half Double Crochet
sl-st : Slip Stitch
ch : Chain
..in : make increase into same stitch as many as the number which is given in front of “inc” abbreviation (exp; 3inc, 4inc..).
FLO : Crochet into front loops only
BLO : Crochet into back loops only
BL : Bobble Stitch – do 5dc all in the same stitch and then yarn over and pull through all the loops on your hook (the original loop + 1 loop for each partially completed dc).
Arms
We start with brown yarn
1 р. – 6 sc in MR (6)
2 р. – 6 inc (12)
3 р. – (3 sc, 1 inc) *3 (15)
Change the yarn color to beige
4 – 5 р. 15 sc (15)
6 р. – (3 sc, dec.)*3 (12)
7 р. – (4 sc, dec.)*2 (10)
Fill the handle with holofiber. Further, do not fill, so that the hands do not bulge after being tied into the body.
8-16 р. – 10 sc
17 р. Fold the handle in half and connect by knitting 5 sc. Fasten and cut the yarn.
We knit the second hand in the same way.

Tail
1 p. Dial with brown yarn 5 sc in MR.
2 – 5 p. – 5sc
Change yarn to body color
6-18 p. – 5 sc.
Knit a ponytail to the desired length.
Cut the yarn, leaving the tip for sewing to the body.
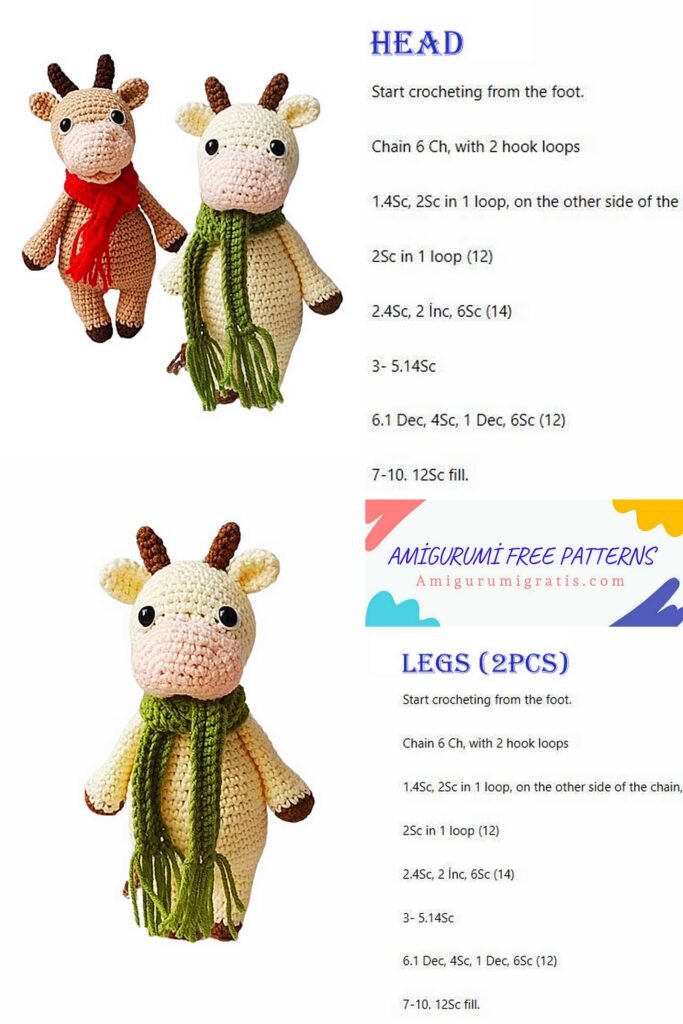
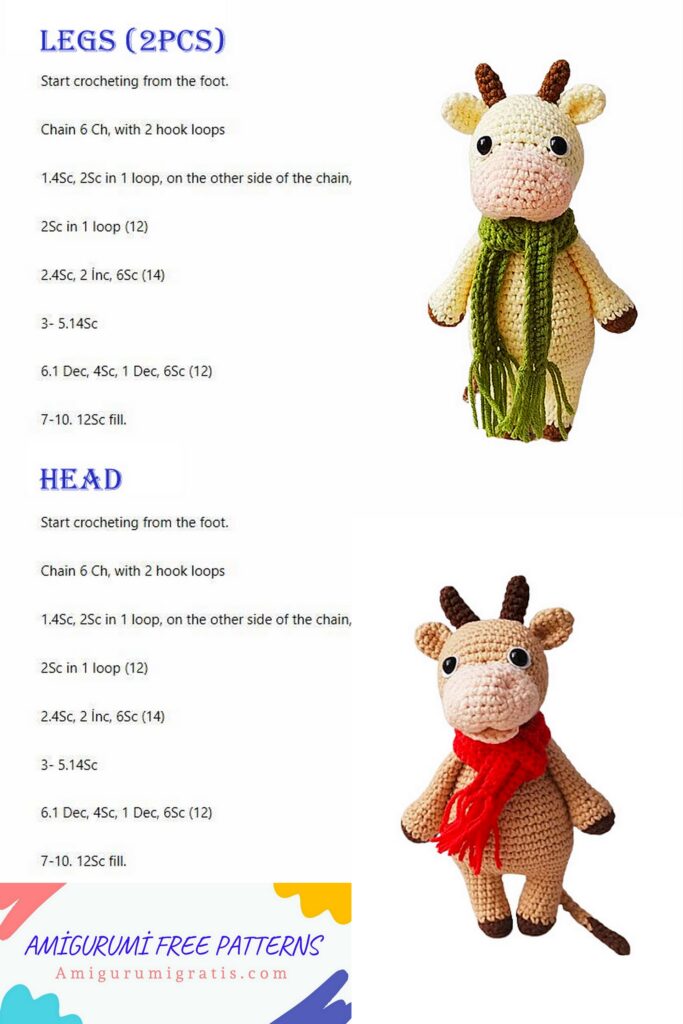
Legs (2 times)
We start with brown yarn
1 р. – 5 sc in MR (5)
2 р. – 5 inc (10)
3 р.- behind the back loop (half loops)10 sc (10)
4 р. – 1 inc 9 sc (11)
Change the yarn to beige
5 р.– 11 sc
6 р. – 1 inc, 10 sc (12)
7-10 р. -12 sc (12)
11 р. – 6 sc., slst. These are offset loops (ol)
Fasten the yarn, cut off.
We knit the second leg in the same way, only we knit 10 ol and do not cut the yarn!
Fill the legs tightly.
Body
Continue knitting with beige yarn. Connect the legs: 3ch, slst at the base of the last column of the first leg, 12 sc along the first leg, 3 sc along the chain of ch, 12 sc along the second leg, 3 sc along the back of the chain ch. (30)
We put a marker – this will now be the beginning of knitting the body.
1 р. – 30 sc (30)
2 р. – (4 sc 1inc,) * 6 (36)
3 р. – (5 sc 1inc,) * 6 (42)
4 -10 p. – 42 sc
11 р. – (5 sc, dec) * 6 (36)
12 – 13 р. – 36 sc (36)
14 р. -(4 sc, dec) * 6 (30)
15 р. – 30 sc
16 р. – (8 sc.dec)*3 (27)
17 р.- 27 sc
18 р. – (7 sc.dec)*3 (24)
19 р. – 24 sc
20 р. – (6 sc.dec)*3 (21)
We knit hands
21 р. – 5 sc, 5 sc (knit the hand), 6 sc, 5 sc ( knit a hand) (21)
22 р. – 7 sc, 1 dec., 4 sc, 1 dec., 3 sc, 1 dec., 1 sc. (18)
23 р. – 15 sc, slst. Fasten the yarn, cut, leaving the tail of the yarn for sewing.
(thus, we do not knit to the end, this is necessary so that from the back in the neck area it is higher than from the front. So the head will look better when fastening)
The body is connected.

Head
We start with pink yarn.
Dial 6ch
1 р. – starting from the second st from 4 sc., 3 sc in one st, 3 sc along the second side of the chain, 1 inc(12)
2 р. – inc, 3 sc, 3 пр, 3 sc, 2 inc (18)
3 р. – 1 sc, inc, 3 sc, (1 sc, inc) * 3, 3 sc, (1 sc, inc)* 2 (24)
4 р. – 2 sc, inc, 3 sc, (2 sc, inc) * 3, 3 sc, (2 sc, inc)* 2 (30)
5 р. – 30 sc
6 р. – dec., 4 sc, dec, 6 sc, dec, 6 sc, dec, 6 sc (26)
7 р. – dec, 9 sc, dec, 13 sc (24)
We knit 5 ol (the beginning next to it will now be in the middle of the head)
Change yarn color to body color
8 р. – 24 sc
9 р. – inc, 5 sc, 1 inc, 3 sc, 5 inc, 3 sc, 1 inc, 5 sc (32)
Make sure the increases are in the middle.
10 р. – 7 sc, 1 inc, 4 sc, 1 inc, 8 sc, 1 inc, 3 sc, 1 inc, 5 sc (36)
11-17 p. – 36 sc
At this stage, you need to insert the eyes between 9 and 10 rows at a distance of 10 columns between them. (10 columns are 5 increments of the 9th row) Cut a circle out of felt (I have foamiran) as follows: put the cap from the eye on the felt, circle it, cut it out at a distance of 1 mm from the drawing line. Make a hole in the circle (not in the middle, but closer to the edge), insert the eyes. Now we insert into the head.
18 р. – (4 sc, dec,) * 6 (30)
19 р. – 30 sc
20 р. – ( 3 sc, dec) * 6 (24)
21 р. – (2 sc, dec ) * 6 (18)
22 р. – (1 sc, dec) * 6 (12)
23 р. – 6 dec (use a needle to close the hole)
We stuff the head as we knit the head. Try to stuff it very tightly.
Face tightening
To begin with, we make a tightening.
We outline the places for tightening with pins (see photo).
Tightening using a