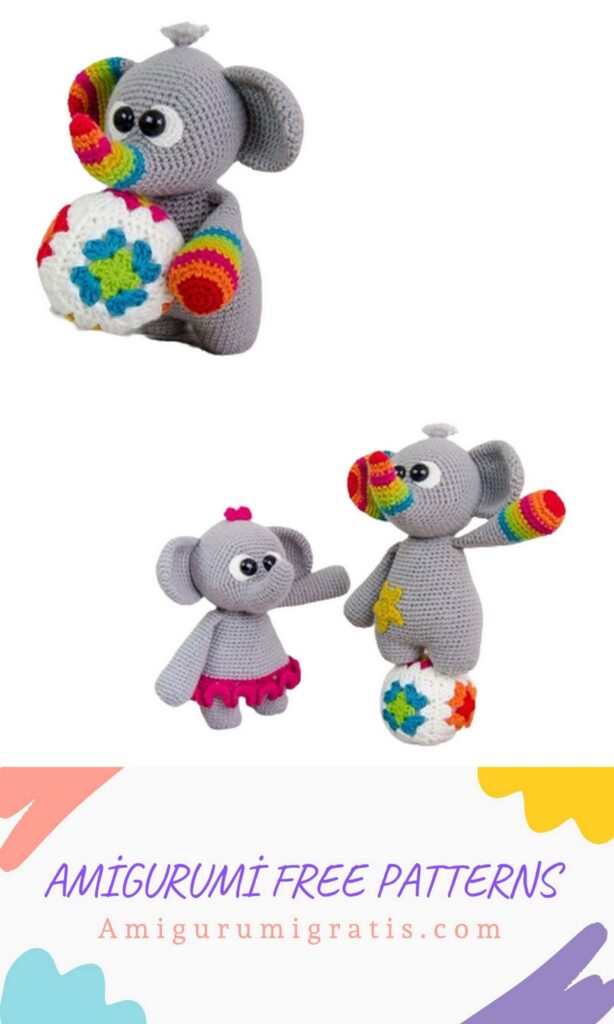
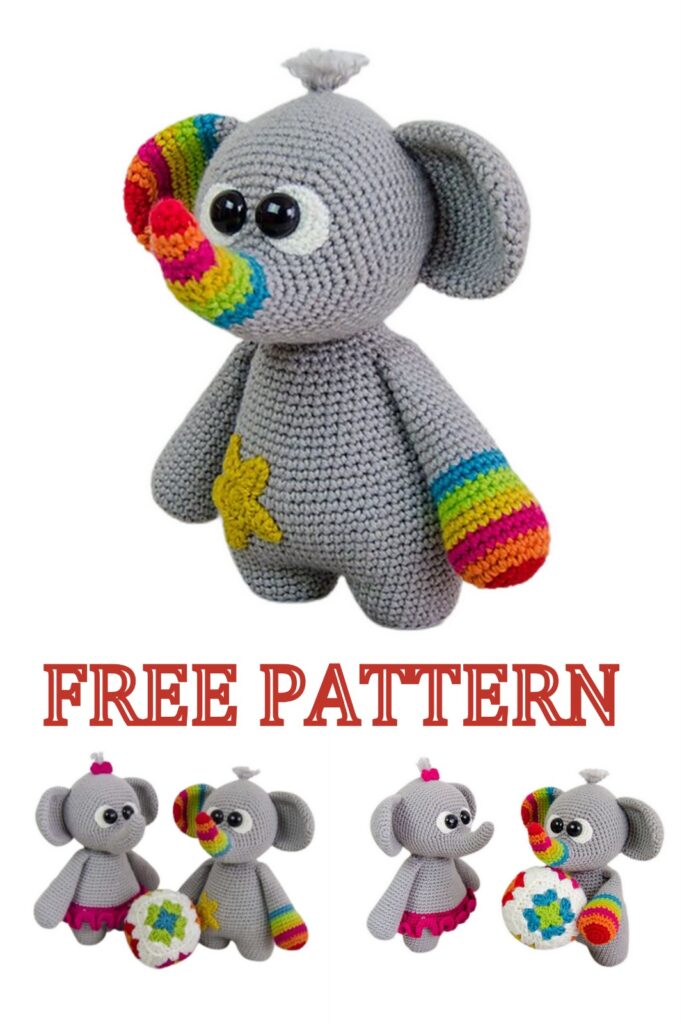
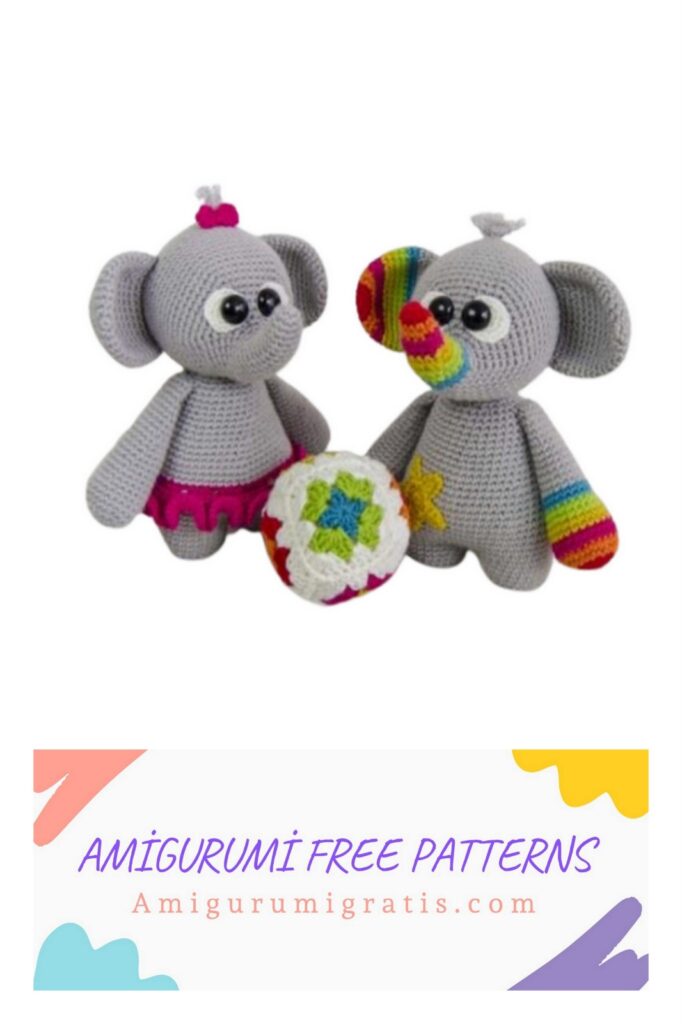
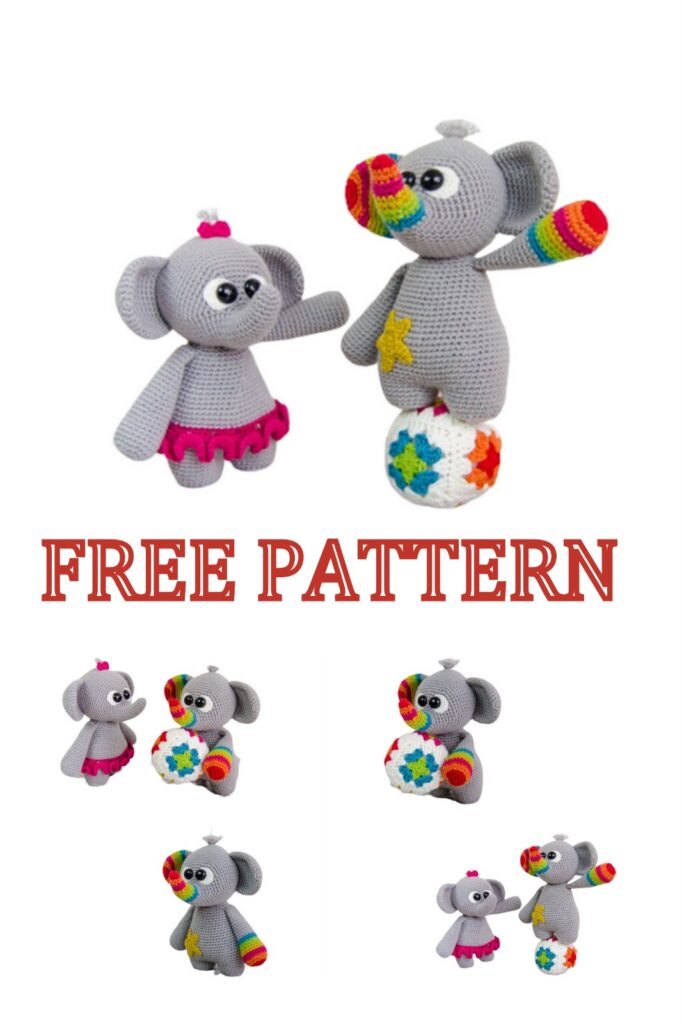
DASH AND DOT THE LITTLE ELEPHANTS


Start here…
– Please read the complete pattern so that you can have a good overview of the whole.
– This amigurumi is made with the following parts:
– 1 Head with 2 ears
– 2 Arms
– 1 Body
– 1 Circus ball
– Optional: 1 small bow or 1 small star
– Measures 26 cm.
materials
3mm and 4mm crochet hook.
Thread in seven colors: Red, Orange, Fuchsia, Gold, Green, Turquoise and Gray.
Finest white thread.
Filling
21mm safety eyes
Some pink sequins
Scissors and sewing needle
Notes:
– The ch and sl-st are not counted as points in the rounds.
– The orientation of all parts of the pattern are front.
Abbreviations:
sc -> low point
dc -> high point
hdc -> half double crochet
sl-st -> slip stitch
ch -> chain
inc -> increase
dec -> decrease
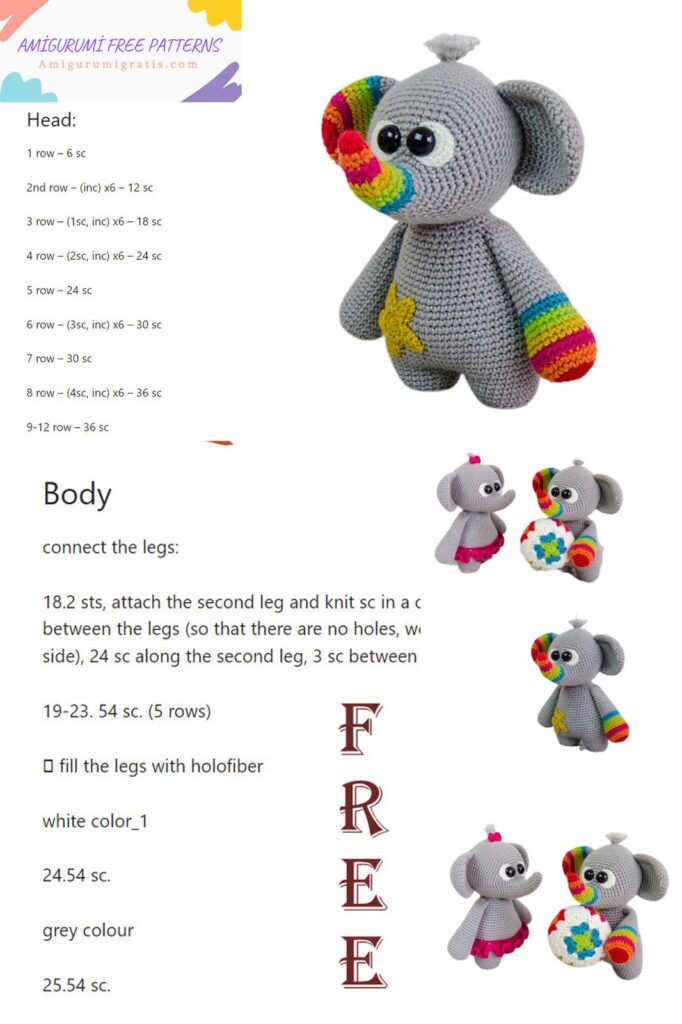
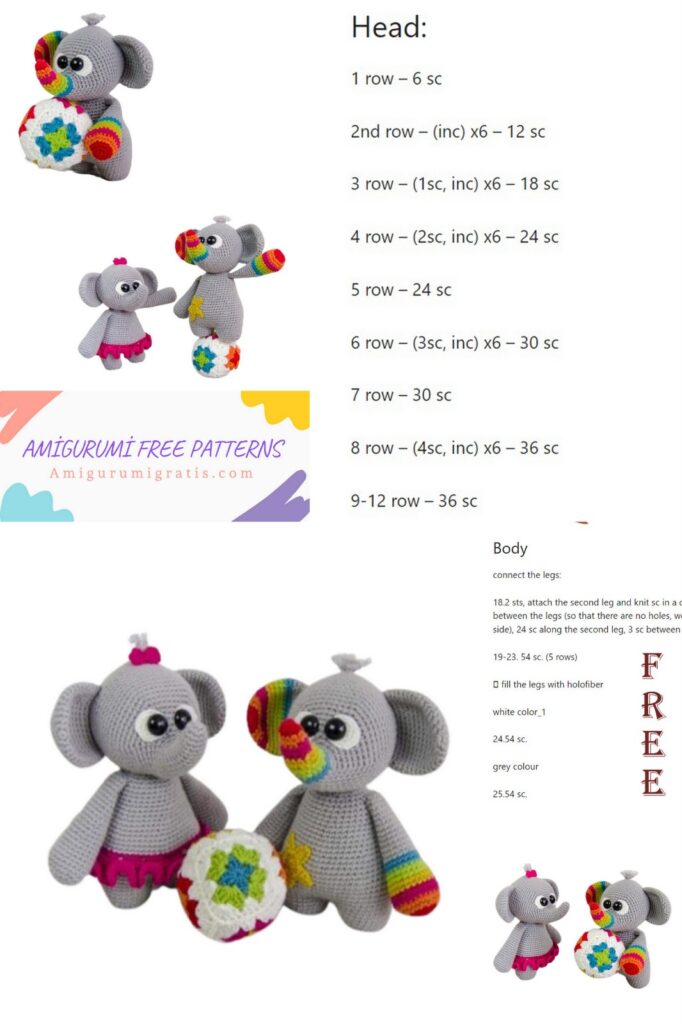
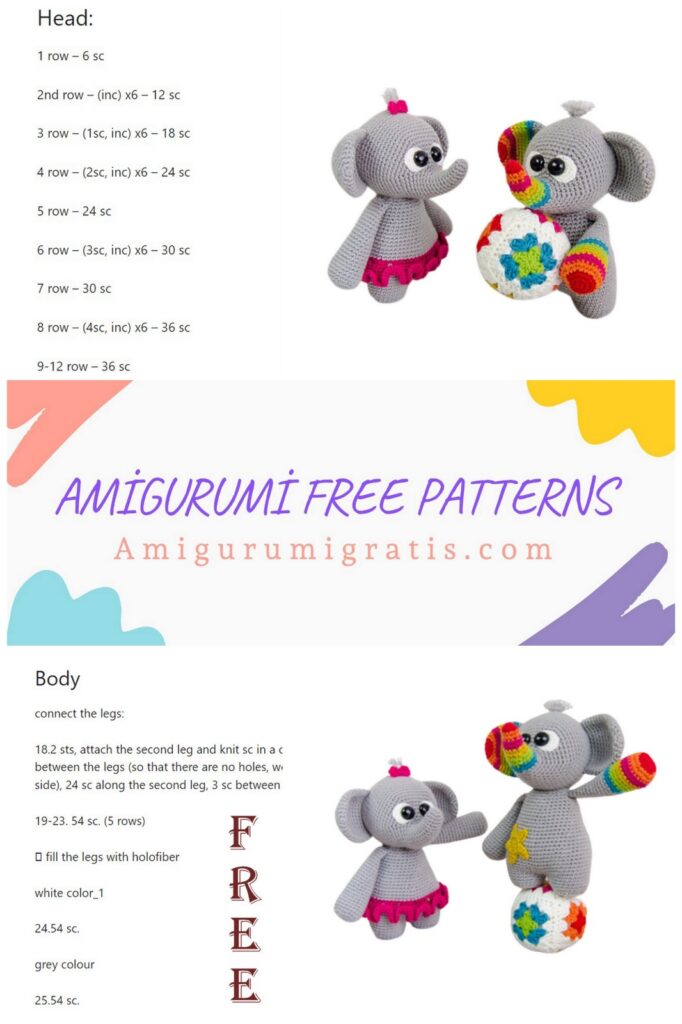
Head
It works in a spiral, so you will need to use a row marker. With the gray thread, make a magic ring with 6 sc.
1. (1 sc, 1 inc) x 3 (9)
2. 9 sc (9)
3. 2 inc, 7 sc (11)
4 – 5. 11 sc (11)
6. (1 sc, 1 inc) x 2.7 sc (13)
7. 13 sc (13)
8. (2 sc, 1 inc) x 2.7 sc (15)
9. 15 sc (15)
10. (3 sc, 1 inc) x 2.7 sc (17)
11. 17 sc (17)
12. (4 sc, 1 inc) x 2.7 sc (19)
13. 19 sc (19)
14. 4 sc (1 sc, 1 inc) x 4.7 sc (23)
15. 4 sc (2 sc, 1 inc) x 4.7 sc (27)
16. 4 sc (3 sc, 1 inc) x 4.7 sc (31)
17. 4 sc (4 sc, 1 inc) x 4.7 sc (35)
18. 4 sc (5 sc, 1 inc) x 4.7 sc (39)
19. 4 sc (6 sc, 1 inc) x 4.7 sc (43)
20. 4 sc (7 sc, 1 inc) x 4.7 sc (47)
21. 4 sc (8 sc, 1 inc) x 4.7 sc (51)
22. 4 sc (9 sc, 1 inc) x 4.7 sc (55)
23 – 31. 55 sc (55)
Now you need to make and sew the eyes. To learn how they are done, see the explanation below.
32. (9 sc, 1 dec) x 5 (50)
33 – 34. 50 sc (50)
35. (8 sc, 1 dec) x 5 (45)
36. 45 sc (45)
37. (7 sc, 1 dec) x 5 (40)
38. 40 sc (40)
39. (6 sc, 1 dec) x 5 (35)
40. 35 sc (35)
41. (5 sc, 1 dec) x 5 (30)
42. 30 sc (30)
43. (4 sc, 1 dec) x 5 (25)
44. (3 sc, 1 dec) x 5 (20)
45. (2 sc, 1 dec) x 5 (15)
46. (1 sc, 1 dec) x 5 (10)
47. 1 dec x 5 (5)
Stuff the head. Close the hole with a needle and finish.
Head (rainbow version)
– Make the following changes for the head in rainbow version.
– Each round you make with a color change you must join it with 1 sl-st and start with 1 ch.
Start the head with red thread.
On lap 2 it changes to orange.
On lap 4 change to fuchsia.
On lap 6 it changes to yellow.
On lap 8 it turns green.
On lap 10 it changes to turquoise.
On lap 12 it changes to gray.
Eyes (X2)
With the finest thread in white and a 3mm needle, make a 6 sc magic ring.
1. 2 inc, 2 ch, skip next point, 3 inc (10)
2. (1 sc, 1 inc) x 2, 3 sc in the space of the two chains, (1 sc, 1 inc) x 3 (18)
Join the end with 1 sl-st, bind off and leave a long thread to later sew.
Put your eyes on your head. Place them centered between rows 15 and 20, with the space of the two chains of each eye facing inwards and sew them together. For your reference these parts will have a separation of 2 points between them. Top it off.
Now put the safety eyes in the 2 ch holes of each white eye.
Ears (X 2)
It works in a spiral, so you will need to use a row marker. With the gray thread, make a magic ring with 6 sc.
1. 6 inc (12)
2. (1 sc, 1 inc) x 6 (18)
3. (2 sc, 1 inc) x 6 (24)
4. 24 sc (24)
5. (3 sc, 1 inc) x 6 (30)
6. 30 sc (30)
7. (4 sc, 1 inc) x 6 (36)
8 – 12. 36 sc (36)
13. (10 sc, 1 dec) x 3 (33)
14. 33 sc (33)
15. (9 sc, 1 dec) x 3 (30)
Finish off and leave long strands to sew.
Fold the edges of each ear and sew them together. Finish off and leave a long strand to sew.
Now sew the ears to the head. Place them centered between turns 32 and 33 of the head.
For your reference the ears have a distance between them of 15 points. Top it off.
Ears (rainbow version)
For this version make an ear with the following changes.
Each round you do with a color change you should join it with 1 sl-st and start with 1 ch.
Start the ear with red string.
On lap 3 it changes to orange.
On lap 5 change to fuchsia.
On lap 7 it changes to yellow.
On lap 9 it turns green.
On lap 11 it changes to turquoise.
On lap 13 it changes to gray.
Hair
To make the hair, cut a piece of gray thread about 2.5 cm long. Insert the needle through one of the stitches on the top of the head, take the thread in the middle and pass it through the stitch. Now pass the needle through the loop created with the piece of thread and pass the two strands of thread. Pulling creates a knot.
Repeat the process to put another piece of yarn in the same stitch and to put another two in the next stitch.
Now open the strands of thread helping you with a needle.
Finally cut the hair to the desired length.
Arms (X2)
It works in a spiral, so you will need to use a row marker. With the gray thread, make a magic ring with 6 sc.
1. 6 inc (12)
2. (1 sc, 1 inc) x 6 (18)
3. (2 sc, 1 inc) x 6 (24)
4 – 7. 24 sc (24)
8. (10 sc, 1 dec) x 2 (22)
9 – 10. 22 sc (22 )
11. (9 sc, 1 dec) x 2 (20)
12 – 13. 20 sc (20)
14. (8 sc, 1 dec) x 2 (18)
15 – 16. 18 sc (18)
17. (7 sc, 1 dec) x 2 (16)
18 – 19. 16 sc (16)
20. (6 sc, 1 dec) x 2 (14)
21 – 22. 14 sc (14)
23. (5 sc, 1 dec) x 2 (12)
24 – 25. 12 sc (12)
Fill in the arms, then fold the open ends and sew them together. He finishes off and leaves a long thread to sew.
Arms (Rainbow version)
For the rainbow version make one of the arms with the following changes.
Each round you make with a color change you should join it with 1 sl-st and start with 1 ch.
Start the arm with red string.
On lap 3 it changes to orange.
On lap 5 change to fuchsia.
On lap 7 it changes to yellow.
On lap 9 it turns green.
On lap 11 it changes to turquoise.
On lap 13 it changes to gray.
Legs (X2)
You must fill them in as you knit them to make this process easier.
It works in a spiral, so you will need to use a row marker. With the gray thread, make a magic ring with 6 sc.
1. 6 inc (12)
2. (1 sc, 1 inc) x 6 (18)
3. (2 sc, 1 inc) x 6 (24) Close this round with 1 sl-st.
4. Taking only the back loop, ch 1 (does not count as a stitch), sc 24 (24)
5. 24 sc (24)
6. (7 sc, 1 inc) x 3 (27)
7. 27 sc (27)
Finish off leaving a long strand on the first leg. Don’t cut the thread on the second.
Bringing the two legs together and starting the body:
Take the second leg and do:
8. 5 sc (figure 1), (take the first leg) 1 sc at point 22 (figure 2 and 3), 26 sc (figure 4), 22
sc on the second leg (figure 5 and 6) (54)
9 – 10. 54 sc (figures 7 and 8) (54)
Now you must take the excess thread from the first leg, thread a needle and make stitches to close the opening between the two legs. (figure 9 and 10)
11. (8 sc, 1 inc) x 6 (60)
12 – 17. 60 sc (60)
18. (8 sc, 1 dec) x 6 (54)
19 – 21. 54 sc (54)
22. (7 sc, 1 dec) x 6 (48)
23 – 24. 48 sc (48)
25. (6 sc, 1 dec) x 6 (42)
26 – 27. 42 sc (42)
28. (5 sc, 1 dec) x 6 (36)
29 – 32. 36 sc (36)
33. (4 sc, 1 dec) x 6 (30)
34. (1 sc, 1 dec, 2 sc) x 6 (24)
Finish off and leave a long thread to sew (figure 11 and 12)
Body (girl version)
Make the following changes for the girl’s version:
On lap 16 change to fuchsia.
On round 17 take only the back strand.
On lap 18 it changes to gray.
Skirt (girl’s version)
It works in a spiral, so you will need to use a row marker.
1. Add a new strand of fuchsia yarn to the back of the body on row 17. Work
only in the front strand of this strand. 60 sc (60)
2 – 3. 60 sc (60)
4. 60 inc (120)
5. 120 inc (240)
Top it off. Optionally you can sew some sequins on the skirt.
Tail
With the gray color do 6 ch.
1. 1 sl-st in the second ch from needle. 4 sl-st (5)
Finish off and leave long strands to sew later.
To finish the tail, cut a piece of gray thread about 2.5 cm long. Insert the needle in the last ch, take the thread in the middle and pass it through the ch. Now pass the needle through the loop created with the piece of thread and pass the two strands of thread. Pulling creates a knot.
Repeat the process to add more hair. I put 3 in total.
Now open the strands of thread helping you with a needle.
Finally cut the hair to the desired length.
Now sew the tail at the back of the body. Center it between rounds 14 and 15.
Little star (rainbow version)
It works in a spiral, so you will need to use a row marker. With the golden thread make a magic ring with 10 sc. Close the magic ring with 1 sl-st.
1. (Ch 5, 1 sc in 3rd ch from needle, 1 hdc in next ch, 1 dc in next ch, skip next stitch, 1 sl-st) x 5 (15)
Sew the little star to the body. Place it a little to the left between laps 13 and 23.
Top it off.
Little tie (girl version)
With fuchsia thread create a magic ring with: 3 ch, 2 dc, 3 ch, 1 sl-st, 3 ch, 2 dc, 3 ch. Close it with 1 sl-st.
Sew the bow at the top of the head. Place it in front of your hair. Top it off.
Finishing the elephants.
– Sew the head to the body.
– With gray thread, sew the arms on both sides of the body on row 33.
– Finish off and hide all the strands.
Circus ball
We are going to create the circus ball with 6 granny squares
Granny squares (x 6)
With the main color thread make a magic ring with: 3 ch (counts as the first dc), 2 dc, 1 ch (3 dc, 1 ch) x 3, close with 1 sl-st. Top it off.
1. Add a new thread in the first 1 ch space, and do 3 ch (counts as the first dc), 2 dc, 1 ch, 3 dc, skip the next 3 dc, (3 dc, 1 ch, 3 dc , skip the next 3 dc) x 3.
Close with 1 sl-st (24)
2. Add a new white thread in the first 1 ch space, do 3 ch (counts as the first dc), 2 dc, 1 ch, 3 dc, skip the next 3 dc, 3 dc in the next space of 1 ch, 1 ch (3 dc, 1 ch, 3 dc, skip the next 3 dc, 3 dc in the next 1 ch, 1 ch space) x
3. Close with 1 sl-st (36)
Finish off and leave long strands to sew.
Make 6 granny squares with the following color scheme:
1. Gold, Fuchsia, White
2 . Fuchsia, Gold, White
3. Orange, Red, White
4. Red, Orange, White
5. Turquoise, Green, White
6. Green, Turquoise, White
Put two squares together and sew the edges. Repeat the process until you have 4 squares joined from left to right.
Now close the circle by sewing the edge of the first square with the edge of the second.
Then place the remaining two at the top and bottom forming a cube and sew the edges.
Remember to fill the ball before closing it completely.
Although the piece you have created is shaped like a cube, when you fill it it remains in the shape of a ball.