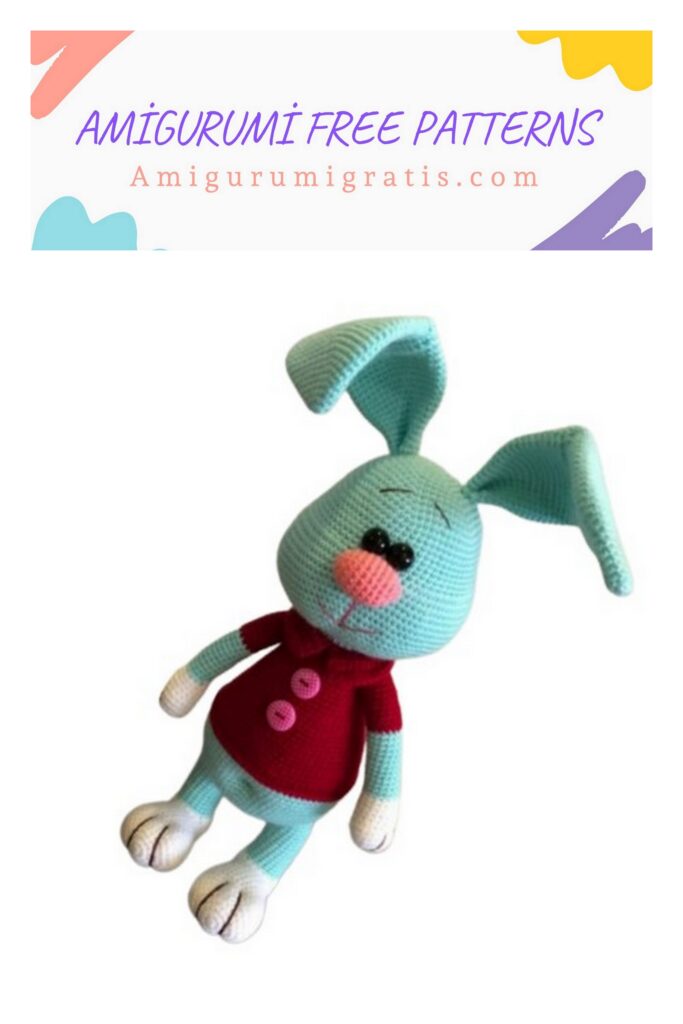
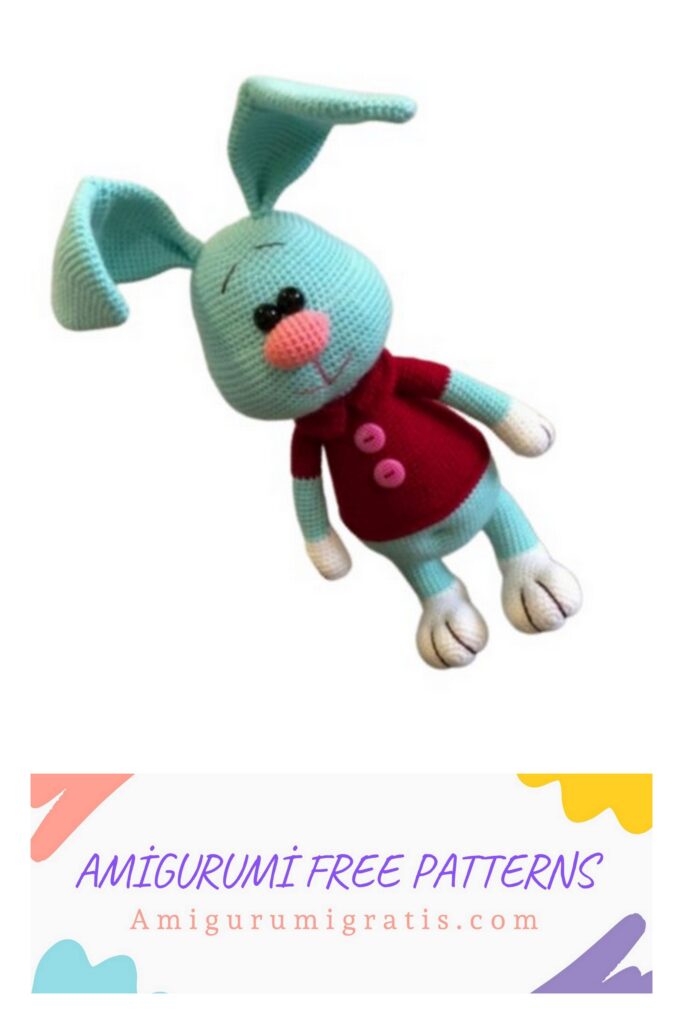
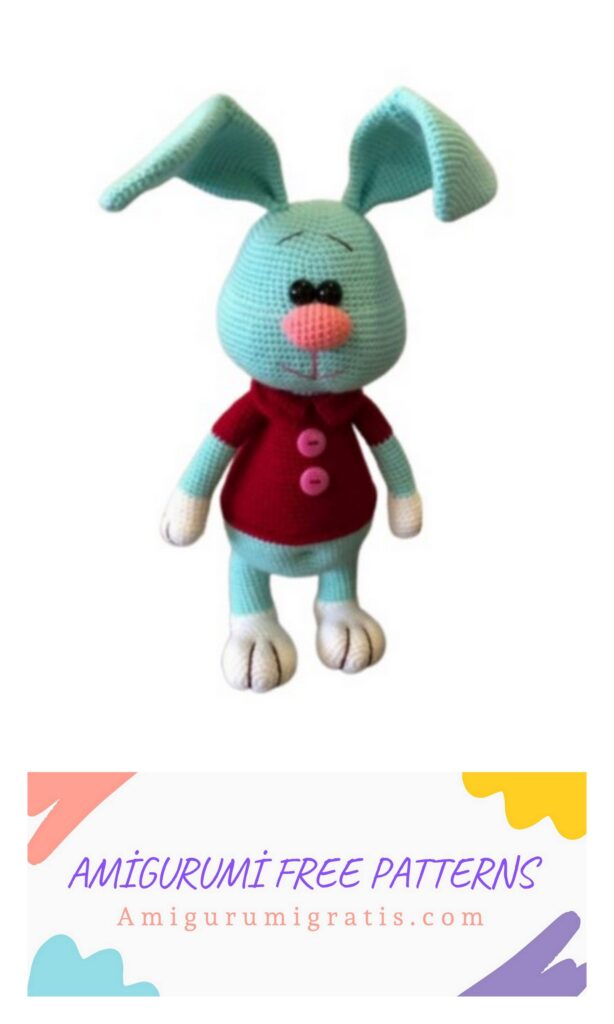
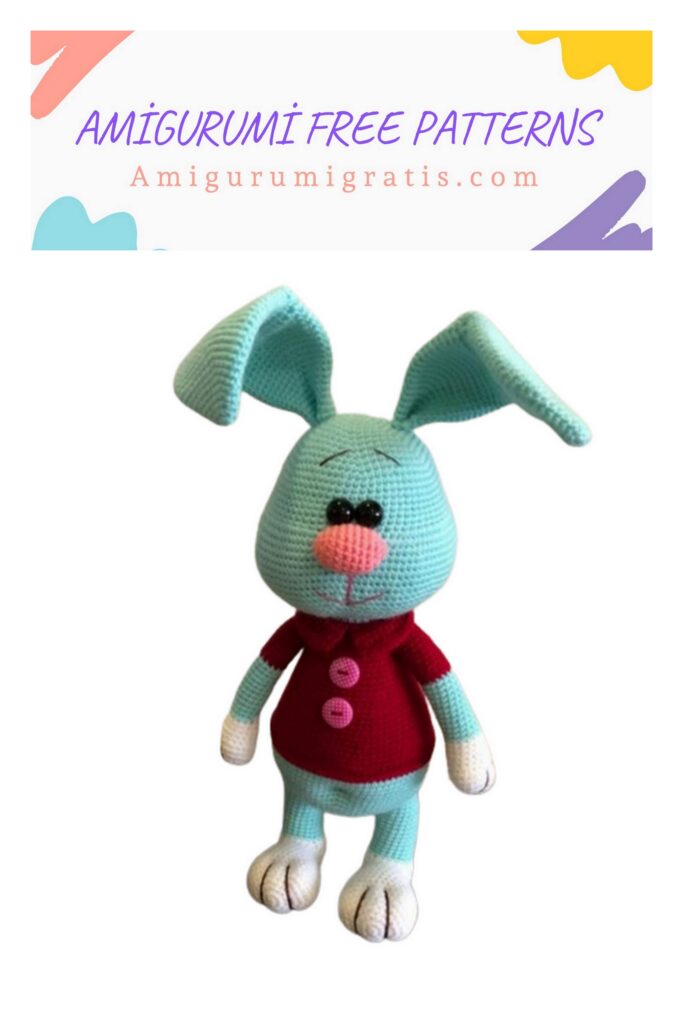
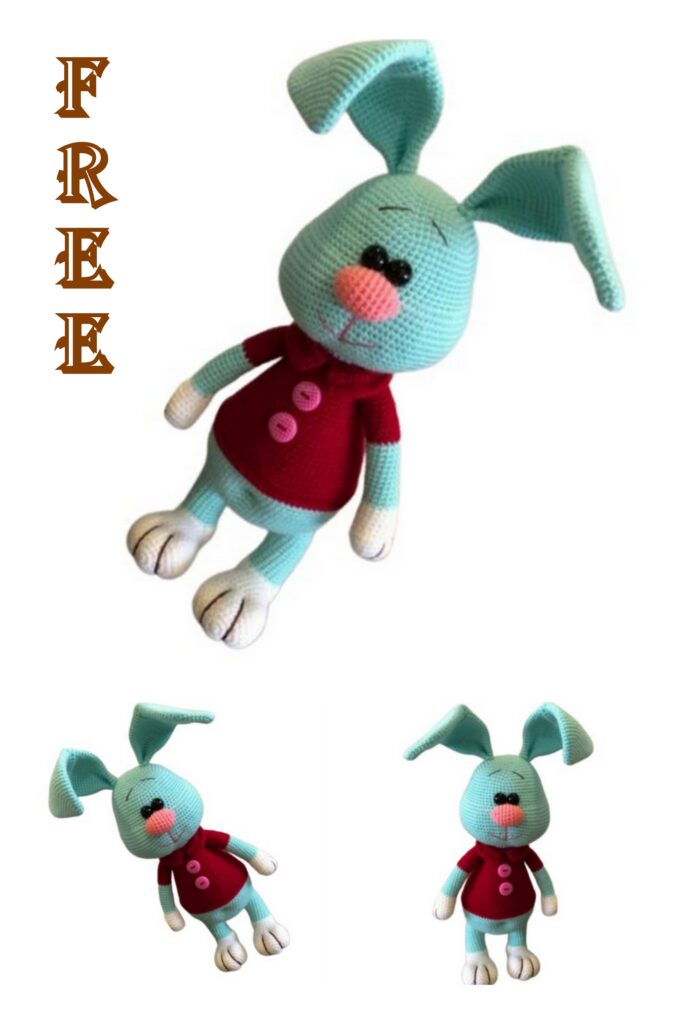
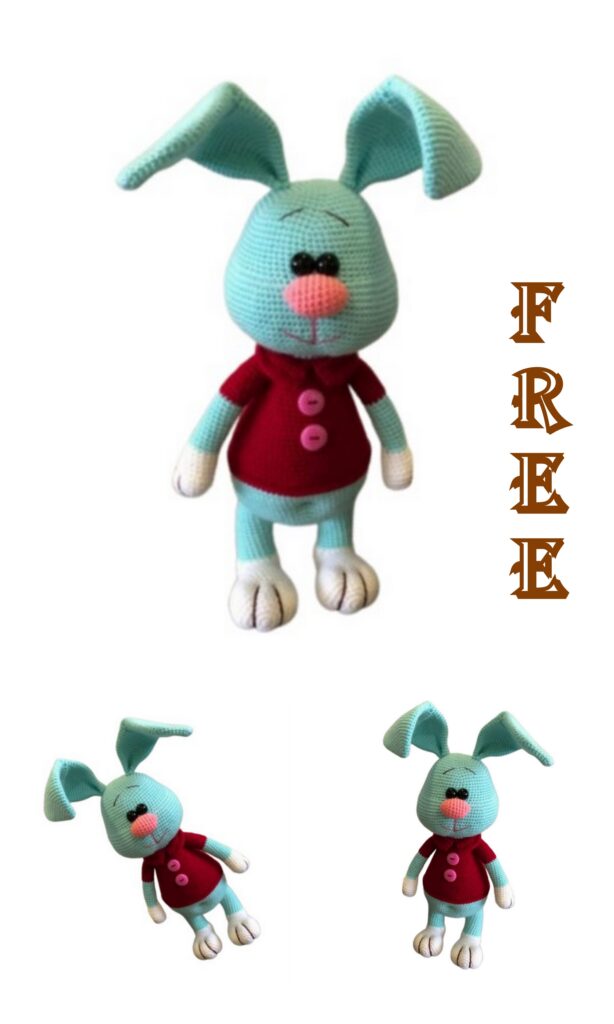
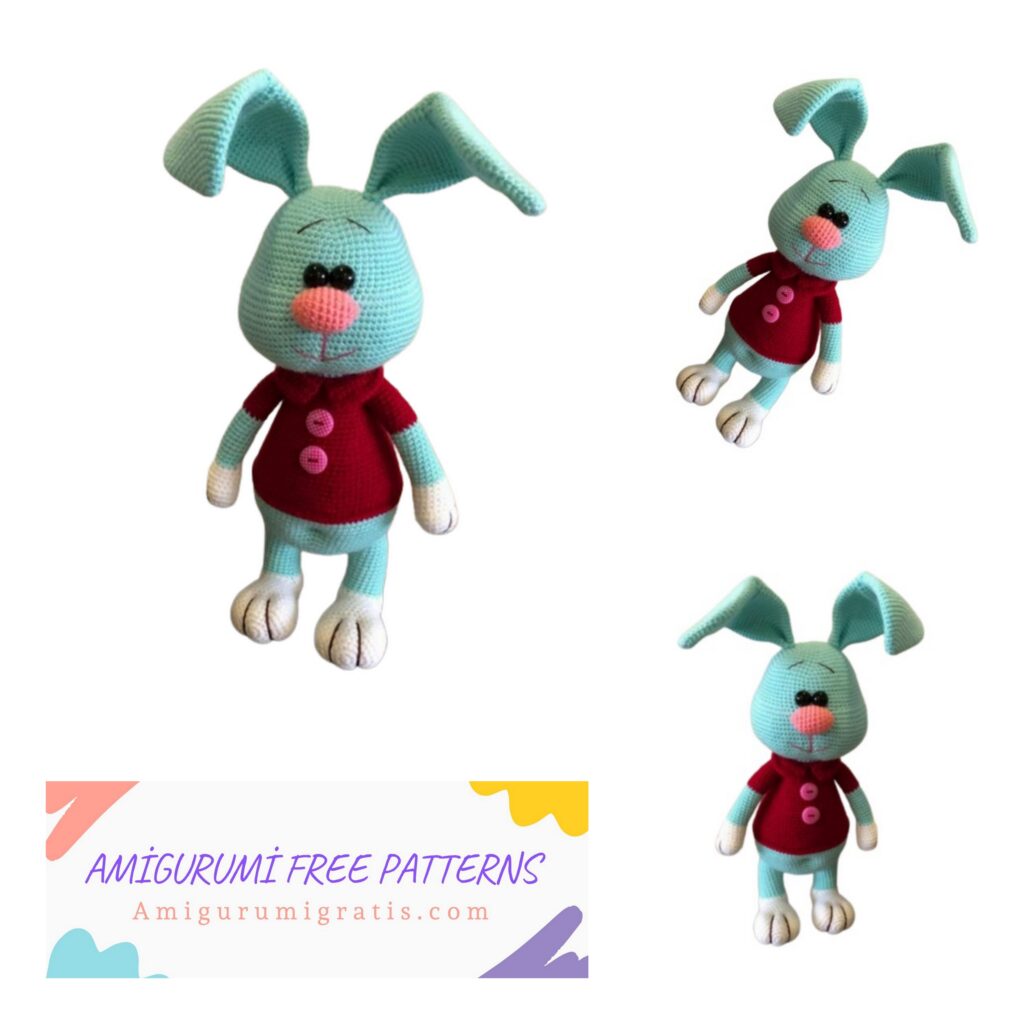
We share a cute bunny amigurumi pattern with you. You can visit our website for beautiful patterns from each other.
Materials:
Girls, I immediately write what yarn I used.
Children’s novelty (iceberg color) – the main, it took about 60 grams.
Children’s novelty – white
Children’s novelty – begonia
Children’s novelty – light cherry
Soft Yarn – White, for Ponytails
Hollofiber
Embroidery floss thread
Eyes 10 mm
2 mm wire (2 x 35 cm)
2 buttons for decor
My hook – 1.25, needle, scissors, glue
With my materials, the height of the toy is 27cm without ears
Designations:
İnc – increase
Dec – decrease
Sc – column without a cape
Hdc – half crochet
Sl-st – connecting column
Ch— air loop
Head
1.6 sc into magic ring
2.6 inc (12)
3.1 sc, inc × 6 times (18)
4.2 sc, inc × 6 times (24)
5.3 sc, inc × 6 times (30)
6.4 sc, inc × 6 times (36)
7.5 sc, inc × 6 times (42)
8.5 sc, inc × 6 times (48)
9.7 sc, inc × 6 times (54)
10.8 sc, inc × 6 times (60)
11.9 sc, inc × 6 times (66)
12.10 sc, inc × 6 times (72)
13-20. (8 rows) – 72 sc
21.18 sc, 13 inc, 10 sc, 13 inc, 18 sc (98)
22-28. (7 rows) – 98 sc
29. 18 sc, dec, 58 sc, dec, 18 sc (96)
30.7 sc, dec, (14 sc, dec) × 5 times, 7 sc (90)
31. (13 sc, dec) × 6 times (84)
32.6 sc, dec, (12 sc, dec) × 5 times, 6 sc (78)
33. (11 sc, dec) × 6 times (72)
34.5 sc, dec, (10 sc, dec) × 5 times, 5 sc (66)
35. (9 sc, dec) × 6 times (60)
36.4 sc, dec, (8 sc, dec) × 5 times, 4 sc (54)
37. (7 sc, dec) × 6 times (48)
38.3 sc, dec, (6 sc, dec) × 5 times, 3 sc (42)
39. (5 sc, dec) × 6 times (36)
40.2 sc, dec, (4 sc, dec) × 5 times, 2 sc (30)
41. (3 sc, dec) × 6 times (24)
Leave the thread for sewing, fill the head tightly, especially the cheeks.
Ears
1.6 sc into magic ring
2. (1 sc, inc) × 3 times (9)
3. (2 sc, inc) × 3 times (12)
4. (3 sc, inc) × 3 times (15)
5. (4 sc, inc) × 3 times (18)
6. (5 sc, inc) × 3 times (21)
7. (6 sc, inc) × 3 times (24)
8. (7 sc, inc) × 3 times (27)
9. (8 sc, inc) × 3 times (30)
10. (9 sc, inc) × 3 times (33)
11. (10 sc, inc) × 3 times (36)
12-23 (12 rows). 36 sc
24. 18 sc blo, 18 sc (36)
25-27. (3 rows). 36 sc
28. 18 sc we knit together with the loops and loops of the 27th row left in the 24th row (see photo), 18 sc (36) So our ear will be broken.
29-35. (7 rows). 36 sc
36. (10 sc, dec) × 3 times (33)
37.33 sc
38. (9 sc, dec) × 3 times (30)
39. (8 sc, dec) × 3 times (27)
40. (7 sc, dec) × 3 times (24)
41. (6 sc, dec) × 3 times (21)
42-44. (3 rows). 21 sc
45. 21 sc + 3 offset loops
Fold the eyelet and close 10 sc. Leave the end of the thread for sewing.
We are not afraid of ears, they are also big
Nose
1.5 sc into magic ring
2.5 inc (10)
3. (1 sc, inc) × 5 times (15)
4-8. (5 rows). 15 sc
9. (1 sc, dec) × 5 times (10)
10.5 dec
We tighten the remaining loops, leave the end of the thread for sewing.
In the interval 10 sc in the 21 row our nose will be located. Sew the nose from the 21-25th row.
Fold the eyelet in half and sew on both edges
for 6-7 rows (that is, for 2 rows) so that it does not hang in different directions. In this case, the spacecraft, I also consider a number.
Glue eyes, embroider eyebrows.
We mark with needles how the mouth will be located and embroider. Maybe someone wants to embroider a larger mouth or less, at your discretion.
Legs
Start knitting with white thread
1.6 sc into magic ring
2.6 inc (12)
3. (1 sc, inc) × 6 times (18)
4. (2 sc, inc) × 6 times (24)
5. (3 sc, inc) × 6 times (30)
6. (4 sc, inc) × 6 times (36)
7-9. (3 rows) – 36 sc
10. (16 sc, dec) × 2 times (34)
11. (15 sc, dec) × 2 times (32)
12. (14 sc, dec) × 2 times (30)
13. (13 sc, dec) × 2 times (28)
14. (12 sc, dec) × 2 times (26)
15. (11 sc, dec) × 2 times (24)
16. (10 sc, dec) × 2 times (22)
17. (9 sc, dec) × 2 times (20) + 3 offset loops
Next we will knit in rotary rows to get a heel.
Sl-st is a connecting column.
Ch is an air loop.
1.4 sc, sl-st, ch, turn
2.5 sc, sl-st, ch, turn
3. 6 sc, sl-st, ch, rotation
4.7 sc, sl-st, ch, turn
5.8 sc, sl-st, ch, turn
6. 9 sc, sl-st, ch, rotation
7.10 sc, sl-st, ch, turn
8.11 sc, sl-st, ch, turn
9.12 sc, sl-st, ch, turn
10.13 sc, sl-st, ch, turn
Then we knit in a spiral, as usual. We knit 7 sc, put the marker so that it passes in the center of the back of the heel.
11.20 sc
Change the color to the main one, fill the foot, insert the wire. We’ll fill the heel well.
We take a wire of 40 -45 cm, it is better to be superfluous than not enough. Everyone has yarn, the density of knitting is different, the growth of the toy will differ, so it’s better to remove the excess at the end.
12-26 (15 rows) – 20 sc
We knit displacement loops to the center of the leg (see photo)
We fix the thread, cut, stuff.
Body
Knit with thread, the main color
1.6 sc into magic ring
2.6 inc (12)
3. (1 sc, inc) × 6 times (18)
4.1 sc, inc, (2 sc, inc) × 5 times, 1 sc (24)
5. (3 sc, inc) × 6 times (30)
6.2 sc, inc, (4 sc, inc) × 5 times, 2 sc (36)
7. (5 sc, inc) × 6 times (42)
8.3 sc, inc, (6 sc, inc) × 5 times, 3 sc (48)
9. 7 sc, now we will knit the leg (we put the leg so that it looks forward, I got that from the center of the back of the leg is behind saw 1 sc to the right), and we knit 8 sc from the inside of the leg together with the body loops, 18 sc, now we knit the second leg in the same way, only in the mirror image 8 sc together with the body loops, 7 sc (48)
10. 7 sc, 12 sc along the remaining loops of the left leg, 18 sc, 12 sc along the remaining loops of the right leg, 7 sc (56)
11.4 sc, inc, 18 sc, inc, 8 sc, inc, 18 sc, inc, 4 sc (60)
12. (9 sc, inc) × 6 times (66)
13.5 sc, inc, (10 sc, inc) × 5 times, 5 sc (72)
14. (11 sc, inc) × 6 times (78)
Twist the wire, isolate with adhesive tape. (a photo)
15-22. (8 rows) 78 sc
Change the thread to the color of the shirt
23. 78 sc
24. 78 sc blo
25. 78 sc
26. (11 sc, dec) × 6 times (72)
27. 72 sc
28. (10 sc, dec) × 6 times (66)
29-30. 66 sc
31. (9 sc, dec) × 6 times (60)
32-33. 60 sc
34. (8 sc, dec) × 6 times (54)
35-36. 54 sc
37. (7 sc, dec) × 6 times (48)
We fill in the course of knitting. Especially good belly, butt and sides
38-40. 48 sc
41. (6 sc, dec) × 6 times (42)
42-44. 42 sc
45. (5 sc, dec) × 6 times (36)
46-47. 36 sc
48. (4 sc, dec) × 6 times (30)
49-50. 30 sc
Next, we knit displacement loops to the center of the back of the body. Change the thread to the main color.
51.We knit blo (3 sc, dec) × 6 times (24)
52-53. 24 sc
We finish knitting with a connecting column, leave the thread for sewing.
Someone sews the head to the body with thread from the head, and someone vice versa, therefore wrote to leave both the head and the body.
The wire in the neck, leave 4-5 cm, cut off the rest, isolate.
We attach the thread to the left front half-loops in the 24th row and tie it with columns.
We tie the collar:
We keep the toy from ourselves, mark the center of our collar, attach the thread
1. Dial 2 ch, (4 hdc, inc) × 6 times, 2 ch, turn (36)
2. (5 hdc, inc) × 6 times, 2 ch, rotation (42 hdc)
3. 42 hdc, 2 ch, turn
4. 42 hdc, fasten the thread, cut it off.
(2 ch are not considered as hdc)
Sew on buttons (optional), sew on the head, embroider paws
Pens:
White thread
1.6 sc into magic ring
2.6 inc (12)
3. (1 sc, inc) × 6 times (18)
4. (2 sc, inc) × 6 times (24)
5-7. (3 rows) 24 sc
8. (2 sc, dec) × 6 times (18)
9-10. 18 sc
11. (4 sc, dec) × 3 times (15)
12.15 sc
Change to the main thread
13-24. (12 rows) 15 sc
We fill in the course of knitting
Change the thread to the color of the shirt
25-35. (11 rows) 15 sc
I do not stuff the last 4 rows so that the handles do not bulge.
Fold the handle and close 7 sc, leave the thread for sewing.
If someone wants to tie the sleeves, then in the 26th row, knit blo. We embroider paws.
Sew pens at the level of 49 rows.
Tail
Yarn Softy
1 option (smaller)
1.6 sc into magic ring
2.6 inc (12)
3. (1 sc, inc) × 6 times (18)
4-5. 18 sc
6. (1 sc, dec) × 6 times (12)
7.6 dec (6)
Fill, leave the thread for sewing.
2 option (more)
1.6 sc into magic ring
2.6 inc (12)
3. (1sc, inc) × 6 times (18)
4. (2 sc, inc) × 6 times (24)
5-7. 24 sc
8. (2 sc, dec) × 6 times (18)
9. (1 sc, dec) × 6 times (12)
Leave the end of the thread for sewing, stuff.
We will sew the tail, as we make the navel.
Navel
We find the center where the tail and the navel will be located (Mark with needles). Enter the needle from the center of the tail, (leave the end of the thread outside), display at the first navel point, then skip 2 columns (you can skip 1 column) and insert the needle in the opposite direction, towards the tail (not just at the same point, but through the column ), tighten the thread and tie. We cut the thread, leaving small ponytails, hide the toys inside. So can be repeated 2 times for strength. My eye does not work well, the navel goes either left or right. The tightening that is obtained from the side of the tail, it closes, we sew the tail to this place.