When knitting, I used:
1.Yarn.
* YarnArt Jeans (skein weight: 50 gr., Thread length: 160 m, Composition: 55% cotton, 45% polyacrylic, Manufacturer: Turkey)
Colors: N 51 – red, N 63 – dark green, N 07 – brown, N 01 – white, N 52 – green.
2. Hook N 1.75
3. Filler – holofiber, sintepon
4. Eyes with a diameter of 1 cm.
5.2 buttons with a diameter of 1 cm (for fastening the hands)
6. Basting needles
7. Stitching needle
8. Scissors
9. Threads for sewing
10. The spout is 9 mm long.
11. Buttons for shoulder straps 2 pcs in a diameter of 5 mm.
12. White felt to decorate the eyelet (I have sequins)
13. Cardboard
14. 15 pcs of multi-colored buttons with a diameter of 5 mm for decorating horns.
15. Pom-poms / beads 3 pcs with a diameter of 0.9 (10) mm

Recommended materials and tools:
sc – single crochet
ch – air loop
inc – increase = 2 sc in one loop
dec – decrease = knit 2 sc together
sl-st – connecting post
DC – double crochet
PSC – half-column without crochet
(…) – the number in brackets means the number of loops in a row
(…) * N – repeat N times
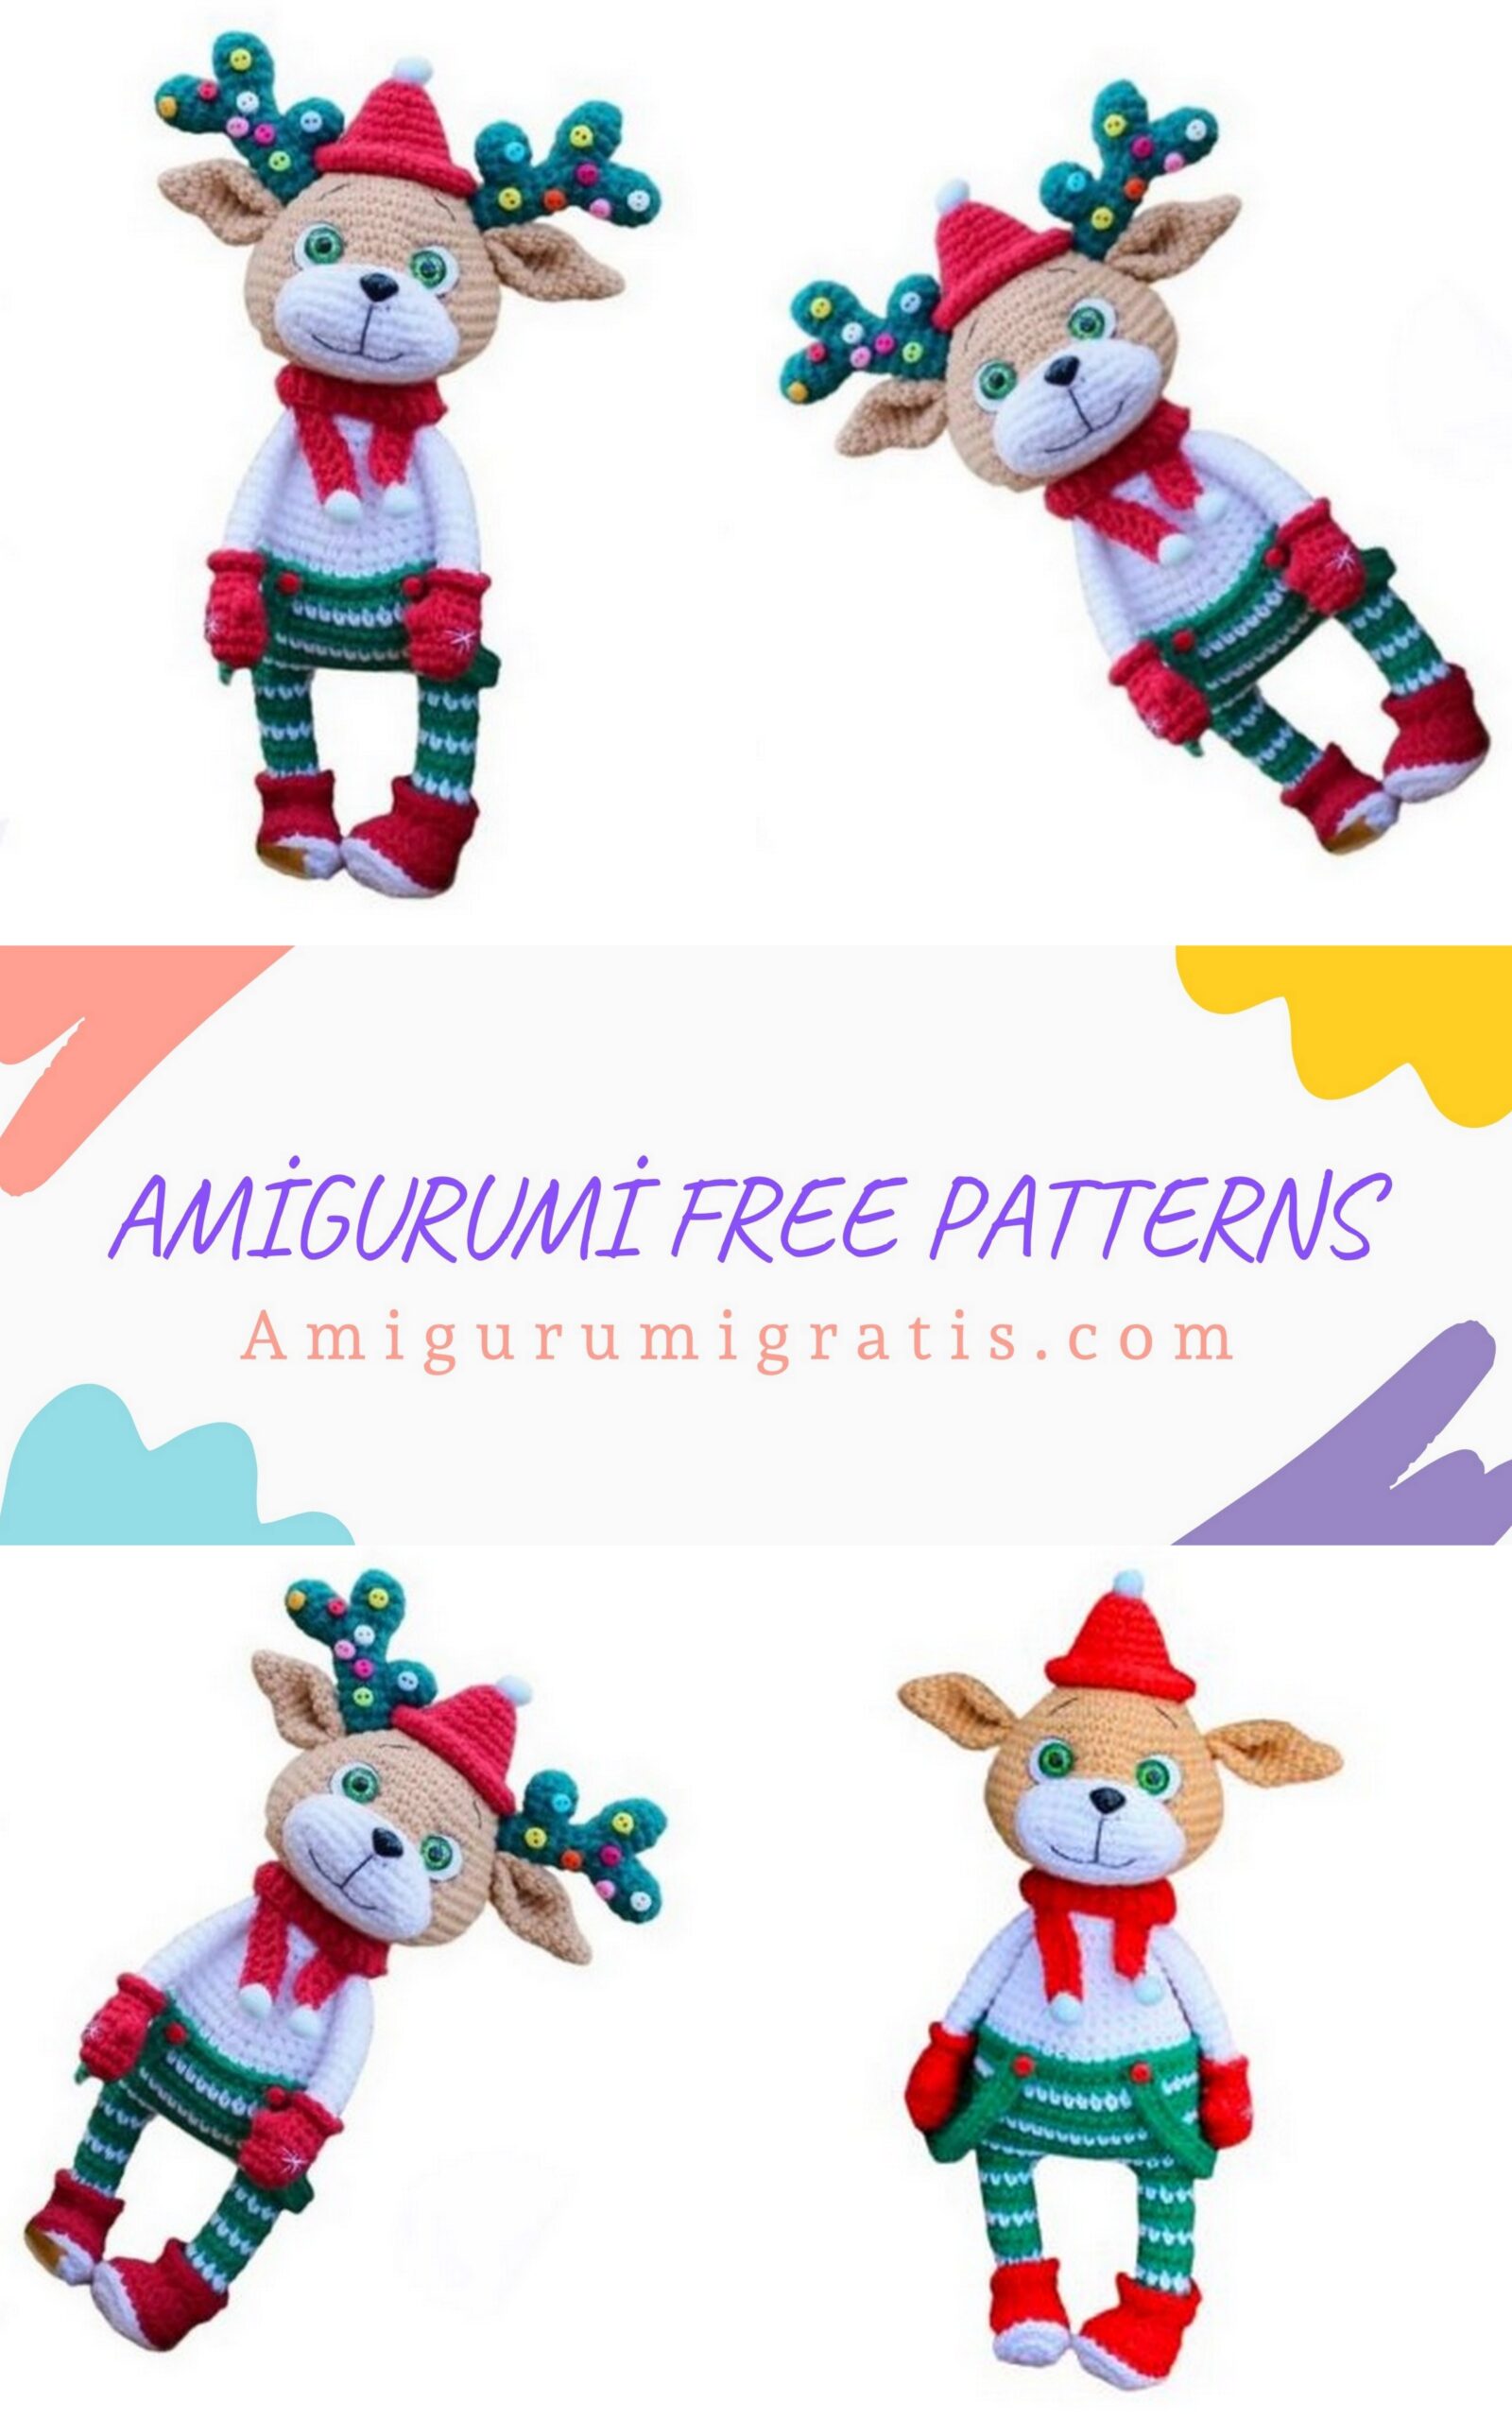
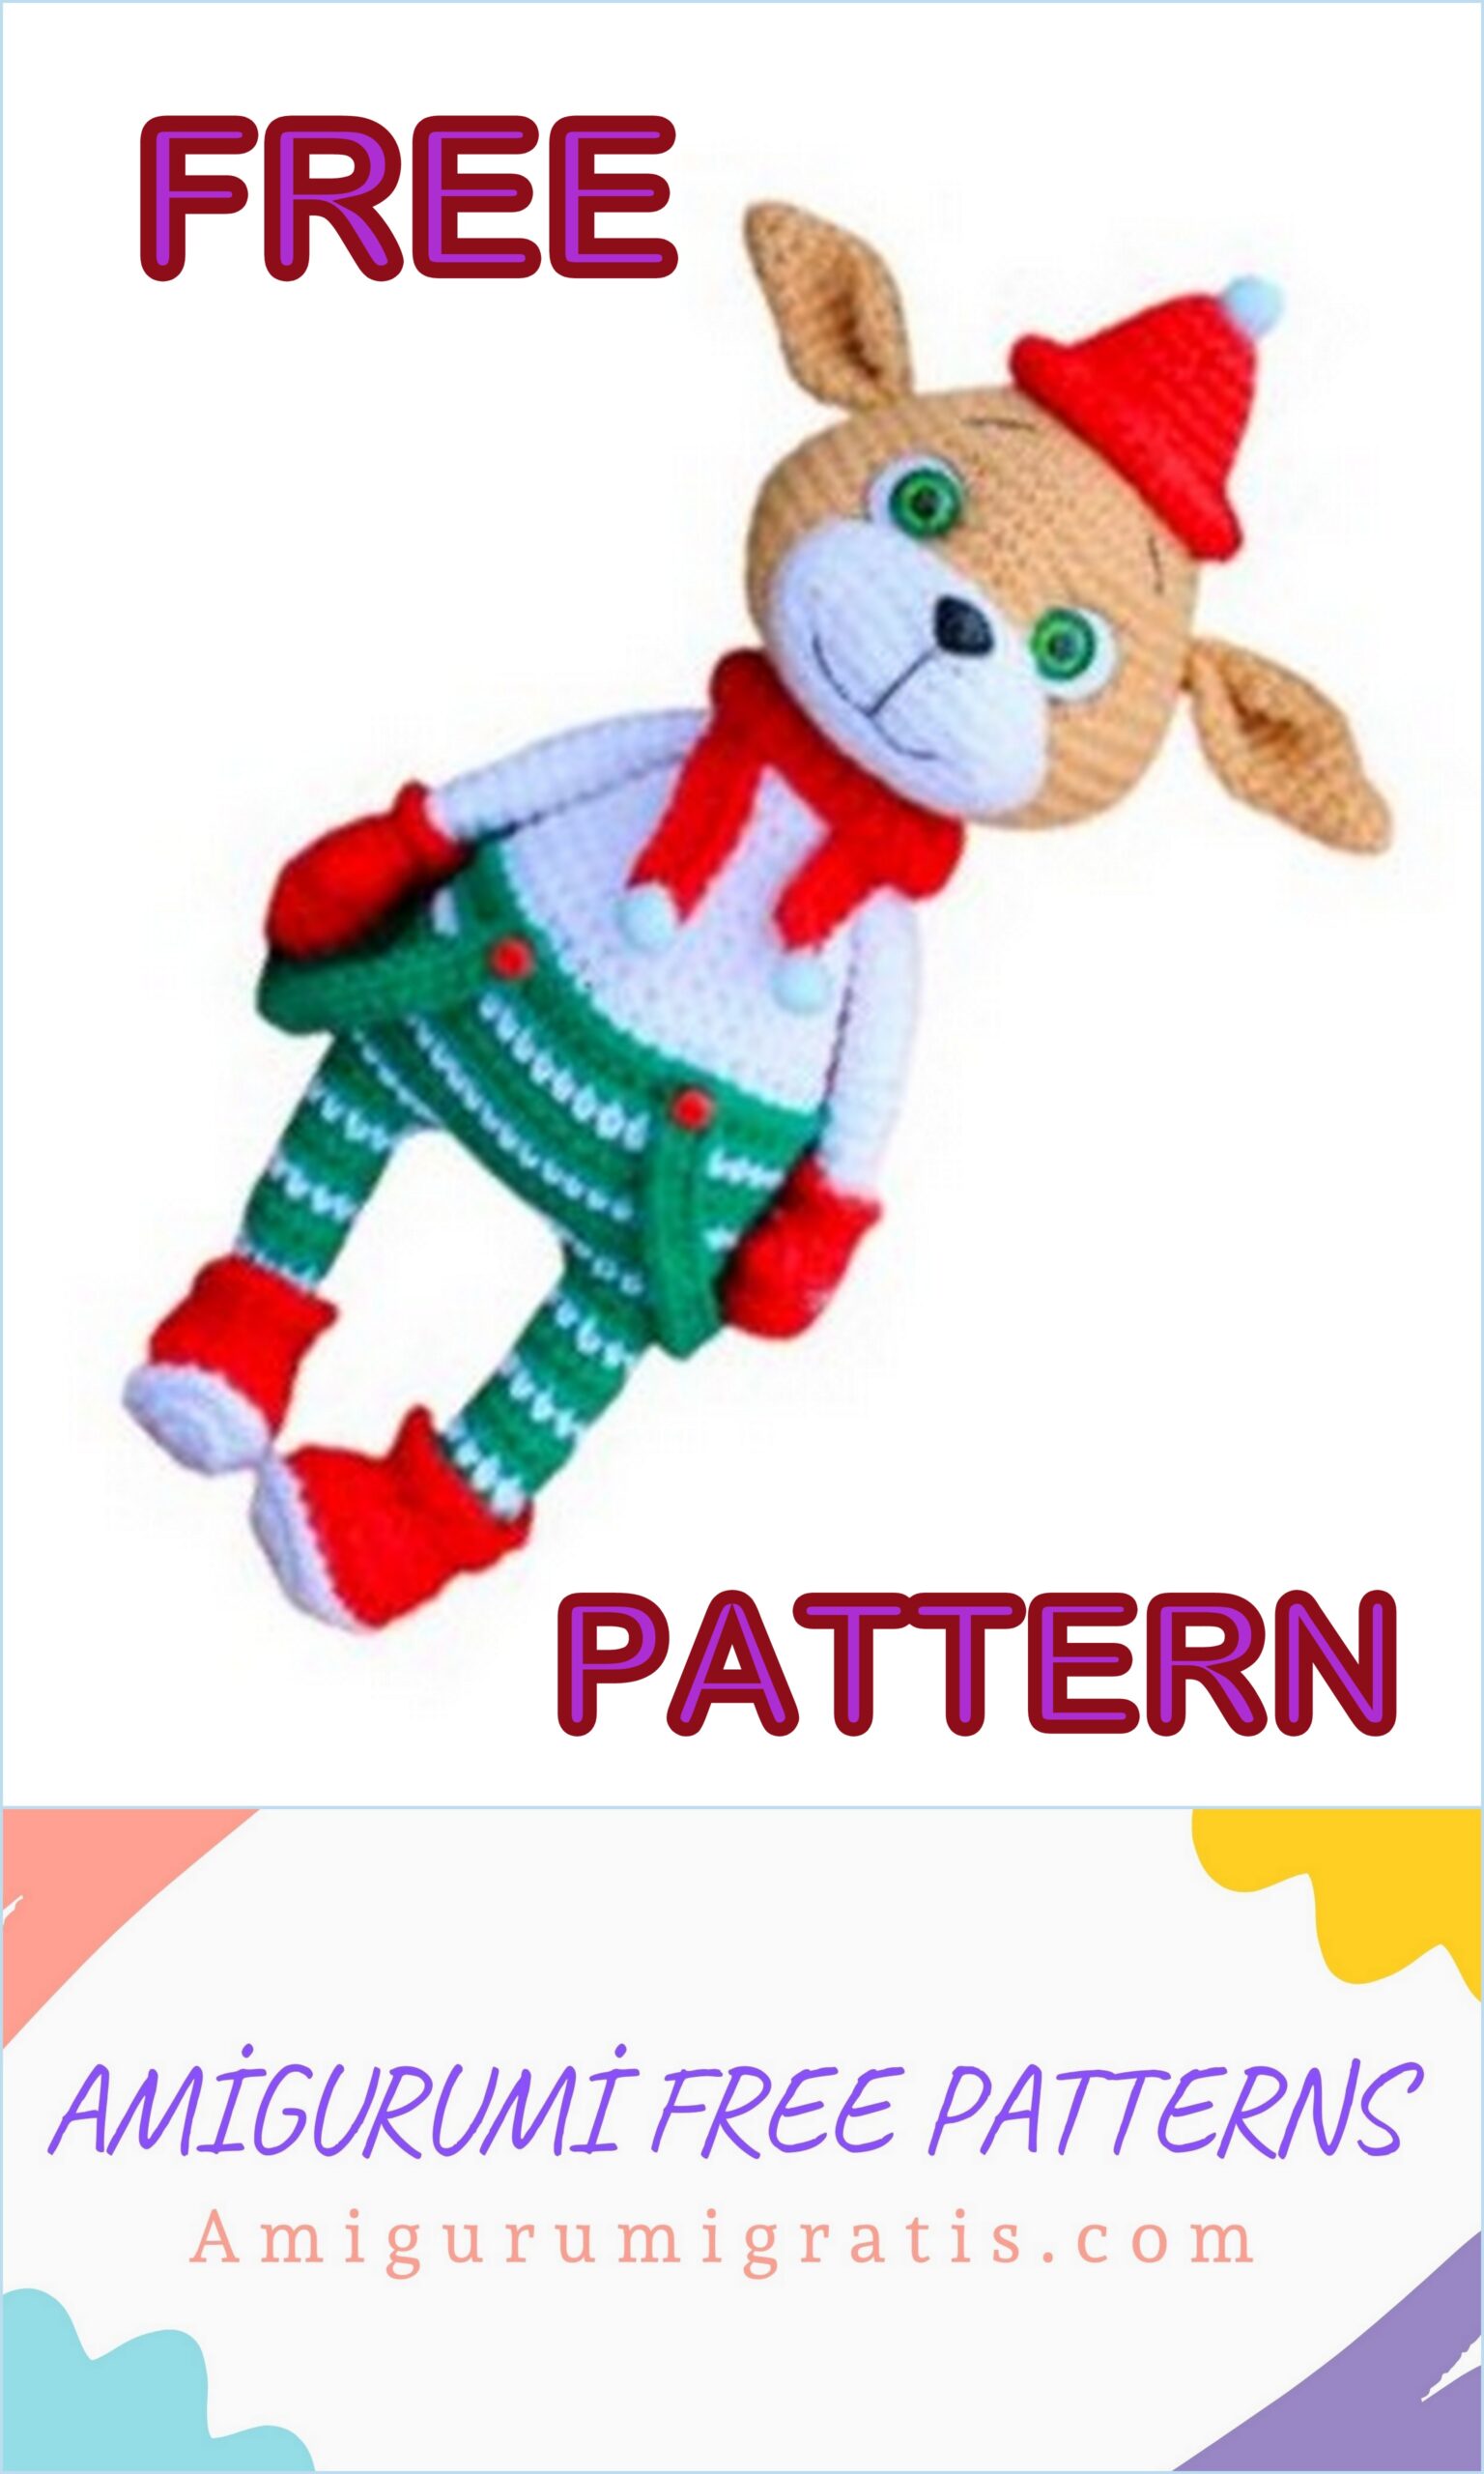
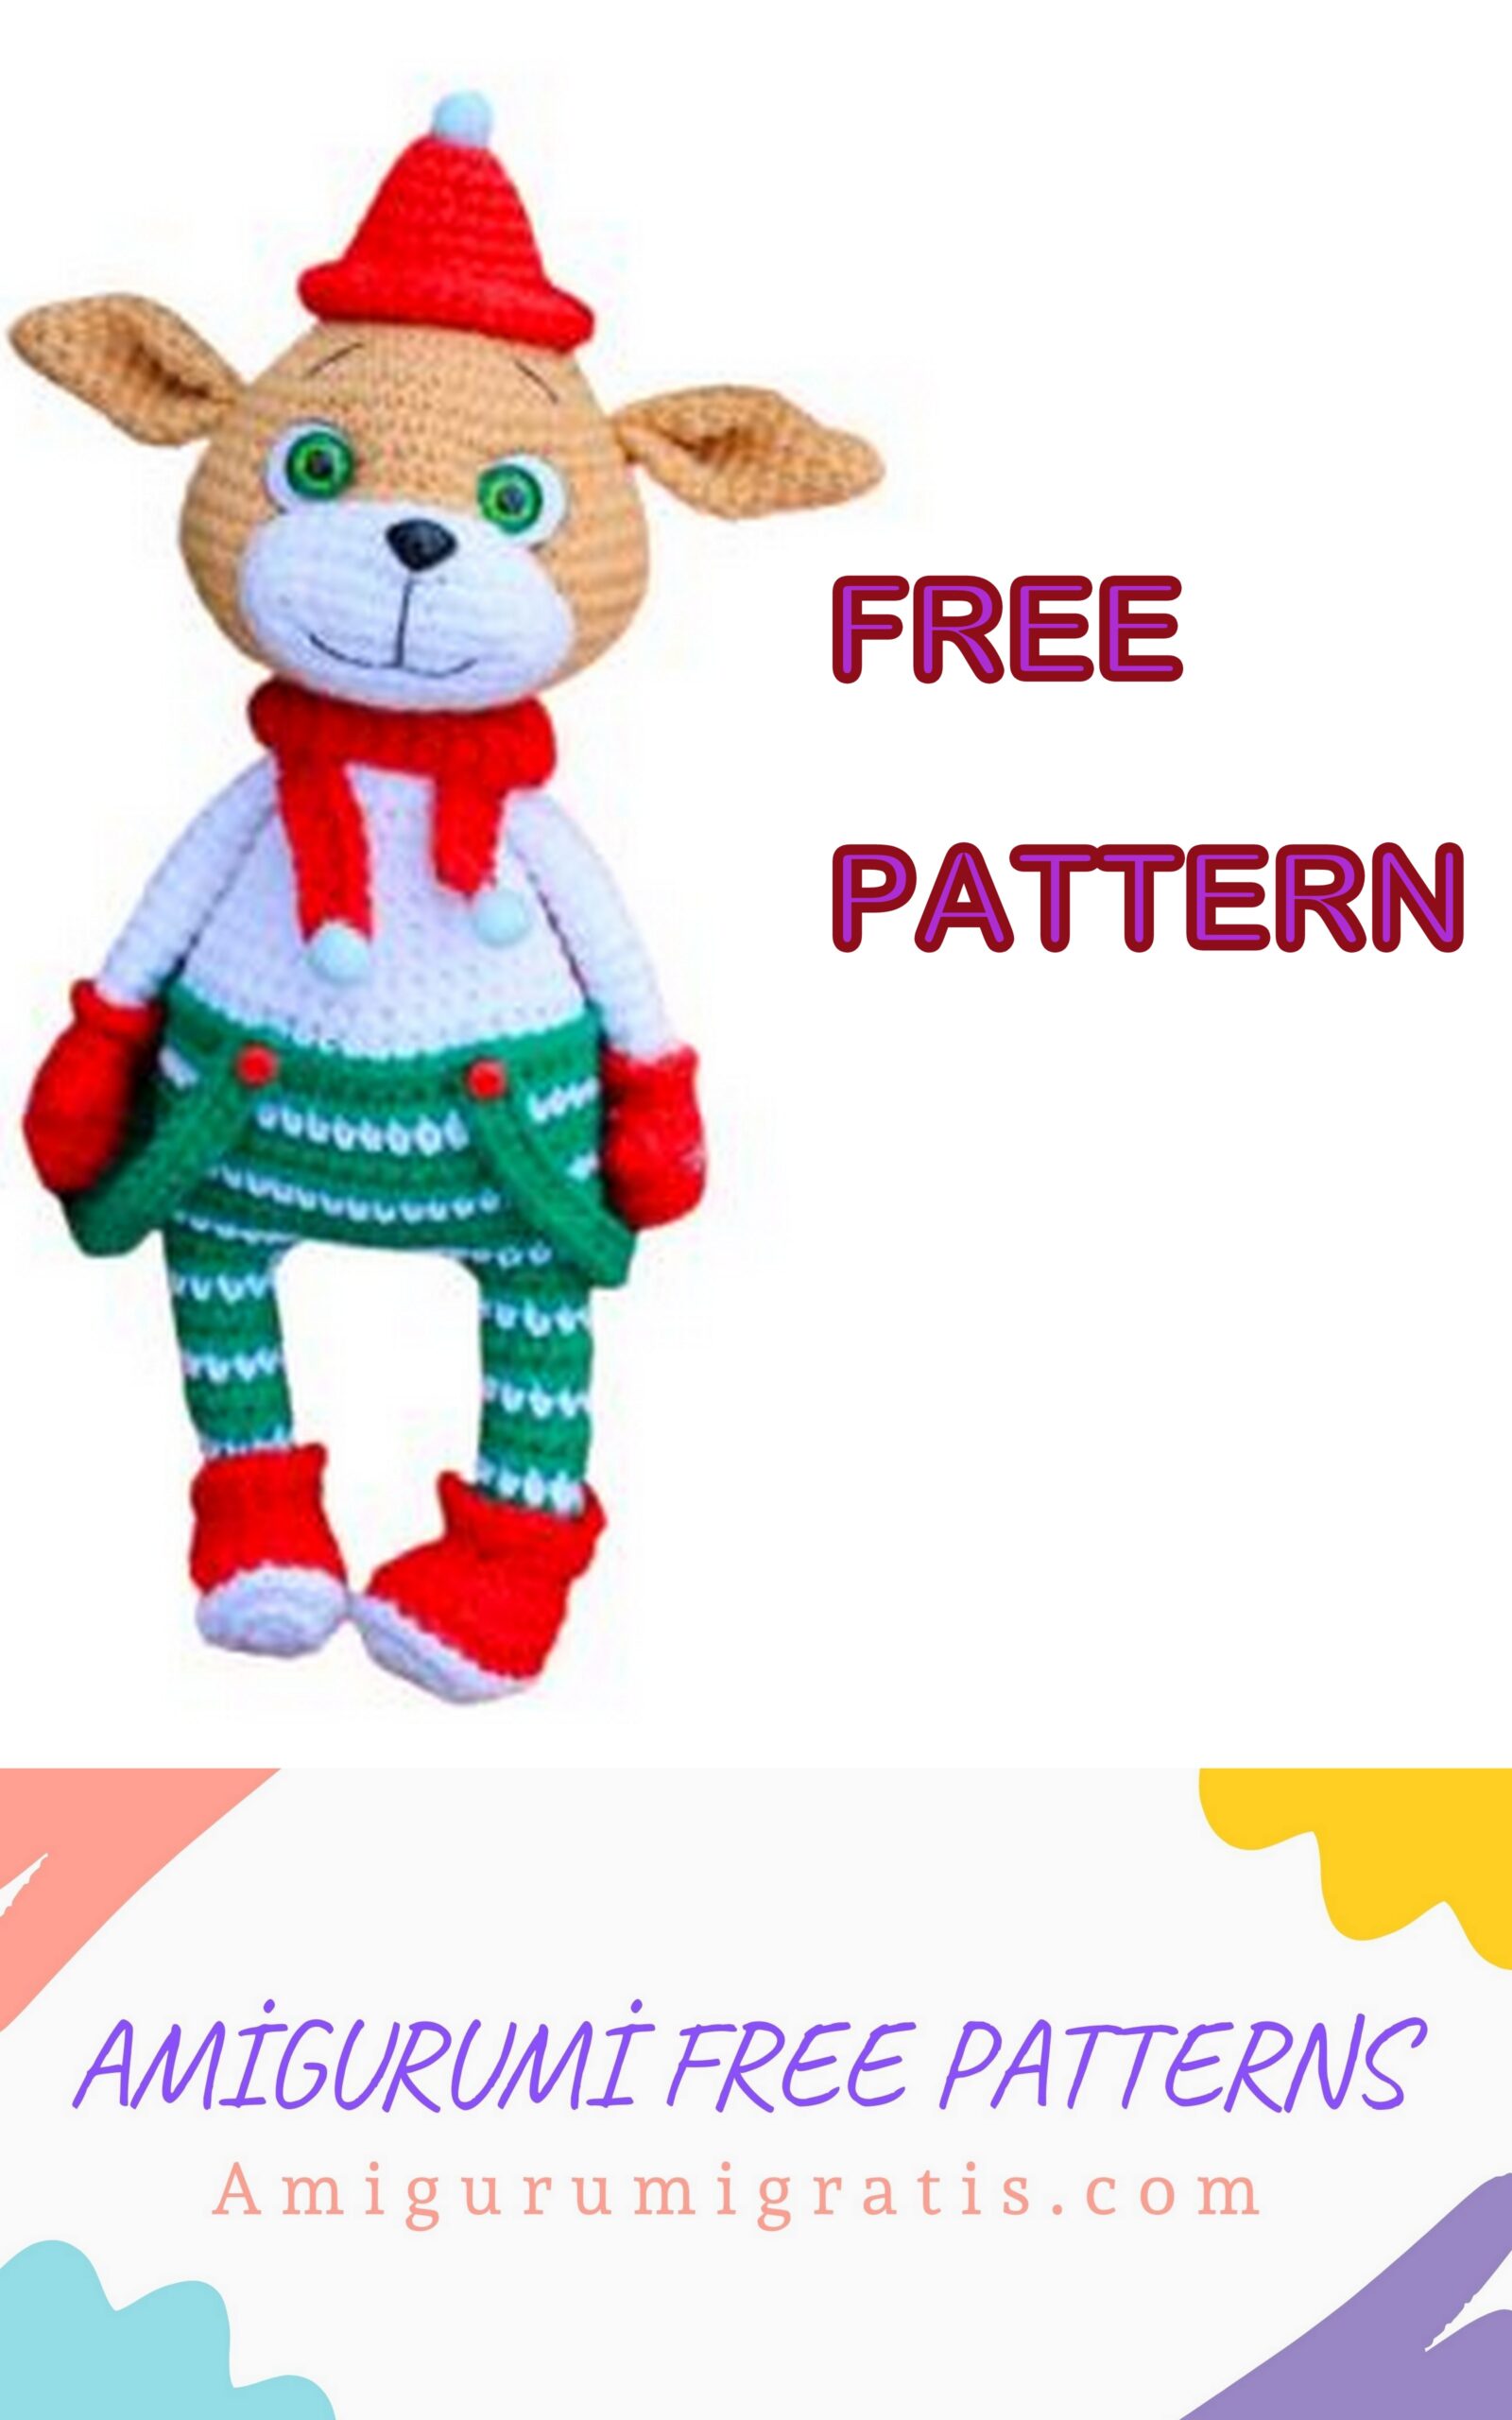
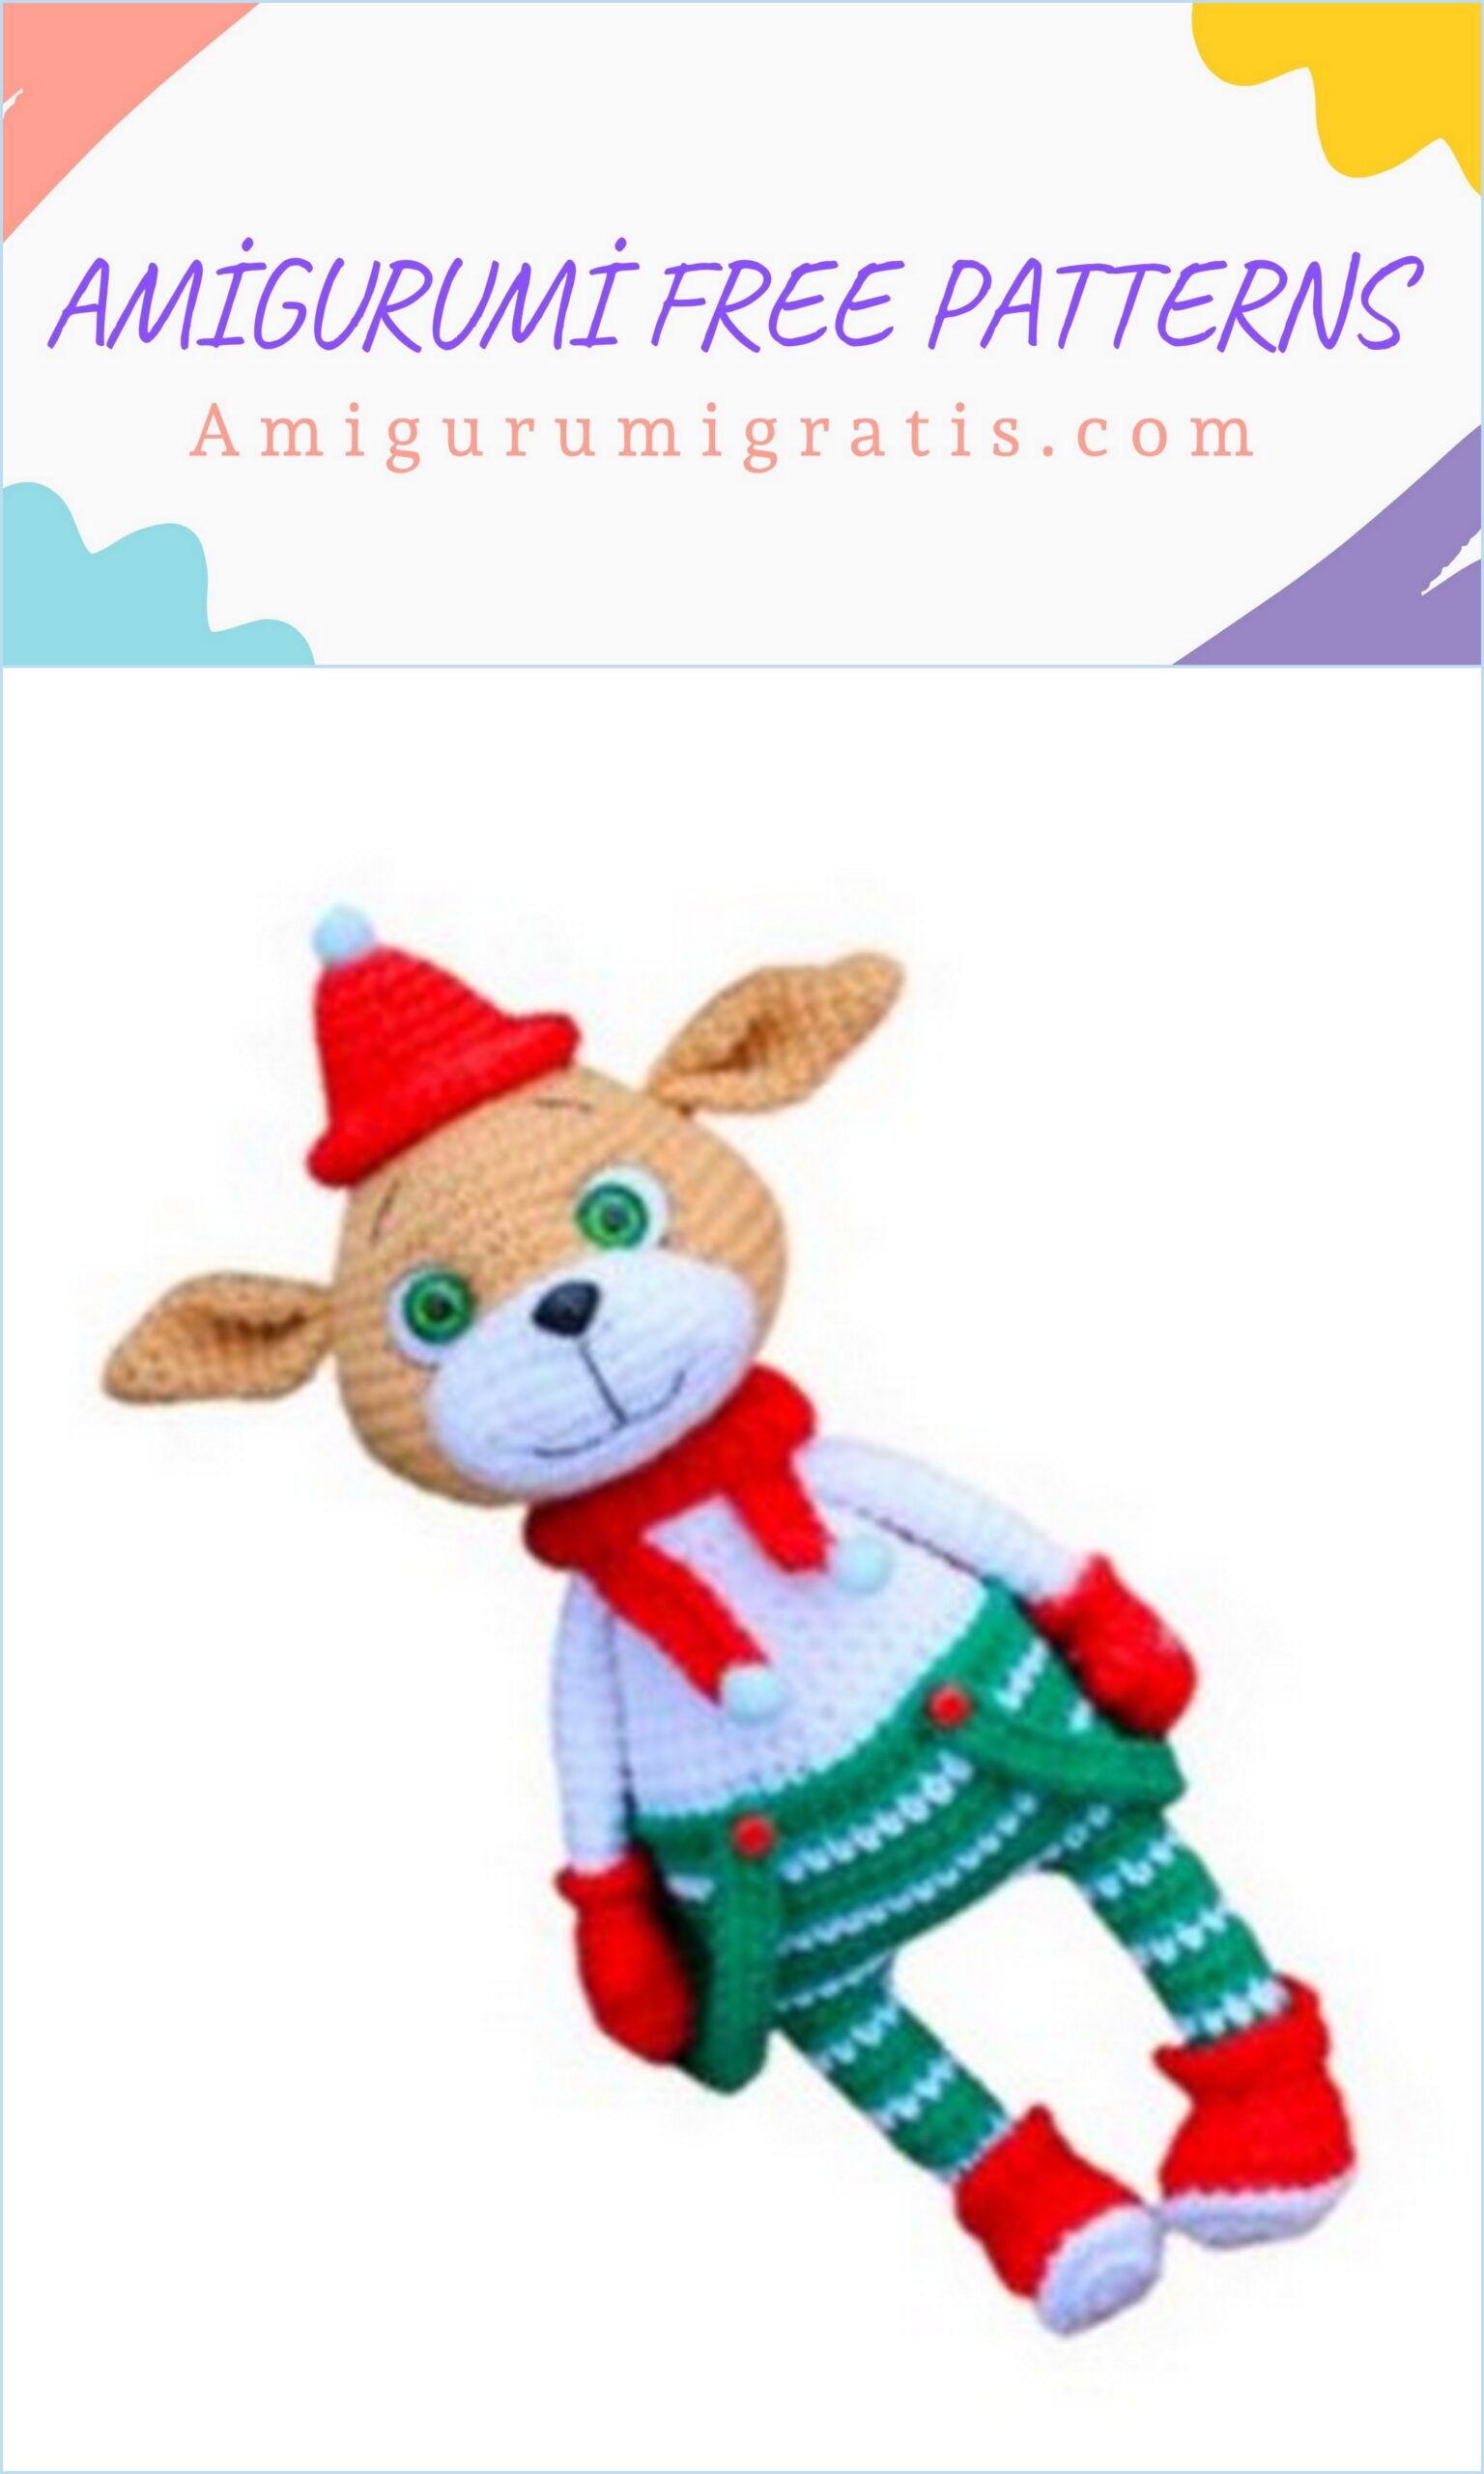
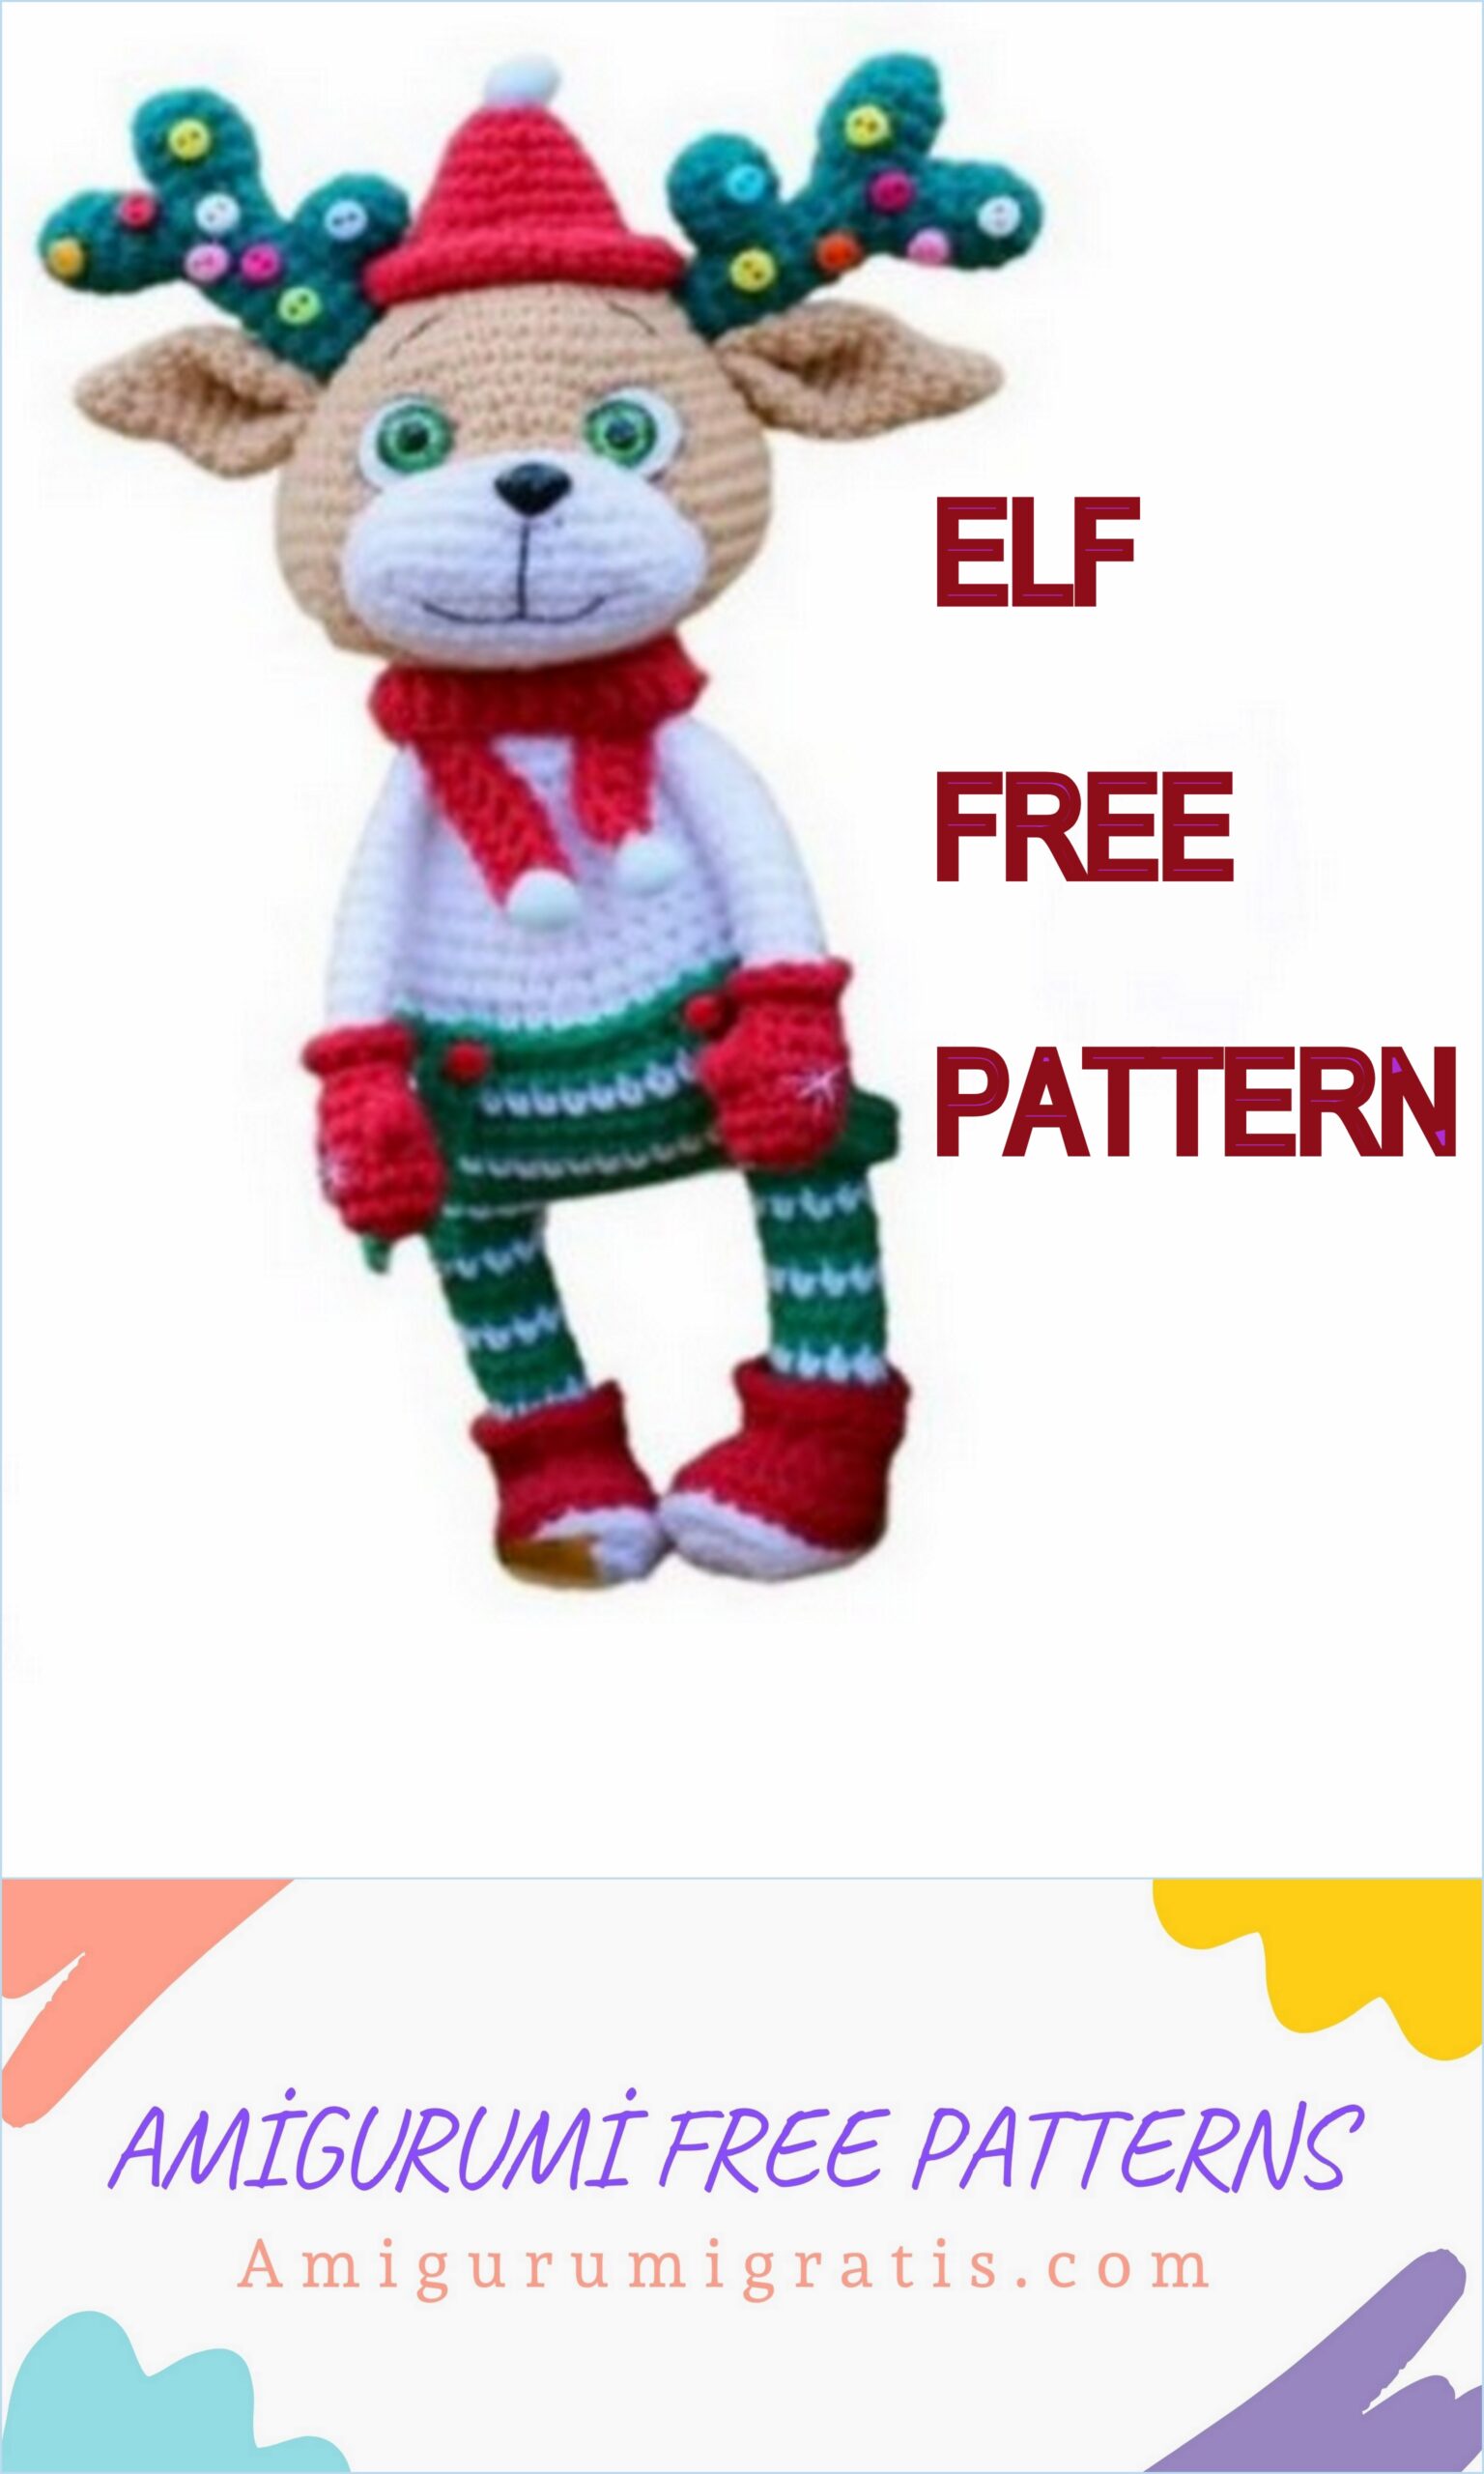
what is indicated in brackets The size of the finished toy (with ears) when using these materials is 22 cm.
Legend
1.HEAD
We knit with brown yarn.
We fill the detail in the knitting process.
1.) 6 sc into magic ring (6)
2.) 6 inc (12)
3.) (1 sc, inc) * 6 (18)
4.) 1 sc, inc, (2 sc, inc) * 5, 1 sc (24)
5.) (3 sc, inc) * 6 (30)
6.) 2 sc, inc, (4 sc, inc) * 5, 2 sc (36)
7.) (5 sc, inc) * 6 (42)
8.) – 10.) 42 sc (42, 3 rows)
11.) 1 sc, (3 sc, inc) * 5, 1 sc, (3 sc, inc) * 5 (52)
12.) 1 sc, (4 sc, inc) * 5, 1 sc, (4 sc, inc) * 5 (62)
13.) 1 sc, (5 sc, inc) * 5, 1 sc, (5 sc, inc) * 5 (72)
14.) – 15.) 72 sc (72, 2 rows)
16.) 1 sc, (5 sc, dec) * 5, 1 sc, (5 sc, dec) * 5 (62)
17.) 1 sc, (4 sc, dec) * 5, 1 sc, (4 sc, dec) * 5 (52)
18.) 1 sc, (3 sc, dec) * 5, 1 sc, (3 sc, dec) * 5 (42)
19.) (5 sc, dec) * 6 (36)
20.) 2 sc, dec, (4 sc, dec) * 5, 2 sc (30)
21.) (3 sc, dec) * (24)
22.) 1 sc, dec, (2 sc, dec) * 5, 1 sc (18)
23.) (1 sc, dec) * 6 (12)
We make 2 decreases and tighten the hole.

DESCRIPTION:
2. Muzzle
We knit with white yarn.
We collect 12 ch, we begin to knit from the second loop from the hook:
1.) 10 sc, 3 sc in one loop, 9 sc, inc (24)
2.) inc, 9 sc, (inc) * 3, 9 sc, (inc) * 2 (30)
3.) – 4.) 30 sc (30, 2 rows)
We knit PSC, fix the thread, cut it off.
If necessary, sew on the seamy side the holes that were formed in the first row using a needle with a white thread for sewing as shown in the photo.
3. EARS (2 PARTS)
We knit with brown yarn.
We do not fill the part.
1.) 6 sc into magic ring (6)
2.) inc, 5 sc (7)
3.) inc, 6 sc (8)
4.) inc, 7 sc (9)
5.) (2 sc, inc) * 3 (12)
6.) (3 sc, inc) * 3 (15)
7.) (2 sc, inc) * 5 (20)
8.) (3 sc, inc) * 5 (25)
9.) 25 sc (25)
10.) (3 sc, dec) * 5 (20)
Fold the piece in half and knit 10 sc for both sides.
4. CONNECTORS
Using the hook, we hide the ponytails inside the part.
Fold each ear in half and sew.
The horns are made up of three pieces that are joined together.
We knit with dark green yarn, we fill in the process of knitting.
Detail No. 1:
1.) 6 sc into magic ring (6)
2.) (1 sc, inc) * 3 (9)
3.) – 4.) 9 sc (9, 2 rows)
We fix the thread, cut it off.
Part No. 2:
1.) 6 sc into magic ring (6)
2.) (1 sc, inc) * 3 (9)
3.) – 4.) 9 sc (9, 2 rows)
We connect parts N 1 and N 2.
How to connect parts is discussed in the Appendix to the MK.
We knit: 9 sc – for part No. 1, 9 sc – for part No. 2.
We get 18 loops in a row.
We continue to knit.
5.) 9 dec (9)
6.) – 12.) 9 sc (9, 7 rows)
We knit PSC, fix the thread, cut it off.

Detail No. 3:
1.) 6 sc into magic ring (6)
2.) (1 sc, inc) * 3 (9)
3.) – 4.) 9 sc (9, 2 rows)
We knit PSC, fix the thread, cut it off.
Part No. 3 is not tightly filled and we sew / glue on the 8-10th row of part No. 2.
5. LEGS (2 PARTS)
RIGHT LEG
We start knitting with white yarn.
We collect 6 ch, we begin to knit from the second loop from the hook:
1.) 4 sc, 3 sc in one loop, 3 sc, inc (12)
2.) inc, 3 sc, (inc) * 3, 3 sc, (inc) * 2 (18)
3.) 1 sc, inc, 3 sc, (1 sc, inc) * 3, 3 sc, (1 sc, inc) * 2 (24)
Change the color of the yarn to red.
4.) Knit by the jumper 24 sc (24)
You will find how to knit by the jumper in the Appendix.
5.) 24 sc (24)
Now we need to cut the insoles into our boots. We circle the part on cardboard, cut it out and insert it into the boots (photo on the next page).
6.) 4 sc, (dec) * 3, 1 sc, (dec) * 3, 7 sc (18)
7.) 4 sc, dec, decrease from 3 sts, dec, 7 sc (14)
I explain how to make a decrease from three loops in the Appendix to the MK.
Change the color of the yarn to green. You will find how to change the color in the appendix to the MK.
8.) For the back half-loops we knit: (2 sc, dec, 1 sc, dec) * 2 (10)
We fill the leg. Next, we will fill the part in the knitting process.
9.) 10 sc (10)
Change the color of the yarn to white.
10.) 10 sc (10)
Change the color of the yarn to green.
11.) – 12.) 10 sc (10, 2 rows)
Change the color of the yarn to white.
13.) 10 sc (10)
Change the color of the yarn to green.
14.) – 15.) 10 sc (10, 2 rows)
Change the color of the yarn to white.
16.) 10 sc (10)
Change the color of the yarn to green.
Knit an additional 5 sc, fix the thread and cut.
LEFT LEG
We start knitting with white yarn.
We collect 6 ch, we begin to knit from the second loop from the hook:
1.) 4 sc, 3 sc in one loop, 3 sc, inc (12)
2.) inc, 3 sc, (inc) * 3, 3 sc, (inc) * 2 (18)
3.) 1 sc, inc, 3 sc, (1 sc, inc) * 3, 3 sc, (1 sc, inc) * 2 (24)
Change the color of the yarn to red.
4.) Knit by the jumper 24 sc (24)
You will find how to knit by the jumper in the Appendix.
5.) 24 sc (24)
Now we need to cut the insoles into our boots. We circle the part on cardboard, cut it out and insert it into the boots (photo on the next page).
6.) 4 sc, (dec) * 3, 1 sc, (dec) * 3, 7 sc (18)
7.) 4 sc, dec, decrease from 3 sts, dec, 7 sc (14)
I explain how to make a decrease from three loops in the Appendix to the MK.
Change the color of the yarn to orange. You will find how to change the color in the appendix to the MK.
Change the color of the yarn to green.
8.) For the back half-loops we knit: (2 sc, dec, 1 sc, dec) * 2 (10)
We fill the leg. Next, we will fill the part in the knitting process.
9.) 10 sc (10)
Change the color of the yarn to white.
10.) 10 sc (10)
Change the color of the yarn to green.
11.) – 12.) 10 sc (10, 2 rows)
Change the color of the yarn to white.
13.) 10 sc (10)
Change the color of the yarn to green.
14.) – 15.) 10 sc (10, 2 rows)
Change the color of the yarn to white.
16.) 10 sc (10)
Change the color of the yarn to green.
Knit an additional 9 sc, do not cut the thread, continue knitting. Next, we knit the body.
* TOP OF BOOTS
We use red yarn. We make a loop and attach it to the front half loop (to the first half loop) of the 8th row.
How to attach a loop to a knitted product for the front half loop is shown in the Appendix to the MK.
1.) ch, (2 sc, inc) * 3, 4 sc (17)
2.) (3 sc, inc) * 3, 5 sc (20)
Knit sl-st, fix the thread, cut off.


6. BODY
We connect the legs. How to connect the legs is discussed in the Appendix to the MK.
We continue to knit.
We collect 8 ch, we knit:
10 sc – on the right leg,
8 sc – by transition,
10 sc – on the left,
8 sc – by transition,
10 sc – on the right,
8 sc – by transition.
We put a marker, mark the beginning of the first row. We should have 36 stitches in a row.
We change the yarn to white.
1.) (5 sc, inc) * 6 (42)
Change the color of the yarn to green.
2.) – 3.) 42 sc (42, 2 rows)
Change the color of the yarn to white.
4.) 42 sc (42)
Change the color of the yarn to green.
5.) – 6.) 42 sc (42, 2 rows)
Change the color of the yarn to white.
7.) 42 sc (42)
Change the color of the yarn to green.
8.) – 9.) 42 sc (42, 2 rows)
Change the color of the yarn to white.
10.) Knit by the jumper: 7 sc, dec, 19 sc, dec, 12 sc (40)
11.) 16 sc, dec, 18 sc, dec, 2 sc (38)
12.) 7 sc, dec, 17 sc, dec, 10 sc (36)
13.) 15 sc, dec, 16 sc, dec, 1 sc (34)
14.) 6 sc, dec, 15 sc, dec, 9 sc (32)
15.) 14 sc, dec, 14 sc, dec (30)
16.) 5 sc, dec, 13 sc, dec, 8 sc (28)
17.) 12 sc, dec, 12 sc, dec (26)
18.) 5 sc, dec, 11 sc, dec, 6 sc (24)
19.) 10 sc, dec, 10 sc, dec (22)
20.) 5 sc, dec, 9 sc, dec, 4 sc (20)
Change the color of the yarn to brown.
21.) – 22.) 20 sc (20, 2 rows)
We knit PSC, fix the thread, cut it off.
7. HANDLES (2 PARTS)
We start knitting with red yarn.
We fill from 1 to 6 rows.
1.) 6 sc into magic ring (6)
2.) 6 inc (12)
3.) – 4.) 12 sc (12, 2 rows)
5.) 3 sc, 4 DC with common base and one vertex, 8 sc (12)
I show in detail how to knit 4 DC with a common base and one vertex in the Appendix to the MK.
6.) (2 sc, dec) * 3 (9)
7.) 9 sc (9)
We change the yarn to white.
8.) Knit by the back half-loops 9 sc (9)
9.) – 20.) 9 sc (9, 12 rows)
Knit an additional 3 sc, fold the piece in half and knit by both sides 5 sc.
* TOP OF MITTLES
We use red yarn. We make a loop and attach it to the front half loop (to the first half loop) of the 8th row.
How to attach a loop to a knitted product for the front half loop is shown in the Appendix to the MK.
Knit: ch, 1 sc, inc, (2 sc, inc) * 2 (12)
We close the row sl-st in ch, fix the thread, cut it off.
Design and assembly:
1) Cut out 2 circles with a diameter of 13 – 14 mm from felt.
We glue eyes 1 cm in diameter on felt circles on the side as shown in the photo.
2) We glue the eyes on the 10-12th row of the head at a distance of 8 sc between them.
3) We make a peephole tightening. Mark points from N 1 to N 4 as shown in the photo.
We use a needle and brown thread for sewing.
The process is described in detail in the Appendix to the MC.
4) Glue the nose in the middle of the muzzle for 3-4 rows.
5) We fix the muzzle with basting needles from 13 to
18 head row.
We sew it to the head with a needle with white thread for sewing as shown in the photo. We DO NOT fill the part.
6) We decorate the eyes with black thread for sewing. Do not tighten the thread.
Mark points from N 1 to N 4 as shown in the photo.
We use a needle with black thread for sewing (in two threads).
We fix the thread on the last row of the head. We insert the needle into the part, output it at point N 1, hold the thread with our finger, then insert the needle into N 2, then N 3 and N 4.
We bring the needle to the last row of the head. We fix the thread, cut it off.
Next, insert the basting needles as shown.
on the picture. We do this so that in the future we will fix the thread in these places.
We again insert the black thread into the needle, fix it on the last row of the head, output it at point N 1 and enter it into it behind the black thread. Thus, fixing it. Do not tighten the thread. We repeat the indicated action at each marked point.
We bring the needle to the last row of the head, fix and cut off.
7) We embroider a smile. Do not tighten the thread too much!
We mark the points with basting needles as shown in the photo.
Point N 1 is under the nose, N 2 is between 2 and 3 rows of the muzzle, N 3 and 4 are between 1 and 2 rows at a distance of 7 sc between them.
We put a thread for sewing black in two threads into the needle, fix it on the last row of the head, insert it into the last row of the head and bring the needle to point N 1, then to N 2, to N 3, to N 2, to N 4 and again to point N 2.
We take out the needle next to the last row of the head, fix it and cut it off.
8) Embroider eyebrows
We mark the points with basting needles.
The upper ones (N 2 and N 3) are between 5 and 6 row at a distance of 4 sc between them.
The lower ones (N 1 and N 4) are between 7 and 8 row at a distance of 11 sc between them as shown in the photo.
We thread a black thread into the needle in two threads, insert the head into the last row, fix the thread and insert the needle in order from N 1 to N 4. Draw the needle next to the last row of the head, fix and cut off.
9) We knit a hat.
We use red yarn.
1.) 6 sc in spacecraft (6)
2.) 6 inc (12)
3.) 12 sc (12)
4.) (1 sc, inc) * 6 (18)
5.) 18 sc (18)
6.) 1 sc, inc, (2 sc, inc) * 5, 1 sc (24)
7.) 24 sc (24)
8.) (3 sc, inc) * 6 (30)
9.) 30 sc (30)
10.) 2 sc, inc, (4 sc, inc) * 5, 2 sc (36)
10.) Sew on the horns.
We fix them with basting needles from 6 to 8 rows of the head and sew with a needle with a dark green thread for sewing.
11.) 2 sc, dec, (4 sc, dec) * 5, 2 sc (30)
We knit PSC, fix the thread, cut it off.
We bend the last (tenth) row of the cap. On the first row we glue a pompom (ball / bead) with a diameter of 0.9 (10) mm. I used a pom-pom cut from the fringe.
Sew the cap in the bend area between 4 and 5 near the head.
11) Sew the ears under the horns (on the 9th row of the head).
13) We embroider snowflakes on mittens using a needle with white thread for sewing on 3-5 rows of the handle.
14) Attach the handles.
Using a hook, we hide the ponytails inside the part.
We fix the hands to the body with basting needles on the line of the legs.
Points through which the needles pass:
Hands: between 16 and 17 near,
Body: between 20 and 19 row.
To fix the hands to the body, we use a button fastening. For details, see the Appendix to the MK.
If you just want to sew, then you should do it between 20 and 21 rows of the body.
12) Sew the head to the body.
With basting needles we fix the body between 20 and 21 rows of the head.
We use a needle with a brown thread for sewing (how to fix the thread on a knitted product, see the Appendix) and sew on both half-loops (see Appendix)
15) Scarf.
We use red yarn. Cast on 60 ch From the second loop from the hook we knit: 1 sc, 57 DC, 1 sc.
We fix the thread, cut it off. Glue pom-poms to the ends.
16) Straps.
We use green yarn. We collect 30 ch Co
knit the second loop from the hook: 29 sc. We fix the thread, cut it off.
We tie the tails into a knot. We fix with basting needles on the 9th row of the body at a distance of 6 sc between them. We lower the straps down and fix the same at the back. Sew on the straps using a green sewing needle and 5 mm red buttons. (I carefully glued the buttons)
17) Glue / sew multi-colored buttons with a diameter of 5 mm on the horns.
18) Wrap the scarf around the neck as shown in the photo.
Hurrah! Michael is ready