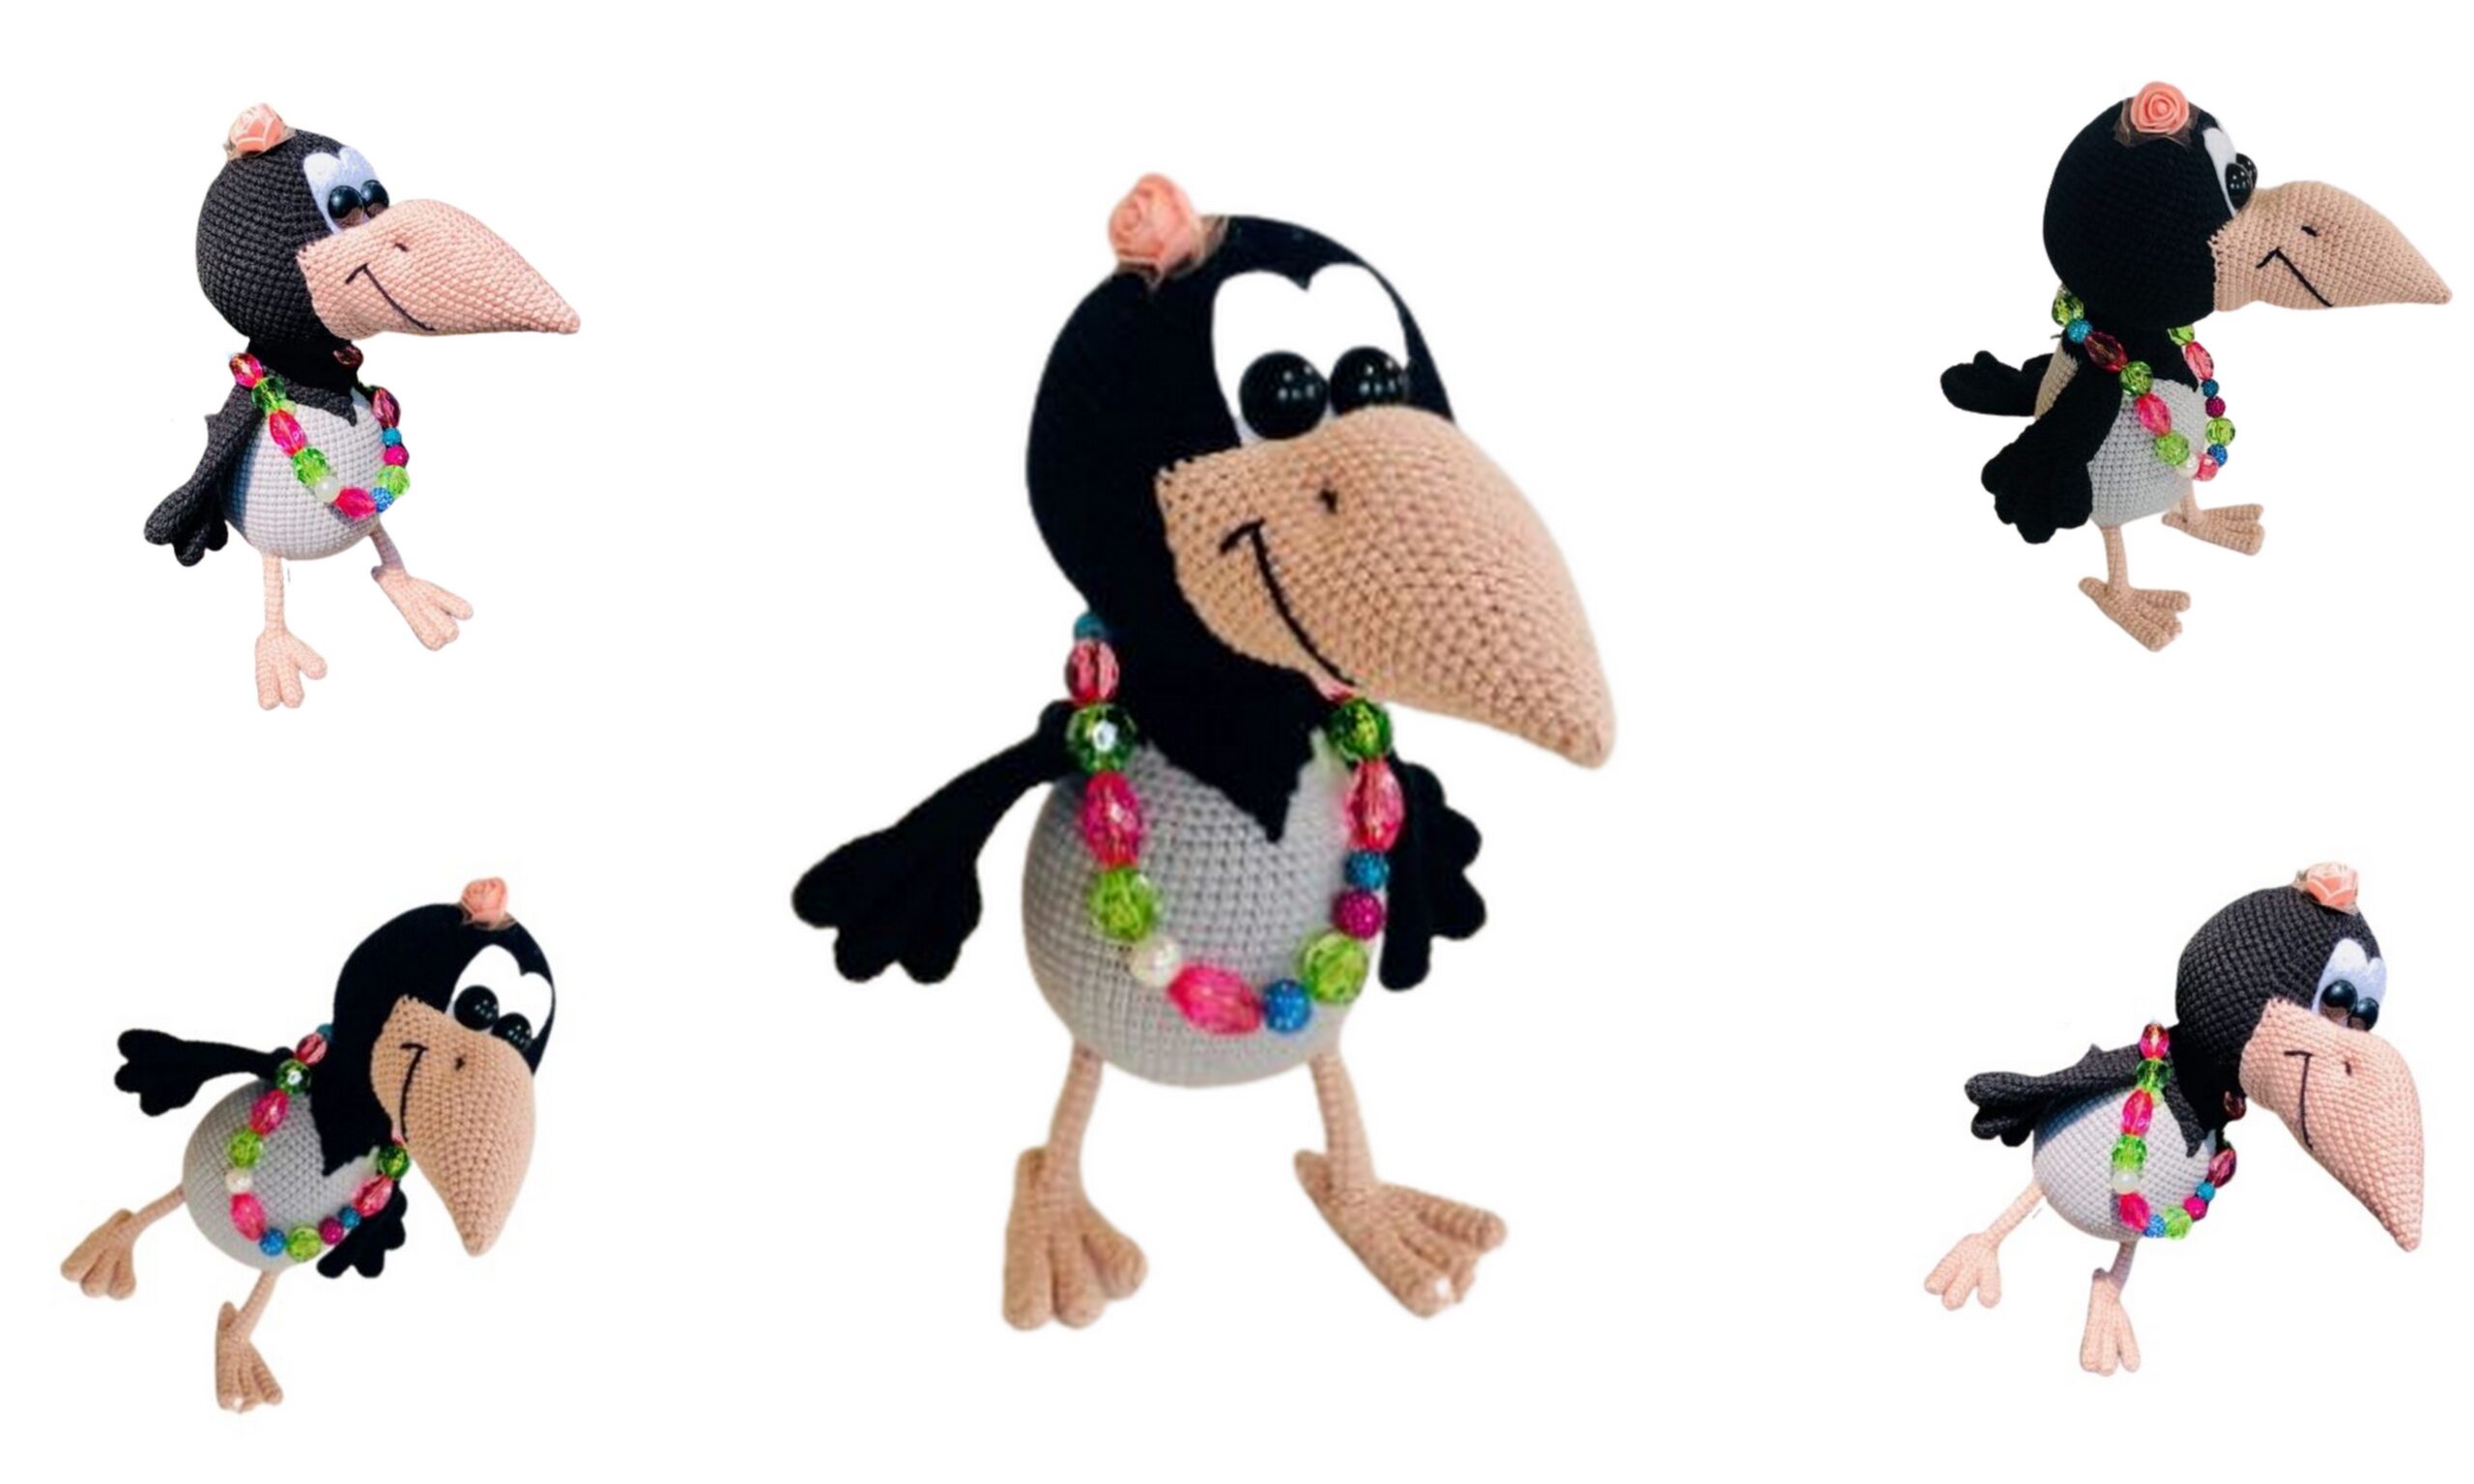
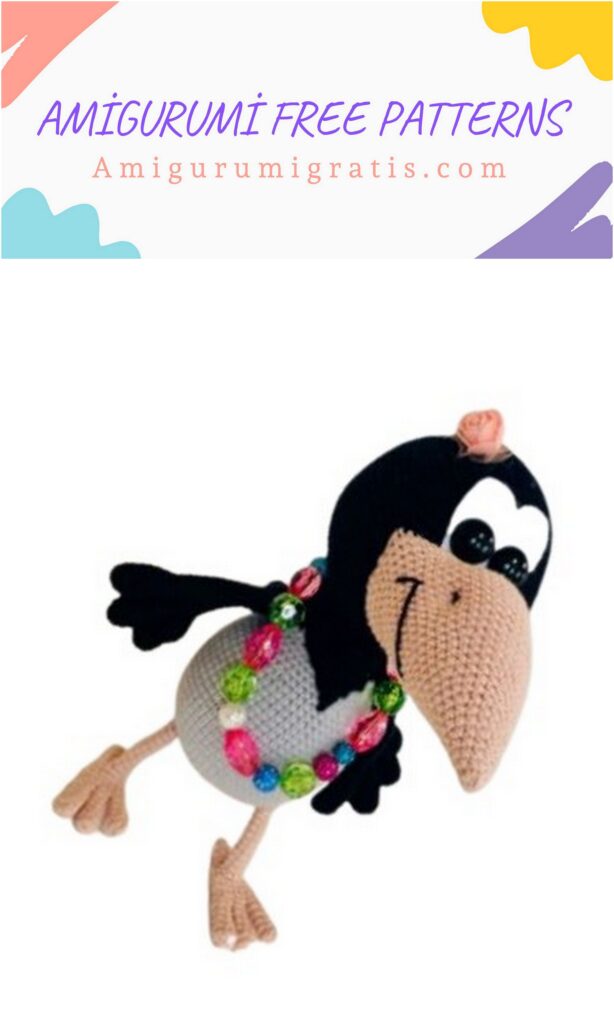
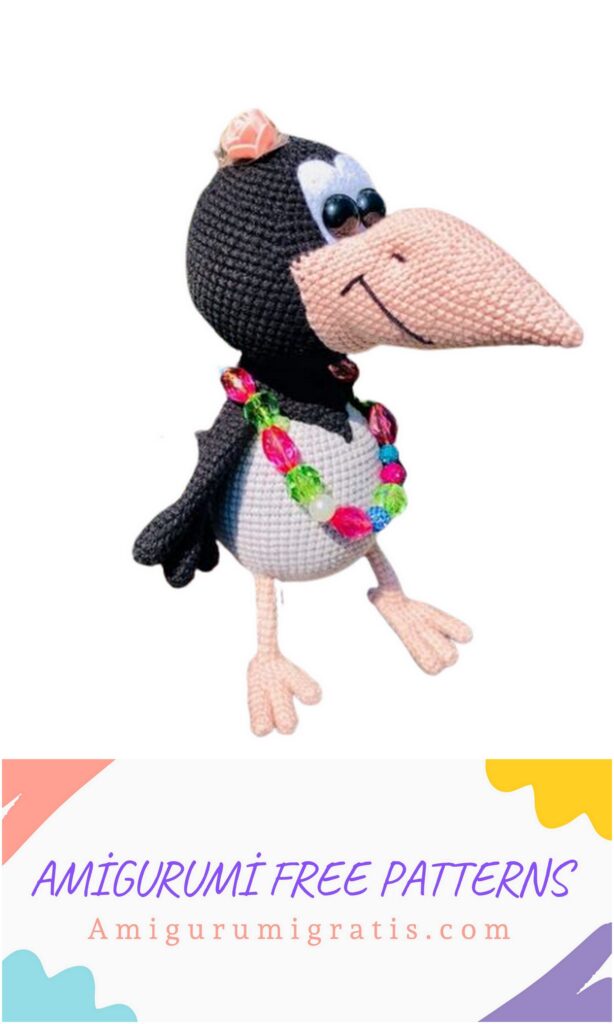
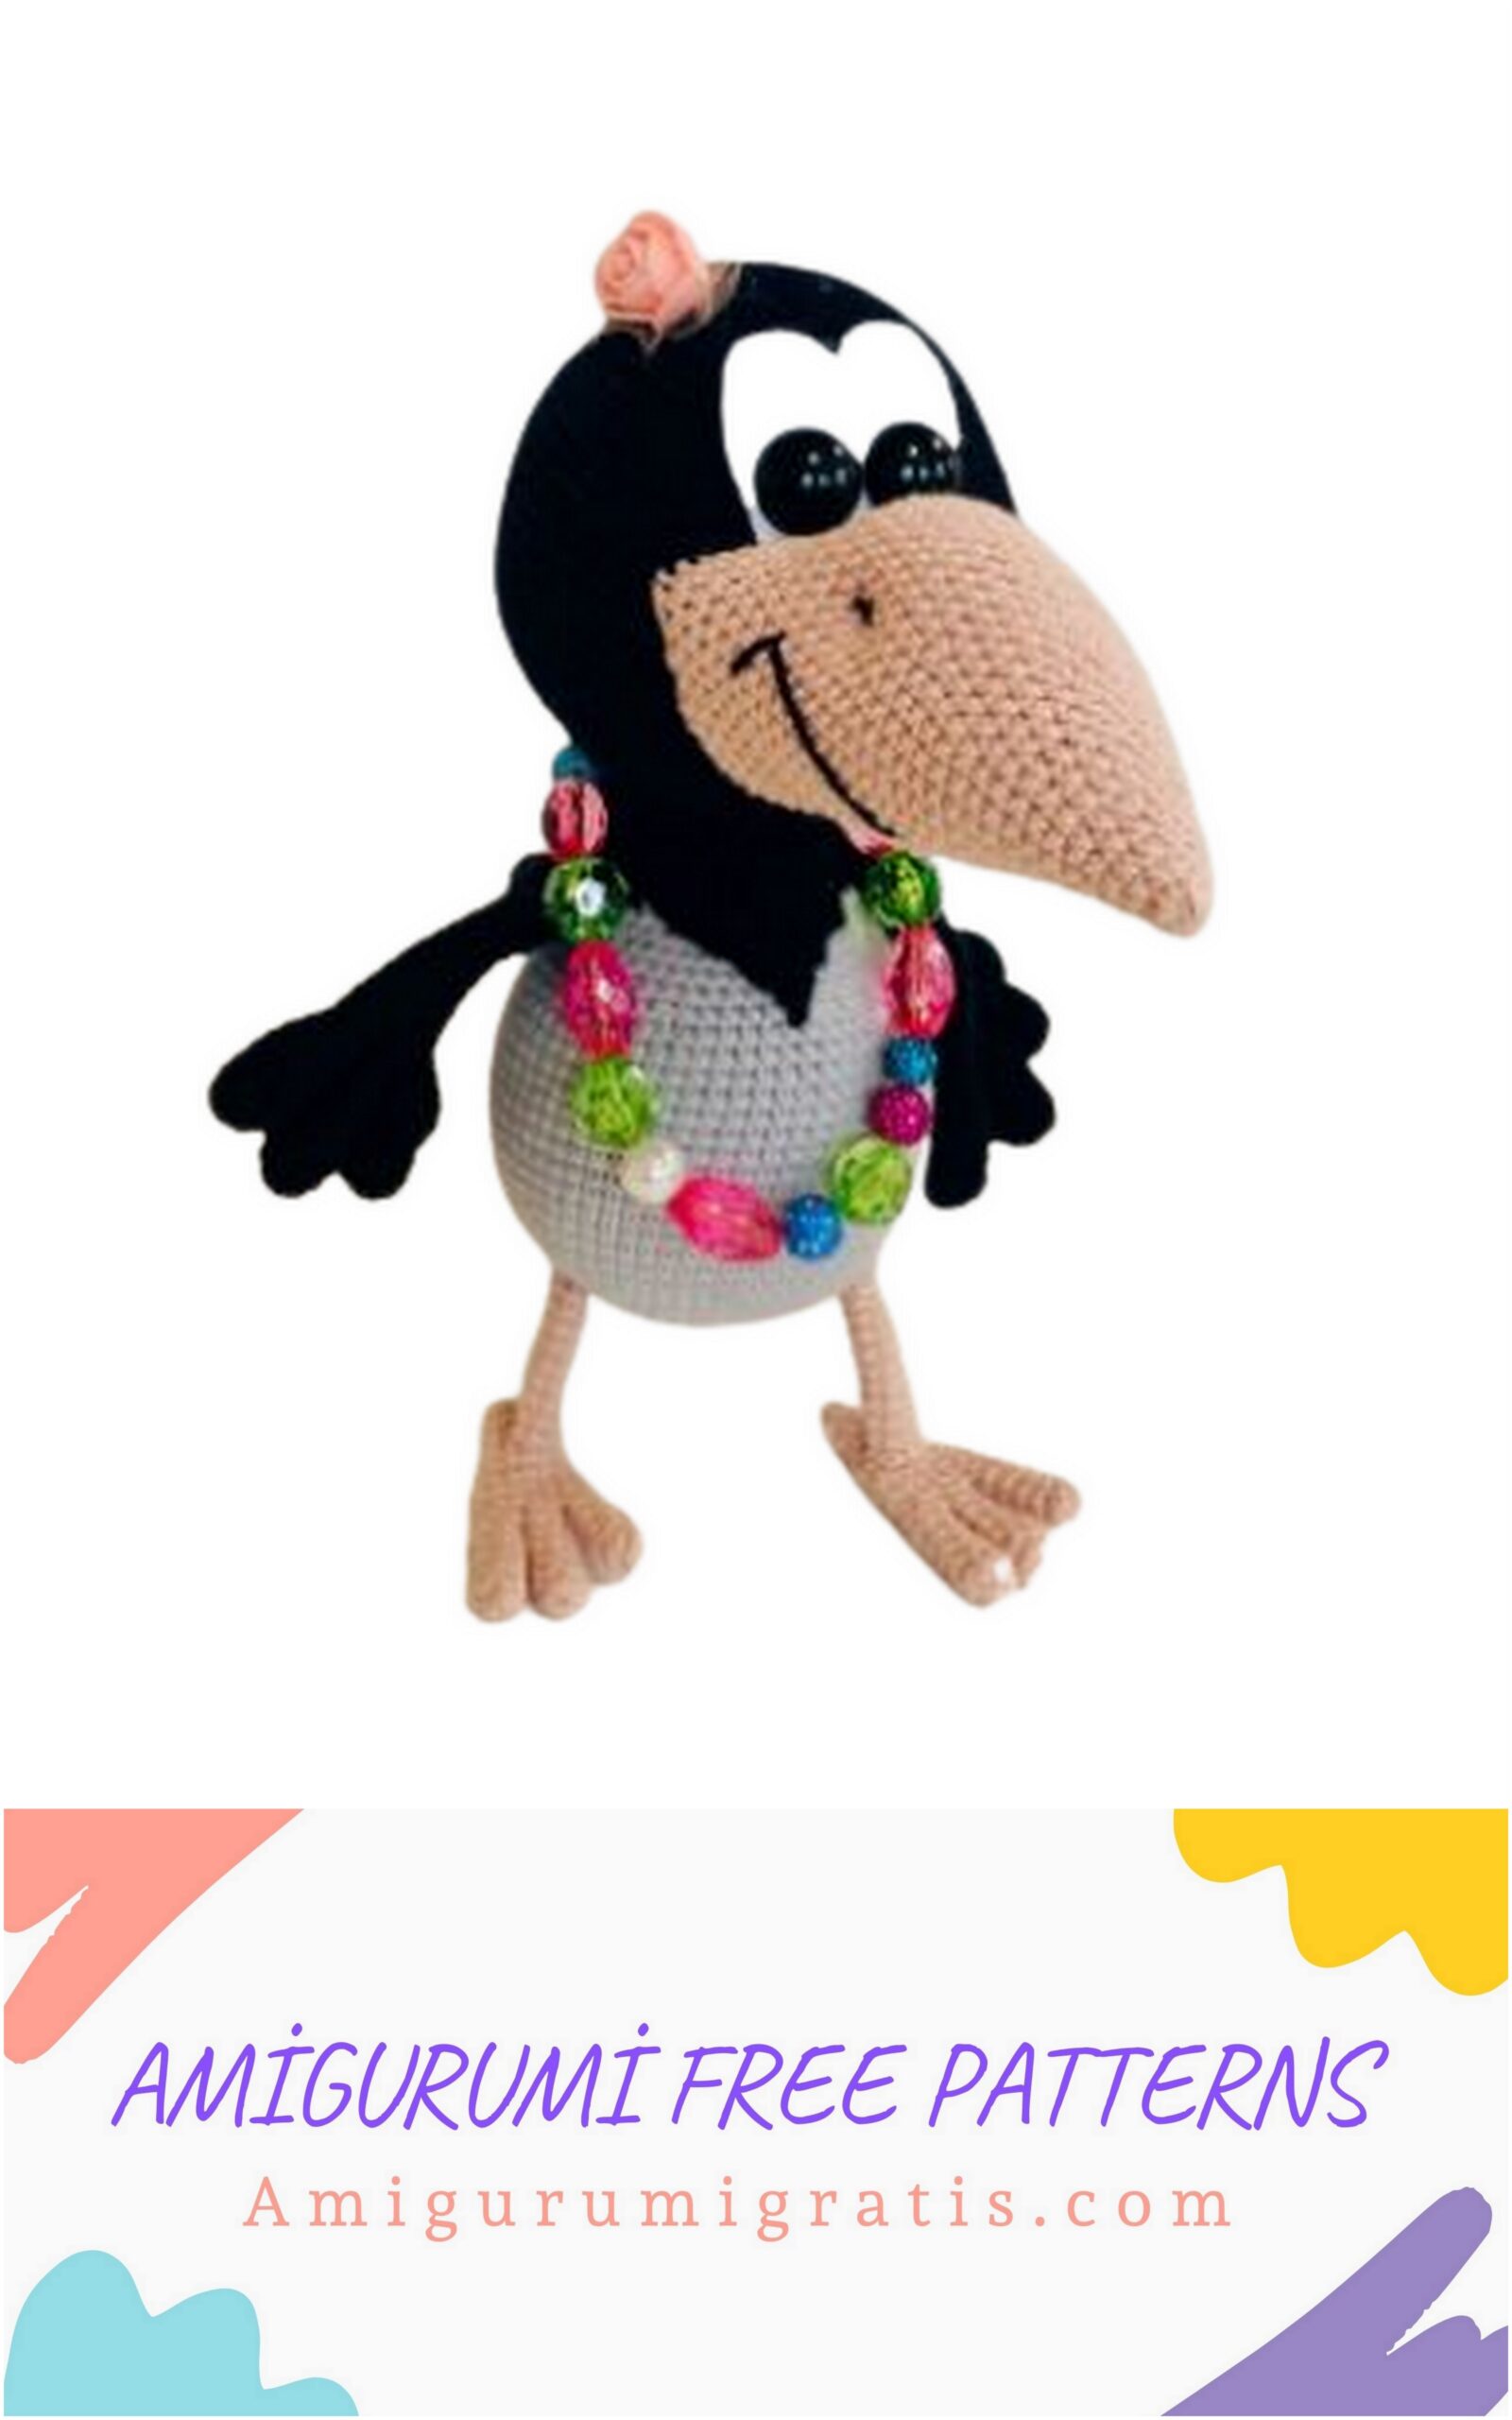
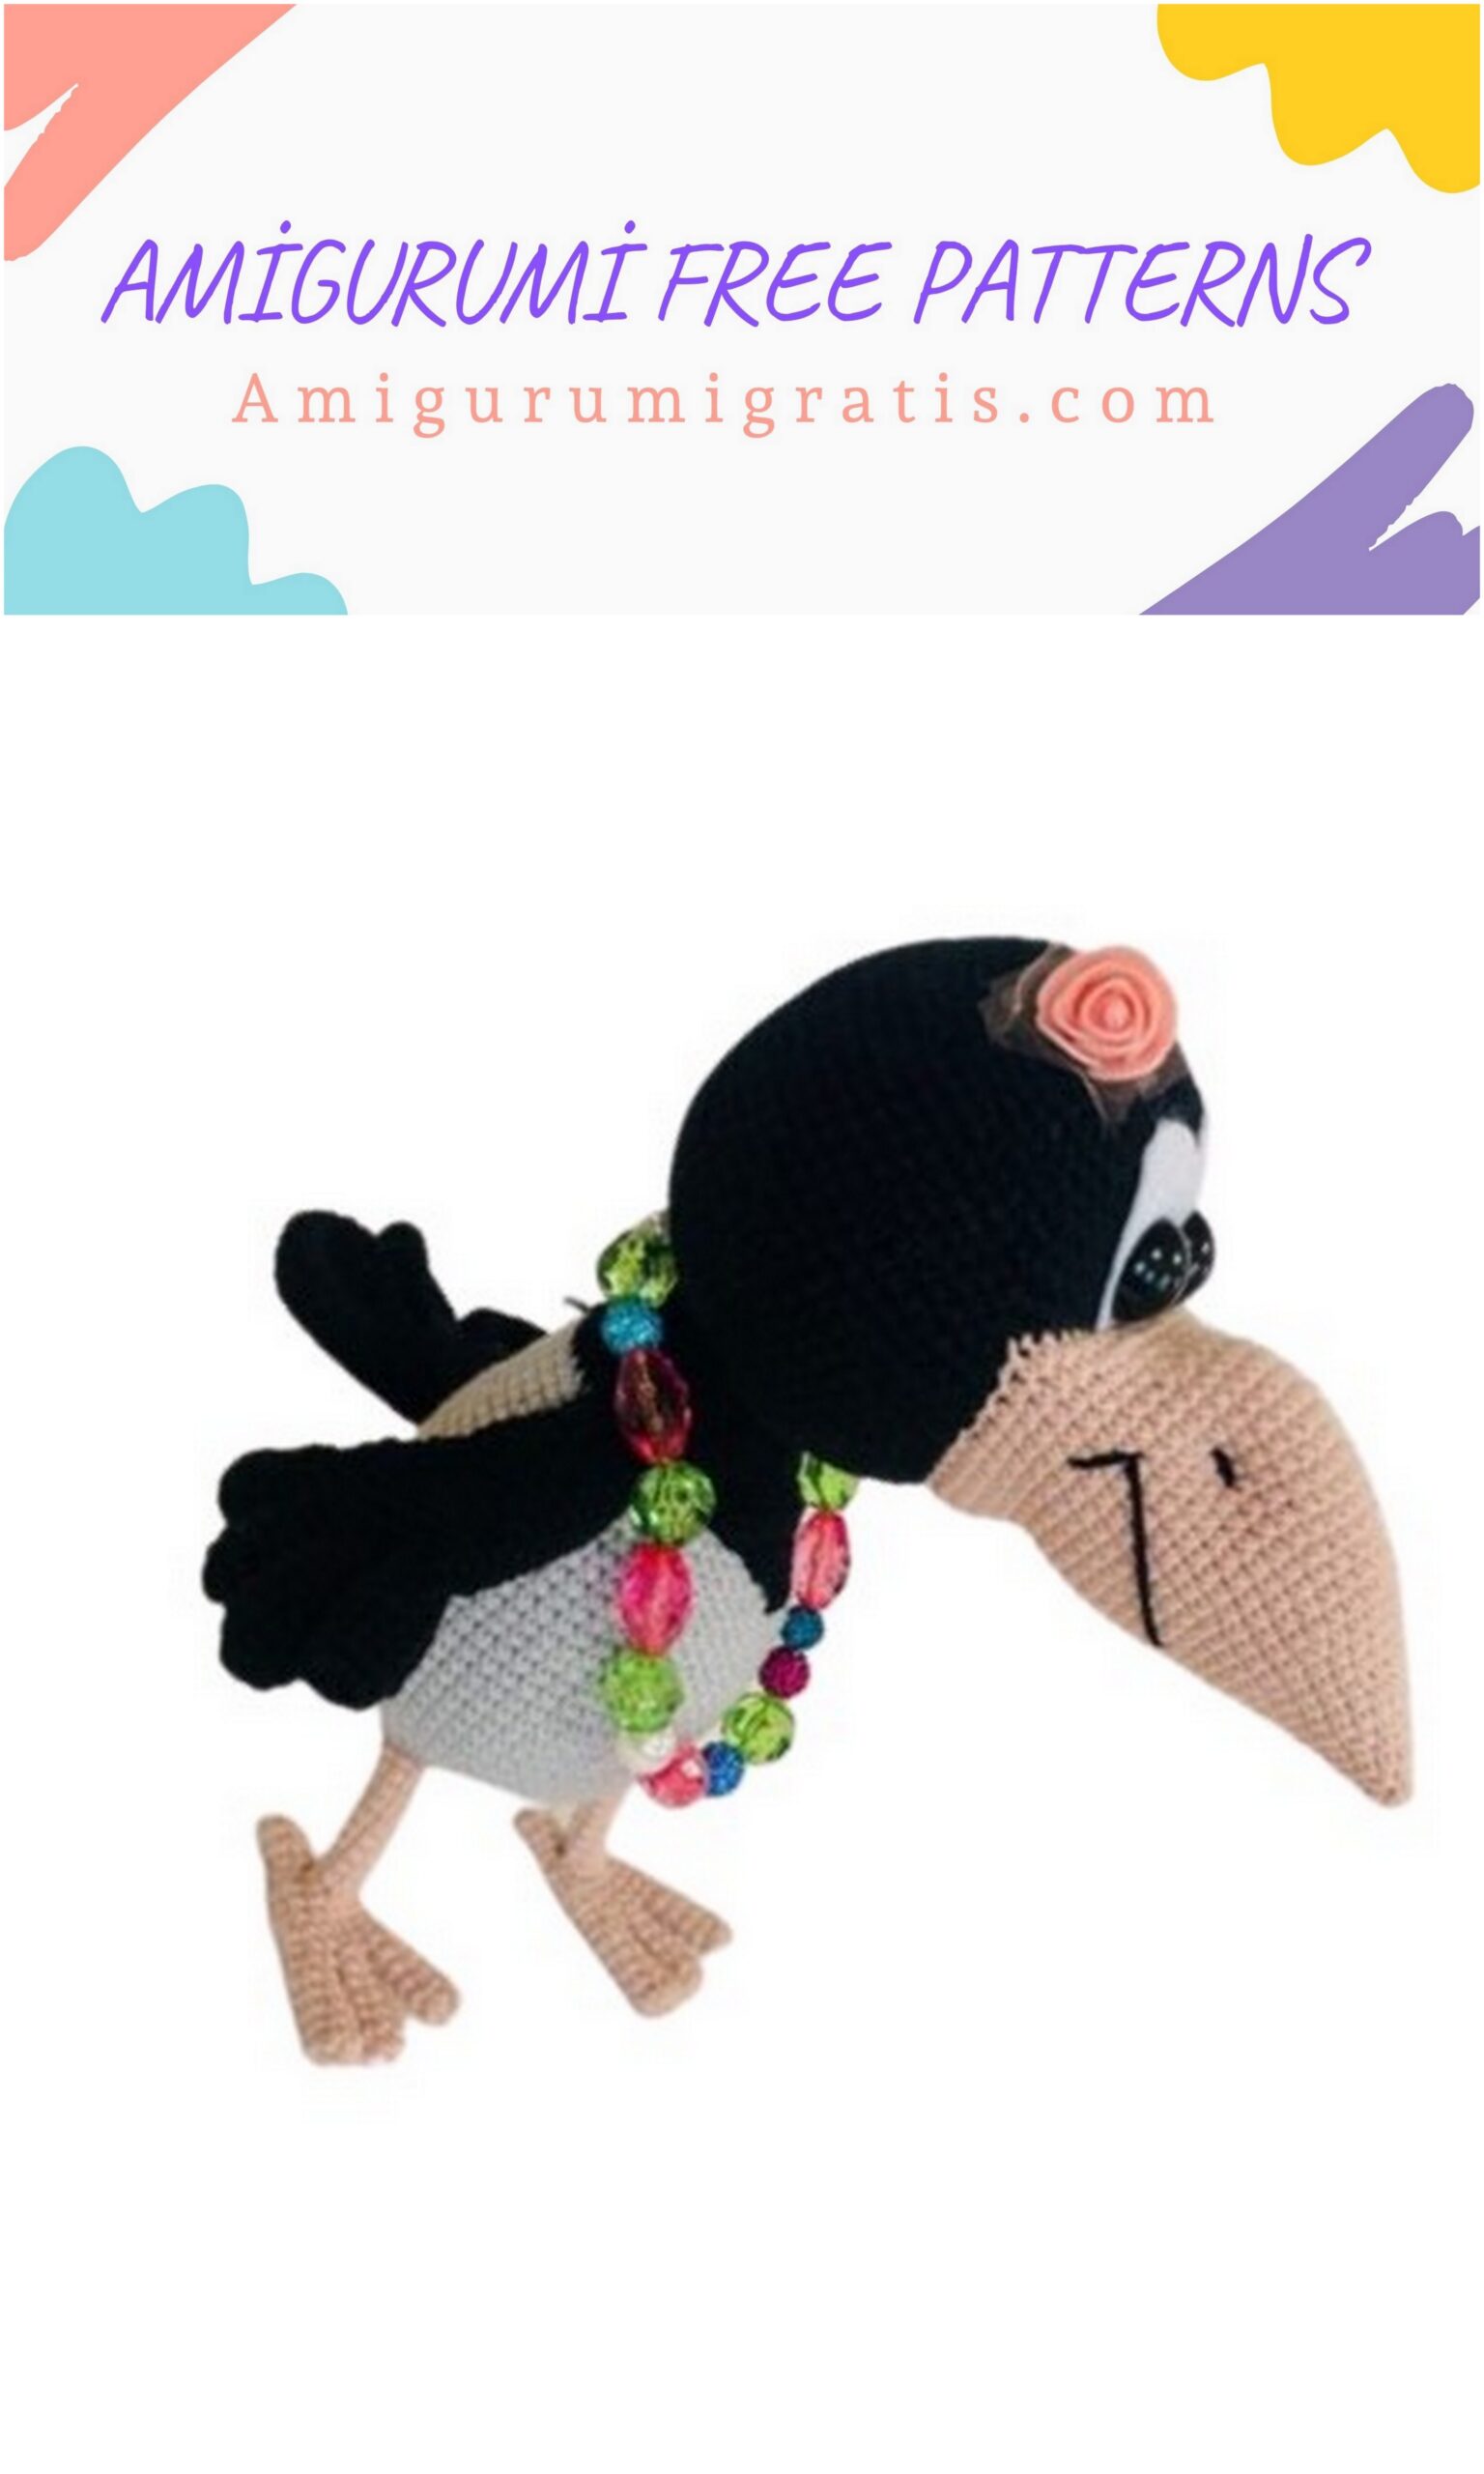
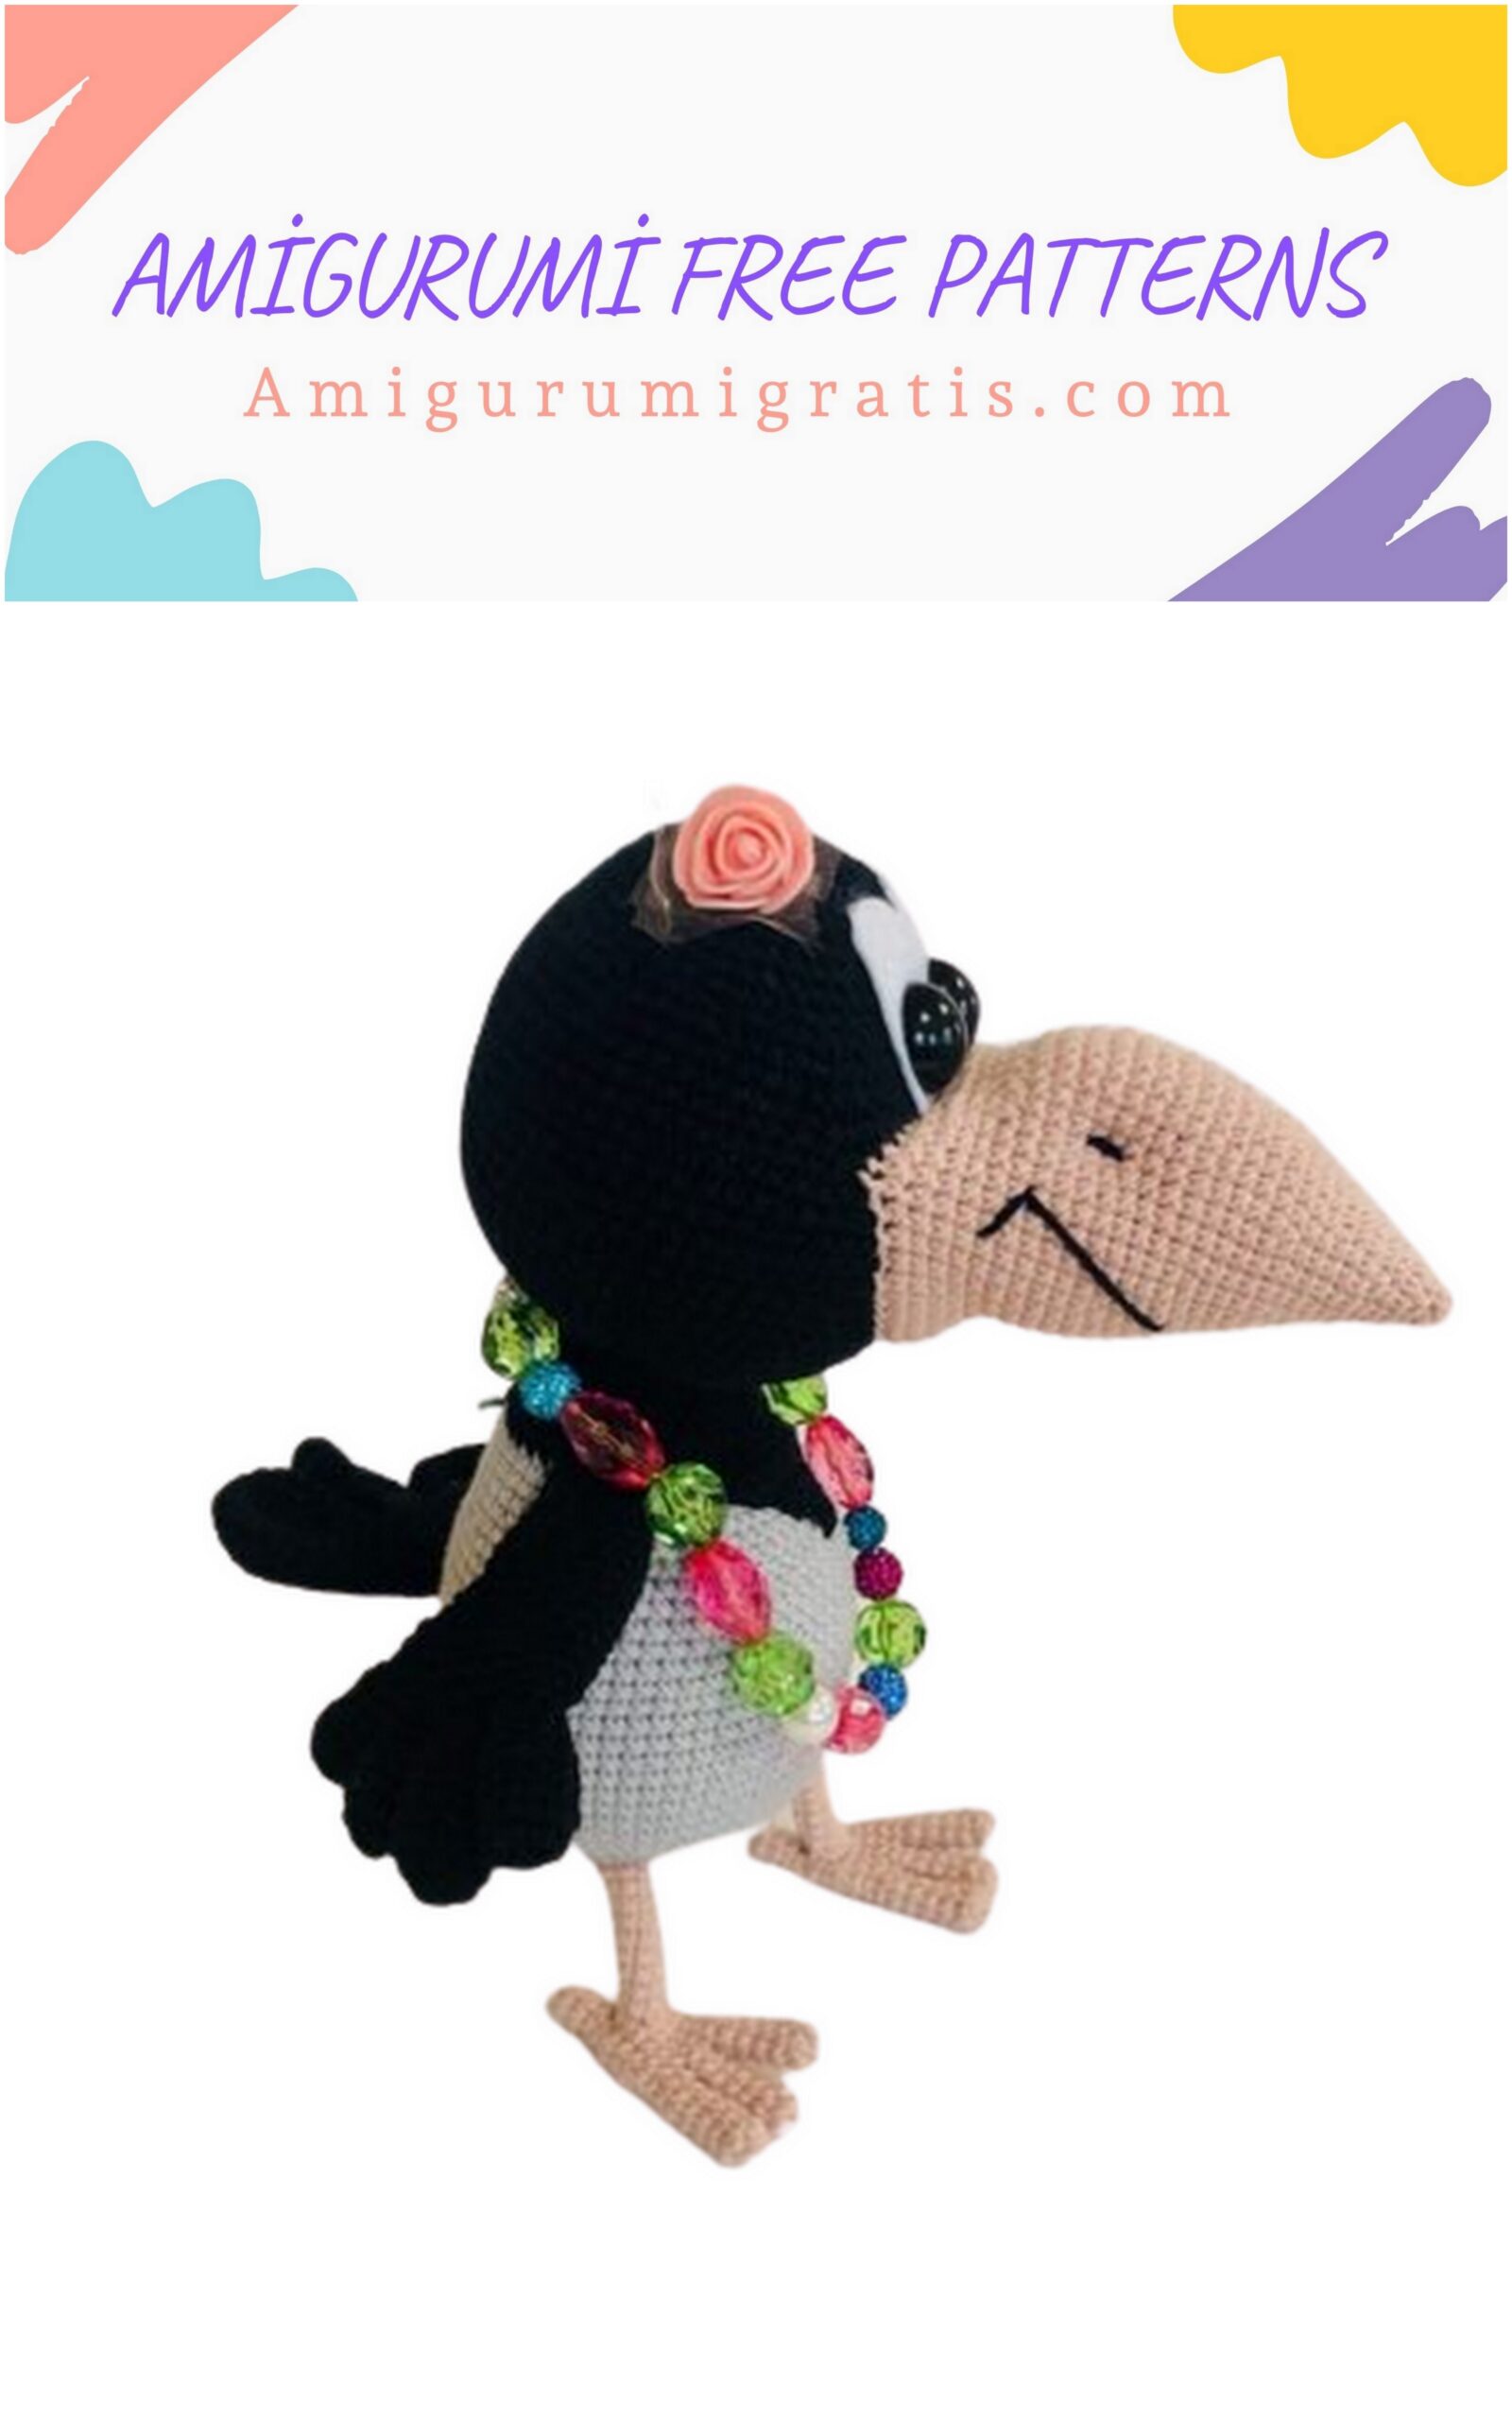
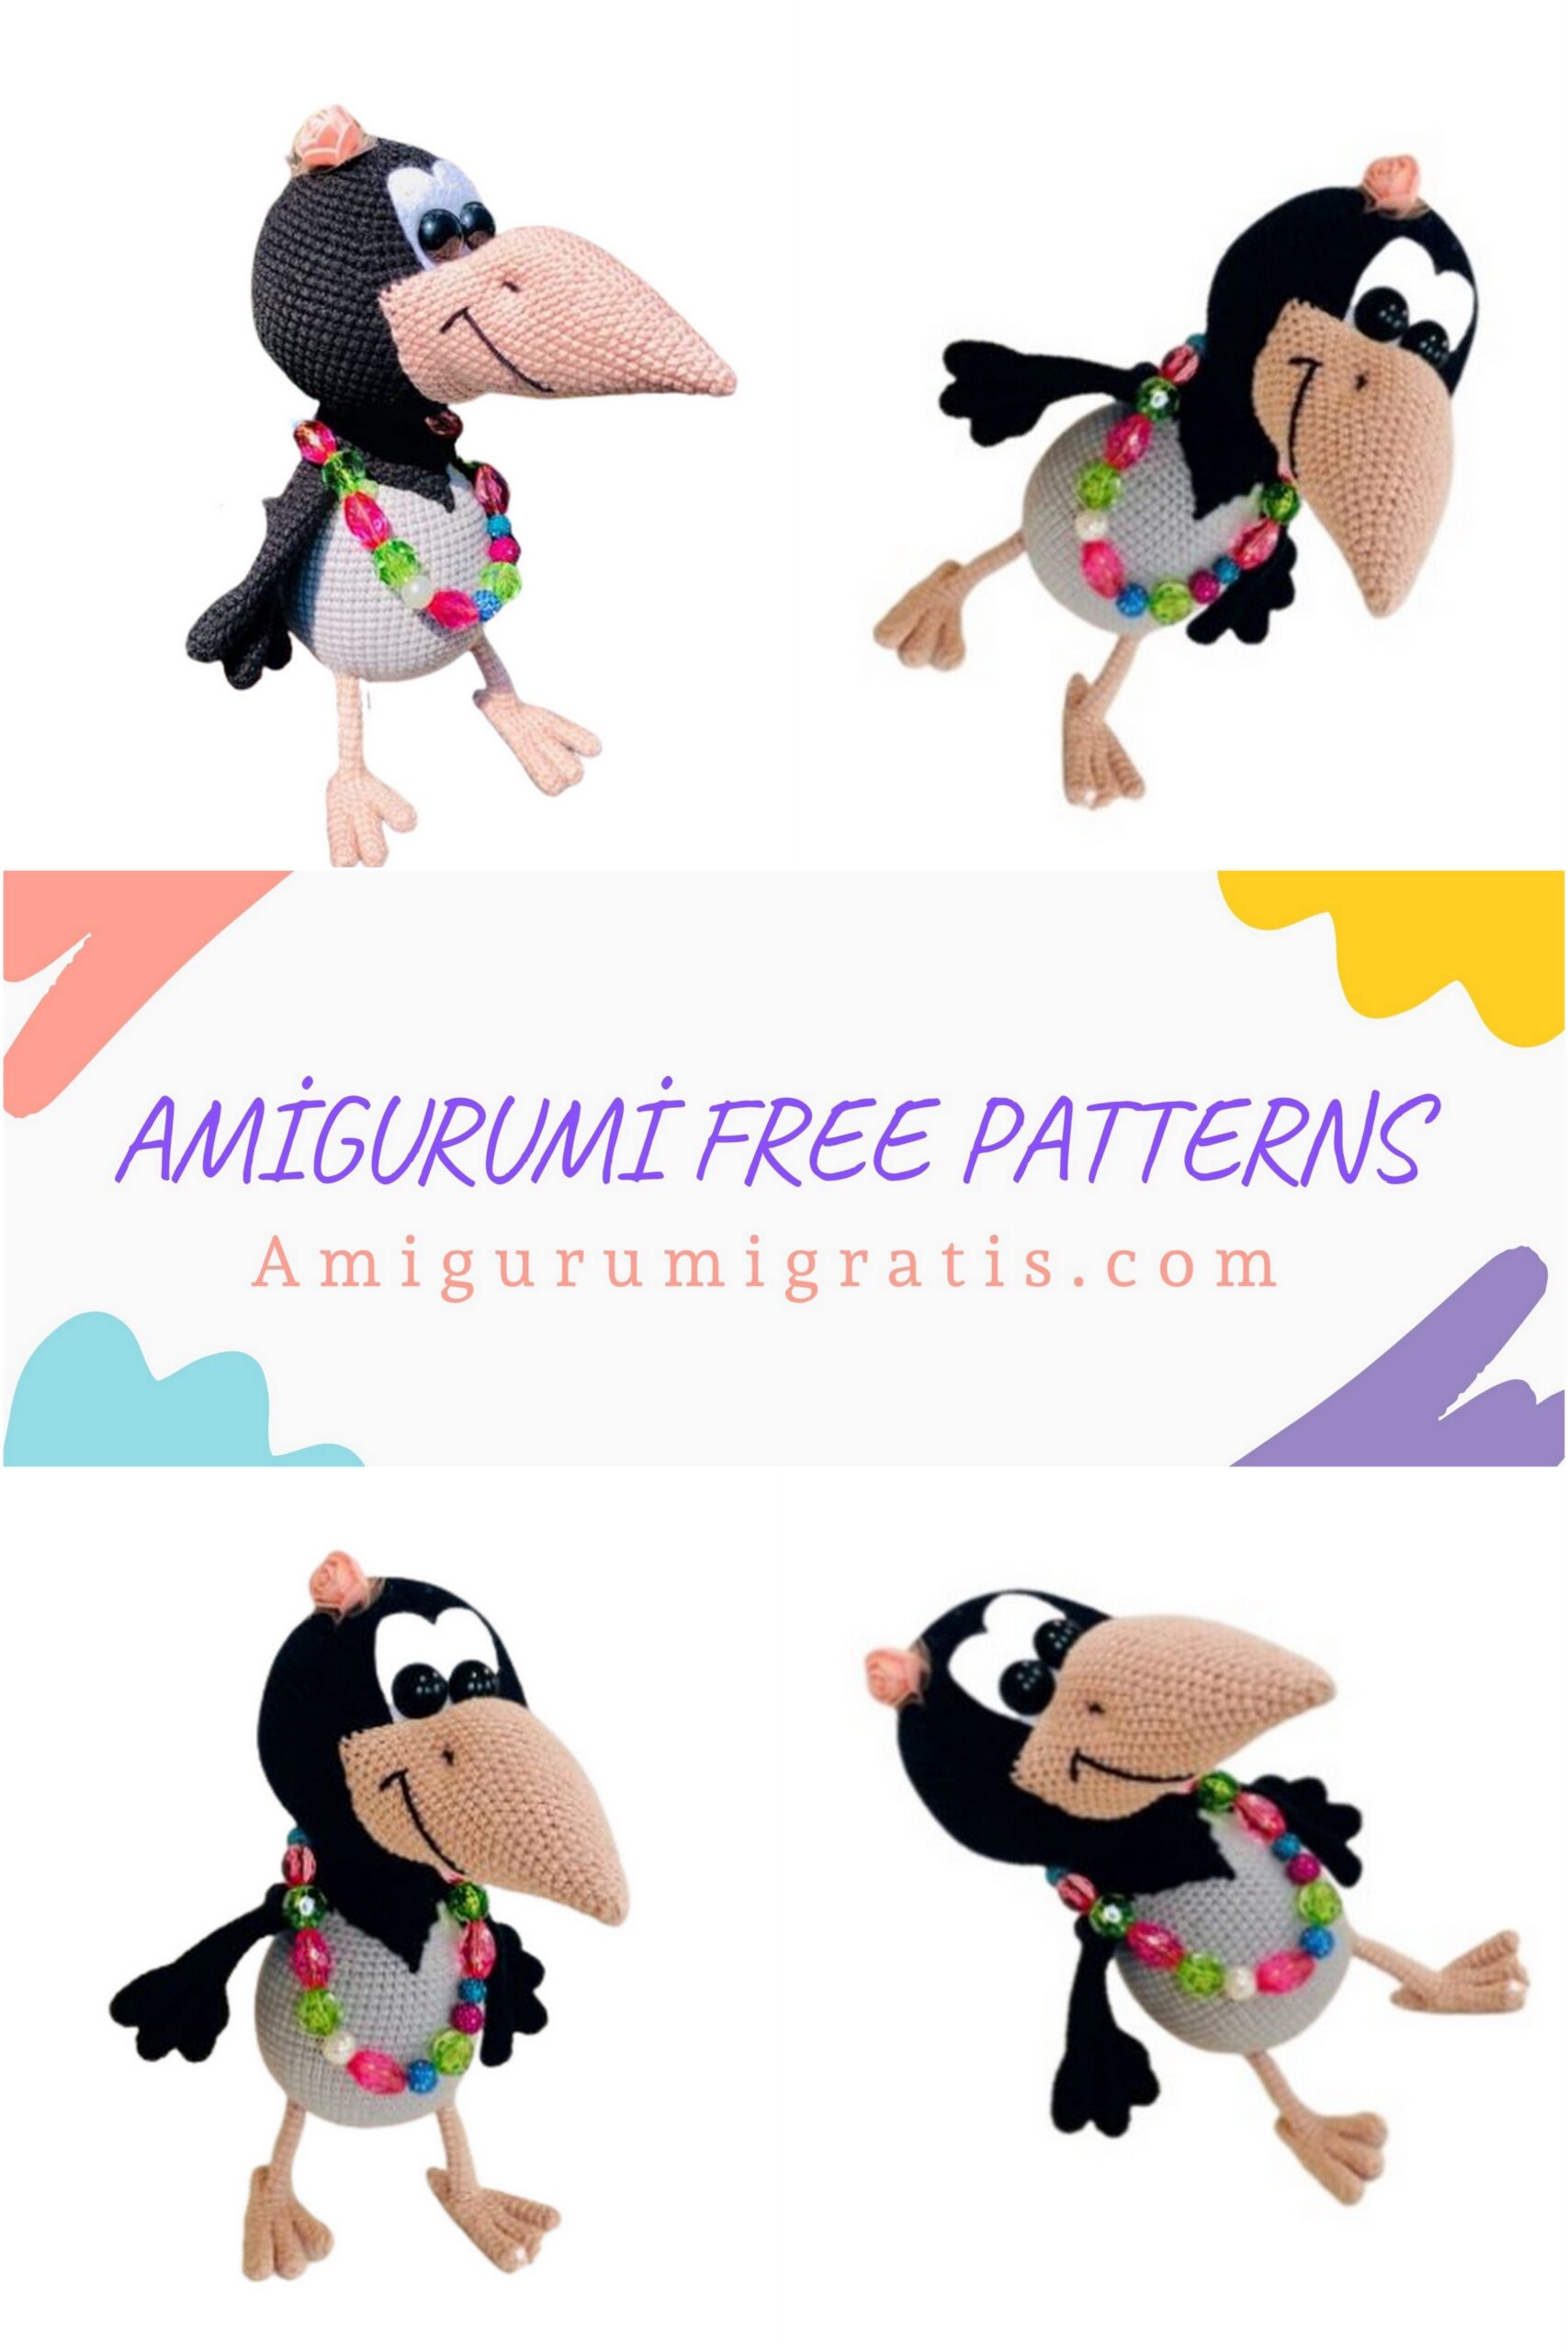
We share the amigurumi crow alena pattern for free. You can visit our website for great amigurumi patterns.
Pattern: Svetlana Voronkova
Legend:
sc – single crochet
ch – air loop
dec – decrease
inc – increase
(…) x6 – repeat the action in
brackets 6 times
Materials:
– Alize Cotton Gold yarn 55% cotton, 45% acrylic (330m / 100g) three
colors – gray, black, beige
– Hook # 2
– Filler
– Ready eyes 12mm
– scissors
– glue
– Needle for sewing on details
– Felt for the eye is white.
The toy is knitted in a spiral, without lifting loops. We stuff in the knitting process.
Of these materials, the height of the toy is 26cm. You can knit from any yarn familiar to you.

Beak:
Knit in beige color. Marker on the side, do not follow him.
1) 6sc in amigurumi ring (6)
2) 6sc
3) (inc) x6 (12)
4-5) 12sc (2 rows)
6) (sc, inc) x6 (18)
7-8) 18sc (2 rows)
9) (2sc, inc) x6 (24)
10-11) 24sc (2 rows)
12) (3sc, inc) x6 (30)
13-15) 30sc (3 rows)
16) (4sc, inc) x6 (36)
17-19) 36sc (3 rows)
20) (5sc, inc) x6 (42)
21-25) 42sc (5 rows)
26) 6sc, (dec) x6, 12sc, (inc) x6, 6sc (42)
27-28) 42sc (2 rows)
29) 6sc, (inc) x6, 30sc (48)
To fill. Cut the thread, leaving a long end for sewing.
Chest lining:
Knit in black, in rotary rows.
1) 10ch, 2 loop from hook 9sc, ch, turn
2) dec, 5sc, dec, ch, turn (7)
3) dec, 3sc, dec, ch, turn (5)
4) dec, sc, dec, ch, turn (3)
5) dec of three sc. Cut the thread.
Wings (2pcs):
Knit in black. We start with feathers. We do not stuff the part.
First feather:
1) 6sc in amigurumi ring
2) (inc) x6 (12)
3) 12sc
4) (sc, dec) x4 (8)
5) 8sc
Cut the thread, hide the end.
Second feather:
1) 6sc in amigurumi ring
2) (inc) x6 (12)
3-5) 12sc (3 rows)
6) (sc, dec) x4 (8)
7) 8sc
Cut the thread, hide the end.
Third feather:
1) 6sc in amigurumi ring
2) (inc) x6 (12)
3-7) 12sc (5 rows)
8) (sc, dec) x4 (8)
9) 8sc
Cut the thread, hide the end.
Fourth feather:
1) 6sc in amigurumi ring
2) (inc) x6 (12)
3-7) 12sc (5 rows)
8) (sc, dec) x4 (8)
9) 8sc
Do not cut the thread, continue knitting.
Connect feathers:
Marker on the side, you can not follow it.
1) 3sc according to the first pen, dec from one sc of the first pen and one sc of the second pen, 2sc from the second pen, dec from one sc of the second pen and one sc of the third pen, 2sc from the third pen, dec from one sc of the third pen and one sc fourth pen, 6sc according to the fourth pen, dec from one sc of the fourth pen and one sc of the third pen, 2sc from the third pen, dec from one sc of the third pen and one sc of the second pen, 2sc from the second pen, dec from one sc of the second pen and one sc first pen, 3sc (26)
2) 12sc, dec, 12sc (25)
3) 12sc, dec, 11sc (24)
4) 11sc, dec, 11sc (23)
5) 10sc, dec, 11sc (22)
6) 10sc, dec, 10sc (21)
7) 10sc, dec, 9sc (20)
8) 9sc, dec, 9sc (19)
9) 8sc, dec, 9sc (18)
10-11) 18sc (2 rows)
12) (4sc, dec) x3 (15)
13) 15sc
14) (3sc, dec) x3 (12)
15-16) 12sc (2 rows)
Fold the part in half, knit 6sc on both sides. Cut the thread, hide the end.
We knit the second wing in the same way.
Tail:
Knit in black. We do not follow the marker. We do not stuff the part.


Feather (3pcs):
1) 6sc in amigurumi ring
2) (inc) x6 (12)
3) (sc, inc) x6 (18)
4) (2sc, inc) x6 (24)
5-6) 24sc (2 rows)
7) (2sc, dec) x6 (18)
8) 18sc
9) (sc, dec) x6 (12)
10) 12sc
On two feathers, cut the thread, hide the end.
On the third thread, do not cut, continue knitting.
Connect feathers:
1) 5sc according to the first pen, dec from one sc of the first pen and one sc of the second pen, 4 sc from the second pen, dec from one sc of the second pen and one sc of the third pen, 10 sc from the third pen, dec from one sc of the third pen and one sc of the second pen, 4 sc of the second pen, dec of one sc of the second pen and one sc of the first pen, 5 sc of the first pen (32)
2) (14sc, dec) x2 (30)
3) (3sc, dec) x6 (24)
4) 24sc
5) (2sc, dec) x6 (18)
6) (7sc, dec) x2 ((16)
Fold the part in half, knit 8sc on both sides. Cut the thread, leaving a long end for sewing.
Legs (2pcs):
Knit in beige color.
Fingers (3pcs):
We do not follow the marker.
1) 6sc in amigurumi ring
2-7) 6sc (6 rows)
On two fingers, cut the thread, hide the end. On the third thread, do not cut, continue knitting.
Connect the fingers:
1) 2sc on the first finger, dec from one sc of the first finger and one sc of the second finger, sc from the second finger, dec from one sc of the second finger and one sc of the third finger, 4sc on the third finger, dec from one sc of the third finger and one sc second finger, sc on the second finger, dec from one sc of the second finger and one sc of the first finger, 2sc on the first finger (14)
2-3) 14sc
If you want to use the wireframe, then at this stage we insert it. If you knit without a frame, then we stuff quite tightly.
4) (5sc, dec) x2 (12)
5) sc, 3ch, skip three sc of the previous row, 8sc (12)
In the resulting hole from three ch, remove the frame.
6) (2sc, dec) x3 (9)
7) (sc, dec) x3 (6)
8-10) 6sc (3 rows)
Pull the hole, cut the thread and hide.
Along the edge of the hole in the 5th row, dial 6sc and knit 10 rows without inc and dec. Cut the thread, hide the end.
Body-head:
Knit in gray. Marker in the middle of the back, if necessary, make a bias loop.
1) 6sc in amigurumi ring
2) (inc) x6 (12)
3) (sc, inc) x 6 (18)
4) (2sc, inc) x6 (24)
5) (3sc, inc) x6 (30)
6) (4sc, inc) x6 (36)
7) (5sc, inc) x6 (42)
In the next row we knit legs.
8) 3sc, inc, 6sc, inc, 3sc together with 3sc of one leg, 3sc, inc, 6sc, inc, 3sc together with 3sc of the other leg, 6sc, inc, 3sc (48)
9) (7sc, inc) x6 (54)
10) (8sc, inc) x6 (60)
11) (9sc, inc) x6 (66)
12-19) 66sc (8 rows)
20) (dec) x3, 54sc, (dec) x3 (60)
21-28) 60sc (8 rows)
29) (8sc, dec) x6 (54)
30) 54sc
31) (7sc, dec) x6 (48)
32) 48sc
33) 18sc, (dec) x6, 18sc (42)
34) 42sc
Change the color to black.
35) 8sc, 6sc with the wing, 14sc, 6sc with the other wing, 8sc (42)
Fill the part quite tightly.
36) 42sc
37) (5sc, dec) x6 (36)
38) (4sc, dec) x6 (30)
39) 30sc
40) (3sc, dec) x6 (24)
41-42) 24sc (2 rows)
43) Behind the back wall (sc, inc) x12 (36)
44) (2sc, inc) x12 (48)
45) 48sc
46) (7sc, inc) x6 (54)
47) (8sc, inc) x6 (60)
48) (9sc, inc) x6 (66)
49-58) 66sc (10 rows)
If you don’t like to sew parts, then in the next row you can knit a beak.
59) 21sc, 24sc along with 24sc of the beak (we knit from the marker the beginning of the row of the beak, the remaining loops of the beak should remain from the bottom), 21sc (66)
60-61) 66sc (2 rows)
62) (9sc, dec) x6 (60)
63) 60sc
64) (3sc, dec) x12 (48)
65-67) 48sc (3 rows)
Fill the part quite tightly.
68) (6sc, dec) x6 (42)
69) (5sc, dec) x6 (36)
70) (4sc, dec) x6 (30)
71) (3sc, dec) x6 (24)
72) (2sc, dec) x6 (18)
73) (sc, dec) x6 (12)
Add filler.
74) (dec) x6
Pull the hole, cut the thread and hide.
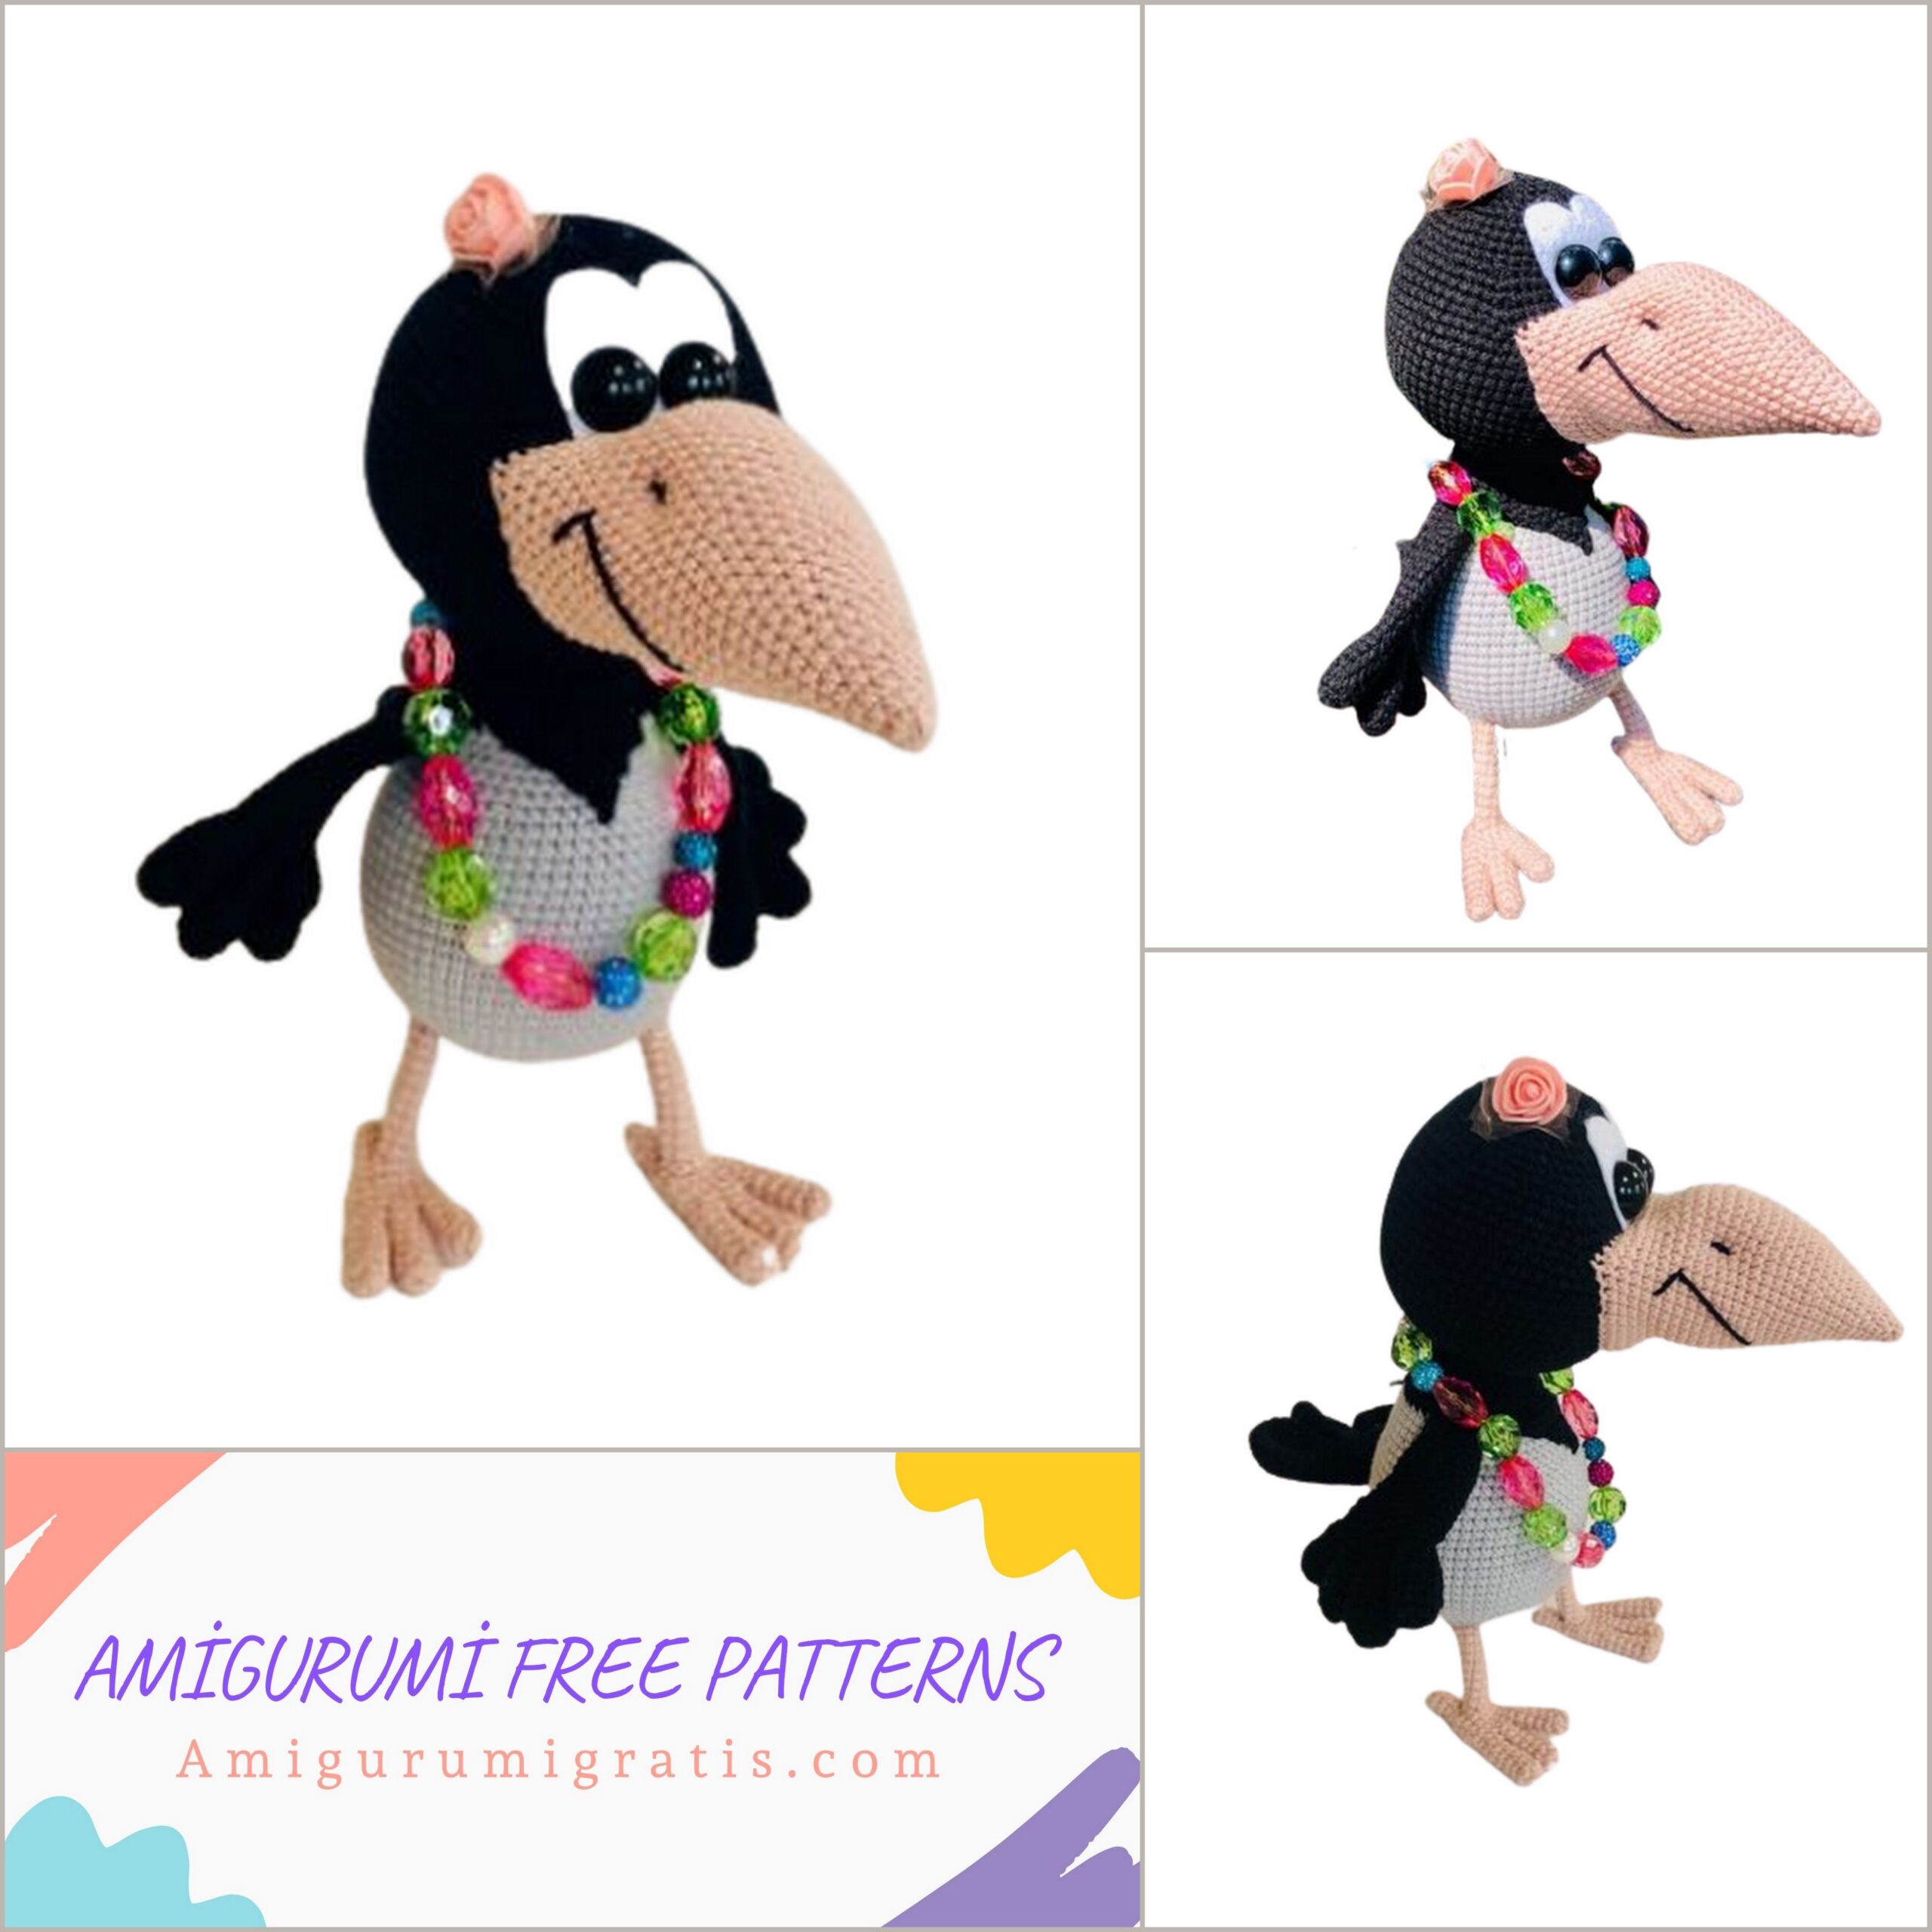
Assembly:
– Fill the beak quite tightly and sew to the head.
– Make the nostril tightening with black thread, embroider a smile.
– From the white felt, cut the undercoats, glue over the beak. To them
stick eyes.
– Sew a patch on the chest.
– Sew a tail over the decreases of the 19th row.
– Decorate the fashionista at your discretion.