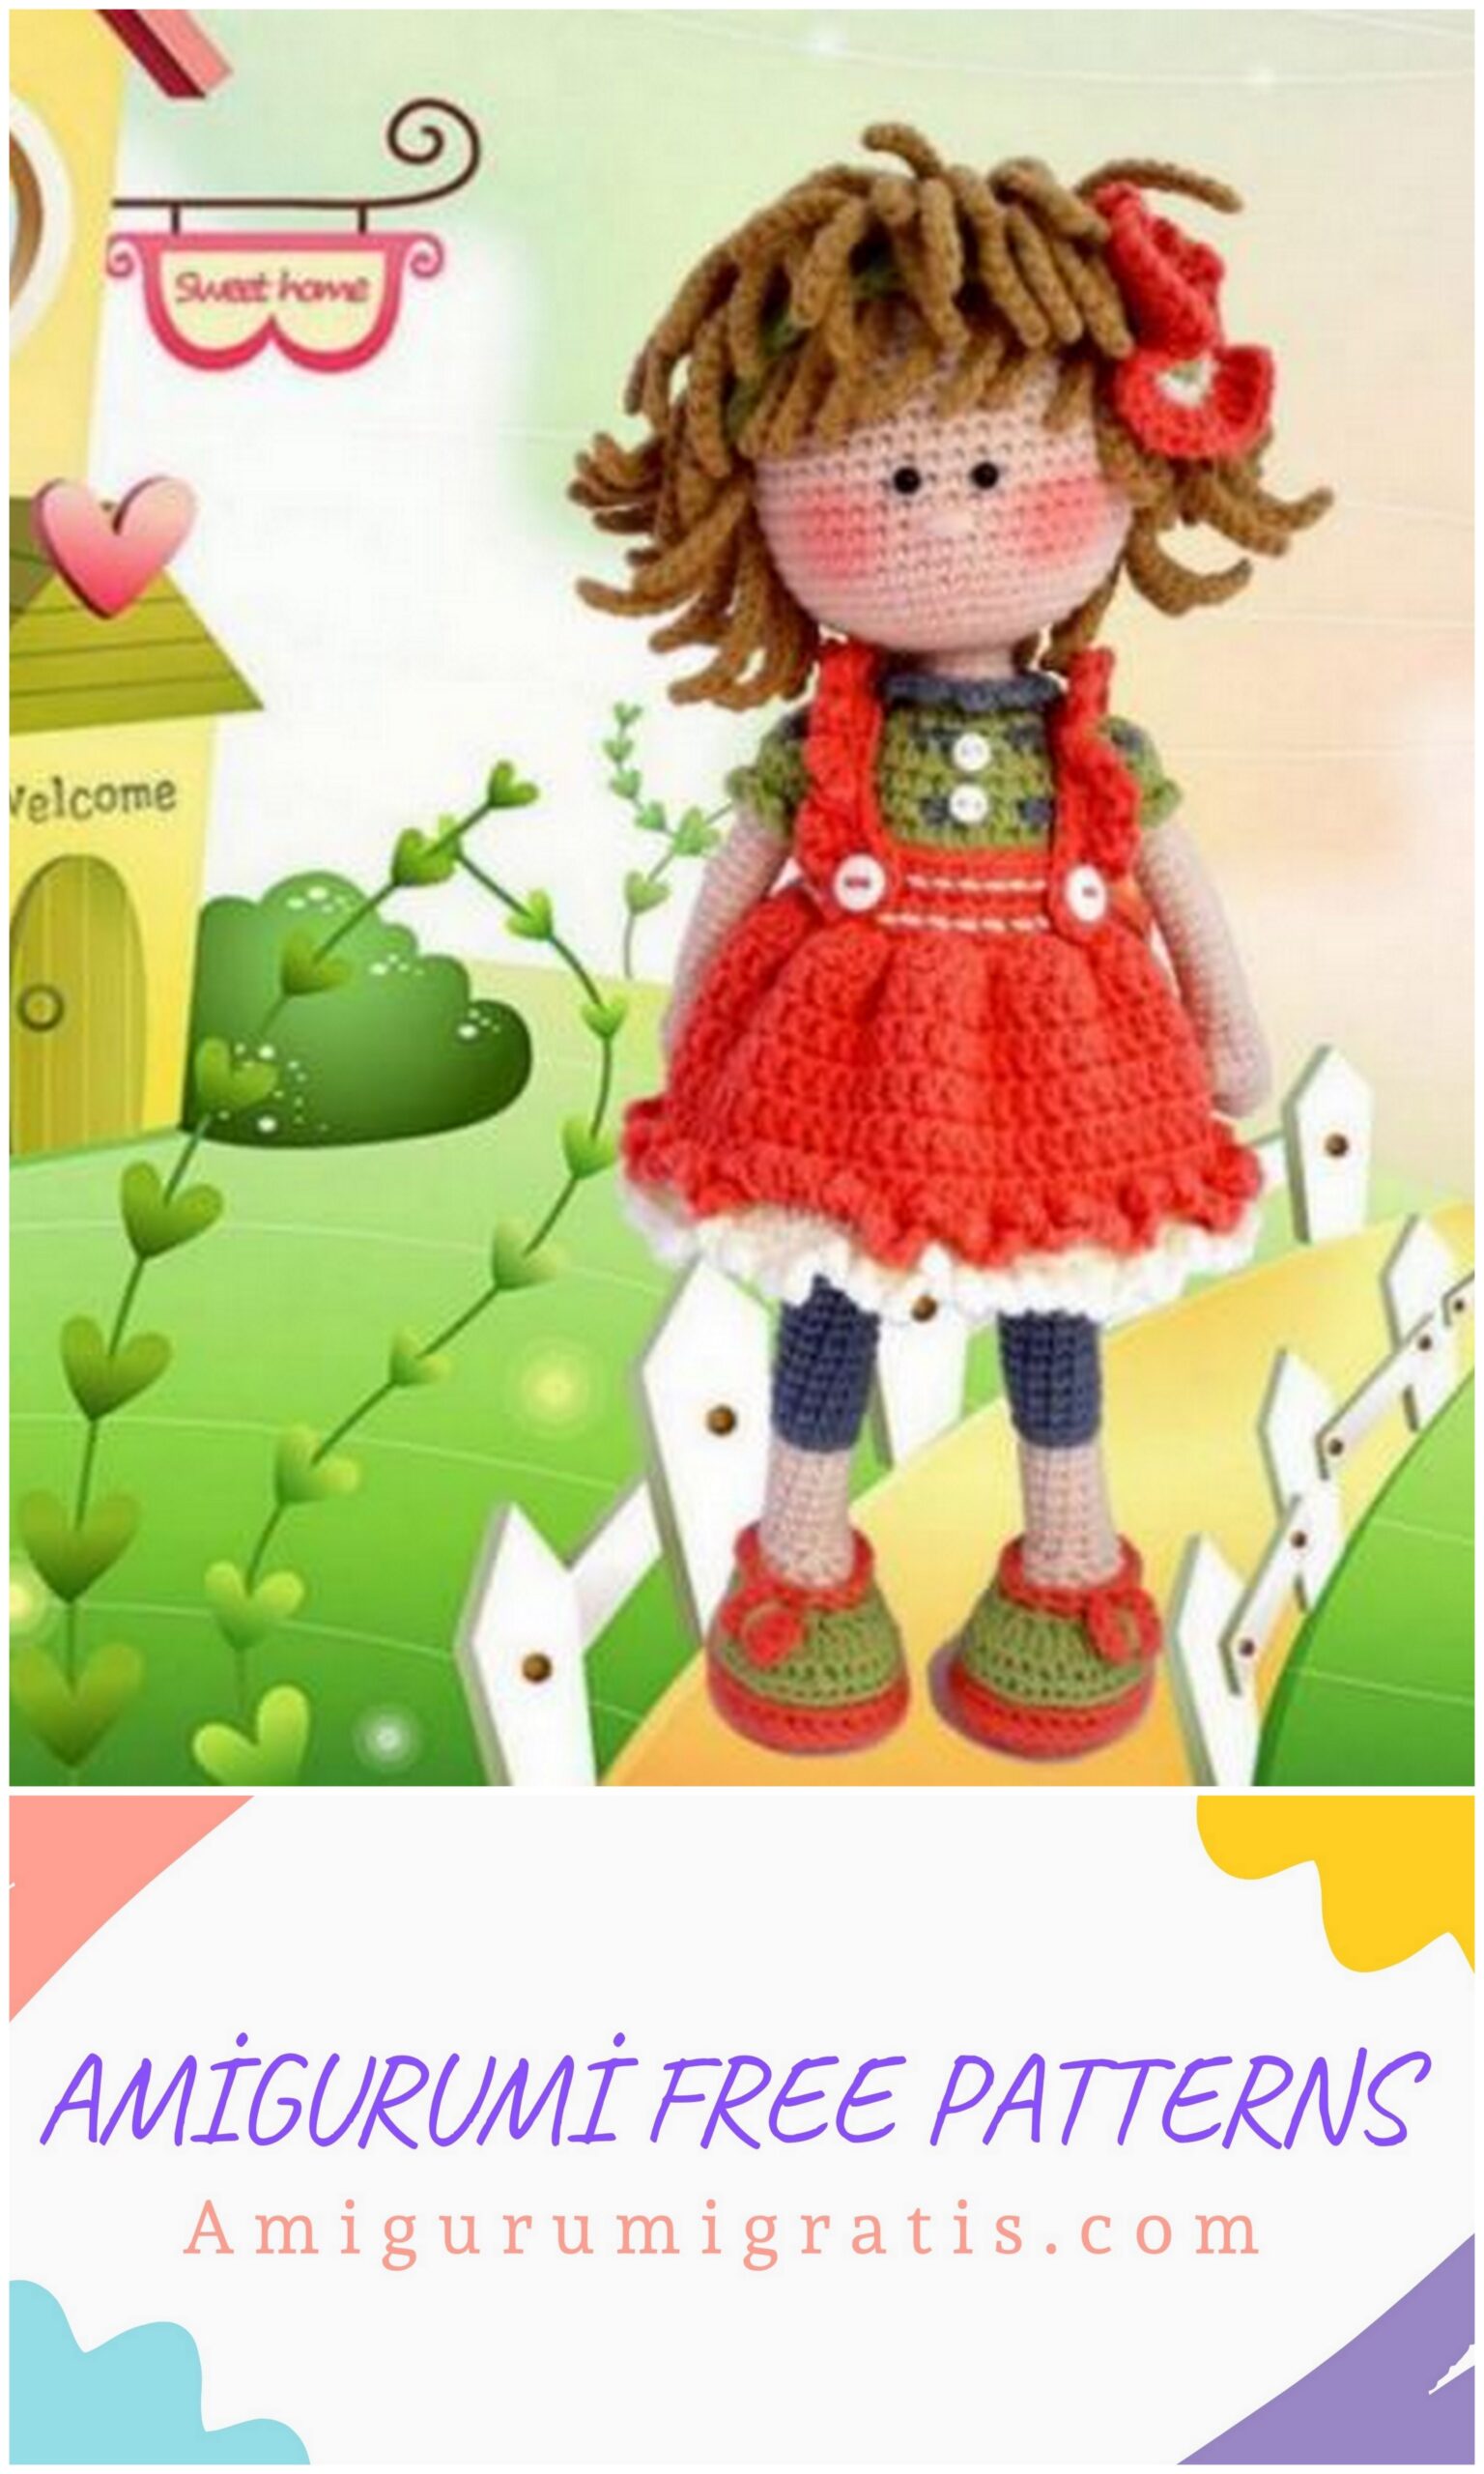
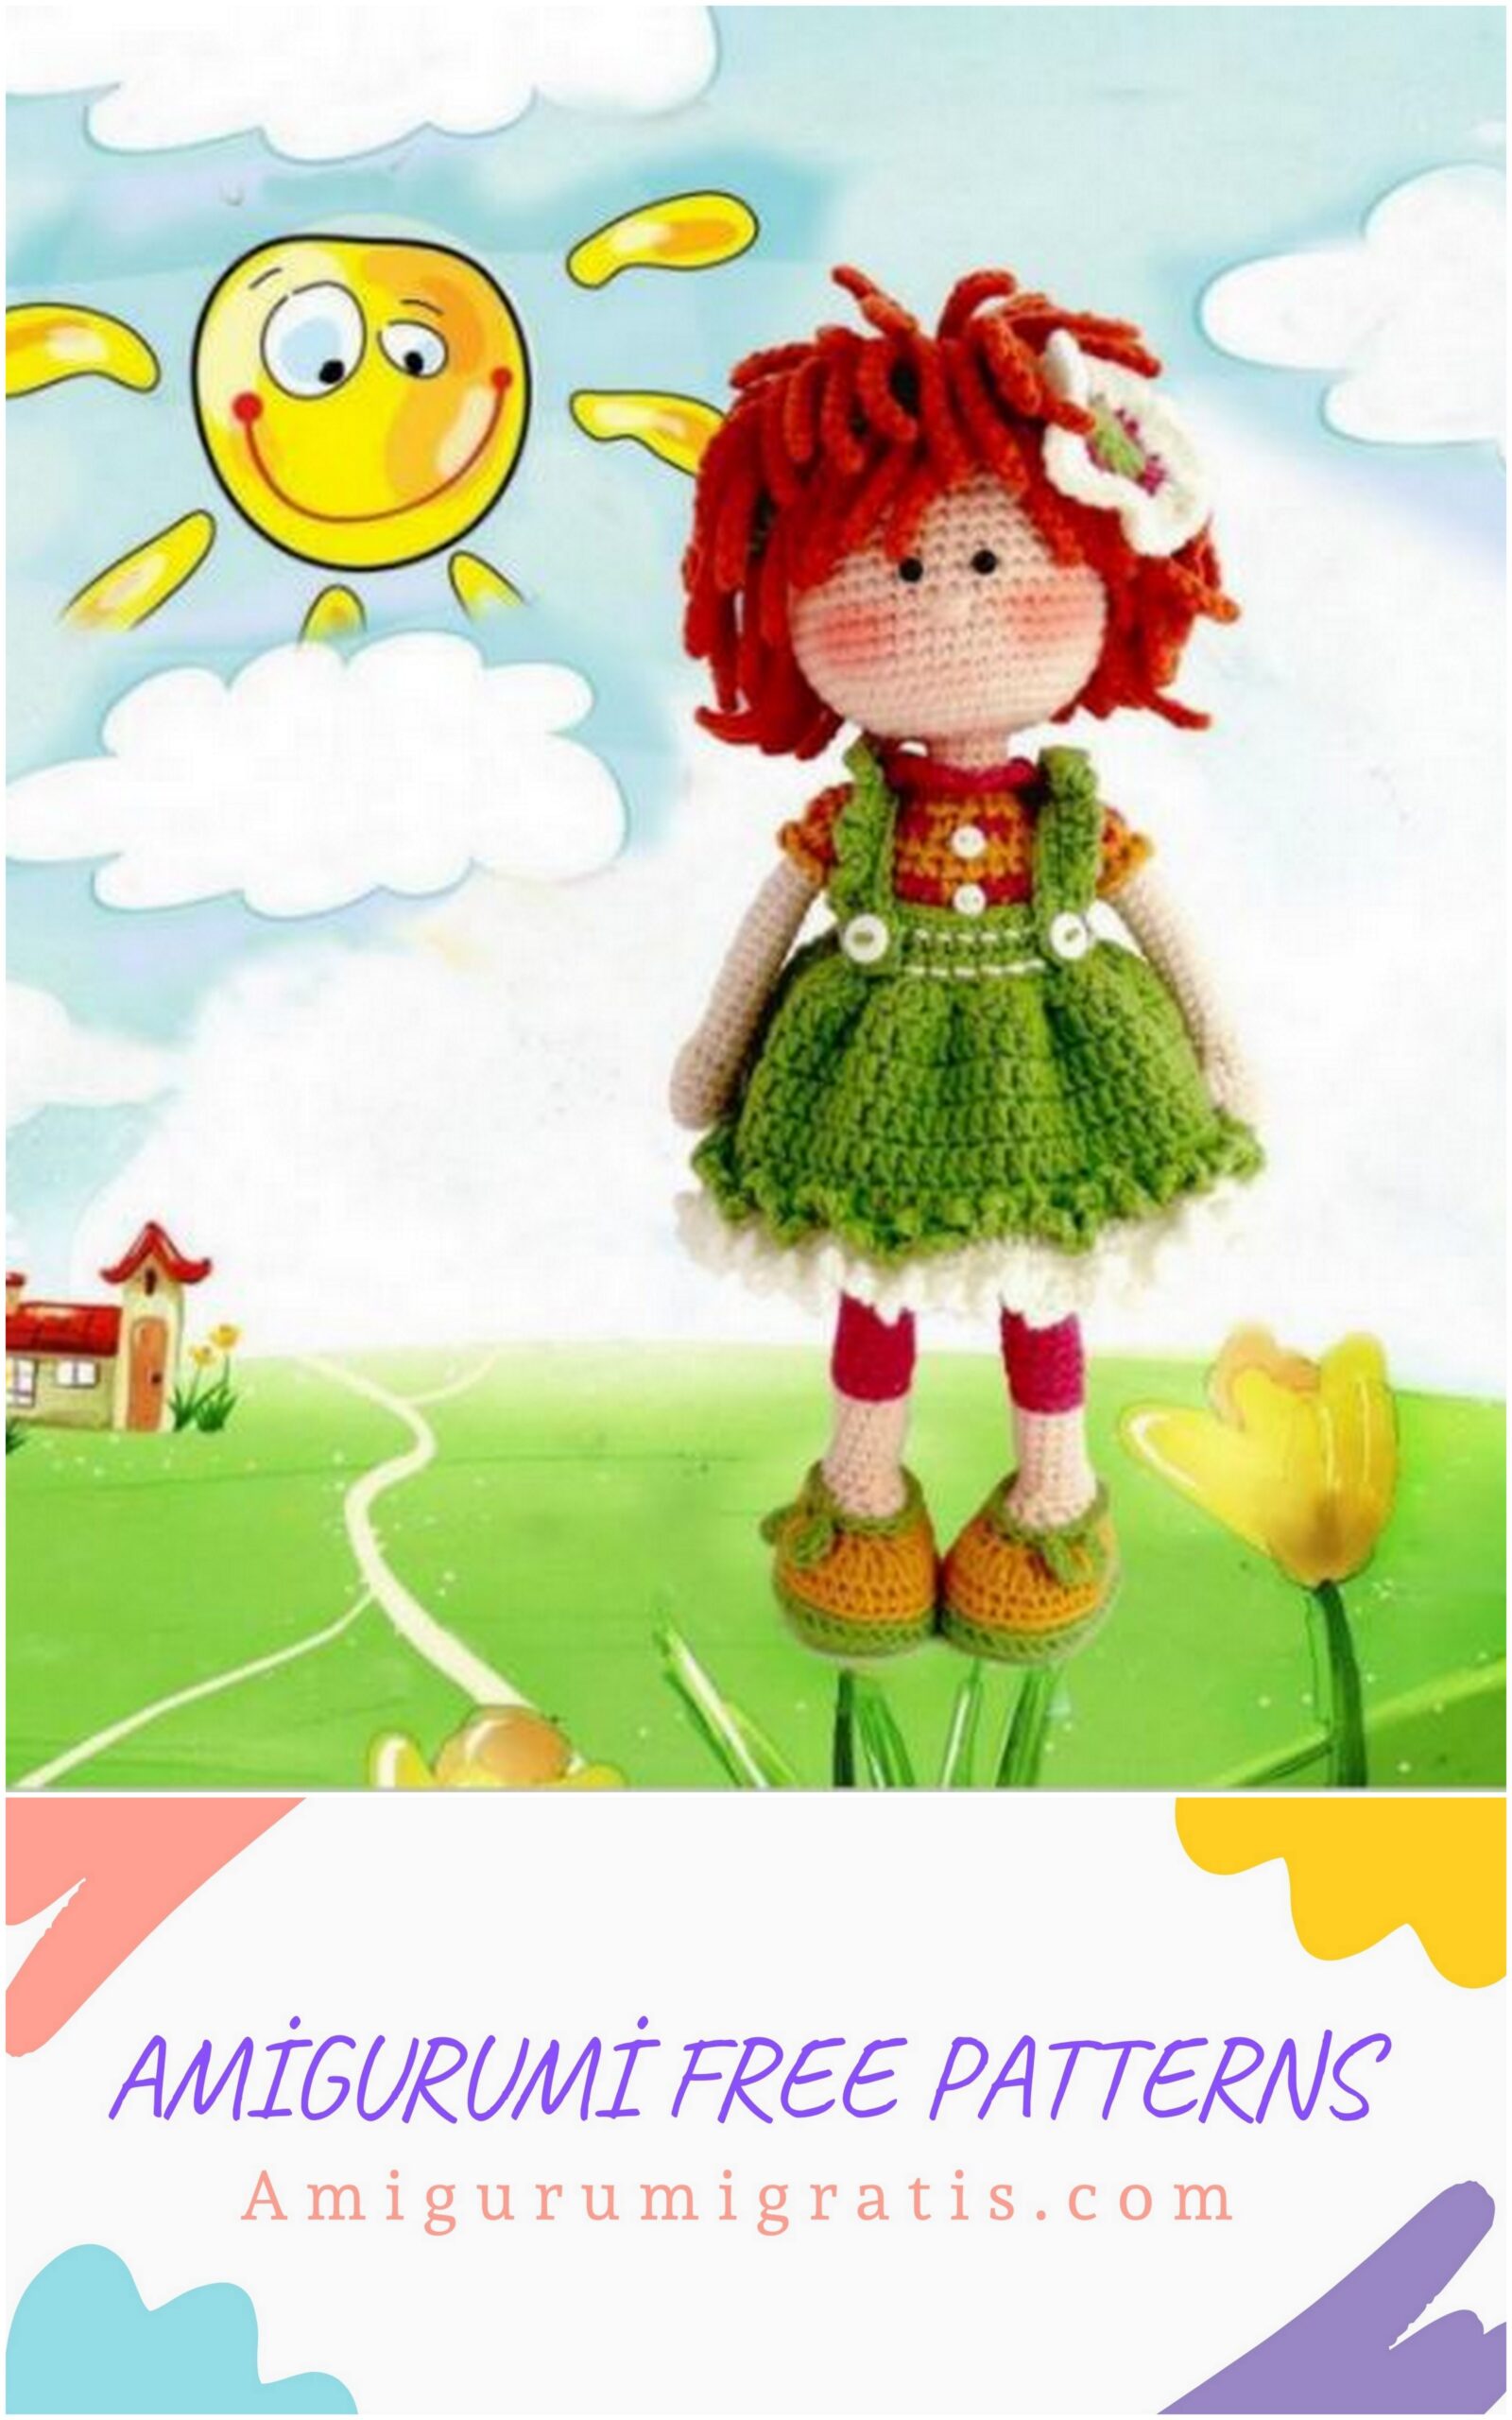
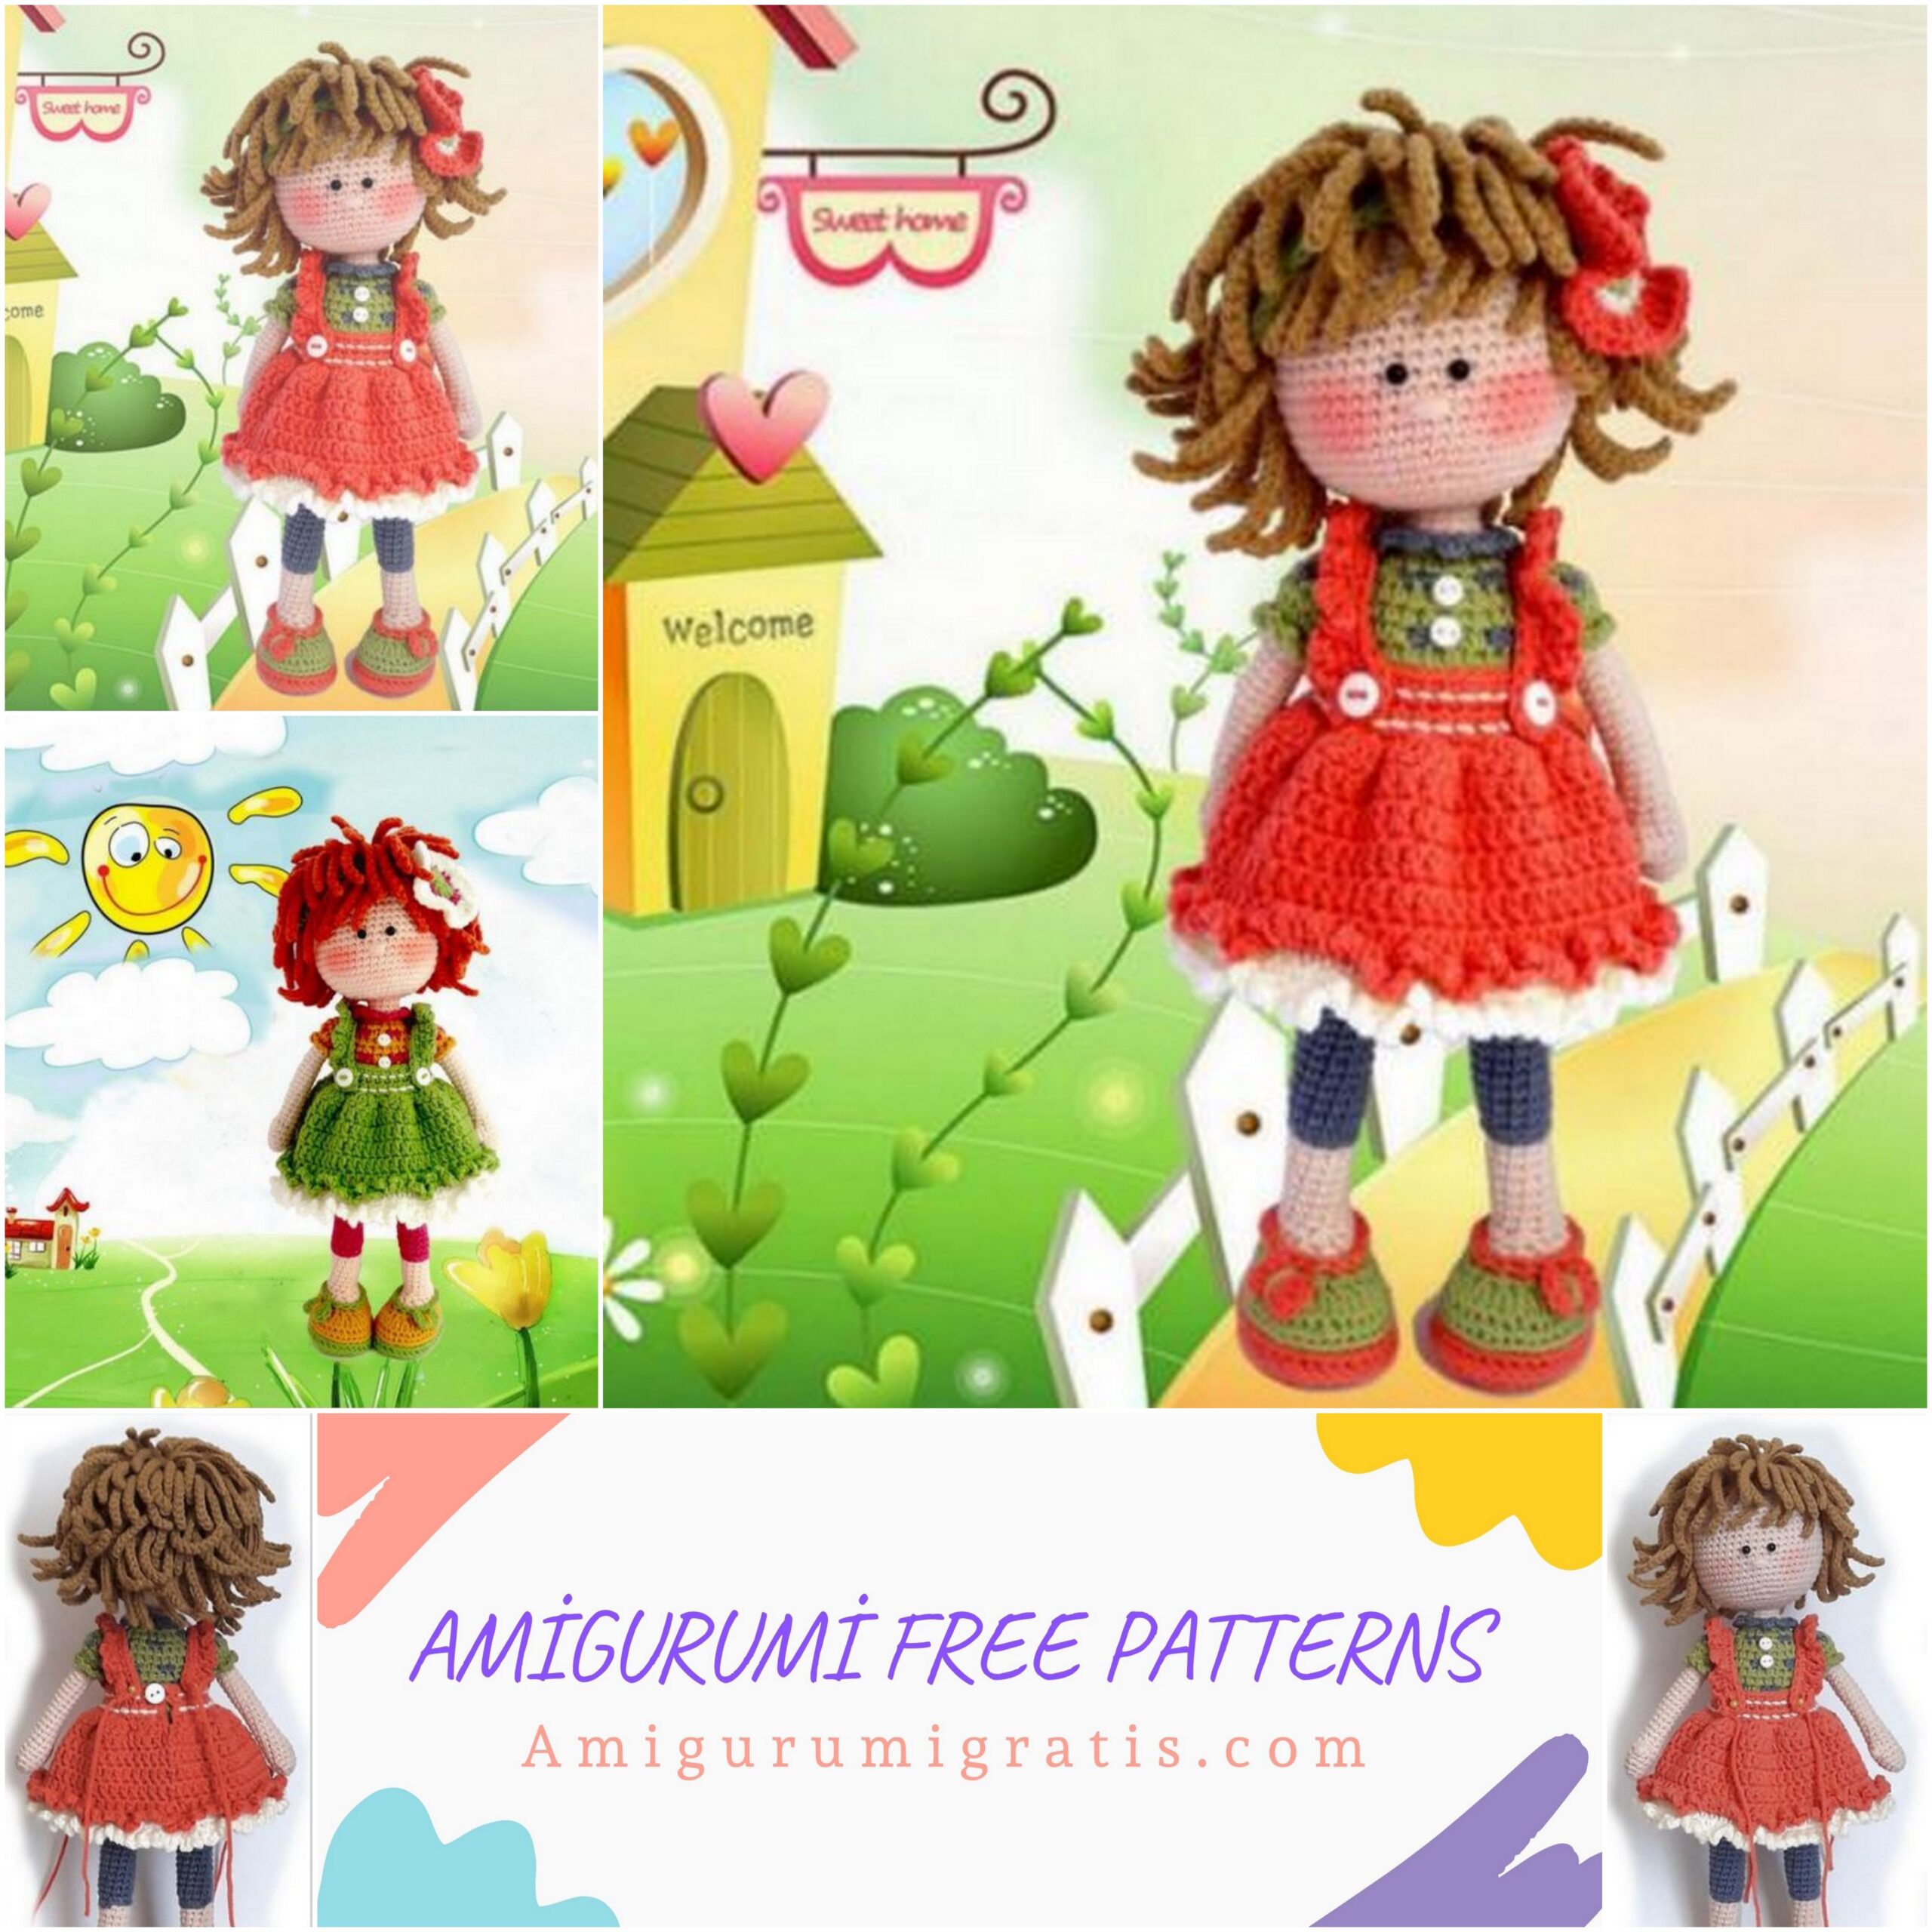
Amigurumi Mary Doll Free Pattern Mary Little fashion-girl
Yarn and equipment
1. Alize Cotton Gold, cotton (55%), acrylic (45%), flesh color (382), 330 m – 100 g.
(Used for the head, legs and arms of the doll). It will take about 10g of yarn.
2.Alize Cotton Gold color gold (05) (for hair). You will need approximately 20 g yarn.
3.Alize Cotton Gold color green (385) (Used for boots and some parts body and hands). You will need approximately 5 g of yarn.
4.Alize Cotton Gold color coral (38) (Used for boots and skirts). You you will need about 5 g of yarn.
5.Alize Cotton Gold color cream (62) (Used for ruffles on the skirt). You you will need about 1 g of yarn.
6.YarnArt Jeans color blue (52) (Used for leggings and for dress). You you will need about 5 g of yarn.
7. A pair of eyes for toys or two half beads Ø 4 mm
8. Crochet hook: 2mm 2.5mm
9. Chopsticks (or any other wooden stick) – for stuffing toys.
10. The filler is hypoallergenic.
11.Long needle for assembling toys.
12. Two small white buttons for the body Ø 6 mm and three buttons Ø 8 mm for the skirt.
13. A piece of wire about 15 cm long.
If you use materials as indicated above, the final size toys will be 24-25 cm from the crown to the tips of the fingers.

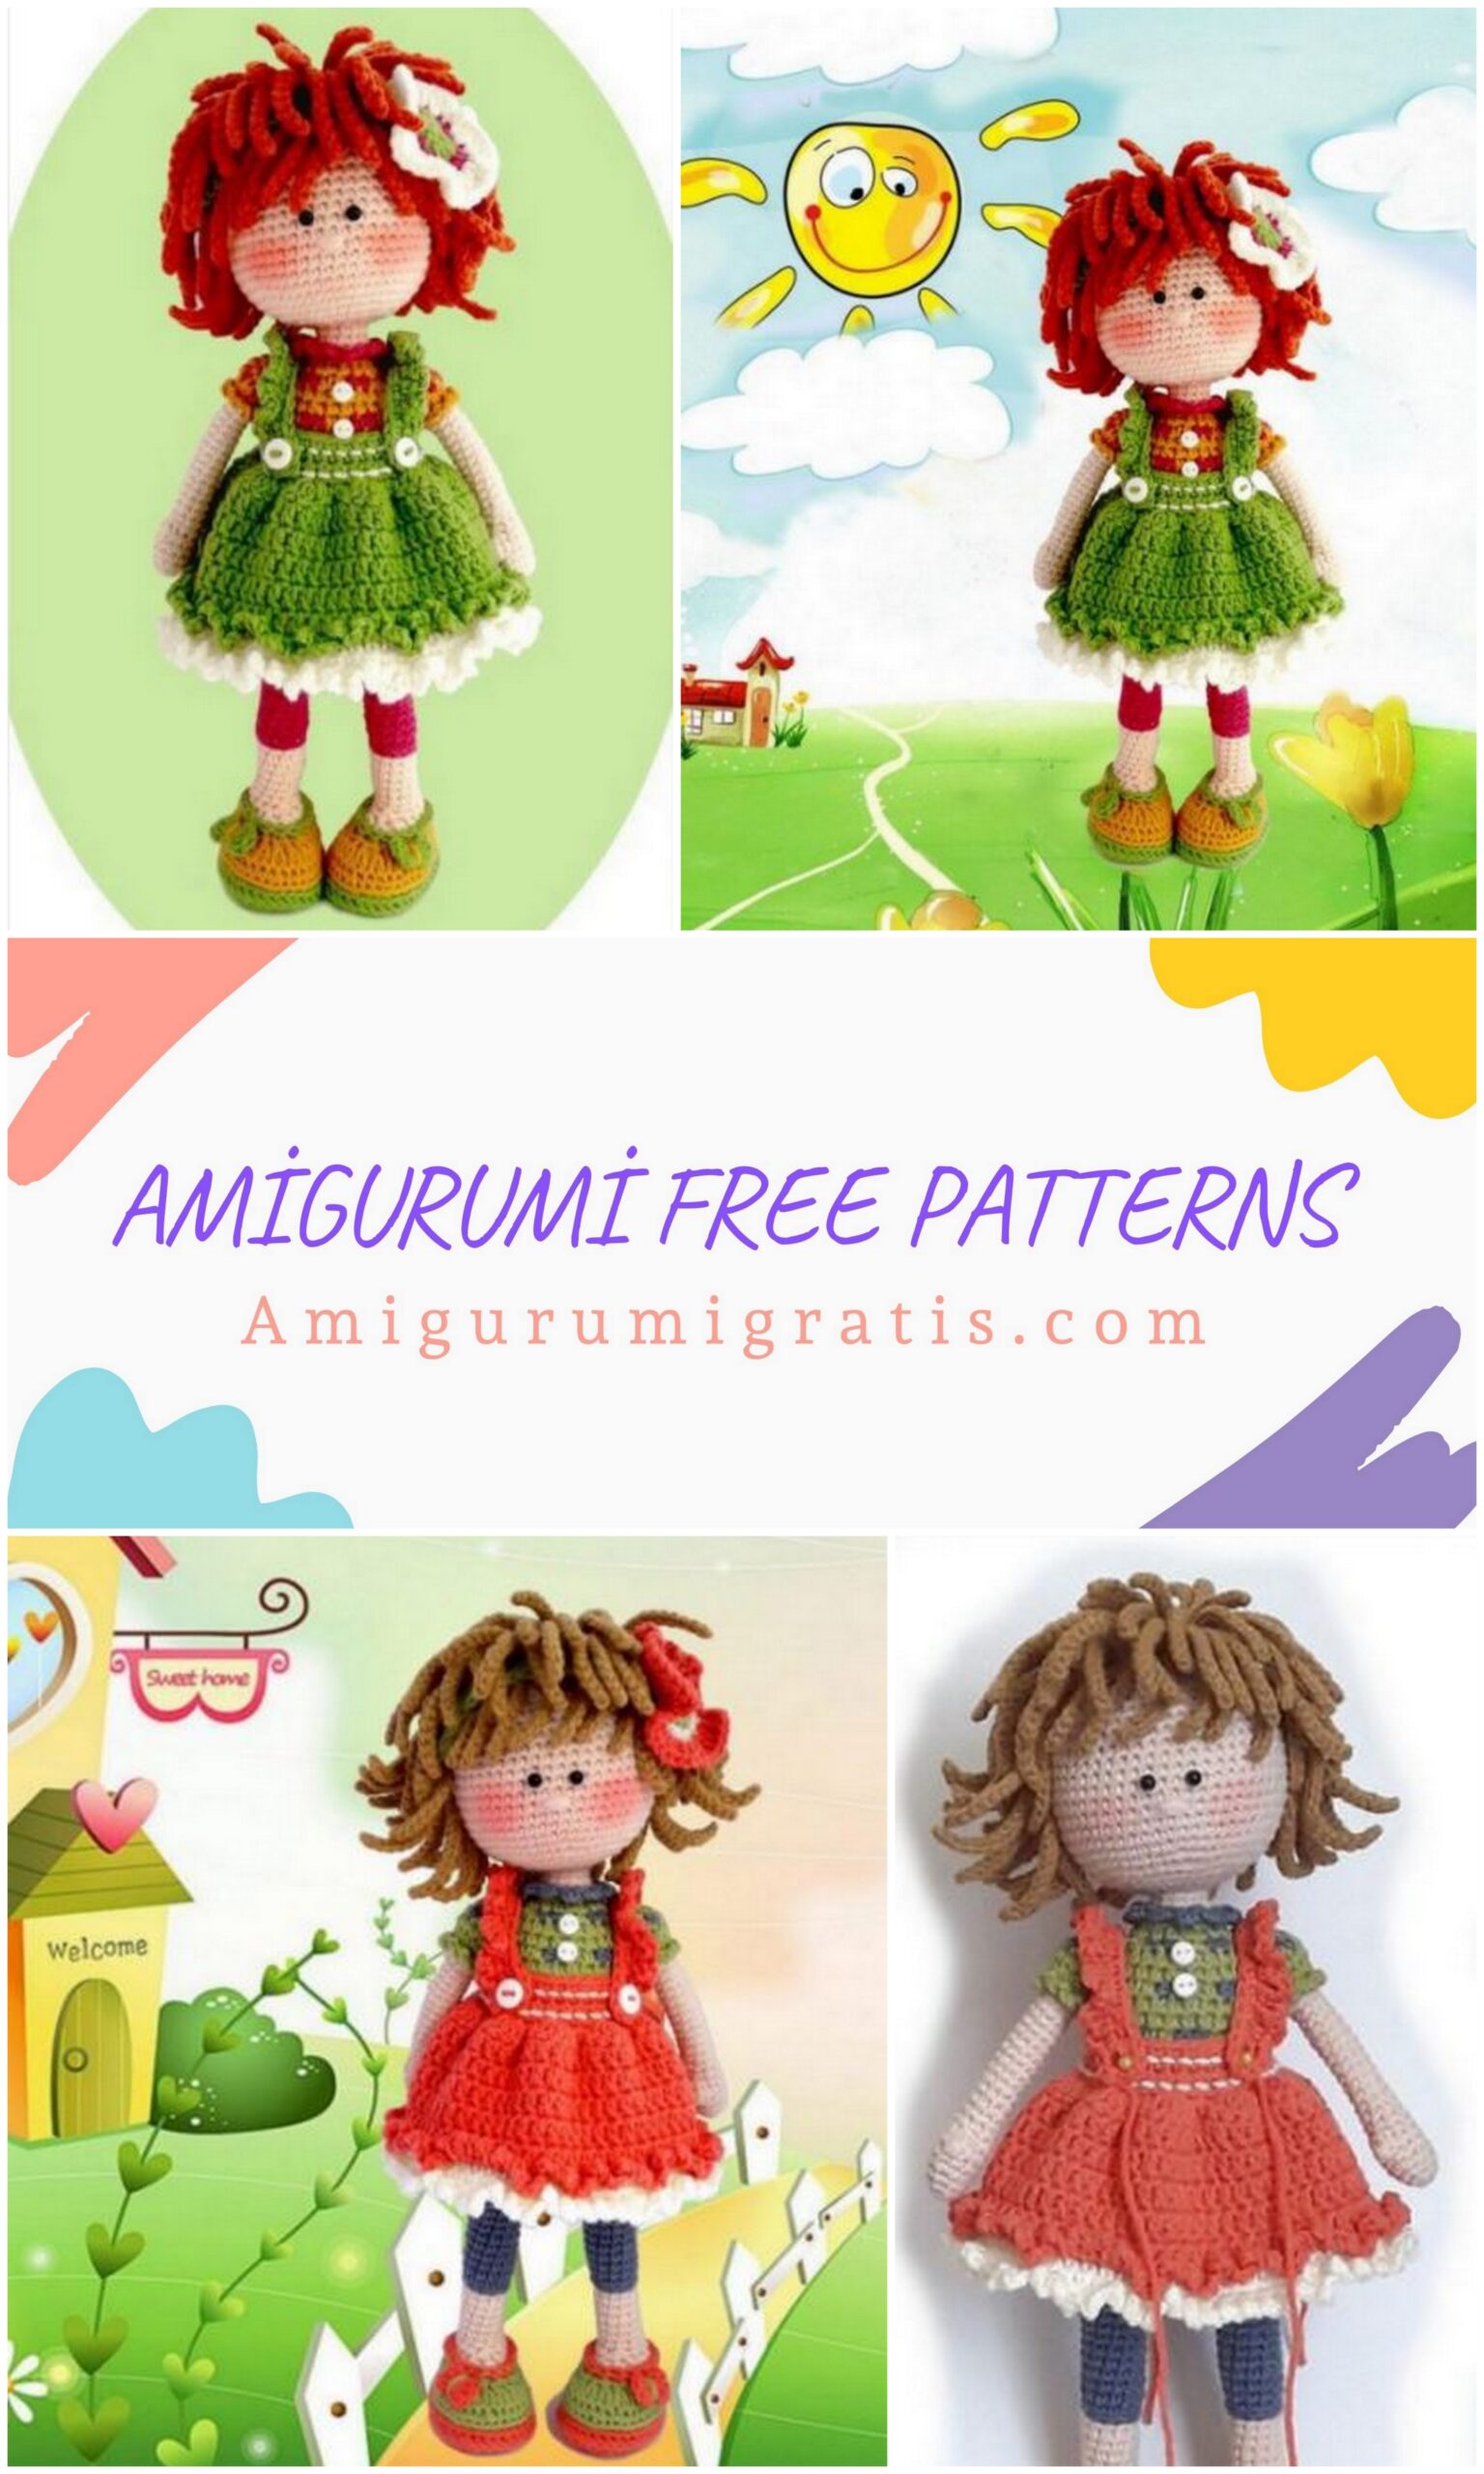
Second color variation
1. Alize Cotton Gold, flesh color (382), (Used for the head, legs and arms of the doll).
2. Alize Cotton Gold terracotta color (89) (For hair).
3. Alize Cotton Gold mustard color (02) (For shoes and some parts of hands and feet).
4. Alize Cotton Gold cream color (62) (For ruffles on a skirt and flower).
5. Alize Cotton Gold color ruby (649) (For leggings and body, as well as for flowers).
6.YarnarТ Jeans color green (69) (For boots, skirts, hair bands and flowers).
Third color version
1. Alize Cotton Gold, flesh color (382), (For the head, arms, legs of the doll).
2.Alize Cotton Gold terracotta color (89) (For hair).
3.Alize Cotton Gold mustard color (02) (For shoes and some parts of hands and feet).
4.Alize Cotton Gold cream color (62) (For ruffles on a skirt, boots, body and flower).
5.Alize Cotton Gold color cherry (390) (For leggings and for body and flowers).
6.Alize Cotton Gold tweed color blue (245) (For boots, skirts, hair bands and flowers).
Template written using US terminology
AbbPeviations
P-row
St – column / stitch;
CH – chain;
SC – single crochet;
DC – double crochet;
SL-ST– slip stitch;
DEC – decrease;
İNC – increase
SC3tog- decrease (3 SC together);
DC2tog- decrease (2 DC together);
bpSC- tie the column with the capture from the front.
Caution: To make the reduction less noticeable on knit parts, I recommend making them as shown in the figure below.
It is recommended to use this method on the visible parts of the doll, such as the face, visible parts of the body, etc.
Hands (2 pcs)
Use a 2 mm hook and skin color yarn.
Start at the bottom of your hand.
P 1: 6 SC into magic ring (6)
P 2: (2 SC, 1 İNC) 2 times (8)
P 3: (3 SC, 1 İNC) 2 times (10)
P 4: 4 SC, 1 İNC, 5 SC (11)
P 5: 11 SC (11)
P 6: 5 SC, 3DC in 1 loop, 5 SC (11)
P 7: 4 SC, SC3tog, 4 SC (9)
P 8-9: 9 SC (9)
Fill the finished part of the hand tightly.
P 10-21: 1 SC in each loop (9)
Cut and fasten the yarn.
Repeat knitting for the second hand to 21 Series.
Place the markers in the center of the arms – say in the armpits. Make sure that the markers are symmetrical.
Attach the green yarn to the stitch marked with a marker.
P 22: 1 SC in each loop (9)
In the 23rd row, we knit all the loops on the back wall of the loop (BLO)
P 23: (BLO) 2 SC, 5 İNC, 2 SC (14)
Attach the blue yarn.
P 24: (1 SC green yarn, 1 SC blue yarn) repeat alternately until the end of the row (14)
Cut and hide the blue thread.
Keep crocheting with green yarn.
P 25: 1 SC in each loop (14)
P 26: 3 SC, (1 SC, 1 DEC) 3 times, 2 SC (11)
P 27: 2 SC, 4 DEC, 1 SC (7)
Never add filler or fill the parts of the hands between the palm and the sleeve. Fill the sleeve very loosely just to maintain the shape of the part. Fold the upper arm and knit 3SC extending over both sides of the arm to make it flat.
Cut the yarn, leaving a long tail for sewing.
Attach the green yarn to the 23rd row in the center of the armpit. Insert the hook in the loop from top to bottom (from the top of the hand in the direction of the palm). Crochet (1 SL-ST, 2 CH) in each stitch around the part. Complete the SL-ST series.
Cut and hide the thread.
We start crocheting from the foot and legs of the doll.
Use a 2mm hook and coral color yarn.
Start crocheting your left leg. CH 8 and knit starting from the 2nd from the hook around the base of the chain:
P 1: 1 İNC, 5 SC, 4 SC in 1 loop, 5 SC, 1 İNC (18)
P 2: 1 SC, 1 İNC, 5 SC, 4 İNC, 5 SC, 1 İNC, 1 SC (24)
P 3: 1 SC, 1 İNC, 6 SC, (1 SC, 1 İNC) 4 times, 6 SC, 1 İNC, 1SC (30)
R 4: 2 SC, 1 İNC, 6 SC, (2 SC, 1 İNC) 4 times, 6 SC, 1 İNC,
2 SC, invisible color change SL-ST, 1 CH, rotation (36)
Cut cardboard insoles for doll stability. how to make an invisible color change.
After you tie 4 columns remove the hook from the loop Place the hook on the back before going through the first stitch of the row.
The yarn you worked on should be under the hook. Grab the thread and pull the loop through the loop to the back of your work. Pull the loop tightly and knit CH, then rotate the work and continue knitting.
Legs, body, head
We knit together in rows from 5 to 9 rows. Complete the SL-ST series and start with CH.
CH 1 and SL-ST are not counted as a column. Always knit the first column in the same loop from where CH was knitted.
P 5: 36 bpSC, knit in 1 st SC lower row (36)
Insert the insoles into the sole of the shoe, making sure that the sole fits snugly on the insole. Set aside the insoles and continue crocheting.
Cut the coral color yarn, leaving a thread to make a knot.
Attach the green yarn as follows – leave the thread so that you can
was to tie a knot and make 1 CH from the wrong side. Then turn the part facing you and start crocheting the 6th row. Leave the tails of yarn alone and do not weave them into parts. Knit stitches of the 6th and 7th rows only on the back of the buttonhole (BLO).
P 6: (BLO) 1 CH, SL-ST in each loop, SL-ST in 1 row stitch (36) (see photo below)
P 7: 1 CH, 1 SC at the base of CH, (7 SC, 1 DEC) 2 times, (6 SC, 1 DEC) 2 times, 1 SC, SL-ST at 1SC (32)
Pull the coral and green threads remaining after the color change by the tails, tie a knot and hide the ends in the stitches of the heel.
Pay attention – a decrease in the 8th row will be done using different stitches.
P 8: 1 CH, 1 SC in the same loop CH, 7 SC, 2 SC2tog, 5 DC2tog, 2 SC2tog, 6 SC, SL-ST in 1 SC (23) Insert the insoles.
P 9: 1 CH, 7 SC, 5 DEC, 6 SC, SL-ST in 1 SC (18)
Cut the green thread and fasten the flesh-colored yarn. Change the threads just like you did the transition from coral to green. Leave the same tails as before.
Pay attention – a reduction in the 10th row will be done using various stitches.
P 10: (BLO); 1 CH, 2 SC, 1 SC2tog, 2 SC, 3 DC2tog, 2 SC, 1SC2tog, 2 SC (13)
Then continue to knit in a spiral.
P 11: 5 SC, SC3tog, 5 SC (11)
Pull the tails of the yarn, pull it tightly, tie a knot and hide the tails inside the part. Fill the boot tightly; avoid stretching the seams and folding the insoles.
P 12-17: 11 SC (11).
P 18: 1 SC, 1 İNC, 9 SC (12)
Change the thread to blue.
Now we are knitting a series of which is not in the calculation:
Insert a hook under both loops of stitches of the 18th Series and crochet SL-ST – 12 SL-ST Try to crochet loosely without tightening the stitches too much. Since the loops of the 19th row you should also knit in the stitches of the 18th row only behind the formed blue chain.
Fill the details while crocheting.
Make sure the marker remains in the center of the back of the leg. If necessary, knit floating loops, if necessary.
P 19-31: 12 SC (12)
Align your leg and mark the left and right ends of the stitches on the side of the legs, as in the photo below.
P 32: Knit a string using SC, in stitches with place marks, make one İNC for each (14)
P 33: 14 SC (14)
P 34: 9 SC (Finish crocheting 34 rows in the middle of the inside of the leg. I stopped and did not knit 5 SC. You can stop sooner or later depending on the thickness of the yarn or the density of crochet).
For the right leg: Repeat from 1 to 33 row.
R 34: 19 SC (In this row, we add 5 SC so that the row ends in the middle
the inside of the leg. I made 5 SC. You may need more or less art.
depending on the thickness of the yarn or the tightness of your crochet).
Finishing the top of the patina.
Use coral yarn.
Turn your foot so that the heel is looking at you. Insert the hook down into the front half loops of the 8th row.
Knit the entire row of SL-ST. Then insert the hook into the same stitches of the 8th row and crochet another row of SL-ST. If you find it difficult to insert the hook into the stitches, try loosening the stitches with a thick needle. Cut and fasten the coral yarn.
We connect the legs and begin to bind the body.
Turn your feet with your heels toward you. Without trimming the blue yarn on the right leg, make 3CH and attach it to the left leg. For an accurate count of the number of stitches, mark the last stitches you knit on your feet. You will clearly see where the chain begins and where it ends.
P 35: 14 SC, on the left foot, 3 SC on the chain, 9 SC, (1 İNC, 1 SC) 2 times, 1 İNC on the right foot, 1 SC, 1 İNC, 1 SC on the chain. In the future, you can stop monitoring both the location of the marker and the floating stitches.
P 36: (1 İNC, 1 SC) 2 times, 1 İNC, 33 SC (41)
P 37-41: 1 SC in each loop (41)
P 42: 8 SC, 1 DEC, 18 SC, 1 DEC, 8 SC, 1 DEC, 1 SC (38)
P 43: 1 SC in each loop (38)
P 44: 18 SC, 1 DEC, 16 SC, 1 DEC (36)
P 45: 6 SC, 1 DEC, 19 SC, 1 DEC, 7 SC (34)
P 46: 6 SC, 1 DEC, 17 SC, 1 DEC, 7 SC (32)
Cut the blue thread and fasten the green yarn.
P 47: (BLO) 1 SC in each loop (32)
P 48: 32 SC (32)
P 49: 8 SC, 1 DEC, 14 SC, 1 DEC, 6 SC (30)
P 50: 1.d EC, 6 SC, 1 DEC, 13 SC, 1 DEC, 5 SC (27)
Add the blue yarn in the next row and knit alternating 2 SC green yarn and 2 SC blue yarn.
If you are unfamiliar with how to crochet and change yarn, take a look
next video https://www.youtube.com/watВП?v=f8vtkK- 3Do
R 51: Start row 2 SC green (3) 2 SC blue yarn (C) to the end
row. The row should be finished with 1 SC blue yarn (27)
Do not cut the blue yarn. Crochet the next two rows using green yarn.
P 52-53: 1 SC in each loop (27)
54 Row 2 SC (C) and 2 SC (C), start with blue yarn.
P 54: 1 SC in each loop (27)
Crochet the 55th and 56th strings, use only green yarn.
P 55: (7 SC, 1 DEC) 3 times (24)
P 56: 1 SC in each loop (24)
57 Row 2 SC (C) and 2 SC (C), start with green yarn. Cut and fasten the blue yarn at the end of the row, then knit only with green yarn.
P 57: 6 SC, 2 DEC, 8 SC, 2 DEC, 2 SC (20)
P 58: 6 SC, 1 DEC, 8 SC, 1 DEC, 2 SC (18)
P 59: (1 SC, 1 DEC) 6 times (12)
Cut the green thread and attach the skin-colored thread.
P 60: (BLO) 12 SC (12)
P 61-63: 1 SC in each loop (12)
Put the main thread aside. Let’s crochet a collar blouse.
Turn the doll with its back to itself and turn it over. Attach the blue yarn to the front stitches of the center stitches. Insert the hook down (from the legs to the neck). Crochet into the front loop of the 60 Series (1 SC, 4 CH). Finish the row using SL-ST, trim and fasten the yarn.
Return to work on the main part. Start knitting your head.
P 64: 12 İNC (24)
P 65: (2 SC, 1 İNC) 8 times (32)
P 66: (3 SC, 1 İNC) 8 times (40)
P 67: 2 SC, 1 İNC, (4 SC, 1 İNC) 7 times, 2 SC (48)
P 68: (7 SC, 1 İNC) 6 times (54)
P 69-79: 54 SC (54)
Take a piece of wire about (15 cm) long.
Attach some cotton yarn to the wire with glue, wrapping the yarn around the wire, bend it in half and twist the ends around, as in the photo.
Insert the pointed ends of the wire through the neck into the body through the packing, as shown in the photo.
Fill your head while crocheting.
P 80: (7 SC, 1 DEC) 6 times (48)
P 81: 3 SC, 1 DEC, (6 SC, 1 DEC) 5 times, 3 SC (42)
P 82: (5 SC, 1 DEC) 6 times (36)
P 83: 2 SC, 1 DEC, (4 SC, 1 DEC) 5 times, 2 SC (30)
P 84: (3 SC, 1 DEC) 6 times (24)
P 85: 1 SC, 1 DEC, (2 SC, 1 DEC) 5 times, 1 SC (18)
P 86: (1 SC, 1 DEC) 6 times (12)
P 87: 6 DEC (6)
Fill your head tightly. Please note that the head is well packed and the filling is well distributed, especially at the bottom where cheeks will form. Close the hole, fasten the yarn and hide its tails inside the part.
Wig
Use a 2.5 mm hook and mustard colored yarn.
The wig cap fits in the united rows. CH at the beginning of the row counts as Art.
All rows knit only the back wall of the loop.
P 1: 6 SC in spacecraft, SL-ST (6)
P 2: (BLO) 1 CH, 1 SC in the same loop where CH, 5 İNC, SL-ST (12)
P 3: (BLO) 2 CH, 1 DC to the same loop where CH, 11 İNC, SL-ST (24)
P 4: (BLO) 2 CH, 1 İNC in the same article, (1 DC, 1 İNC) 11 times, (place the marker on the stitch in
last DC of this series), SL-ST (36)
We continue to knit from 5 to 8 row. 2 CH at the beginning does not count as a stitch.
P 5: (BLO) 2 CH, 1 DC at the same station, 1 İNC, (2 DC, 1 İNC) 6 times, 1 DC, 1 DEC, turn (29)
P 6: (FLO) 2 CH, 29 DC, turn (29)
P 7: (BLO) 2 CH, 29 DC, turn (29)
P 8: (FLO) 2 CH, 29 DC, tuPn woPk (29)
In the future, we will knit strands of hair.
Caution: Use a 2 mm hook. Work with strands of hair behind the back of the loop or bottom loop.
P 9: (10 CH, 8 SL-ST with 2 loops from the hook, 1 SC, 1 skip, 1 SL-ST in the next loop of the 8th row) repeat 14 times, 10 CH, 9 SL-ST with 2 loops from the hook , 1 SL-ST in the next loop of the 8th
Row. It should be 15 strands.
Close and cut the thread.
Next, we will knit the upper strands on the remaining front loops from the 7th to the 1st row.
The hook is inserted into the stitches from bottom to top – from the bottom of the wig in the direction
top of the head. Attach the same yarn to the 2nd row from the bottom of the 7th row – see photo below.
P 1: (11 CH, 9 SL-ST with 2 loops from the hook, 1 SC, 1 skip, 1 SL-ST in the next loop of the 7th row) repeat 14 times, 11 CH, 10 SL-ST with 2 loops from the hook, 1 SL-ST to the next loop of Series 7. It should be 15 strands. Close and cut the thread.
We continue to tie the threads into the front loops of the 6th row.
Attach the thread to the 6th row, as we did in the previous rows.
P 2: (12 CH, 10 SL-ST with 2 loops from the hook, 1 SC, 1 skip, 1 SL-ST in the next loop of the 6th row) Repeat 14 times, 12 CH, 11 SL-ST with 2 loops from the hook, 1 skip, 1 SL-ST in the last loop of the 6th row.
It should be 15 strands.
Close and cut the thread.
We continue to bind threads to the front loops of the 5th row.
Attach the thread to the 5th row, as we did in the previous rows.
P 3: (13 CH, 11 SL-ST with 2 loops from the hook, 1 SC, 1 skip, 1 SL-ST in the next loop)
Repeat 14 times, 13 CH, 12 SL-ST with 2 loops from the hook, 1 skip, 1 SL-ST to the last
loop 5 th Series.
It should be 15 strands.
Close and cut the thread.
Attention: Next, continue to knit strands in connected rows in front stitch buttonhole.
Fasten the thread to the front loop 4 rows marked with a marker.
P 4: (10 CH, 8 SL-ST with 2 loops from the hook, 1 SC, 1 skip, 1 SL-ST in the next loop of 4 Rows) Repeat 6 times, 10 CH, 9 SL-ST with 2 loops from the hook, 1 SL-ST to the next loop of the 4th Row, (13 CH, 12 SL-ST with 2 loops from the hook, 1 SL-ST to the next loop of the 4th Row) Repeat until the end of the Row.
You should get 7 short strands and 23 long ones.
Close and cut the thread.
Continue crocheting in the front stitches of the 3rd row. Attach the yarn to the center of the back of the wig.
P 5: (13 CH, 12 SL-ST with 2 loops from the hook, 1 SL-ST in the next loop of the 3 Row) Repeat until the end of the Row.
Close and cut the thread.
You should get 24 strands.
Continue crocheting in the front stitches of the 2nd row. Attach the yarn to the center of the back of the wig.
P 6: (12 CH, 11 SL-ST with 2 loops from the hook, 1 SL-ST in the next loop of 2 Rows) Repeat until the end of the Row.
Close and cut the thread.
You should get 12 strands.
Continue crocheting in the front stitches of the 1st row. Attach the yarn to any loop of the 1st row.
P 7: (10 CH, 9 SL-ST with 2 loops from the hook, 1 SL-ST in the next loop of 2 Rows) Repeat until the end of the Row.
Close and cut the thread.
You should get 6 strands.
Collect the toy
Lock your hands with pins to the row (last row with blue and green SC).
Attach the hands to the upper part, in turn sew that hand on the body, then raise your hands and make a few stitches one row lower to attach the inside of the hands and hold them pressed to the body. – see photo below.
Count 15 rows from the top of the head and mark the place for the eyes with pins.
The distance between the eyes should be 3 tbsp. Glue or sew on eyes. Mark the nose 2 rows down from the eyes.
Start embroidering your nose. Embroidery nose captures 2CT. Do not make the stitches too tight – the stitches should be the same for all turns. Only in this case the nose will be flat. After finishing the embroidery of the nose, skip the needle at the top of the head, fix the thread well and hide its ends in the head.
Attach the wig to the head with pins, and then sew it with small stitches along the edges of the wig (as shown in the photographs below).
Put a little blush on your cheeks.
Skirt
It’s all! Now you can dress the doll!
Use a 2.5 mm crochet hook and coral-colored yarn. Start knitting
rotary rows. We collect 31 CH from 2 loops from the hook.
R 1: 30 SC, turn (30)
P 2-3: 1 CH, 30 SC, rotation (30)
P 4: 1 CH, 1 SC, 2 DC to the next ST, 2 SC, * 5 DC to the next ST, 2 SC *.
Repeat * to * until 2 st, 2 DC to the next st, 1 SC, turn (64)
P 5: 2 CH, DC to end of row, SL-ST (64)
Next, we knit in joined rows.
2 CH at the beginning of each row and SL-ST at the end of the row do not count Art.
To help you achieve a straight, almost invisible seam, watch this
P 6: 2 CH, DC to the same loop, DC to each loop to the end of the Series, SL-ST (64)
P 7: 2 CH, skip st at the base, DC in each loop until the end of the series. The last DC will be at the base of 2 CH, SL-ST. (64)
P 8: 2 CH, DC at the base 2 CH, DC at each loop to the end of the Series, SL-ST (64)
P 9: 2 CH, skip st at the base, DC in each loop to the end of the last row
DC will be at the base of 2 CH, SL-ST (64)
P 10: (FLO) 1 CH, (1 SC, 3 CH) in each loop to the last st. After the last
SC knit 2 CH. Complete the SL-ST series. Cut and hide the thread.
Attach the cream yarn in the center of the back to the back loops with a crochet of the 9th Series.
P 11-12: (BLO) 1 CH, 64 SC, SL-ST (64)
P 13: 1 CH, (1SC, 4 CH) in each loop to the last st. After
last SC knit 3 CH. Complete the SL-ST series. Cut and hide the thread.
Attach the coral yarn to the upper left end of the belt. Start crocheting along the upper end of the belt using the SL-ST. At the end of the row, do 3 CH
(we make a buttonhole, try on the button or not, if not, knit a few more CHs) and attach it to the last st on the belt (see photo).
Cut and fasten.
Make some decorative seams on the belt with the help of the “Step back” stitch, taking one st (see photo).
Skirt Straps (2 pcs)
Use a 2.5 mm crochet hook and coral yarn. Leave a long thread of yarn for sewing and start crocheting the 17CH chain and start with 2 loops from the hook:
Left shoulder strap -15 SC, 4 SC in 1 loop, (3 CH, 1 SC) 13 times, 1 SC.
leaving a long tail for sewing.
Right shoulder strap
– 2 SC, (3 CH, 1 SC) 13 times, 3 CH, 4 SC in 1 st, 15 SC.
leaving a long tail for sewing.
Attach the straps to the skirt with sewing pins, and then sew them.
Sew buttons to the front of the blouse and to the waist of the skirt at the back.
Bows on shoes (2 pcs)
Use a 2 mm hook and coral yarn.
İNTO MAGİC RİNG: (2 CH, 2 DC, CH 2, SL-ST) Repeat 2 times
Cut and hide the yarn.
Attach bows with green yarn.
Scrunchy
Start crocheting a chain of your desired length (I made 51 CH), and then knit a row of SC on 1 side of the chain. Next, knit 3 SC in the last stitch and continue Do not knit SC on the other side of the chain.
Cut the thread, leaving a long tail for sewing. Connect the ends of the part to make a hairband.
Flower
Start with green yarn. Use a 2.5 mm hook.
P 1: İNTO MAGİC RİNG: 3CH (count as 1 st DC), 9 DC, SL-ST in 3 CH. Cut and fasten the green yarn.
Attach cream-colored yarn to any 1st row st.
P 2: 1 CH, 1 SC in the base 1 CH, 9 İNC, SL-ST in 1 tbsp. CH.
Cut and fasten the cream yarn.
Attach coral color yarn to any second row sc.
P 3: * 3 CH, (2 DC in 1 st) 3 times, 3 CH, SL-ST in the next st * Repeat 5 times, SL-ST in 3 CH.
Attach the flower to the hairband.
The doll is ready !!!
Now you can praise yourself and pat yourself on the back slightly for work perfectly worked)))
Now you have a soft and cozy friend Mary,
Little fashion-girl!