
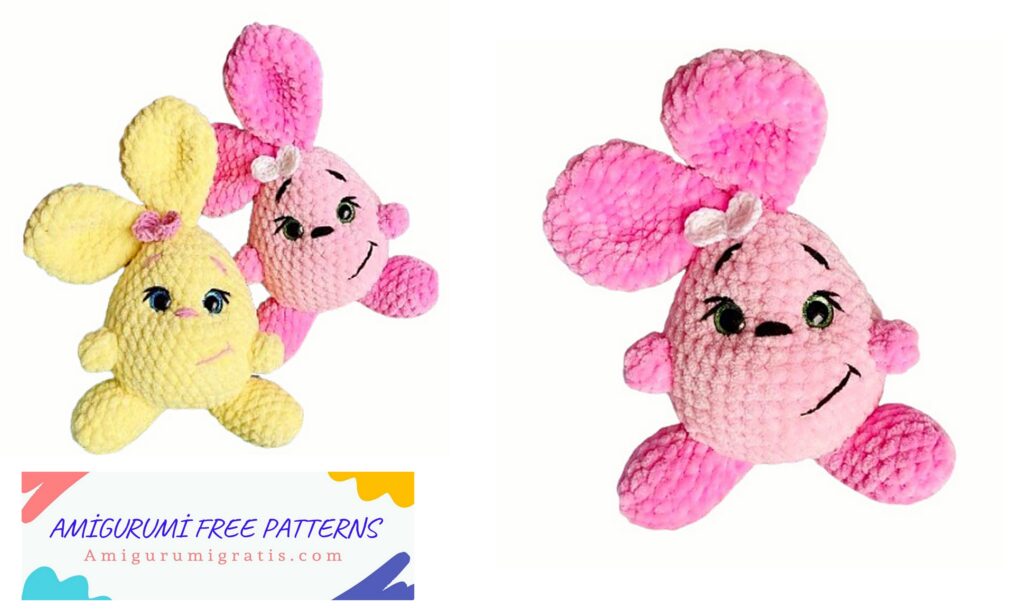
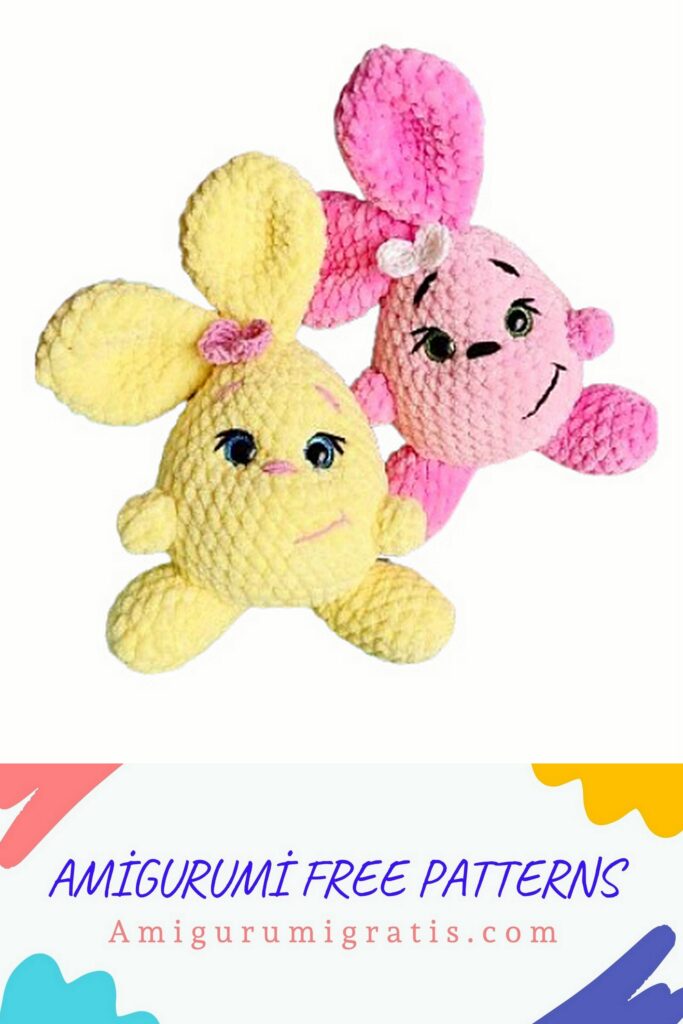
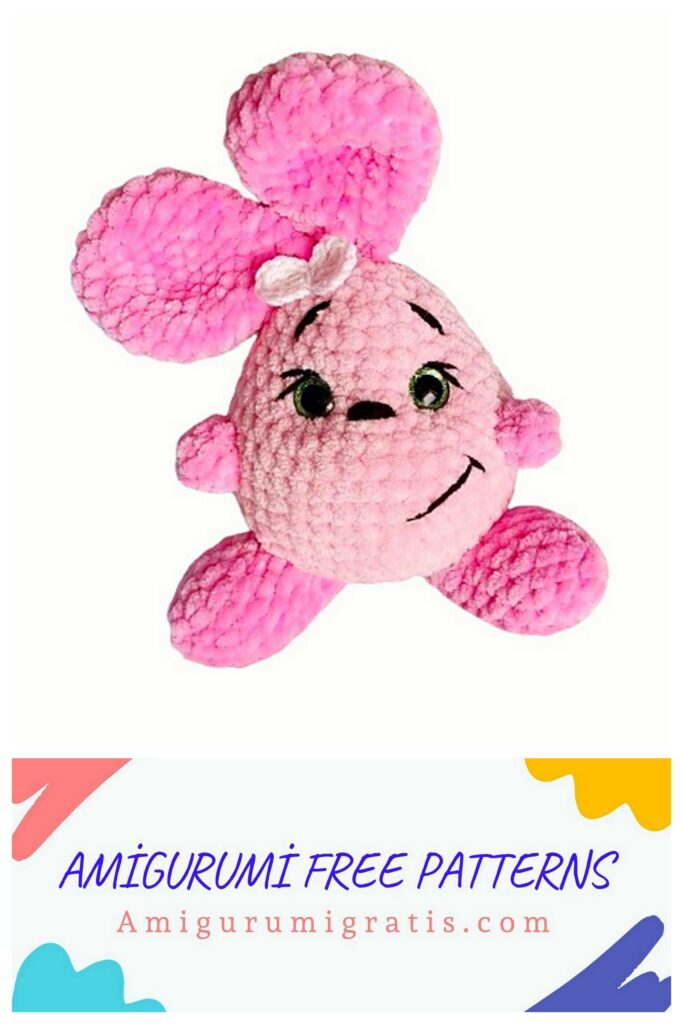
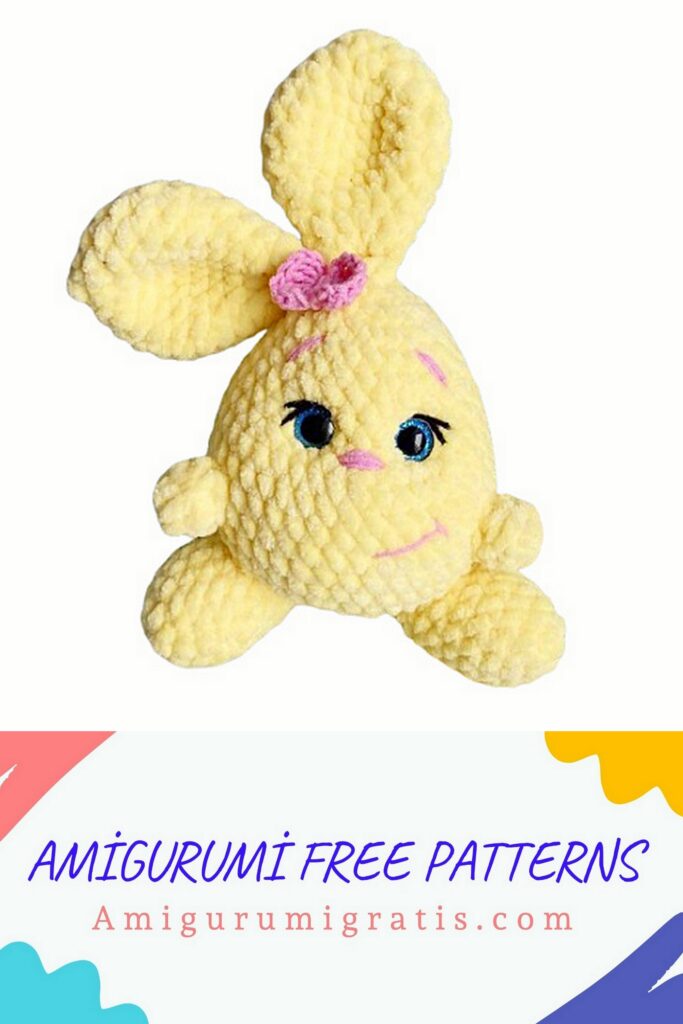
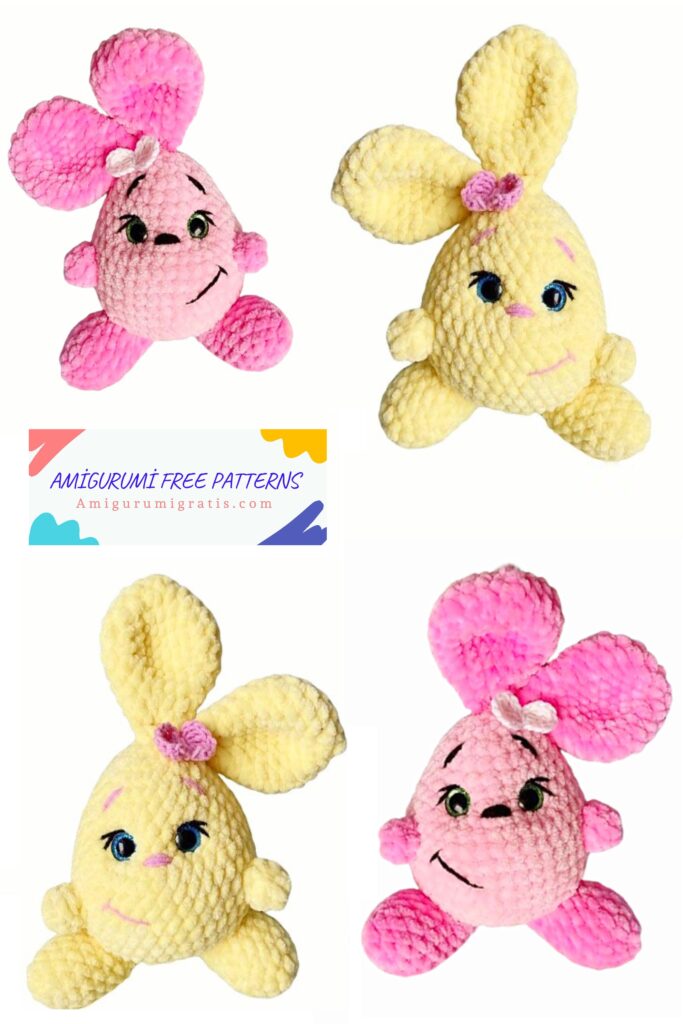
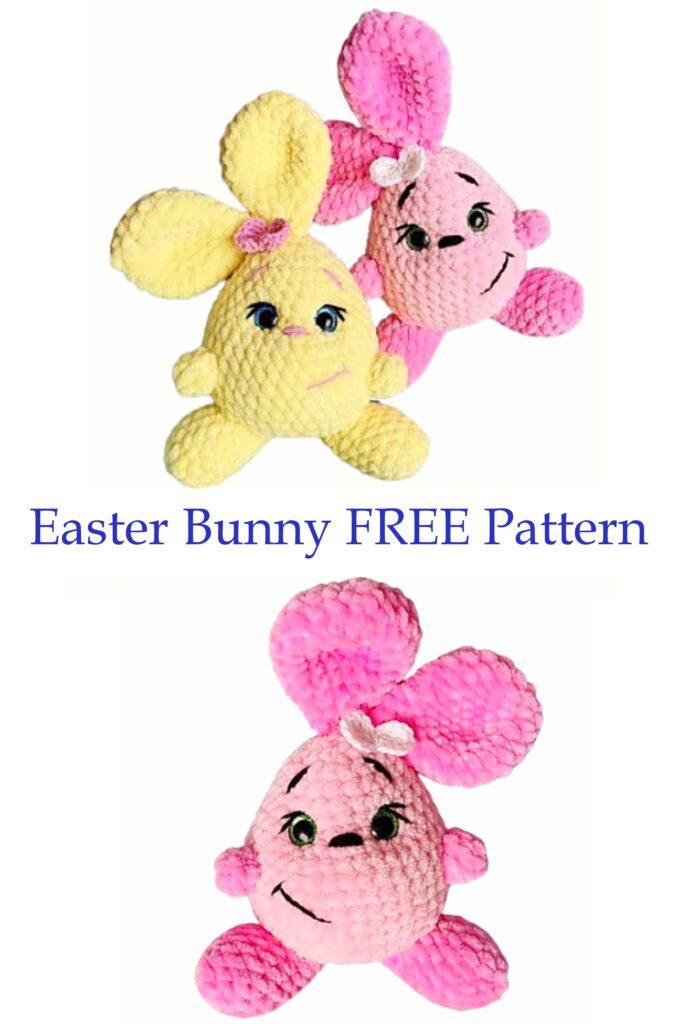
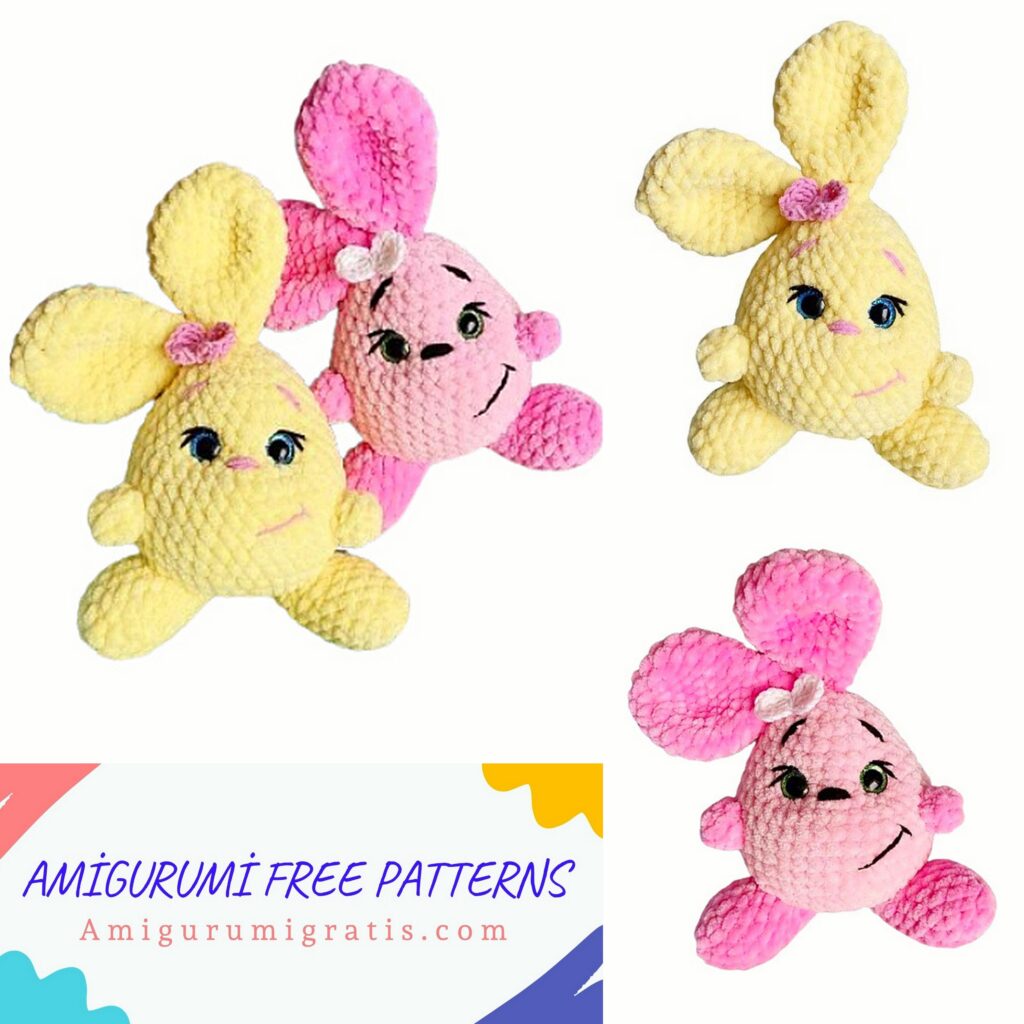
Best Easter bunny Free Amigurumi Easter is a wonderful time for creativity and crafting, making it the perfect occasion to create an Easter bunny amigurumi. Amigurumi, the Japanese art of crocheting small, stuffed yarn creatures, has gained immense popularity among crafters of all ages. Finding the best free amigurumi pattern for an Easter bunny can enhance your holiday celebrations with a touch of handmade charm.
When searching for the ideal Easter bunny amigurumi pattern, it’s essential to look for one that offers clear, step-by-step instructions and detailed photos to guide you through the process. Beginners should prioritize patterns that are easy to follow and provide thorough explanations of each step. More experienced crafters might enjoy patterns that include intricate details and advanced techniques.
Customization is another key aspect to consider. The best patterns allow you to personalize your bunny with different yarn colors, sizes, and embellishments like bows or buttons. This flexibility ensures that your Easter bunny will be unique and special.
List of required materials:
1. Yarn Himalaya Dolhin Baby 100g/120m
2. Yatnart Jens yarn (black) for decorating the face
3. Hook – 4 mm.
4. Eyelets on a safe mount – 12 mm.
5. Holofiber
6. Sewing pins for securing small parts before sewing
7. Scissors
8. Marker or contrasting thread to mark a new row 9. Needle with a wide eye
Best Easter bunny Free Amigurumi Pattern
Amigurumi Abbreviations
Mr – amigurumi ring
İnc – increase
Dec – decrease
Sc – single crochet
Sl-st – connecting post
Ch – air loop
(…)*6 – repeat the combination the specified number of times
Best Easter bunny Free Amigurumi
Easter bunny Torso:
1.6MR
2.6 inc (12)
3. (1 Sc, İnc)*6 (18)
4. 1 Sc, İnc, (2 Sc, İnc)*5, 1 Sc (24)
5. (3 Sc, İnc)*6 (30)
6. 2 Sc, İnc, (4 Sc, İnc)*5, 2 Sc (36)
7. (5 Sc, İnc)*6 (42)
8-13. 42 Sc (6 rows)
14. (5 Sc, Dec)*6 (36)
15. 36 Sc
16. (4 Sc, Dec)*6 (30) 17. (3 Sc, Dec)*6 (24) 18-19. 24 Sc (2 rows) 20. (2 Sc, Dec)*6 (18) 21. (1 Sc, Dec)*6 (12) 22. 6 Dec
Fill with filler.
We insert the eyes between rows 15 and 16, at a distance of 5 Sc from each other.
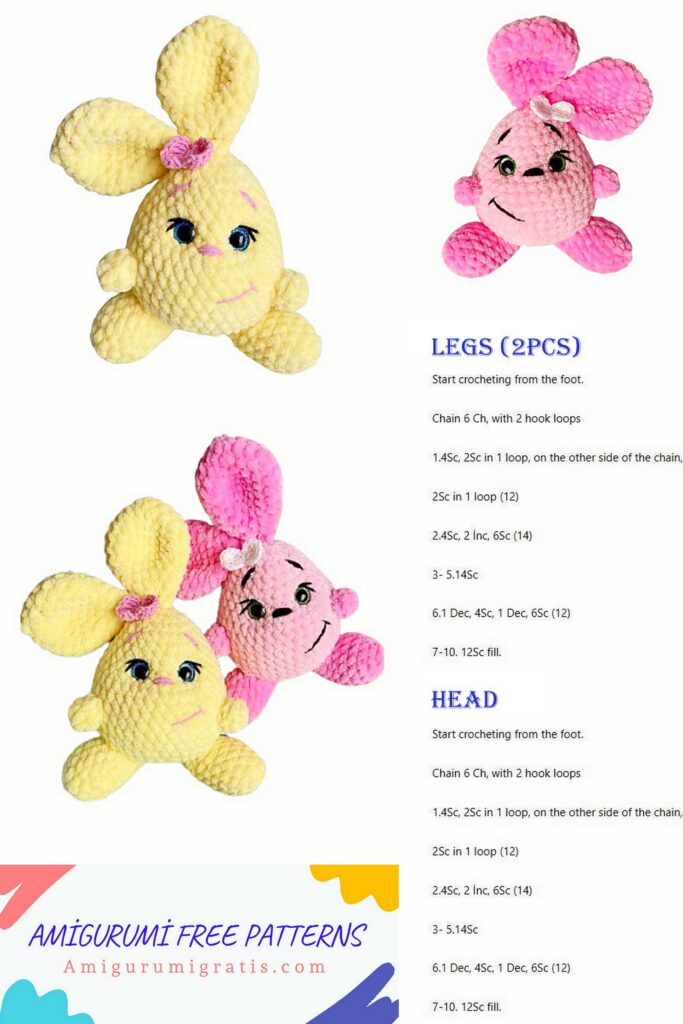
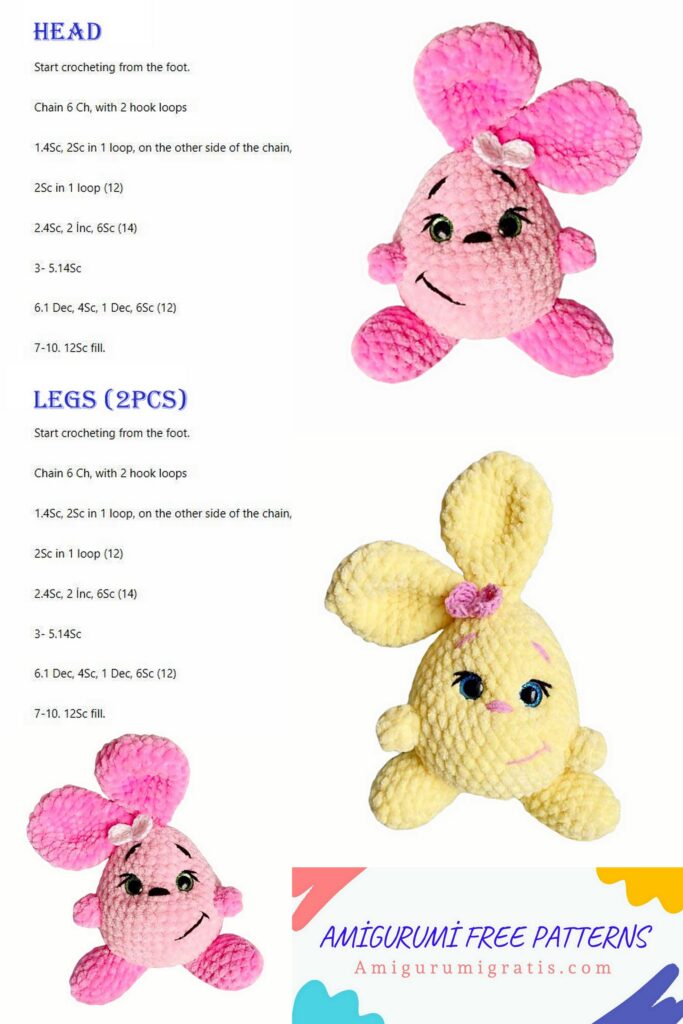
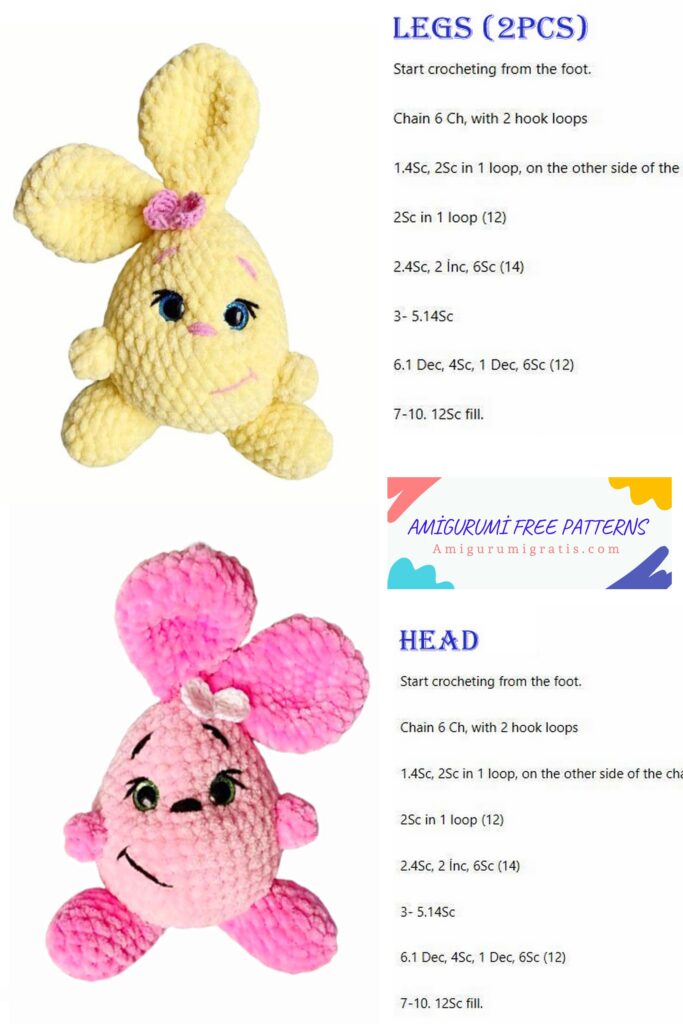
Easter bunny Legs: (2 parts):
1.6Mr
2.6 inc (12)
3. (3 Sc, İnc)”З (15) 4-6.15 Sc (3 rows) 7. (3 Sc, Dec)”3 (12) 8.12 Sc
9. (4 Sc, Dec)’2 (10)
10. (3 Sc, Dec)’2 (8)
We stuff the legs just a little, then fold them in half and knit 4 Sc together.
Easter bunny Handles: (2 parts):
1.6Mr
2-3. 6 Sc (2 rows)
We knit SL-ST, fasten the thread and leave a long end for sewing to the body. We stuff the hands very lightly.
Easter bunny Ears: (2 parts):
1.6MR
2.6 inc (12)
3. (1 Sc, İnc)*6 (18)
4. (2 Sc, İnc)*6 (24)
5-6. 24 Sc (2 rows)
7. (6 Sc, Dec)*3 (21)
8. (5 Sc, Dec)*3 (18)
9. (4 Sc, Dec)*3 (15)
10. (3 Sc, Dec)*3 (12)
11. (2 Sc, Dec)*3 (9)
12.9Sc
Fold in half and knit 4 Sc. Then fold it in half again and knit 2 Sc. Fasten the thread and leave a long tip for sewing.
Easter bunny Tail:
1.6Mr
2.6 inc (12)
3. (3 Sc, İnc) “З (15)
4.7 Dec
We stuff the tail just a little bit.
We knit SL-ST, fasten the thread and leave a long tip for sewing to the body.
Assembly and design:
We start with tightening the eyes. (Video in the carousel)
Then we embroider the eyelashes
We embroider the eyebrows between 18 and 20 rows.
We embroider the mouth between 9 and 11 rows.
We embroider the nose between the 14th and 15th rows, between the eyes
We fasten the legs with needles, then sew them on
Sew handles between 10 and 13 rows
We sew the ears in any position you want
We sew the tail between rows 5 and 9, so that the tail serves as a support for the Easter bunny