Enter the world of elegance and charm with our luxurious creation, the Amigurumi Velvet Bunny in Dress! If you’re enchanted by sophisticated and stylish crochet projects, you’re in for a delightful experience. This amigurumi bunny, adorned in a velvety dress, is more than just a project; it’s a symbol of refinement and handmade beauty. Whether you’re an experienced crocheter or just starting, our crochet pattern provides detailed instructions to bring this exquisite Velvet Bunny to life.
Our Amigurumi Velvet Bunny in Dress crochet pattern is designed for creators of all skill levels, offering a rewarding and enjoyable experience. With step-by-step instructions and accompanying images, crafting your own Velvet Bunny has never been more delightful.
Required materials and tools:
1. Yarn – semi-cotton Gazzal Baby Cotton 50g/165m, color No. 3430 (gray), color
#3438 (navy), color #3431 (denim), color #3432 (white), color #3443
(Red poppy)
2. Hook number 2
3. Filler – holofiber
4. Beads for eyes with a diameter of 6mm
5. Some black, white and pink yarn for embroidery of the muzzle
6. Stitching needle, scissors, pins, crocheting marker
7. A piece of fabric measuring 27 * 9 cm (for a scarf)
8. Buttons – 2 pieces
9. Sewing machine (optional)
Abbreviations
AR – Amigurumi Magic ring
MR – Amigurumi Magic ring
3in1 – crochet 3 columns in one loop
sc : Single Crochet
inc : Increase
dec : Decrease
tr : Triple Crochet/ Treble Crochet
st: Stitch
dc : Double Crochet
hdc: Half Double Crochet
sl-st or Slst: Slip Stitch
ch : Chain
tch: Turnin chain crochet
..in : make increase into same stitch as many as the number which is given in front of “inc” abbreviation (exp; 3inc, 4inc..).
FLO : Crochet into front loops only
BLO : Crochet into back loops only
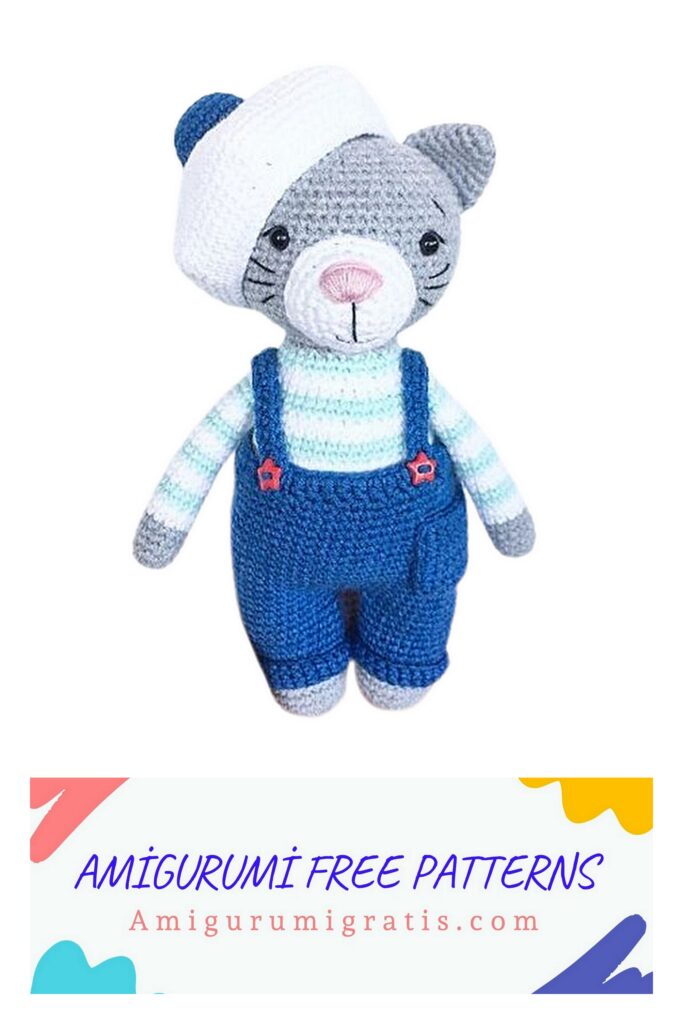
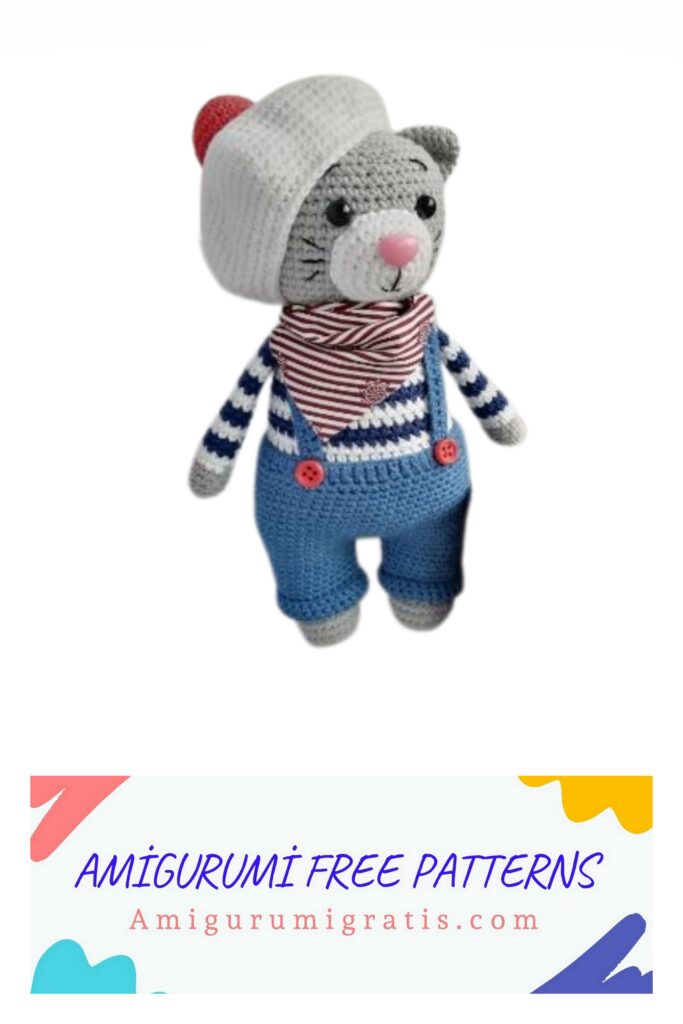
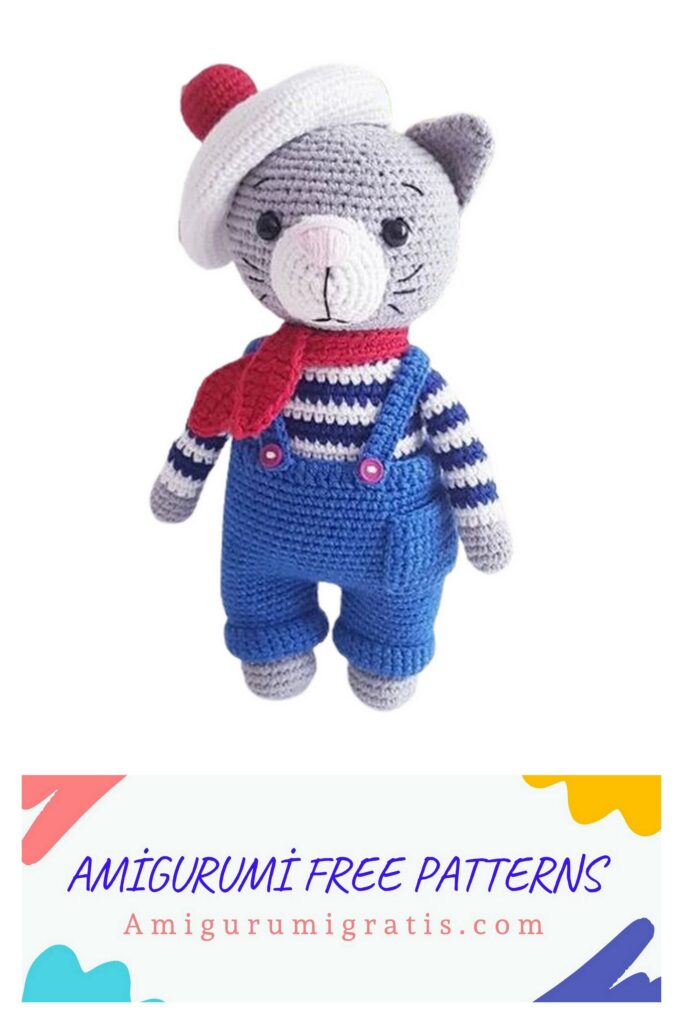
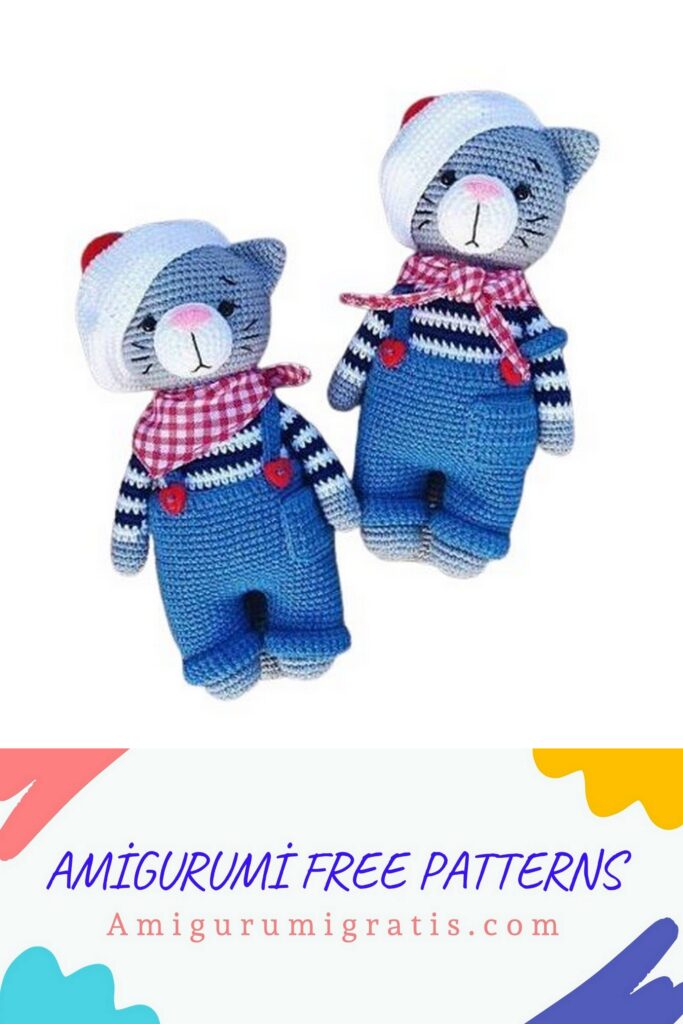
The size of the finished toy when using the specified materials is about 20 cm.

Arms:
Link two pieces. Stuff while crocheting. Stuff the bottom tightly
then fill in the middle, you do not need to fill the upper part.
Begin with gray color:
1Rnd: 6sc in MR
2Rnd: inc in every loop (12sc)
3-6Rnd: 12sc (4rows)
Change color to white.
7-8Rnd: 12sc
Change yarn to dark blue.
9-10Rnd: 12sc
Change color to white.
11-12Rnd: 12sc
Change yarn to dark blue.
13-14Rnd: 12sc
Change color to white.
15-16Rnd: 12sc
Change yarn to dark blue.
17-18Rnd: 12sc
Change color to white.
19-20Rnd: 12sc
Change yarn to dark blue.
21-22Rnd: 12sc
Change color to white.
23Rnd: 12sc
crochet another 6sc, then fold the edges of the part together, crochet 6sc.
Fasten the yarn, cut.

Tail:
Stuff while crocheting. Stuff the lower part tightly, then fill it medium, do not need to fill the upper part.
with gray:
1Rnd: 6sc in MR
2Rnd: inc in every loop (12sc)
3-25Rnd: 12sc (23rows)
Fold the edges of the part together, crochet 6sc. Fasten the yarn, cut.
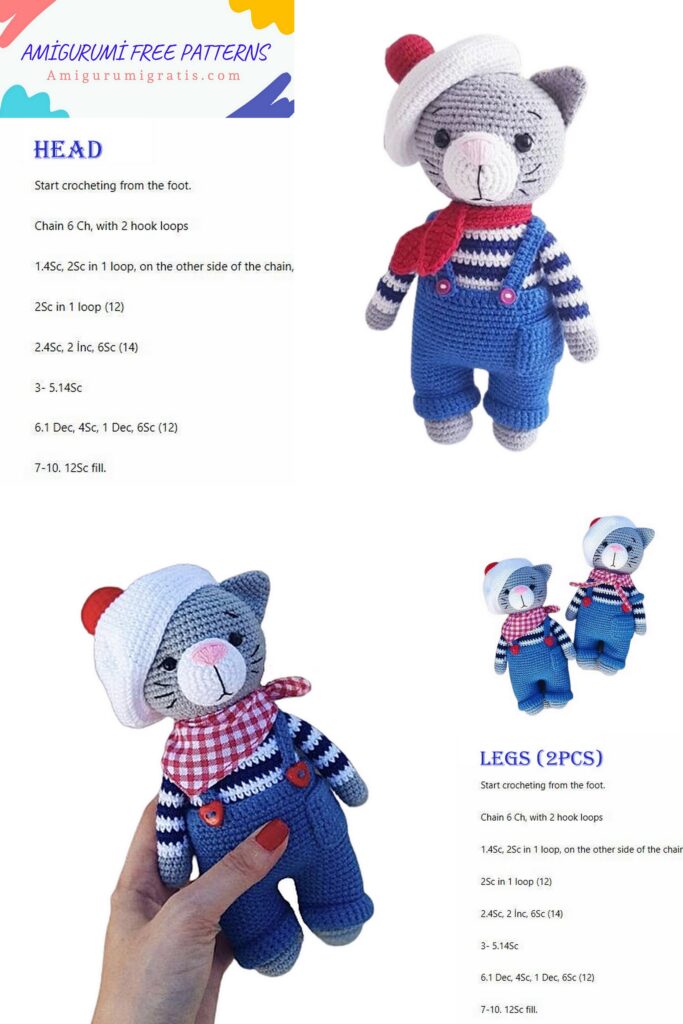
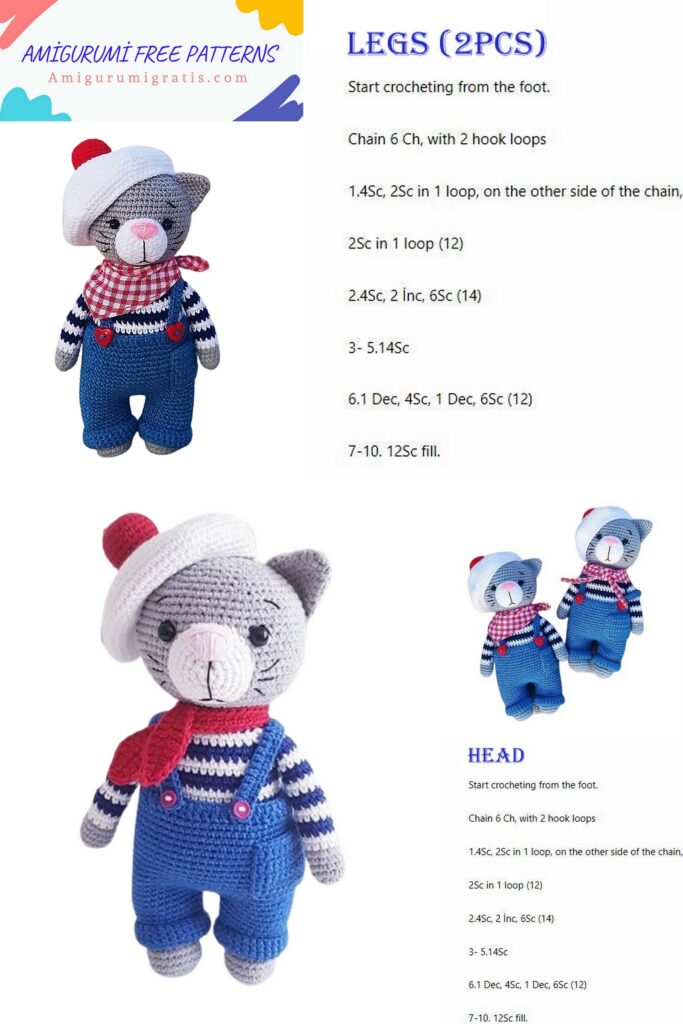
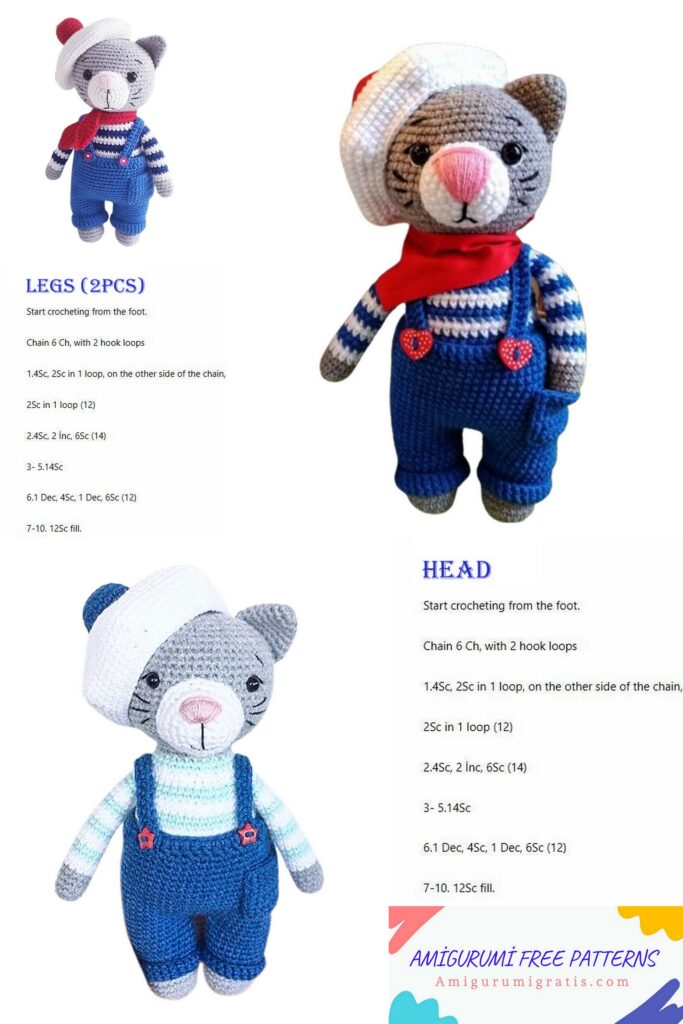
Legs + Body:
First tie the first leg. Stuff the legs and body tightly while crocheting.
Start with gray:
1Rnd: 6sc in MR
2Rnd: inc in every loop (12sc)
3Rnd: (1sc, inc)*6 (18sc)
4Rnd: 1sc, inc, (2sc, inc)*5, 1 sc (24sc)
5-7Rnd: 24sc (3rows)
8Rnd: 6sc, 6dec, 6sc (18sc)
9Rnd: (4sc, dec)*3 (15sc)
10-12Rnd: 15sc (3rows)
13Rnd: (4sc, inc)*3 (18sc)
14-16Rnd: 18sc (3rows)
17Rnd: (5sc, inc)*3 (21sc)
crochet another 7sc, slst. Finish crocheting, fasten the yarn and cut off.
legs
crochet the second leg in the same way as the first, but after the 17th row, crochet another 18sc.
Do not cut the yarn, but continue to crochet the body. (You may need a different number of stitches after the 17th row, then you need to adjust it yourself.)
legs 2
18Rnd: from the second leg, cast on a chain of 6ch and attach to the first leg where you finished crocheting (into the loop following slst). Make sure your legs are straight.
Then crochet 21sc in the first piece, 6sc in the chain of chains, 21sc in the second piece, 6sc on the reverse side of the chain of chains (54sc) Place a marker in this place (the marker is in front).
19-26Rnd: 54sc (8 rows)
In the next row, you need to crochet a tail.
Make sure that the tail is located exactly in the middle.
27Rnd: 22sc, 6sc (tie a tail), 26sc (54sc)
28Rnd: (7sc, dec)*6 (48sc)
Next, you need to align the marker exactly in the middle of the back. To do this, I needed to crochet 22sc (you may need to crochet a different number of loops), and in the next loop change the color to dark blue.
Now this will be the beginning of the next row, set the marker.
29-30Rnd: 48sc
Change color to white.
31Rnd: 48sc
32Rnd: (10sc, dec)*4 (44sc)
Change yarn to dark blue.
33-34Rnd: 44sc
Change color to white.
35-36Rnd: 44sc
Change yarn to dark blue.
37-38Rnd: 44sc
Change color to white.
39Rnd: 44sc
40Rnd: (9sc, dec)*4 (40sc)
Change yarn to dark blue.
41-42Rnd: 40sc
Change color to white.
43Rnd: (8sc, dec)*4 (36sc)
In the next row, you need to crochet arms.
Make sure that they are located symmetrically on the sides of the body.
44Rnd: 9sc, 6sc (with arm), 12sc, 6sc (with arm), 3sc (36sc)
Change the yarn to dark blue.
45Rnd: (4sc, dec)*6 (30sc)
46Rnd: 30sc
Change yarn to gray.
47Rnd: (3sc, dec)*6 (24sc)
48-49Rnd: 24sc
The body is ready. Further, without tearing off the yarn, we continue to crochet the head. We stuff very tightly.
Head:
50Rnd: inc in each loop (48sc)
51Rnd: (7sc, inc)*6 (54sc)
52Rnd: 4sc, inc, (8sc, inc)*5, 4sc (60sc)
53-64Rnd: 60sc (12rows)
65Rnd: 4sc, dec, (8sc, dec)*5, 4sc (54sc)
66Rnd: (7sc, dec)*6 (48sc)
67Rnd: 3sc, dec, (6sc, dec)*5, 3sc (42sc)
68Rnd: (5sc, dec)*6 (36sc)
69Rnd: 2sc, dec, (4sc, dec)*5, 2sc (30sc)
70Rnd: (3sc, dec)*6 (24sc)
71Rnd: 1sc, dec, (2sc, dec)*5, 1sc (18sc)
72Rnd: (1sc, dec)*6 (12sc)
Fasten and cut the yarn, leaving a long tip, with which to tighten the remaining hole. Hide the tail of the yarn inside the head.
Ears:
Connect two pieces in gray.
1Rnd: 6sc in MR
2Rnd: (1sc, inc)*3 (9sc)
3Rnd: (2sc, inc)*3 (12sc)
4Rnd: (5sc, inc)*2 (14sc)
5Rnd: (6sc, inc)*2 (16sc)
6Rnd: (7sc, inc)*2 (18sc)
7Rnd: (8sc, inc)*2 (20sc)
Fasten the yarn, cut off, leaving a long end for sewing.
Muzzle:
with white.
1Rnd: 6sc in MR
2Rnd: inc in each loop (12sc)
3Rnd: (1sc, inc)*6 (18sc)
4Rnd: 1sc, inc, (2sc, inc)*5, 1 sc (24sc)
5Rnd: (3sc, inc)*6 (30sc)
6Rnd: 30sc
Fasten the yarn, cut off, leaving a long end for sewing.
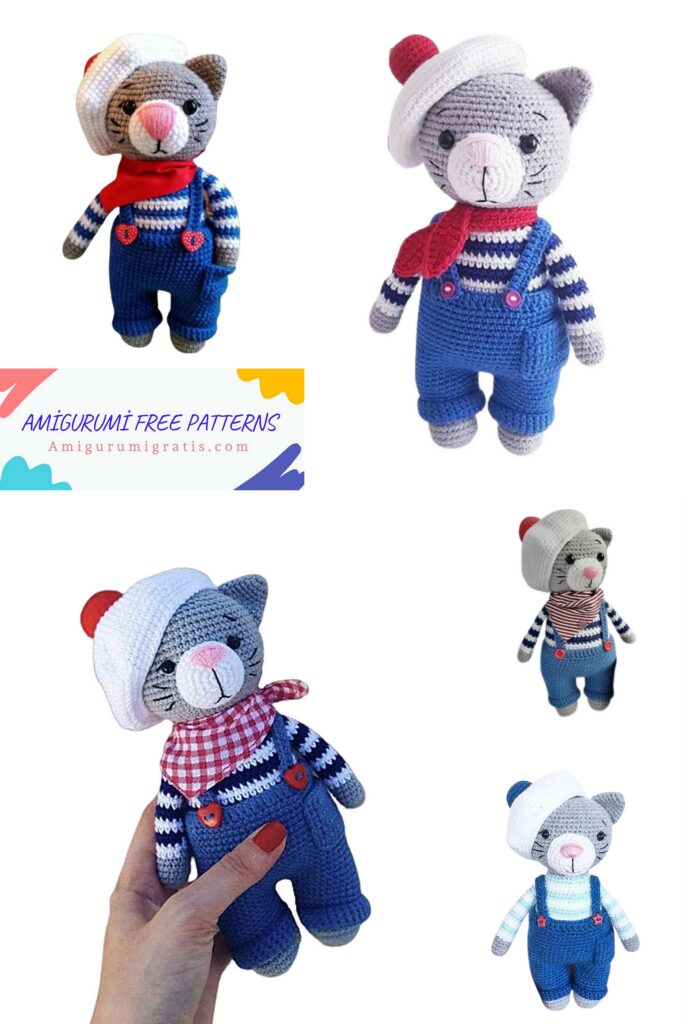
Design and assembly:
First you need to sew on the muzzle.
Determine the location of the muzzle approximately between 51 and 61 rows of the head, pin it with pins (make sure that it is located in the center).
Sew, in the process of sewing, put the filler inside.
Sew eyes on both sides of the muzzle. To do this, mark with pins the location of the eye, which are between 59 and 60 next to the head, the distance between the points is 10-11sc. When sewing, make a small tightening. With a white yarn, make stitches around the eye to make the look more “alive”. Black yarn can be added or rather eyelid.
On the muzzle with pins, mark the location of the spout, embroider with pink yarn. Embroider the mouth, eyebrows and mustache with black yarn.
With pins, mark the location of the ears, sew approximately between 61 and 70 next (make sure that the ears are sewn symmetrically).
Pants:
crocheting panties starts from the top.
With the color “jeans” make a chain from 54ch and with the help of slst close it in a circle.
1Rnd: 2ch turn, 54dc, slst
2Rnd: (8sc, inc)*6 (60sc)
3-7Rnd: 60sc (5 rows)
In the next row, you need to make a hole for the tail.
8Rnd: Make a chain from 6ch, 6sc of the previous row, skip, continue crocheting in the next loop, 54sc (60sc)
9-18Rnd: 60sc (10 rows)
Further crocheting is divided as follows:
28sc (pants), 2sc, 28sc (pants), 2sc.
It is necessary to position the legs so that the hole for the tail is exactly in the middle.
To do this, I needed to crochet 4sc (maybe you will have a different number of loops), then count 28sc and join in a circle. Continue crocheting already on 28 loops.
19-29Rnd: 28sc (11 rows)
Finish crocheting slst, fasten and cut the yarn, hide the tip of the yarn.
Next, return to the beginning of crocheting the legs, count 2 sc from the first (this will be the distance between them), tie the yarn, leaving a free tail of about 20 cm.
Count off 28sc, join in a round with sl-st and work again 11 rows of 28sc. Next, finish crocheting slst, fasten and cut the yarn, hide the tip of the yarn.
With the left end of the yarn, sew the distance between the legs.
Pocket:
crochet in turning rows, each row start with 1ch turn.
Make a chain of 10ch + 1ch turn.Start the first row from the 2nd loop from the hook.
1-8Rnd: 10sc (8 rows)
Connect the sides of the sc pocket, fasten and cut the yarn, leaving a long tip for sewing.
Webbing:
crochet 2 pieces of the desired length. I needed to Make 28ch, maybe you will have a different amount (depending on the density of crocheting).
crochet in turning rows. When tying the initial chain, leave a free tail of about 20 cm.
Make chain of 28ch + 1ch turn.
Start the first row from the 2nd loop from the hook.
1Rnd: 28sc, 1ch turn
2Rnd: 28sc
Fasten and cut the yarn, leaving the tip for sewing.
Sew the straps to the pants, sew decorative buttons on the front.
Sew on a pocket.
Beret:
crochet in white:
1Rnd: 6sc in MR
2Rnd: inc in each loop (12sc)
3Rnd: (1sc, inc)*6 (18sc)
4Rnd: (2sc, inc)*6 (24sc)
5Rnd: (3sc, inc)*6 (30sc)
6Rnd: (4sc, inc)*6 (36sc)
7Rnd: (5sc, inc)*6 (42sc)
8Rnd: (6sc, inc)*6 (48sc)
9Rnd: (7sc, inc)*6 (54sc)
10Rnd: (8sc, inc)*6 (60sc)
11Rnd: (9sc, inc)*6 (66sc)
12Rnd: (10sc, inc)*6 (72sc)
13Rnd: (11sc, inc)*6 (78sc)
14Rnd: (12sc, inc)*6 (84sc)
15-17Rnd: 84sc (3 rows)
18Rnd: (12sc, dec)*6 (78sc)
19Rnd: (11sc, dec)*6 (72sc)
20Rnd: (10sc, dec)*6 (66sc)
21Rnd: 66sc
Finish crocheting slst, fasten and cut the yarn, hide the tip of the yarn.
Pompon:
crochet in red, stuff in the process of crocheting.
1Rnd: 6sc in MR
2Rnd: inc in each loop (12sc)
3Rnd: (1sc, inc)*6 (18sc)
4Rnd: (2sc, inc)*6 (24sc)
5-8Rnd: 24sc (4 rows)
9Rnd: (2sc, dec)*6 (18sc)
10Rnd: (1sc, dec)*6 (12sc)
Fasten the yarn, cut off, leaving a long end for sewing.
Sew the pompom to the top of the beret.
Scarf:
On paper, make a pattern according to the dimensions indicated in the photo.
Transfer the pattern to the fabric, leave allowances of 0.7-1 cm for hem, cut out.
Finish the edges, fold and stitch.
Congratulations!
Your kitty Jeremy is ready!
I hope the process of its creation turned out to be easy and exciting for you, and the result met all your expectations!