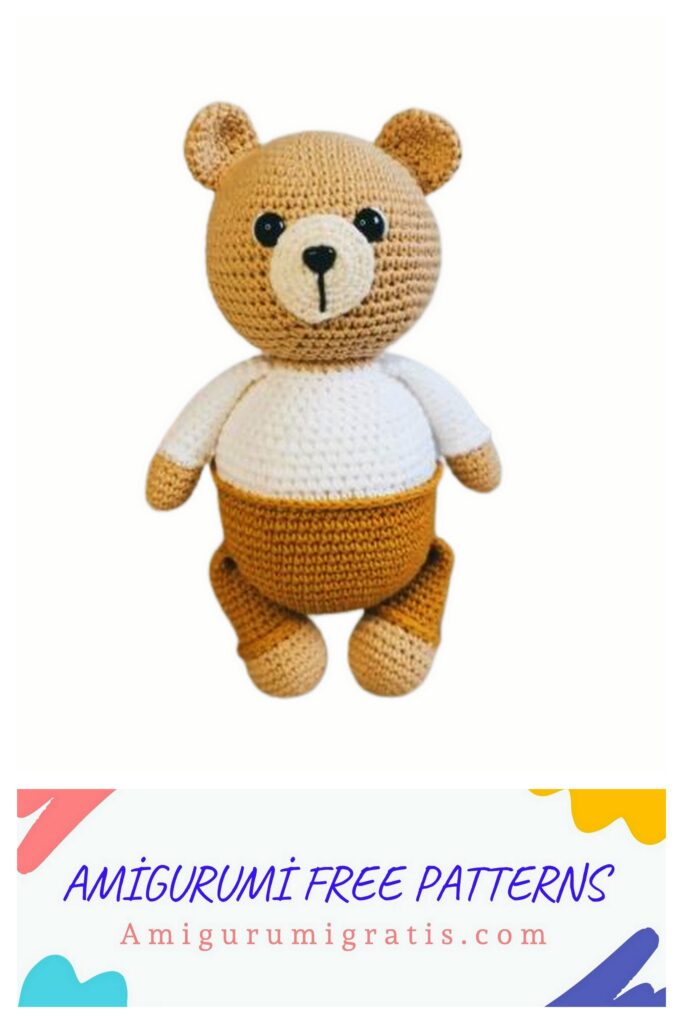
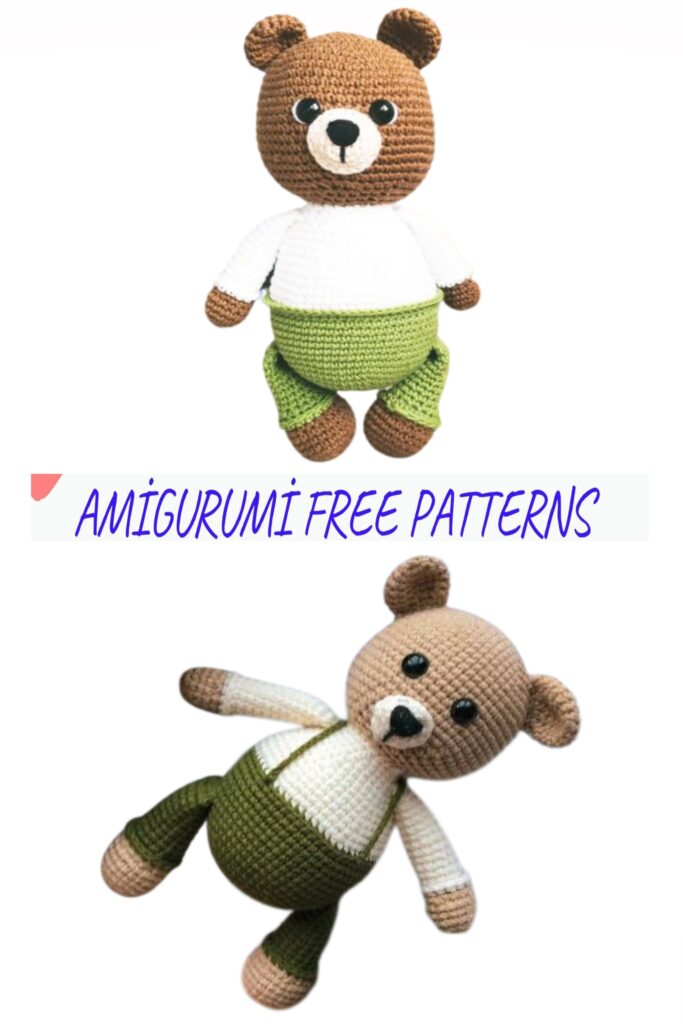
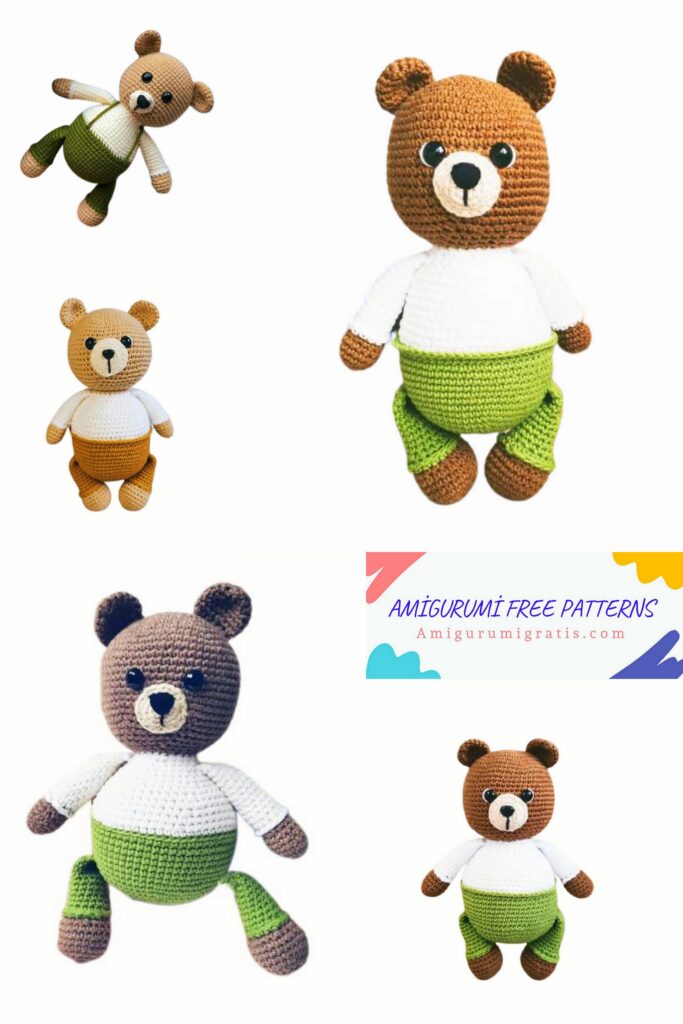
Step into the whimsical world of crochet with our charming creation, Barney the Bear. If you have a soft spot for adorable and huggable crochet toys, you’re in for a delightful experience. This amigurumi bear is not just a project; it’s a symbol of creativity and handmade warmth. Whether you’re a seasoned crocheter or just beginning, our free pattern offers detailed instructions to bring this lovable bear to life.
Our Amigurumi Barney the Bear crochet pattern is crafted to be accessible for all skill levels, ensuring a fun and rewarding experience for crocheters of any expertise. With step-by-step instructions and accompanying images, creating your own Barney the Bear has never been more enjoyable.
Necessary materials:
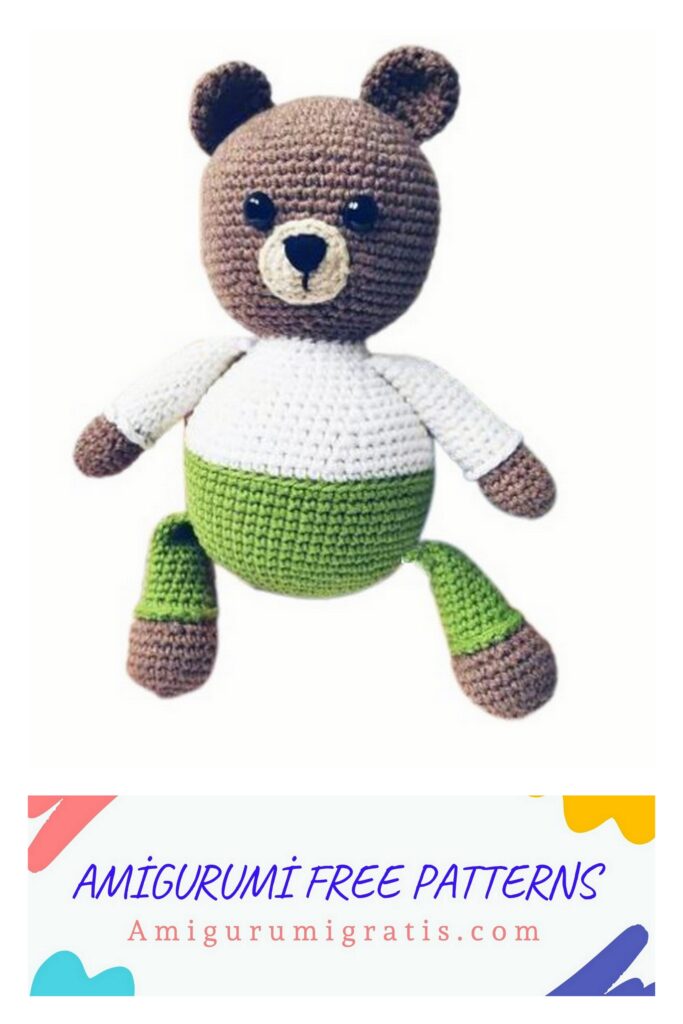
YarnArt Jeans yarn in green, white, brown, beige colors
Hook 2.0 mm
10 mm eyes on safety mount
Some black thread for embroidering a muzzle
Filler
Abbreviations
AR – Amigurumi Magic ring
MR – Amigurumi Magic ring
App – application
ll – lift loop
sc : Single Crochet
inc : Increase
dec : Decrease
tr : Triple Crochet/ Treble Crochet
st: Stitch
dc : Double Crochet
hdc: Half Double Crochet
sl-st : Slip Stitch
ch : Chain
..in : make increase into same stitch as many as the number which is given in front of “inc” abbreviation (exp; 3inc, 4inc..).
FLO : Crochet into front loops only
BLO : Crochet into back loops only
BL : Bobble Stitch – do 5dc all in the same stitch and then yarn over and pull through all the loops on your hook (the original loop + 1 loop for each partially completed dc).
Ears (2 parts)
1 RND: 6 sc in MR (6)
2 RND: inc×6 (12)
3 RND: (1 sc, inc)×6 (18)
4-6 RND: 18 sc (3 rows)
7 RND: (1 sc, dec) ×6 (12)
Fold the edges together and knit 6 sc on both edges.
We fasten the thread, cut it, leaving a little for sewing.
Legs (2 parts)
We fill the legs a little more than half.
We start knitting with the color of the bear’s body.
1 RND: 6 sc in MR (6)
2 RND: inc×6 (12)
3 RND: (1 sc, inc)×6 (18)
4 RND: (2 sc, inc)×6 (24)
5-8 RND: 24 sc (4 rows)
9 RND: (2 sc, dec) ×6 (18)
10 RND: Change the thread to the color of the pants and knit 18 sc behind the back of the loop.
11 RND: (4 sc, dec)×3 (15)
12-20 RND: 15 sc (9 rows)
Fold the edges together and knit 7 sc on both edges.
We fix the thread, cut it off.
We tie the bottom of the panties.
To do this, you need to attach a thread in the color of the pants to the 10th row and knit behind the front wall of the loop 18 sc.
Arms (2 parts)
We fill the handles a little more than half.
We start knitting with the color of the bear’s body.
1 RND: 6 sc in MR (6)
2 RND: inc×6 (12)
3 RND: (3 sc,inc)×3 (15)
4-6 RND: 15 sc (3 rows)
7 RND: (3 sc,dec)×3 (12)
8 RND: Change the thread to the color of the jacket and knit 12sc on the back of the loop.
9-21 RND: 12 sc (12 rows)
Fold the part with the edges together and knit 6 sb at both edges.
We fix the thread, cut it off.
We tie the bottom of the sleeves.
To do this, attach a sweater-colored thread to row 8 and knit 12sc behind the front wall of the loop.
Muzzle
1 RND: 6 sc in MR (6)
2 RND: inc×6 (12)
3 RND: (1 sc, inc)×6 (18)
4 RND: 18 sc, сс
Fasten the thread, cut off.
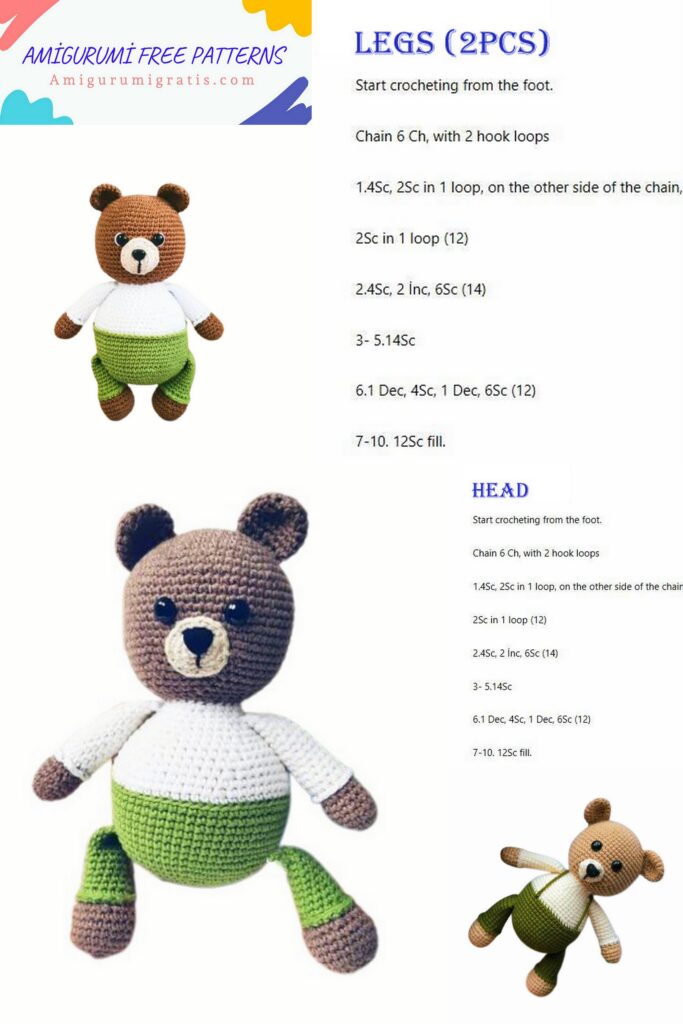
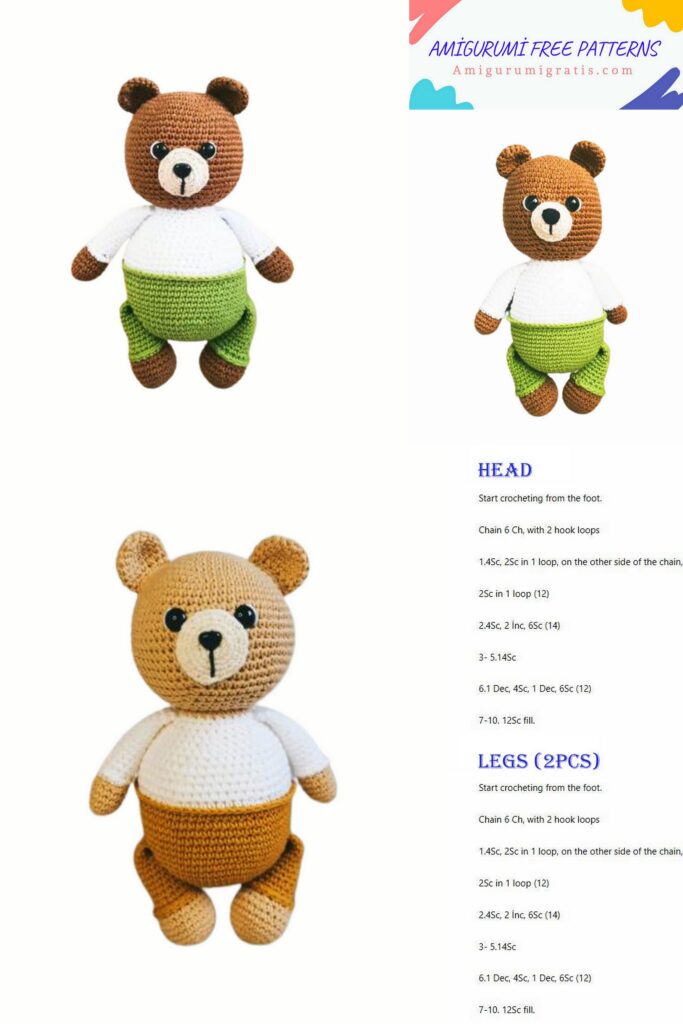
Head
1 RND: 6 sc in MR (6)
2 RND: inc×6 (12)
3 RND: (1 sc, inc)×6 (18)
4 RND: (2 sc, inc)×6 (24)
5 RND: (3 sc, inc)×6 (30)
6 RND: (4 sc, inc)×6 (36)
7 RND: (5 sc, inc)×6 (42)
8 RND: (6 sc, inc)×6 (48)
9 RND: (7 sc, inc)×6 (54)
10 RND: (8 sc, inc)×6 (60)
11-21 RND: 60 sc (11 rows)
At the level of 16-17 rows, we insert eyes. The distance between the eyes is 4 loops.
22 RND: (8 sc, dec)×6 (54)
23 RND: (7 sc, dec)×6 (48)
24 RND: (6 sc, dec)×6 (42)
25 RND: (5 sc, dec)×6 (36)
26 RND: (4 sc, dec)×6 (30)
27 RND: (3 sc, dec)×6 (24)
We fasten the thread, cut it, leaving a little for sewing.
Body
We start knitting with the color of the pants.
1 RND: 6 sc in MR (6)
2 RND: inc×6 (12)
3 RND: (1 sc, inc)×6 (18)
4 RND: (2 sc, inc)×6 (24)
5 RND: (3 sc, inc)×6 (30)
6 RND: (4 sc, inc)×6 (36)
7 RND: (5 sc, inc)×6 (42)
8 RND: (6 sc, inc)×6 (48)
9 RND: (7 sc, inc)×6 (54)
10 RND: (8 sc, inc)×6 (60)
11-19 RND: 60 sc (9 rows). In the 13th row we knit the legs. Knit 12 sc, 7 sc with leg, 24 sc, 7 sc with leg, 10 sc.
20 RND: Change the color of the thread to the color of the jacket and knit at the back of the loop 60 sc.
21 RND: (8 sc, dec)×6 (54)
22 RND: 54 sc
23 RND: (7sc, dec)×6 (48)
24 RND: 48 sc
25 RND: (6 sc, dec)×6 (42)
26 RND: 42 sc
27 RND: (5 sc, dec)×6 (36)
28 RND: 36 sc
29 RND: (4 sc, dec) ×6 (30)
30 RND: In this row we will knit handles: 8 sc, 6 sc together with the handle, 10 sc, 6 sc together with the hand (30)
31 RND: (3 sc, dec)×6 (24)
32 RND: 24 sc
We fix the thread, cut it off.
Assembling the toy
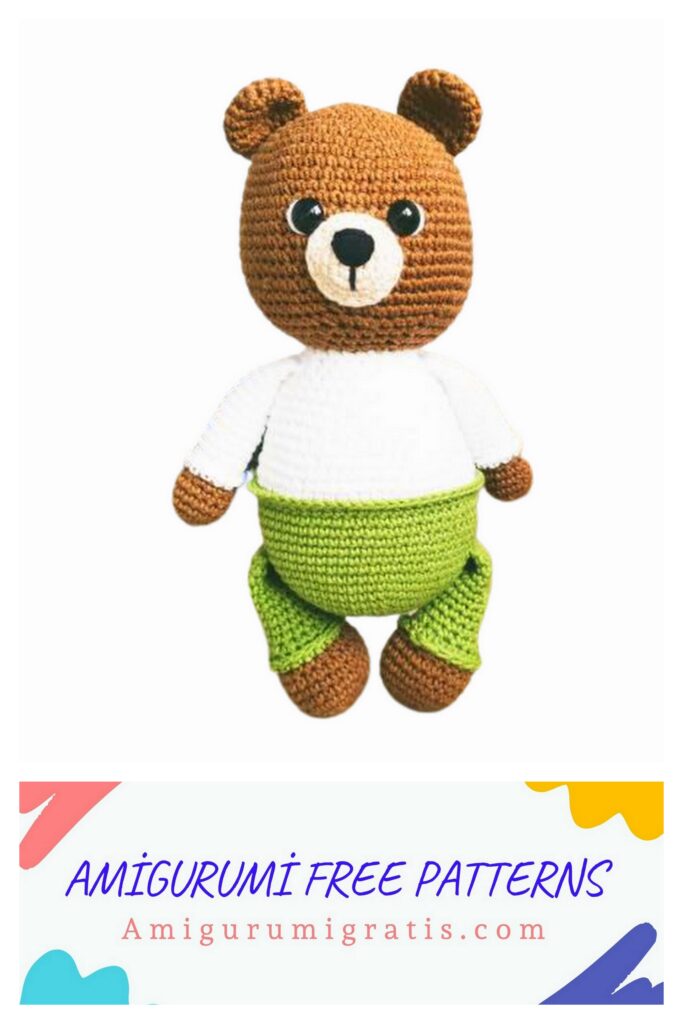
Sew the ears and muzzle to the head. We embroider a nose on the face.
Sew the head to the calf.