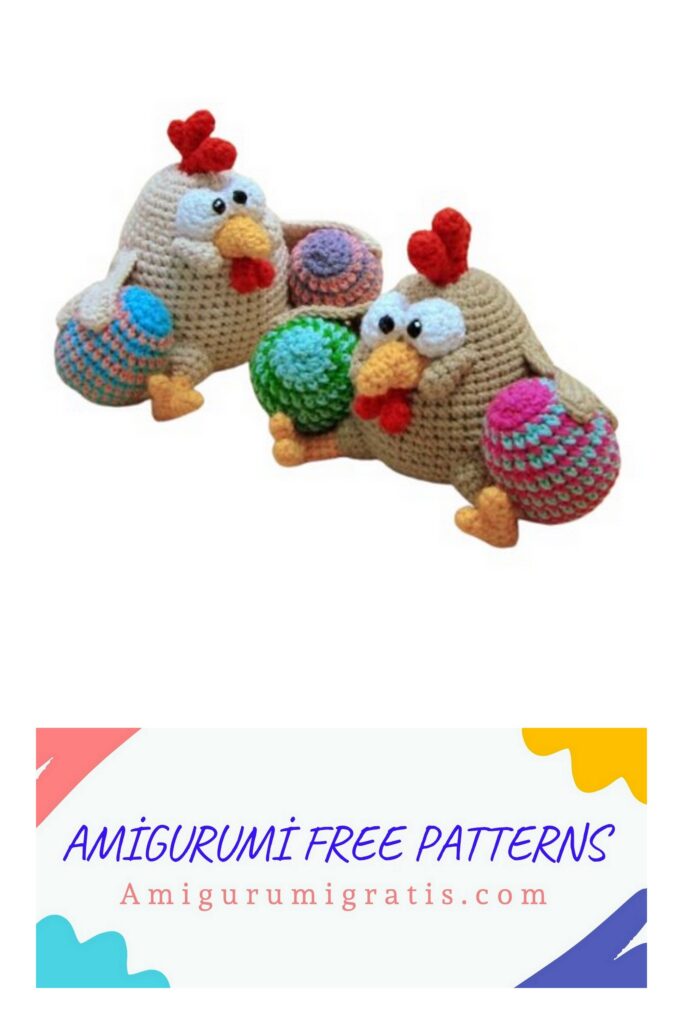
Height 11 cm.
Tools and materials:
Hook 2.5 or 2 mm.
The filler is chlorofiber.
Yarn ALIZE Cotton Gold, 55% cotton, 45% acrylic, 330 m / 100 g. An analog of the specified yarn is YarnArt Jeans.
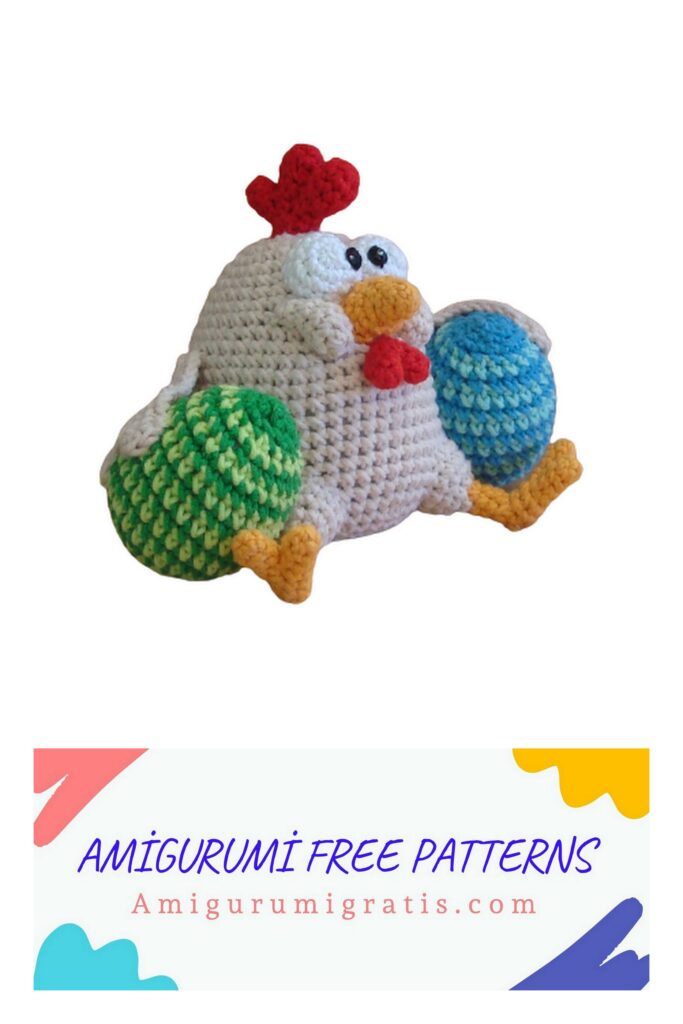
Colors: for chicken, any light, dim color, except for white. We will have beige.
A little red and bright yellow.
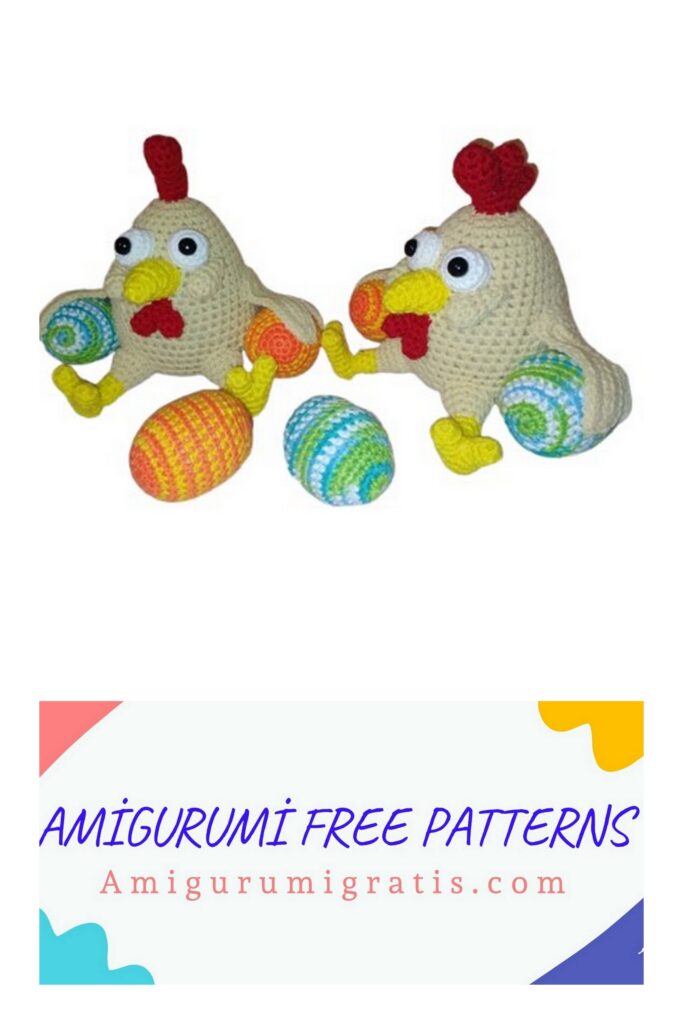
For eggs, any bright residues of yarn.
Smoother white yarn (VITA cotton LIRA, GAZZAL BABY COTTON) for the eyes.
Sewn on rhinestones black d = 6 mm for the pupils.
Abbreviations
CH () – air loop
SC () – single crochet
SL-ST () – connecting column
İNC () – increase
DEC () – decrease
HDC () – half crochet
İNC 3in1 () – 3 single crochet knitted in the same column of the previous row
All details, unless otherwise indicated, are knitted in a spiral
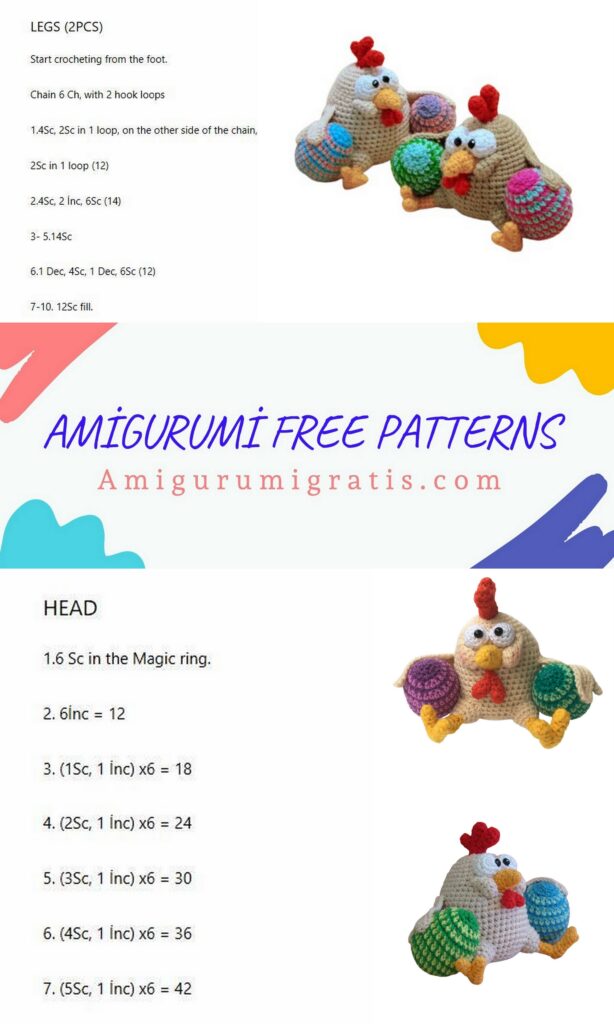
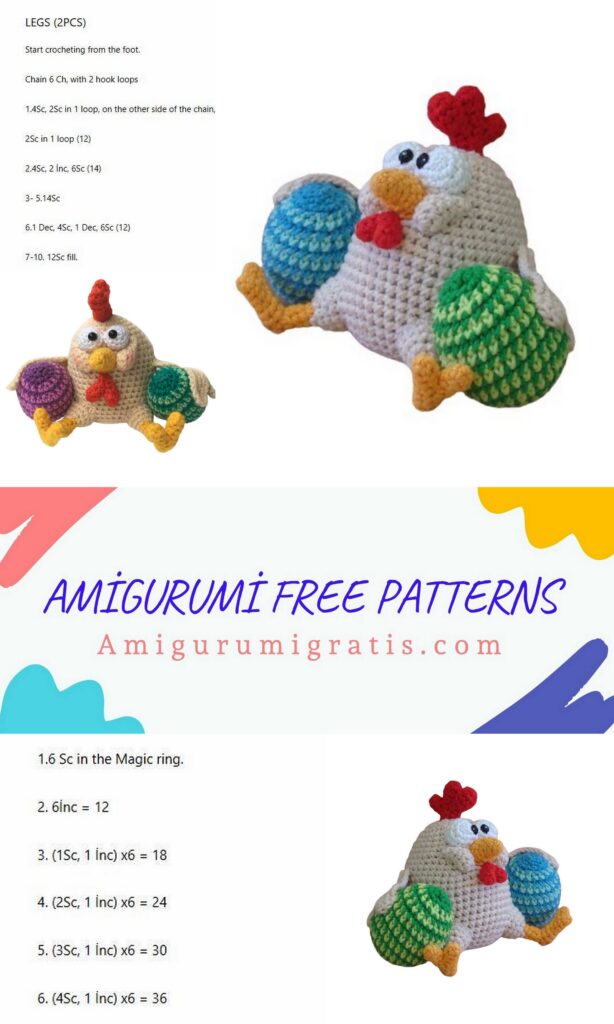
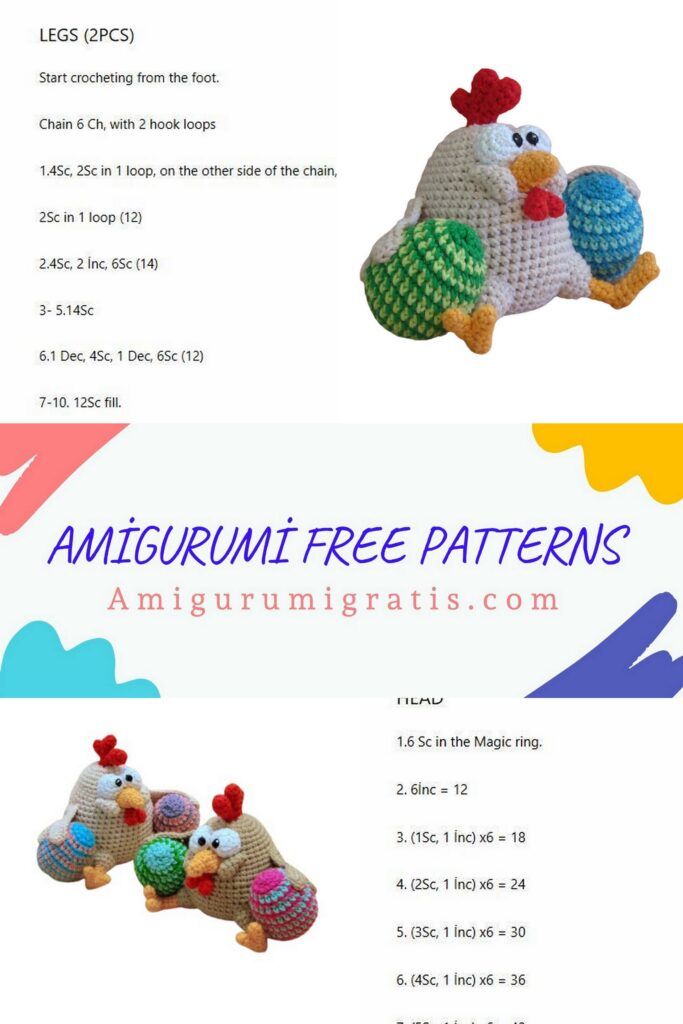
Body Head (Beige):
1 p: 6 SC into magic ring
2 p: 6 İNC = 12 SC
3 p: (İNC, 1 SC) * 6 = 18 SC
4 p: (2 SC, İNC) * 6 = 24 SC
5 p: (İNC, 7 SC) * 3 = 27 SC
6 p: (5 SC, İNC, 3 SC) * 3 = 30 SC
7 p: (8 SC, İNC, 6 SC) * 2 = 32 SC
8 p: (İNC, 15 SC) * 2 = 34 SC
9 p: (9 SC, İNC, 7 SC) * 2 = 36 SC
10 p: (İNC, 17 SC) * 2 = 38 SC
11 p: (10 SC, İNC, 8 SC) * 2 = 40 SC
12 r: 40 SC
13 p: (İNC, 19 SC) * 2 = 42 SC
14 p: 42 SC
15 p: (11 SC, İNC, 9 SC) * 2 = 44 SC
16 p: 44 SC
17 p: (İNC, 21 SC) * 2 = 46 SC
18 r: 46 SC
19 p: (12 SC, İNC, 10 SC) * 2 = 48 SC
20-23 pp: 48 SC
24 p: (DEC, 6 SC) * 6 = 42 SC
25 p: (DEC, 4 SC) * 7 = 35 SC
26 p: (2 SC, DEC, 1 SC) * 7 = 28 SC
27 p: (DEC, 2 SC) * 7 = 21 SC
We stuff the body
28 p: (1 SC, DEC) * 7 = 14 SC
29 p: 7 DEC = 7 SC
() * 6 – repeat 6 times
Finish stuffing, cut the thread and tighten the hole.
Beak (Yellow):
1 p: 4 SC into magic ring
2 p: (İNC, 1 SC) * 2 = 6 SC
3 p: 2 HDC, İNC, 2 SL-ST, İNC = 8
4 p: 8 SC
5 r: 3 HDC, İNC 3in1, 3 SL-ST, İNC 3in1 = 12
6 p: 12 SC
7 p: 3 HDC, 3 SC, 3 SL-ST, 3 SC = 12
We make SL-ST, cut the thread, leaving the end for sewing, and fix it.
We stuff the beak, sew it so that it is bent down. Sew through 8 rows from the crown (initial ring), slightly stretching to the sides. We do not sew to the end, when a small hole remains, we stuff denser and finish sewing.
Goatee (red):
1 p: 6 SC into magic ring
2 p: 6 SC
3 p: (DEC, 1 SC) * 2 = 4 SC
We do not cut the thread very short, we fix it.
We knit another exactly the same part, repeating 1-3 pp, we do not cut the thread, then we will bind the parts together.
4 p: we connect the parts, knitting 3 SC on each, one column between them we skip = 6 SC
The end of the thread from the first part is brought out through
the hole between the parts, then they sew a hole.
8 rows 4 rows
1 loop
skipping
We stuff the beard. It’s better to take a drop of synthetic winterizer or
You can wool, they are easy to cram even with a knitting needle.
We do SL-ST, cut the thread, leaving the end for sewing, tighten the hole.
Sew the hole between the parts of the beard.
Sew just under the beak, close to it.
We grab it and a little down when sewing, so that the beard does not stick out forward, but rests on the body.
Eyes (white), 2 pcs:
For eyes it is better to take a smoother yarn. We have VITA cotton LIRA
1 p: 6 SC into magic ring
2 p: 6 İNC = 12 SC
3 p: (İNC, 3 SC) * 3 = 15 SC
4 p: 15 SC
We make SL-ST, cut the thread, leaving the end for sewing and fasten.
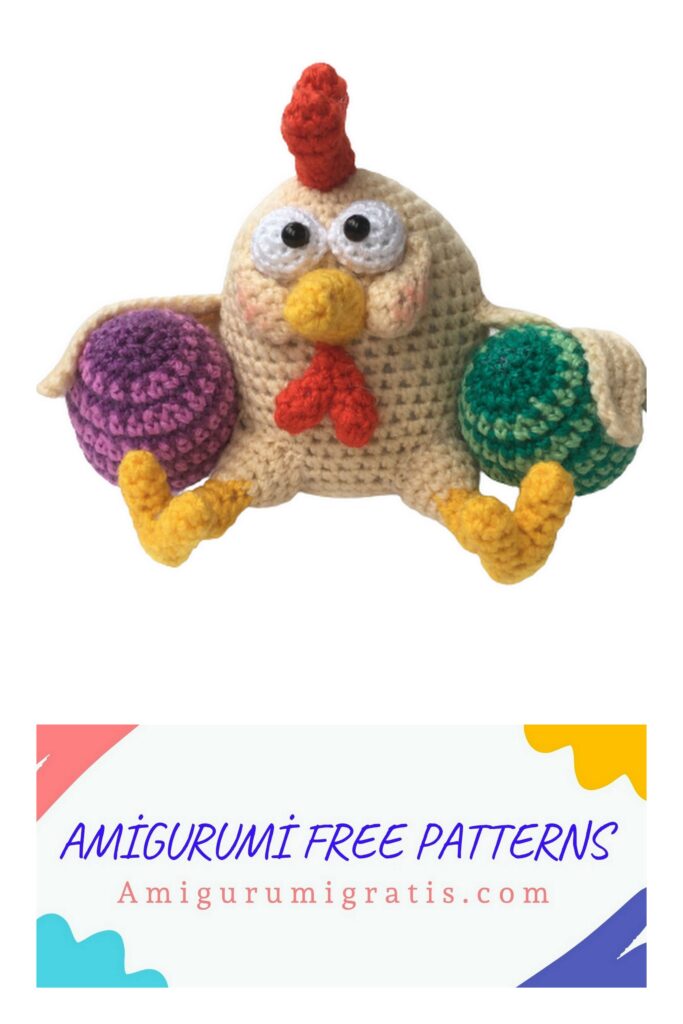
Sew close to the beak. Sew not until the end, when a small hole remains, fill, then finish sewing. So that the eyes do not look in different directions, we pull them together with two or three stitches.
Sew rhinestone pupils obliquely inward. We sew on 2 stitches with a bobbin thread in half, this is enough.
With each stitch, pull the thread strongly (but carefully) so that the strazik fits snugly. You can fix the thread on the crown, there will be covered with a crest.
Cheeks (beige), 2 pcs:
1 p: 6 SC into magic ring
2 p: (İNC, 2 SC) * 2 = 8 SC
3 p: 8 SC
4 p: (DEC, 2 SC) * 2 = 6 SC
We put a little filler to keep the form, it is not necessary to fill very tightly.
5 p: (1 SC, DEC) * 2 = 4 SC
6 p: 4 SC
We cut the thread, leaving the end for sewing,
add filler, tighten the hole.
Sew the plump side to the beak, bending it slightly so that the cheek goes along the beak, then along the eye (everywhere flush). Sew on both sides in a circle.
Crest (red):
1 item:
1 p: 6 SC into magic ring
2 p: (2 İNC, 1 SC) * 2 = 10 SC
3 p: 10 SC
4 p: (2 SC, DEC, 1 SC) * 2 = 8 SC
5 p: (DEC, 2 SC) * 2 = 6 SC
We make SL-ST, cut the thread, leaving the end for stitching, fix it.
2 detail:
1 p: 6 SC into magic ring
2 p: (İNC, 2 SC) * 2 = 8 SC
3 p: 8 SC
4 p: (DEC, 2 SC) * 2 = 6 SC
We make SL-ST, cut the thread, fix it.
3 detail:
1 p: 6 SC into magic ring
2-3 pp: 6 SC, do not cut the thread
Track. row: we connect together the 2nd and 3rd details,
knitting 4 SC on each, two columns in between skip = 8 SC
Track. row: we attach the 1st part, two columns between the parts to be connected, skip = 10 SC
The end for sewing (from the first part) is brought out between the parts.
Track. range: 10 SC
We make SL-ST, cut the thread, leaving the end for sewing, fixed it with ya. Sew holes between the parts. We stuff the crest. skip 2 loops
Sew a crest on the crown ≈ 2 rows from the eyes, with the largest part forward.
Feet (yellow, beige), 2 pcs:
Knit with a yellow thread
1 p: 5 SC into magic ring
2-4 pp: 5 SC
We make SL-ST, cut the thread, leaving the end for stitching, fix it. This is a finger.
We knit one more same finger, repeating 1-4 pp, do not break the thread. Fingers stuffed.
5 r: connect the fingers (like a goatee and crest details), knitting 4 SC on each, skip one column between them = 8 SC
6-7 pp: 8 SC
Stuff the foot.
8 p: (DEC, 2 SC) * 2 = 6 SC
Finish stuffing, make SL-ST, cut the thread and tighten the hole. Sew a hole between the fingers.
Then we knit a leg. Still a yellow thread.
1 p: right on the foot, stepping a little off the heel, we type 6 SC: (attach the thread, CH) – this is the first column of the row, and further in the circle.
Ideally, it will not work out exactly, but in the process of knitting everything will be leveled.
2 rows
2-4 pp: 6 SC
on the last column of the 4th row, go to beige, the yellow thread can be cut.
5 p: (İNC, 1 SC) * 3 = 9 SC
6 p: (2 SC, İNC) * 3 = 12 SC
7 p: (İNC, 3 SC) * 3 = 15 SC
8 p: 15 SC
We make SL-ST, cut the thread, leaving the end for sewing, and fix it.
We stuff the legs. Our chicken sits quite steadily, so we attach it where necessary, so that it sat further, and sew on. Between the legs 5-6 columns. We do not sew to the end, when a small hole remains, we stuff denser and finish sewing.
Wings (beige), 2 pcs:
Knit in rows back and forth. After each row we unfold the knitting, each next row we begin to knit from the 2nd loop from the hook (the loop on the hook does not count).
Wing 1:
1 p: dial 9 CH, expand
2 p: 8 SC, CH
3 p: İNC, 4 SC, 6 CH
4 p: 11 SC, CH
5 p: DEC, 4 SC, 8 CH
6 p: 12 SC
5-6 columns
We continue the row, tying the wing in a circle.
In the side, we do İNC, İNC 3in1, İNC.
Next we knit SC. Between the feathers of SL-ST, at the ends of the feathers we knit 4 SC in 1 loop. We end the row with a connecting column, in the first loop, cut the thread, leaving the end for sewing, fasten.
Wing 2:
1 p: dial 13 CH, expand
2 p: 12 SC, CH
3 p: İNC, 4 SC, 6 CH
4 p: 11 SC, CH
5 p: DEC, 4 SC, 4 CH
6 p: 8 SC
Just like the first, tying the wing in a circle. We make İNC, İNC 3in1, İNC, then SC. Between the feathers of SL-ST, at the ends of the feathers we knit 4 SC in 1 loop. We end the row with a connecting column, in the first loop, cut the thread, leaving the end for sewing, fasten.
We will sew on a little later.
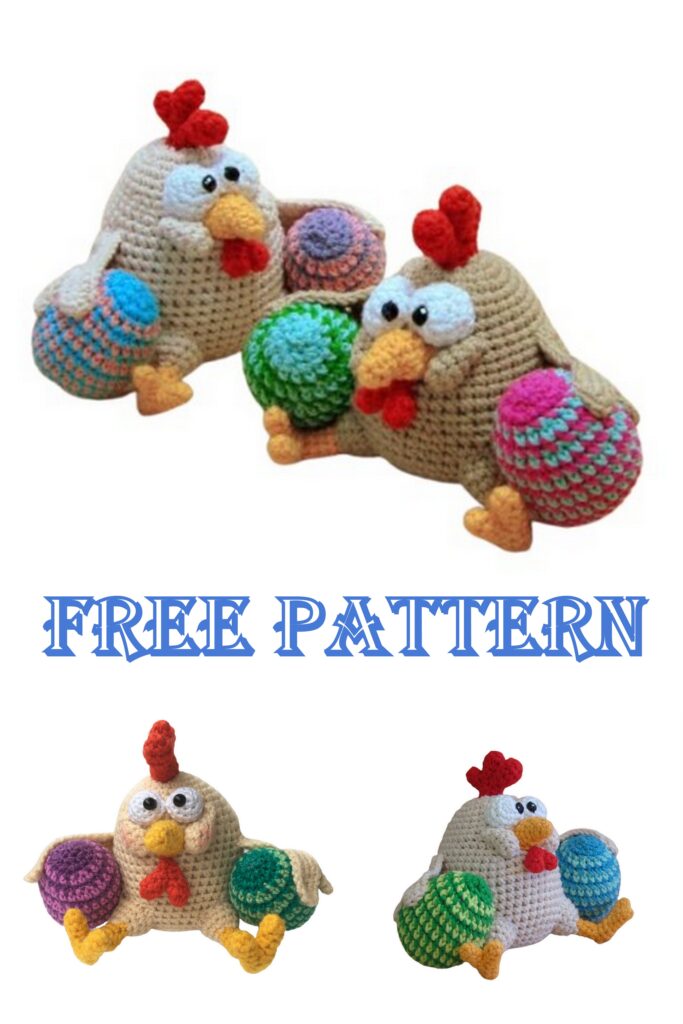
Eggs (multi-colored), 2 pcs:
We use the remains of multi-colored yarn, except for yellow (otherwise it will merge with the legs). The description will be color 1 and color 2.color 1:
1 p: 6 SC into magic ring
2 p: 6 İNC = 12 SC
3 p: (2 SC, İNC) * 4 = 16
On the last column of the row, go to color 2.
Color 2: 4 p: (İNC, 3 SC) * 4 = 20 SC
Color 1: 5 r: (3 SC, İNC, 1 SC) * 4 = 24 SC
Color 2: 6 p: (İNC, 5 SC) * 4 = 28 SC
SL-ST
4 SC in 1 loop
Color 1: 7 r: 28 SC
Color 2: 8 r: 28 SC
Color 1: 9 r: 28 SC
Color 2: 10 r: 28 SC
Color 1: 11 r: 28 SC
Color 2: 12 r: 28 SC
Color 1: 13 p: (DEC, 12 SC) * 2 = 26 SC
Color 2: 14 p: (6 SC, DEC, 5 SC) * 2 = 24 SC
Color 1: 15 p: (DEC, 6 SC) * 3 = 21 SC
Color 2: 16 p: (3 SC, DEC, 2 SC) * 3 = 18 SC
Stuff the egg. Then we knit only in color 1, the second thread can be cut.
Color 1:
17 p: (DEC, 4 SC) * 3 = 15 SC
18 p: (2 SC, DEC, 1 SC) * 3 = 12 SC
19 p: 6 DEC = 6 SC
Finish stuffing, make SL-ST, cut the thread, tighten the hole.
Sew the eggs to the chicken. Close to the legs, slightly inclined.
Sew the wings so that they grab the eggs.
Sew the wing to the body at the corner, then attach feathers to the egg with several stitches.
Ideally absolutely not necessary, as she could, and hugged. We remove the initial end from the wing into the body.
Tail (beige):
Knit in rows back and forth. After each row we unfold the knitting, each next row we begin to knit from the 2nd loop from the hook (the loop on the hook does not count).
1 p: dial 5 CH, expand
2 p: 4 SC, CH
3 p: 1 SC, 5 CH
4 p: 5 SC, CH
5 p: 1 SC, 4 CH
6 p: 4 SC
We continue the row, tying the wing in a circle SC. In the corners we make İNC 3in1. Between the feathers of SL-ST, at the ends of the feathers we knit 4 SC in 1 loop. We end the row with a connecting column, cut the thread, leaving the end for sewing, fasten.
SL-ST
4 SC in 1 loop
in the last knitted column we also knit İNC,
it turns out İNC 3in1 Sew on the back bottom. It is not necessary to stretch, more often we do 2 stitches in one hole.
THE CHICKEN IS READY!