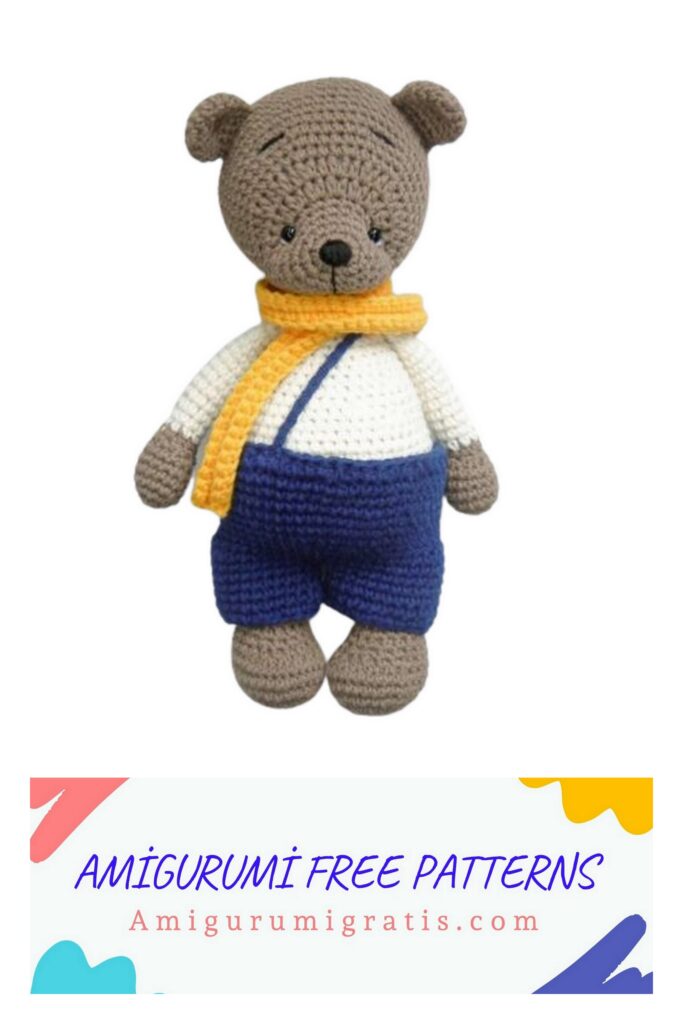
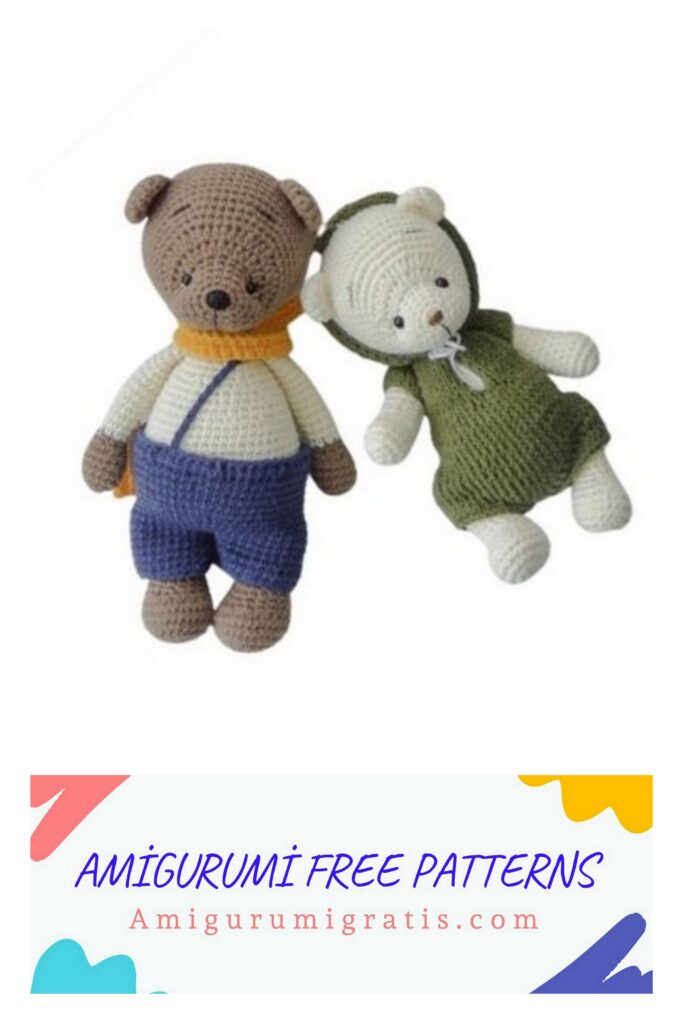
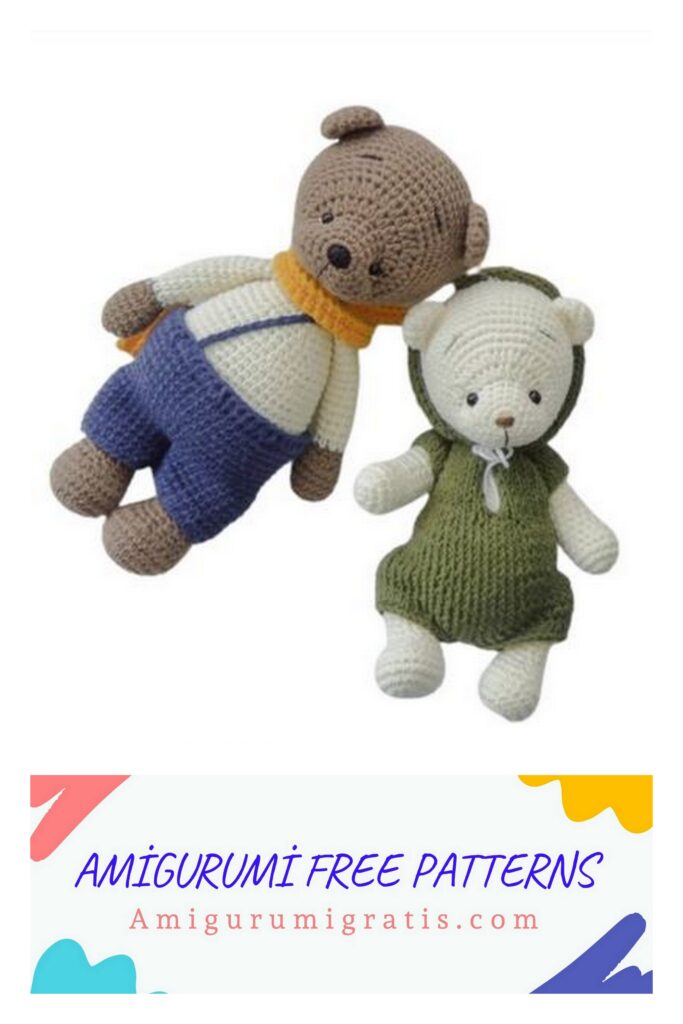
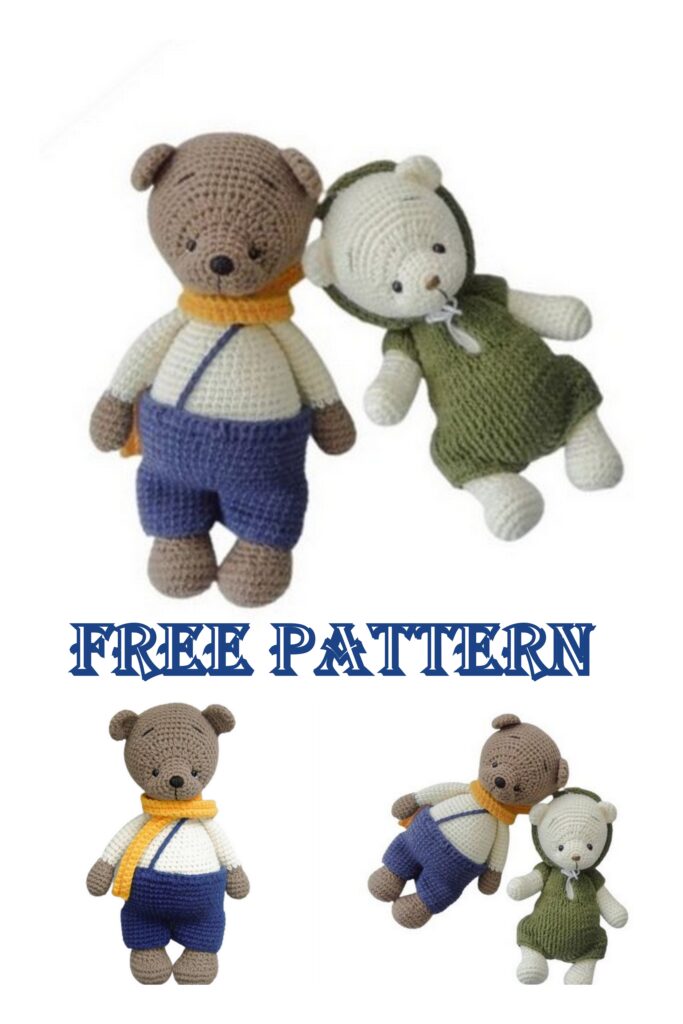
Teddy bear
We continue to share the most beautiful amigurumi patterns. You can visit our website for free pattern of Amigurumi Teddy bear.
MATERIALS USED :
– Yarnart Jeans yarn
– hook number 2
– stitching needle
– pins
– eyes 6 mm
– filler
– thread for embroidering nose, mouth, eyebrows and highlights
The height of the toy with the specified materials is 19-20 cm
SYMBOLS:
CH – air loop
İNC – increase
SC – single crochet
SL-ST – connecting post
BLO – knit for the back half loop
FLO – knit by the front half loop
(…) * n – repeat n times
[…] – number of loops at the end of the row
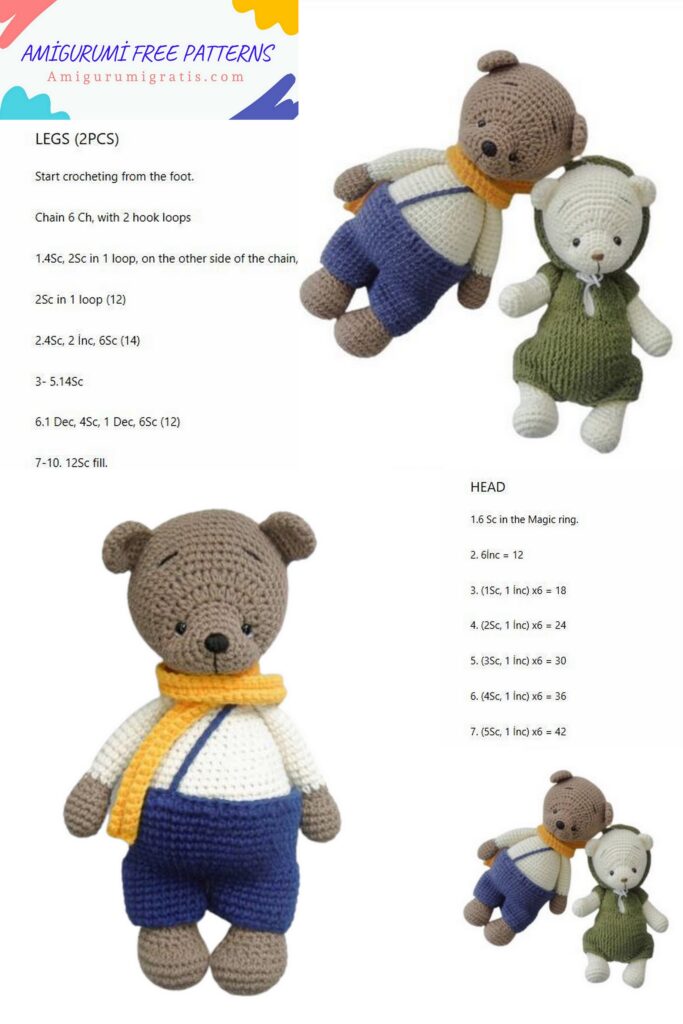
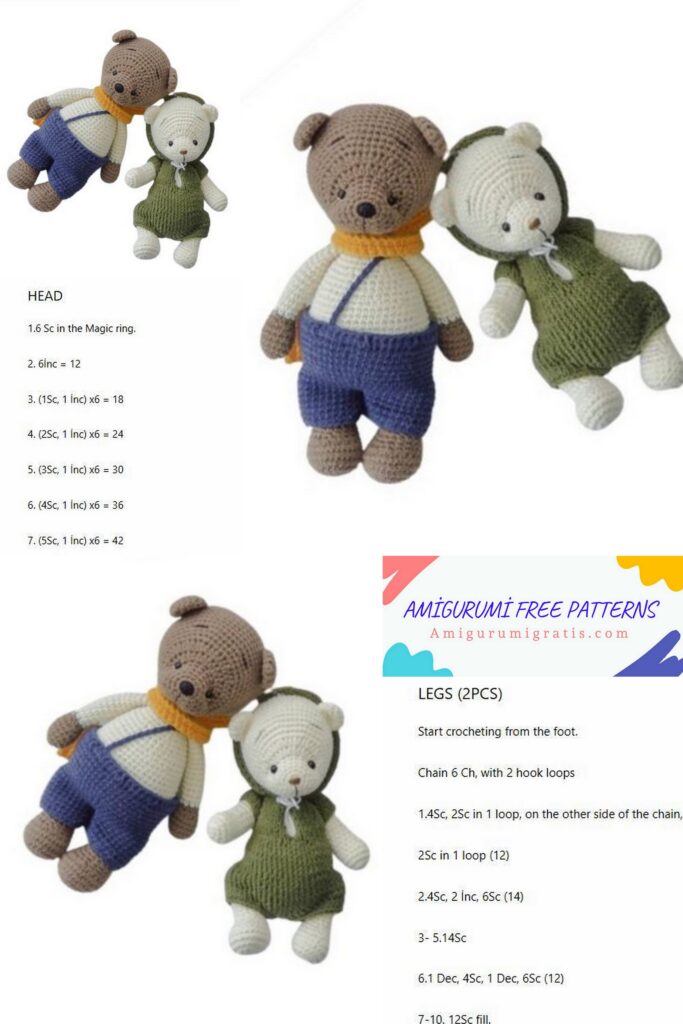
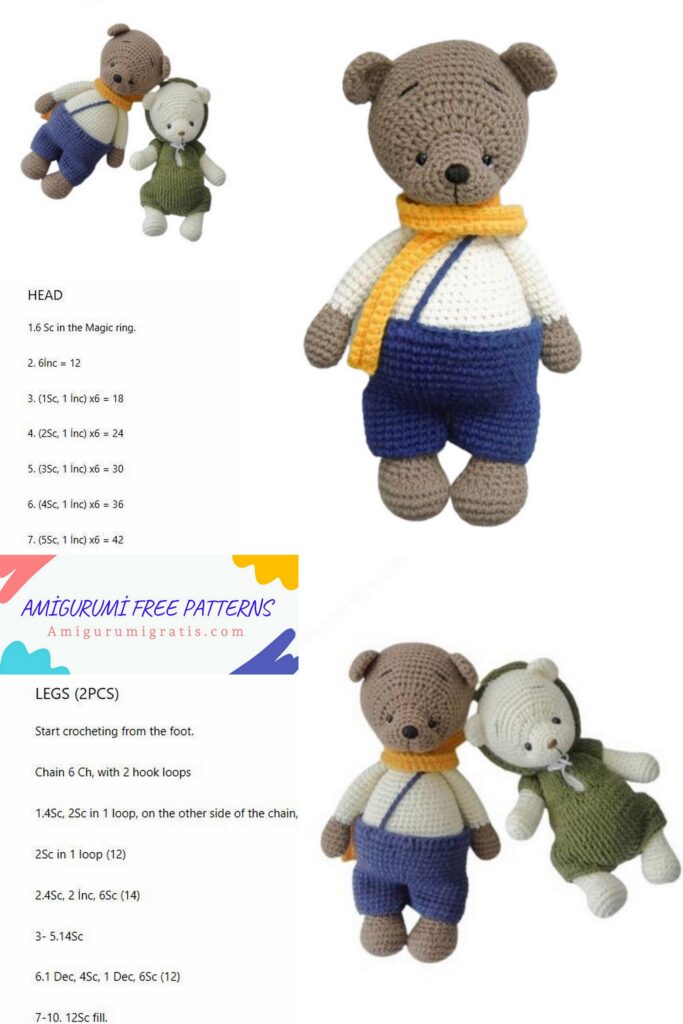
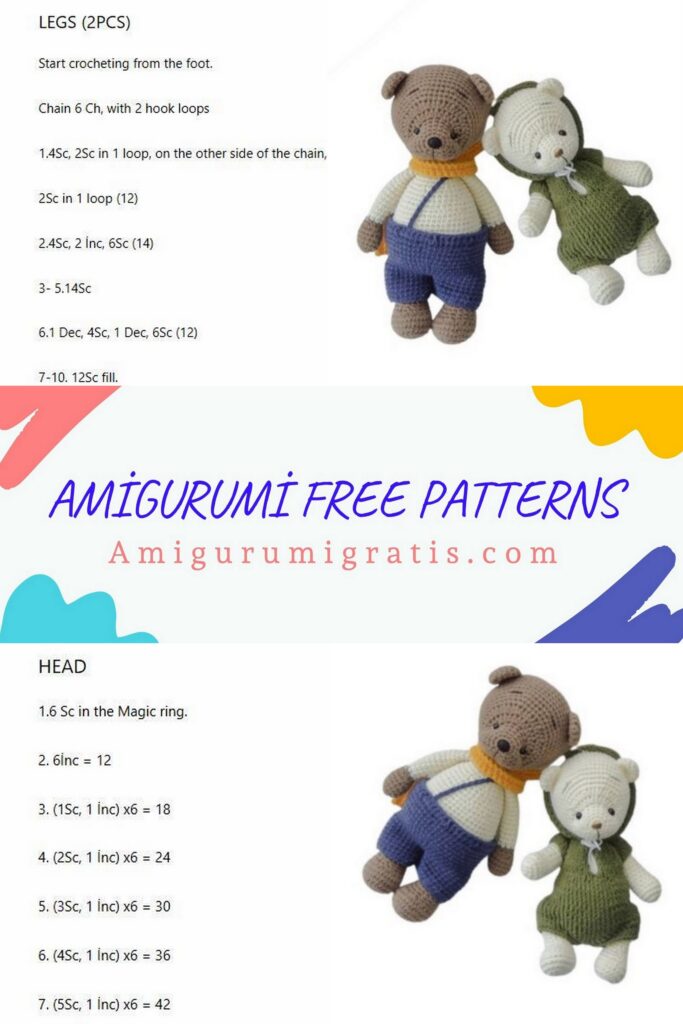
Head
1) 6 sc into magic ring
2) (1, inc) * 6 [12]
3) 2 sc, 2 inc, 4 sc, 2 inc, 2sc [16]
4) 3 sc, 2 inc, 6 sc, 2 inc, 3 sc [20]
5) 4 sc, inc, 1 sc, inc, 6 sc, inc, 1 sc, inc, 4 sc [24]
6) 24 sc
7) 8 sc, (inc. From HDC) * 8, 8sc [32]
8p) 8 sc, (1 HDC, inc. From HDC) * 8, 8 sc [40]
9) 14 sc, (inc, 3 sc) * 3, 14 sc [43]
10) 15 sc, inc, 8 sc, inc, 18 sc [45]
11) 16 sc, inc, 3 sc, inc, 5 sc, inc, 2 sc, inc, 15 sc [49]
12) 9 sc, inc, 7 sc, inc, 14 sc, inc, 8 sc, inc, 7 sc. [53]
13-21) 53 sc
21) 7 sc, dec, (6 sc, dec) * 5, 4 sc [47]
22) dec, 5 sc, dec, (5 sc, dec) * 5, 3 sc [40]
We insert eyes 6 mm, between 6 and 7 rows, at a distance of 7 columns. We begin to fill.
23) (6 sc, dec) * 5 [35]
24) (5 sc, dec) * 5 [30]
25) (4 sc, dec) * 5 [25]
26) (3 sc, dec) * 5 [20]
27) (2 sc, dec) * 5 [15]
28) (1 sc, dec) * 5 [10]
29) dec * 5 [5]
We tighten the hole and hide the end of the thread inside the toy.
We introduce the thread to the lower left point, then to point 1, leave the tail, then to point 2 and back to the lower right.
Ears
1) 6 sc into magic ring
2) (1sc, inc) * 6 [12]
3) (3sc, inc) * 4 [16]
4-5) 16 sc
6) dec, 4 sc, 2 dec, 4 sc, dec [12]
Fold in half and knit 6 sc. Leave the thread for sewing.
Sew on the ears between 16 and 17 rows, at a distance of 12 columns.
Muzzle
We embroider the nose along the perimeter of the spacecraft.
We carry out the tightening in 2 stages.
1. Introduce the thread to the lower left point, then to point 1, leave the tail, then to point 2 and back to the lower right.
2. We take a new thread. We introduce the thread to the lower right point, then to point 3, leave the tail, then to point 4 and back to the lower right. Tie 3 knots on the remaining ends, pulling the muzzle.
We embroider the eyebrows and mouth.
Pens
1) 6 sc into magic ring
2) 6 inc [12]
3) (2 sc, inc) * 4 [16]
4-6) 16 sc
7) dec, 2 sc, (dec, 1 sc) * 2, dec * 3 [10]
8) 10 sc
Color change
9-22) 10 sc (14 rows)
23) 1 sc
Half fill.
Fold in half and knit 5 sc
For the second handle on row 22, knit 7 sc instead of 10.
Legs – Body
1) 6 sc into magic ring
2) inc * 6 [12]
3) (1 sc, inc) * 6 [18]
4) 1 sc, inc, (2sc, inc) * 5, 1sc [24]
5) (3 sc, inc) * 6 [30]
6-7) 30 sc
8) 7 sc, dec * 8, 7 sc [22]
9) 5 sc, (1 sc, dec) * 4, 5 sc [18]
10) 18 sc
11) (4 sc, dec) * 3 [15]
12) (3sc, dec) * 3 [12]
13-17) 12 sc (5 rows)
We knit 2 details.
We knit at the second leg
13-16) 12 sc
17) 6 sc
18) 5 ch, attach to 2 leg, in 2 column from the end, 11sc, 5 sc along ch, 12 sc [34]
19) (4 sc, inc) * 6, 4 sc [40]
20) 15 sc, (1 HDC, inc. From HDC) * 8, 9 sc [48]
21-23) 48 sc (3 rows)
Change color to blouse
24-32) 48sc (9 rows)
33) 13 sc, dec, (7 sc, dec) * 3, 6 sc [44]
34) 8 sc, dec, (6 sc, dec) * 4, 2 sc [39]
35) 39 sc
We start to fill
36) 4 sc, dec, 12 sc, dec, 4 sc, dec, 11 sc, dec [35]
37) 13 sc, dec, 13 sc, dec, 5 sc [33]
38) 13 sc, dec, (3 sc, dec) * 3, 3 sc [29]
39) 29 sc
We fill, form a belly
40) dec, (7 sc, dec) * 2, 9 sc [26]
41) (6 sc, dec) * 3, 2x sc [23]
42) 1 sc, dec, (4 sc, dec) * 3, 2 sc [19]
43) 19 blo
Change color to brown
44) 19 sc
Leave a long thread for sewing
Knit 19 sc FLO in row 43 (this is the collar)
Sew on the head and handles. Handles between 41 and 42 row.
Scarf
We collect a chain of air loops, choose the quantity yourself. We knit all the time for the back half loop.
The width of the scarf depends on the number of rows.
The bear is ready!