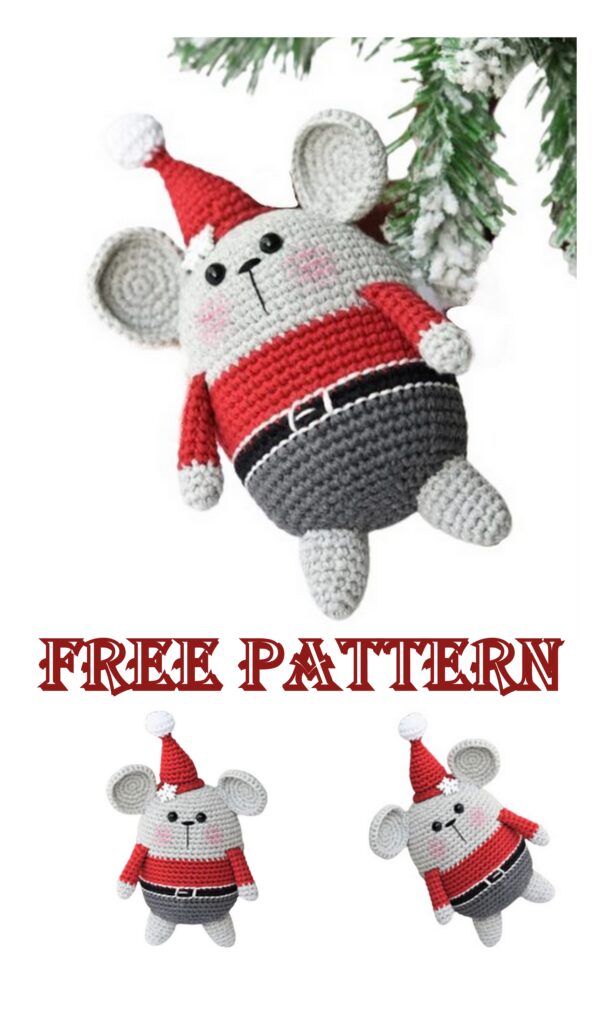
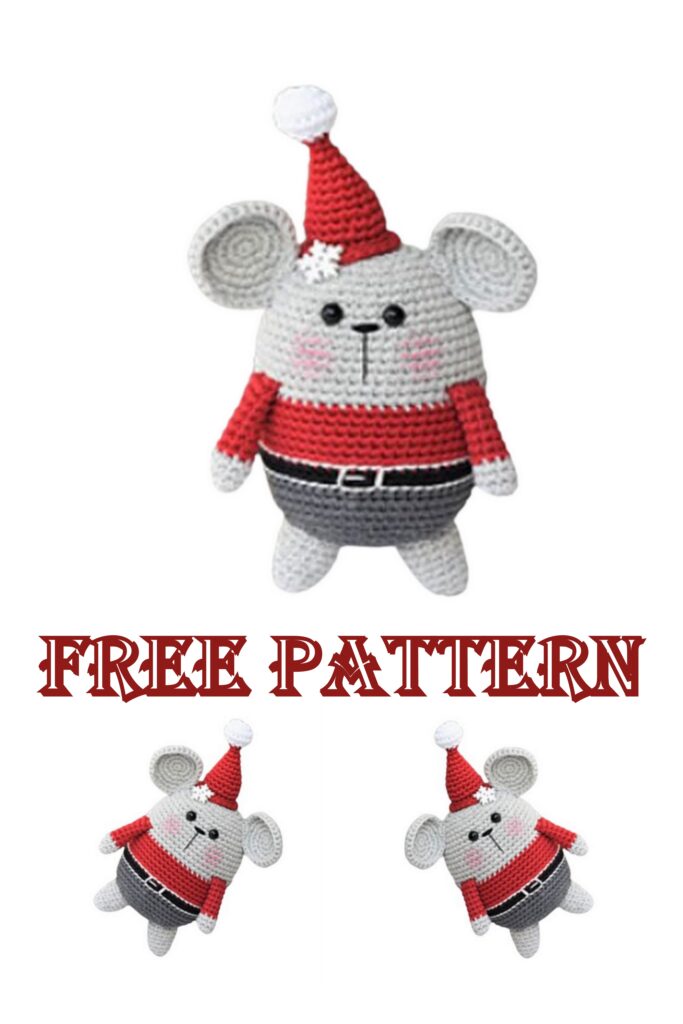
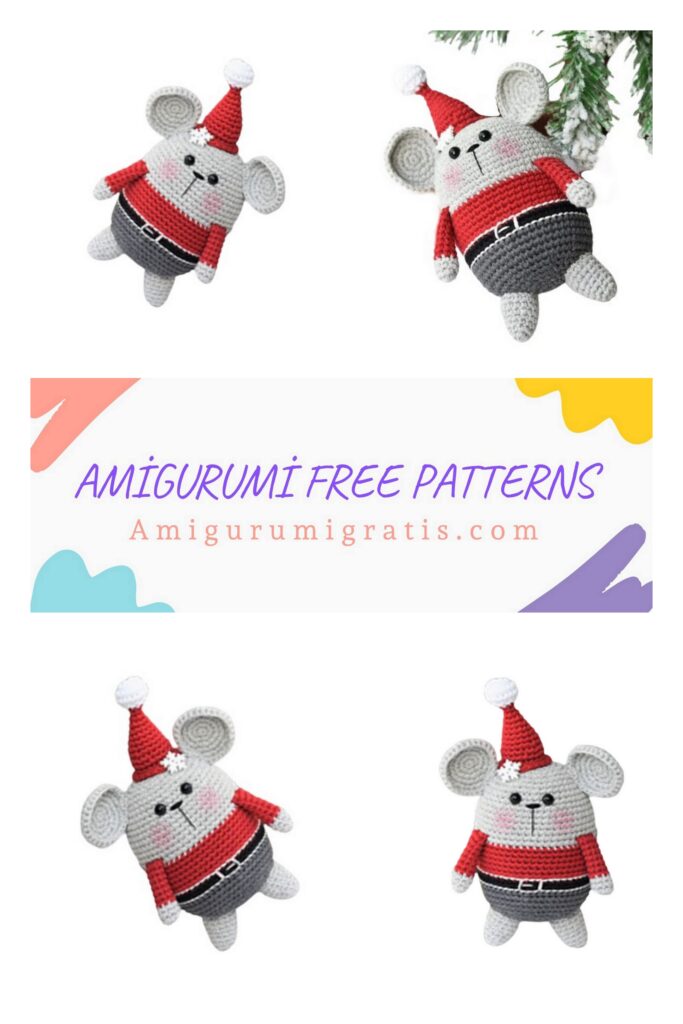
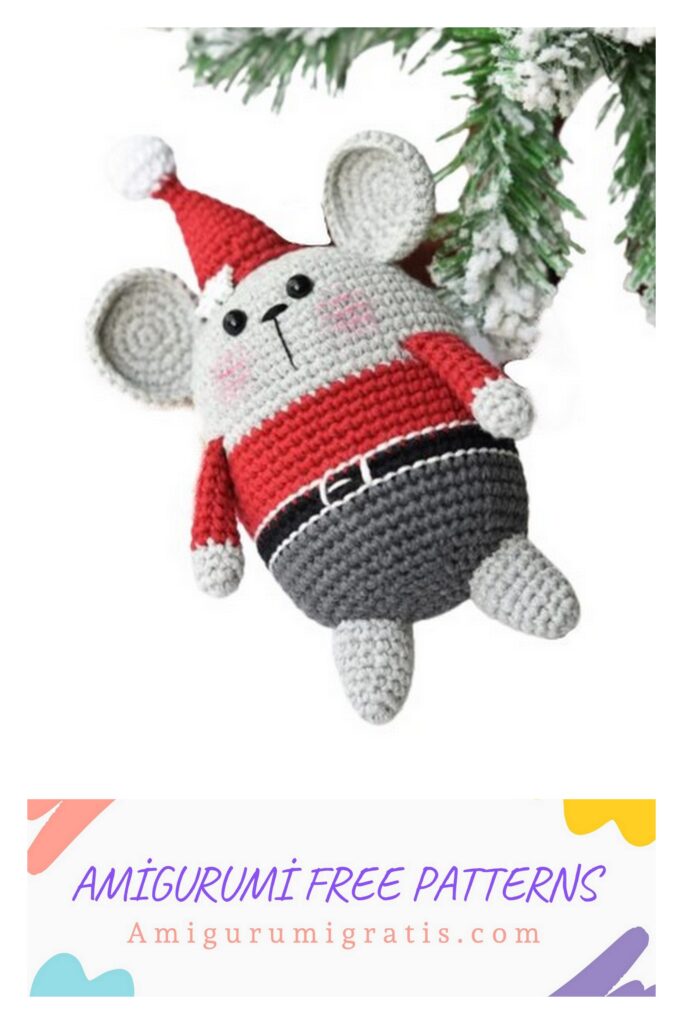
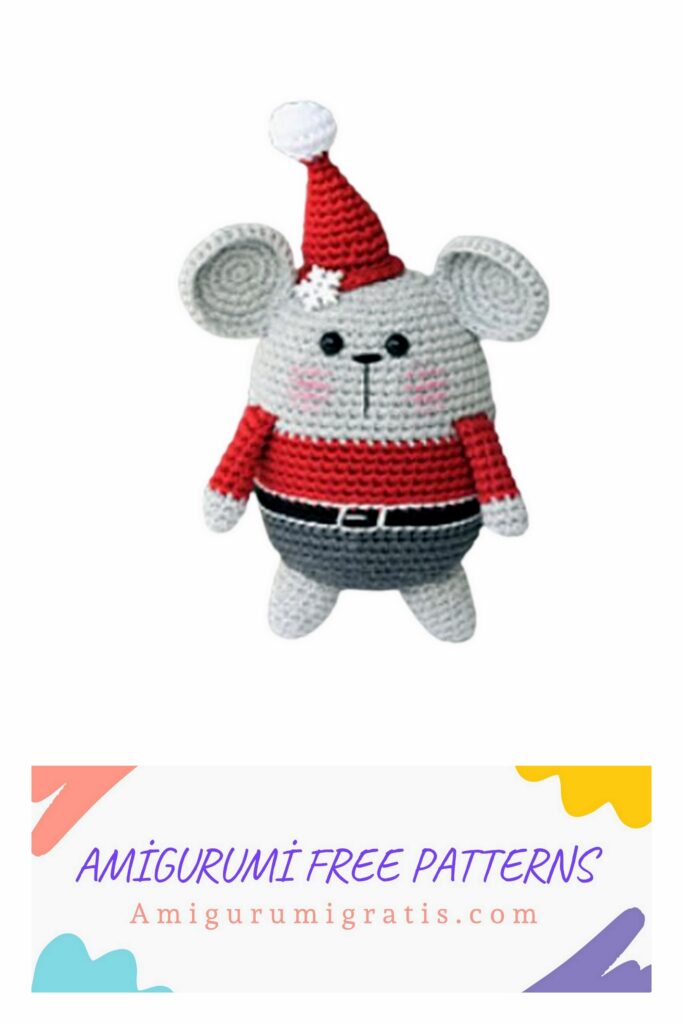
Enjoy the free pattern of amigurumi Santa Mouse. A super cute crochet project when waiting for Christmas.
You can embellish the coat with two little buttons for a more boyish version. Or add a sweet snowflake button to the hat and blush the cheeks for a girlish Santa.
Make cute amigurumi Santa Mouse for Christmas gift or for decorating your home for the holidays.
Supplies you`ll need:
Sport or DK weight (fine or light) cotton or wool in 5 colors – gray, red, white, black and blue.
Crochet hook 2.5 mm (or in accordance to the yarn you use)
Polyester fiberfill
Black safety eyes, 6 mm if using Sport or 8 mm is using DK yarn
2 small buttons or a snowflake button
Darning needle
Fnished size: 19 cm / 7.5 in
Skill level: easy+
Stitches needed (US crochet terms):
Slip stitch (sl st), chain (ch), single crochet (sc)
Abbreviations:
Repeat (rep), stitch(es) – st(s)
About the pattern:
Work in continuous rounds. Do not join or turn unless otherwise instructed.
Use a stitch marker and place it in the first stitch of the round to mark the beginning of it.
Leave each piece a long tail for sewing.
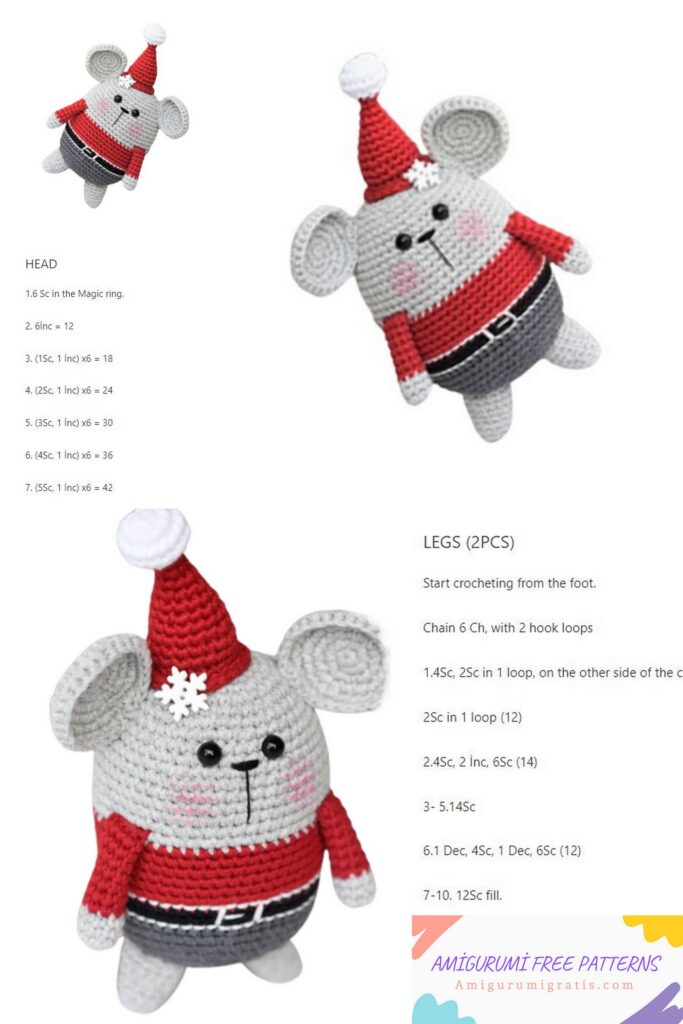
HEAD AND BODY
1: Start with gray. Start 6 sc in a magic ring [6]
2: Work 2 sc in each st around [12]
3: (Sc in next st, 2 sc in next st) rep 6 times [18]
4: (Sc in next 2 sts, 2 sc in next st) rep 6 times [24]
5: (Sc in next 3 sts, 2 sc in next st) rep 6 times [30]
6: (Sc in next 4 sts, 2 sc in next st) rep 6 times [36]
7: (Sc in next 5 sts, 2 sc in next st) rep 6 times [42]
8: Sc in each st around
9: (Sc in next 6 sts, 2 sc in next st) rep 6 times [48]
10-11: Sc in each st around
12: (Sc in next 7 sts, 2 sc in next st) rep 6 times [54]
13-18: Sc in each st around
19-24: Change to red. Sc in each st around
Fasten the safety eyes between rounds 10 and 11 with an interspace of 6 stitches. Close the washers from the inside of the piece. Make sure the color change stays on the back side.
25-26: Change to black. Sc in each st around
27-30: Change to blue. Sc in each st around
31: (Sc in next 7 sts, sc2tog) rep 6 times [48]
32: (Sc in next 6 sts, sc2tog) rep 6 times [42]
33: (Sc in next 5 sts, sc2tog) rep 6 times [36]
34: (Sc in next 4 sts, sc2tog) rep 6 times [30]
Fill the piece and keep stuffing as you go.
35: (Sc in next 3 sts, sc2tog) rep 6 times [24]
36: (Sc in next 2 sts, sc2tog) rep 6 times [18]
37: (Sc in next st, sc2tog) rep 6 times [12]
Weave the yarn tail through the front loops of the remaining stitches and pull tightly to close. A helpful video can be found here.
EAR (make 2)
1: Use gray yarn. Start 6 sc in a magic ring [6]
2: Work 2 sc in each st around [12]
3: (Sc in next st, 2 sc in next st) rep 6 times [18]
4: (Sc in next 2 sts, 2 sc in next st) rep 6 times [24]
5: (Sc in next 3 sts, 2 sc in next st) rep 6 times [30]
6: Sc in each st around
Fasten off.
Hide the short starting yarn tail. Sew the ears at rounds 6-8 from the top of the body.
HAT
1: Start with white yarn. Start 8 sc in a magic ring [8]
2: Work 2 sc in each st around [16]
3-4: Sc in each st around
5: (Sc2tog) rep 8 times [8]
6: Change to red. (Sc in next 2 sts, sc2tog) rep 2 times [6]
7: Sc in each st around
8: (Sc in next st, 2 sc in next st) rep 3 times [9]
9: Sc in each st around
10: (Sc in next 2 sts, 2 sc in next st) rep 3 times [12]
11: Sc in each st around
12: (Sc in next 3 sts, 2 sc in next st) rep 3 times [15]
13: Sc in each st around
14: (Sc in next 4 sts, 2 sc in next st) rep 3 times [18]
15: Sc in each st around
16: (Sc in next 5 sts, 2 sc in next st) rep 3 times [21]
17: Sc in each st around
18: Working in the front loops only, sc in each st around
Fasten off.
Fill the tassel and hat. Sew between the ears using the back loops of the last round.
Embroider a nose with black yarn.
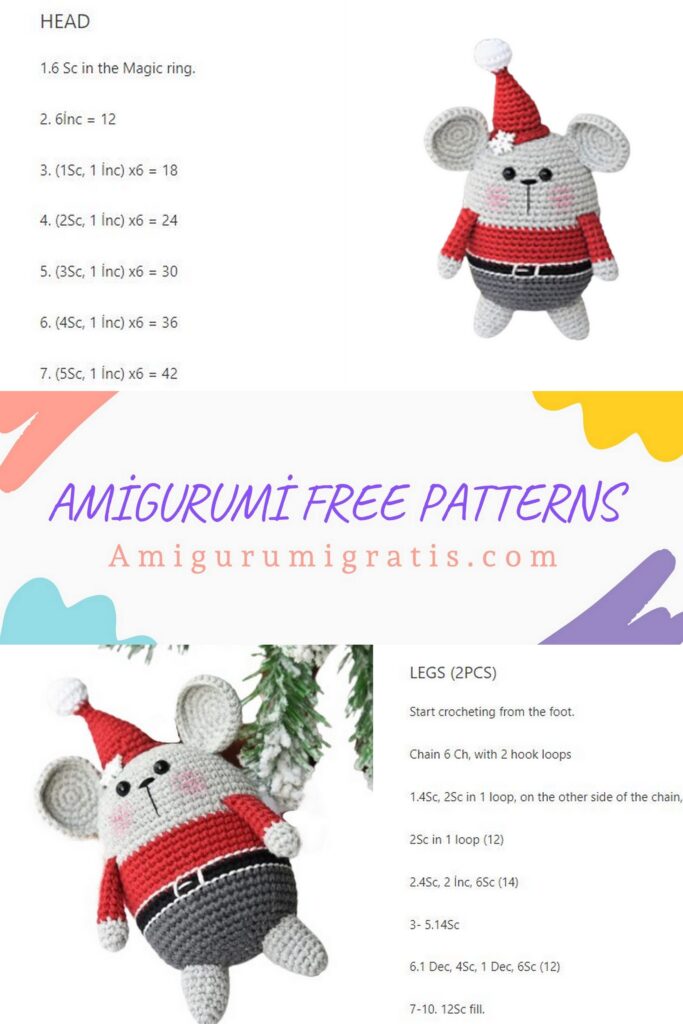

LEG (make 2)
1: Use gray yarn. Start 8 sc in a magic ring [8]
2: Sc in each st around
3: (Sc in next st, 2 sc in next st) rep 4 times [12]
4-5: Sc in each st around
6: (Sc in next 2 sts, 2 sc in next st) rep 4 times [16]
7-8: Sc in each st around
Fasten off.
Stuff the legs and sew to the bottom of the body.
Embroider 2 lines with white yarn between rounds 24-25 and 26-27 to imitate the belt. Stitch a buckle at the front.
ARM (make 2)
1: Start with gray. Start 9 sc in a magic ring [9]
2-4: Sc in each st around
5-11: Change to red. Sc in each st around
Fasten off. Add a tiny bit of stuffing to the tip of the arm, flatten the top and sew closed with a couple of stitches. A simple video tutorial about how to sew the piece closed can be found here.
Sew the arms on the body about a round higher than the coat. Attach the arms to the body from a couple of rounds lower as well.
Sew 2 buttons on the jacket.
TAIL
1: Use gray. Ch 30. Starting in the second ch from hook, sl st in each ch [29]
Fasten off.
Sew the tail to the back of the body.