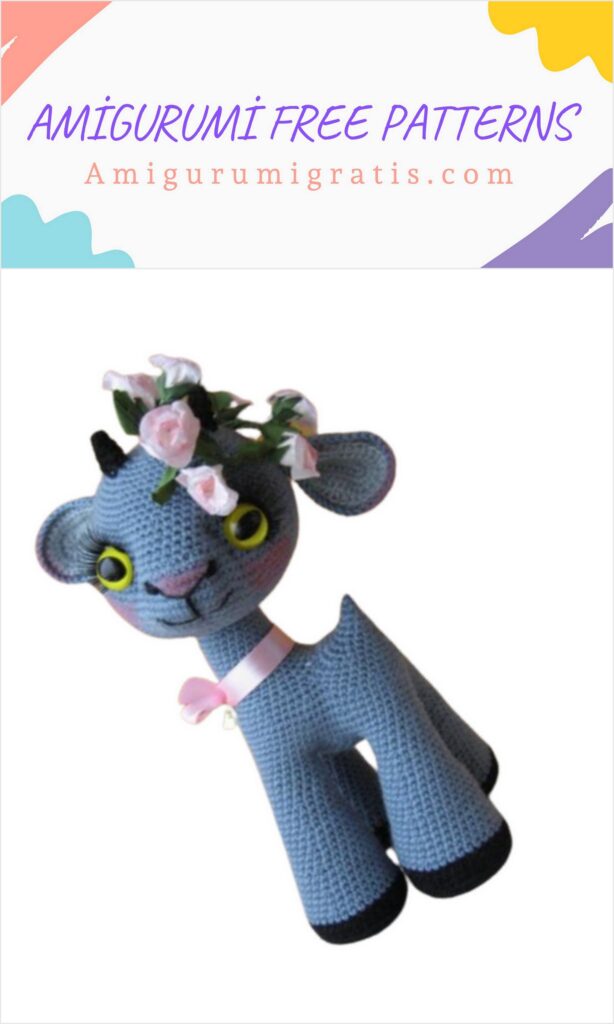
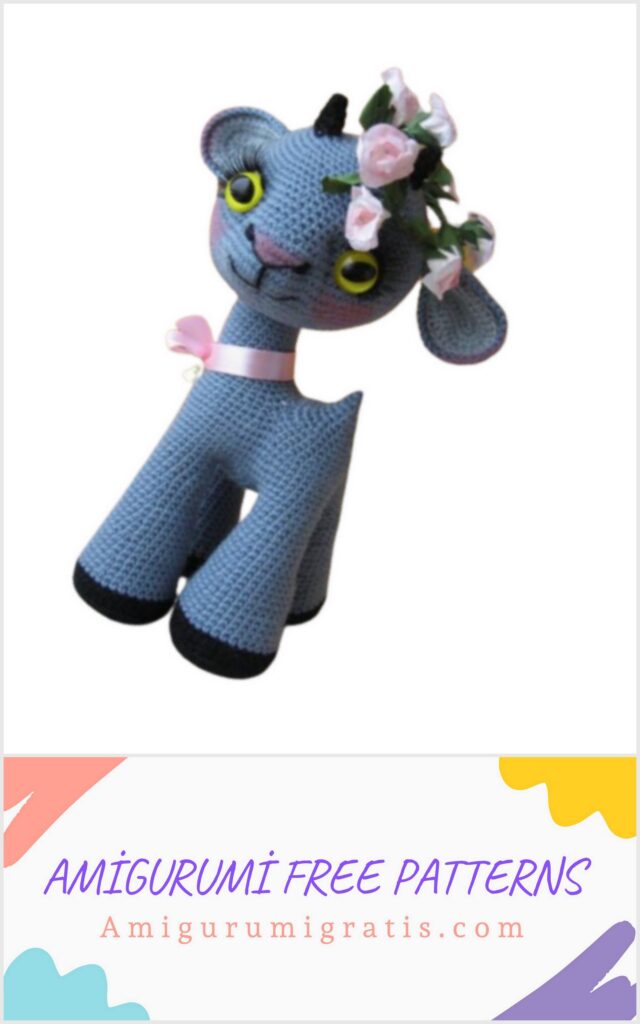
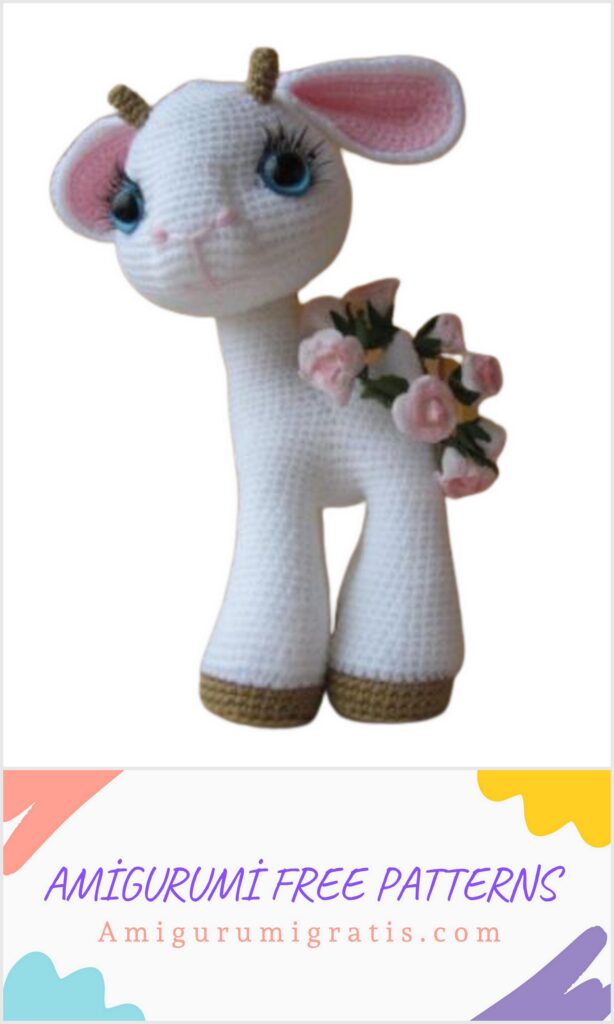
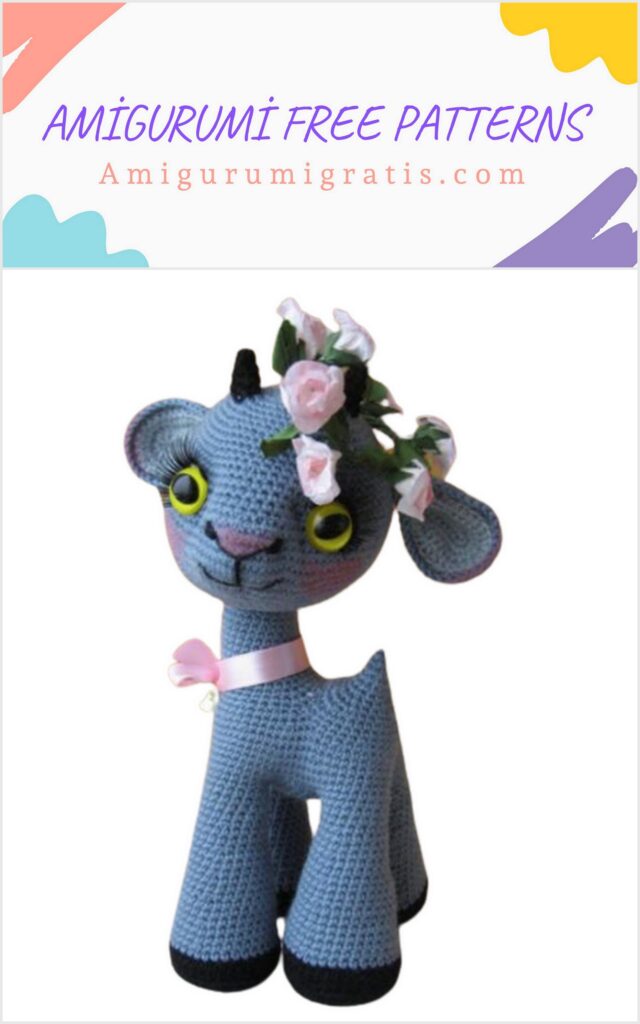
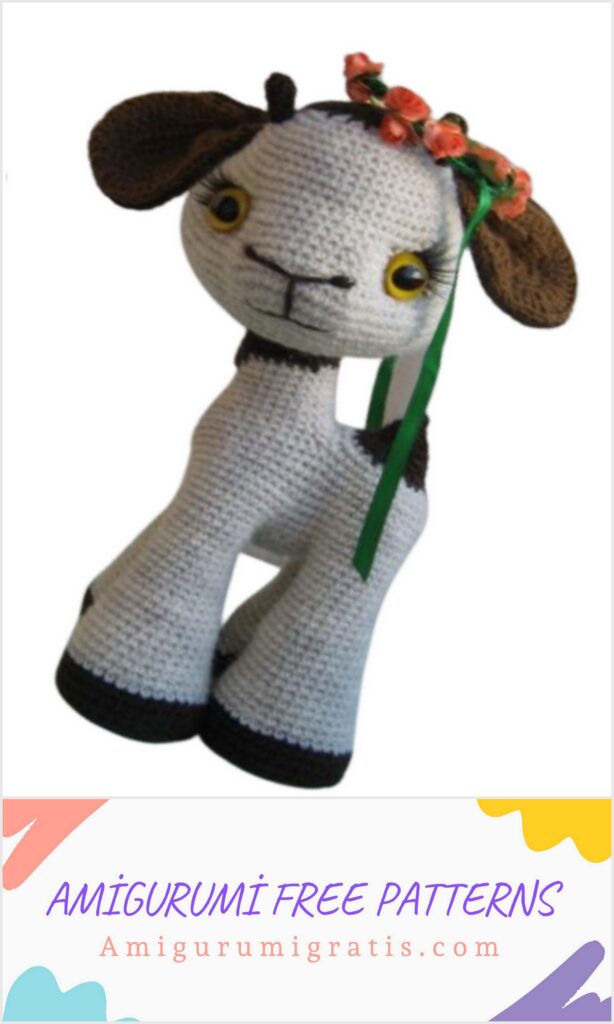
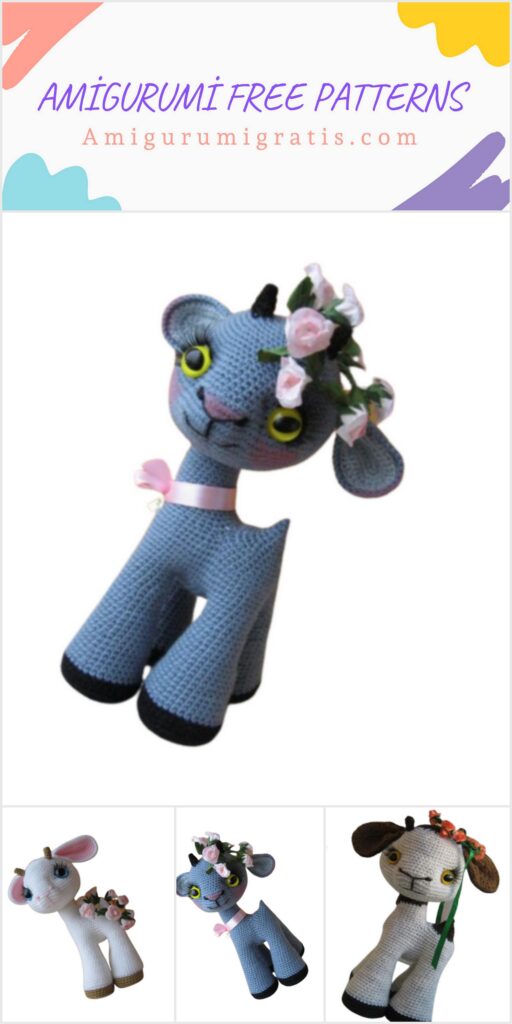
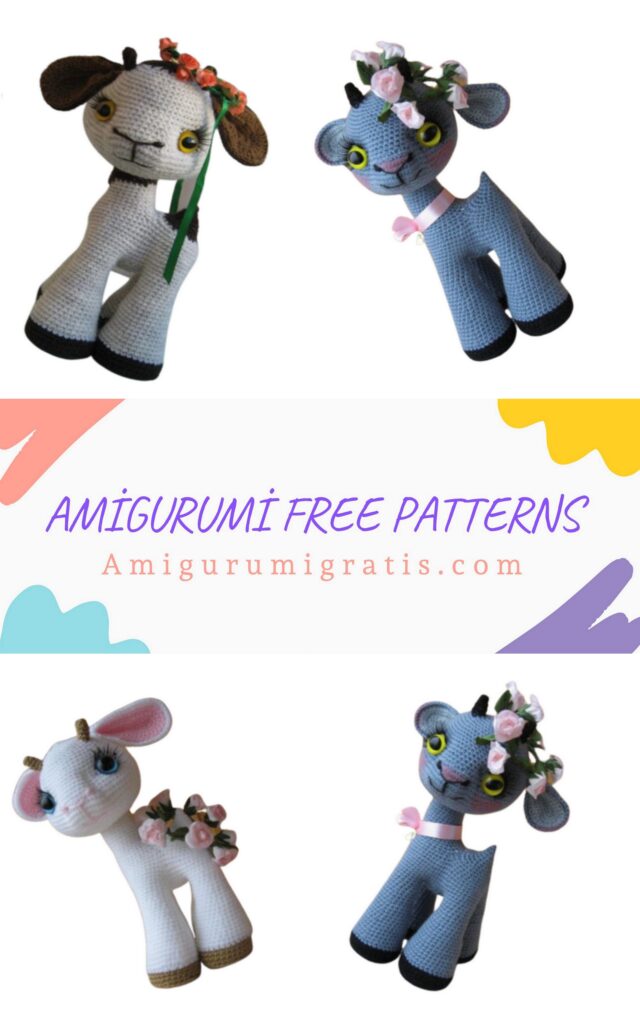
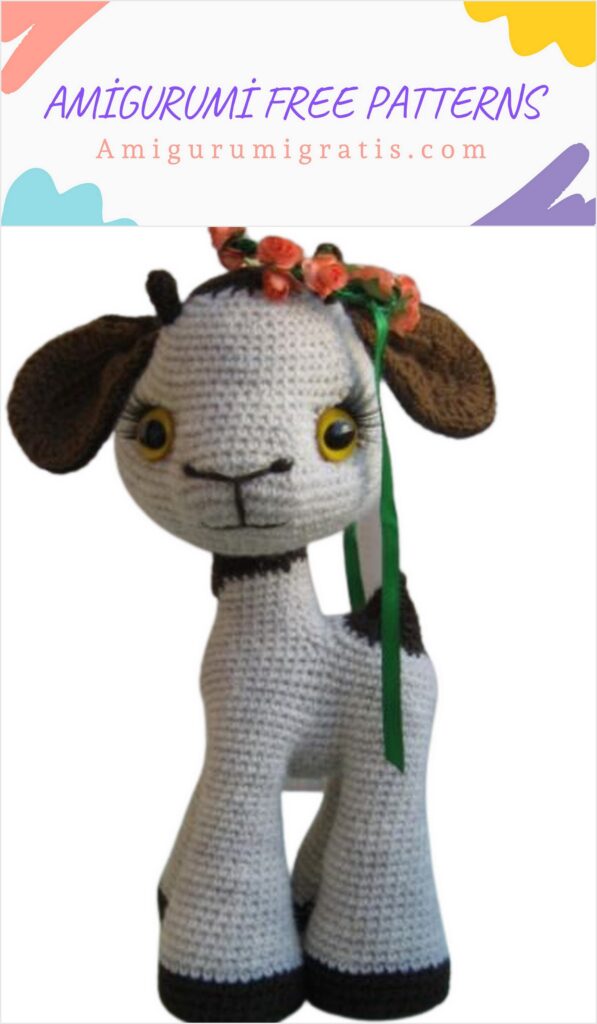
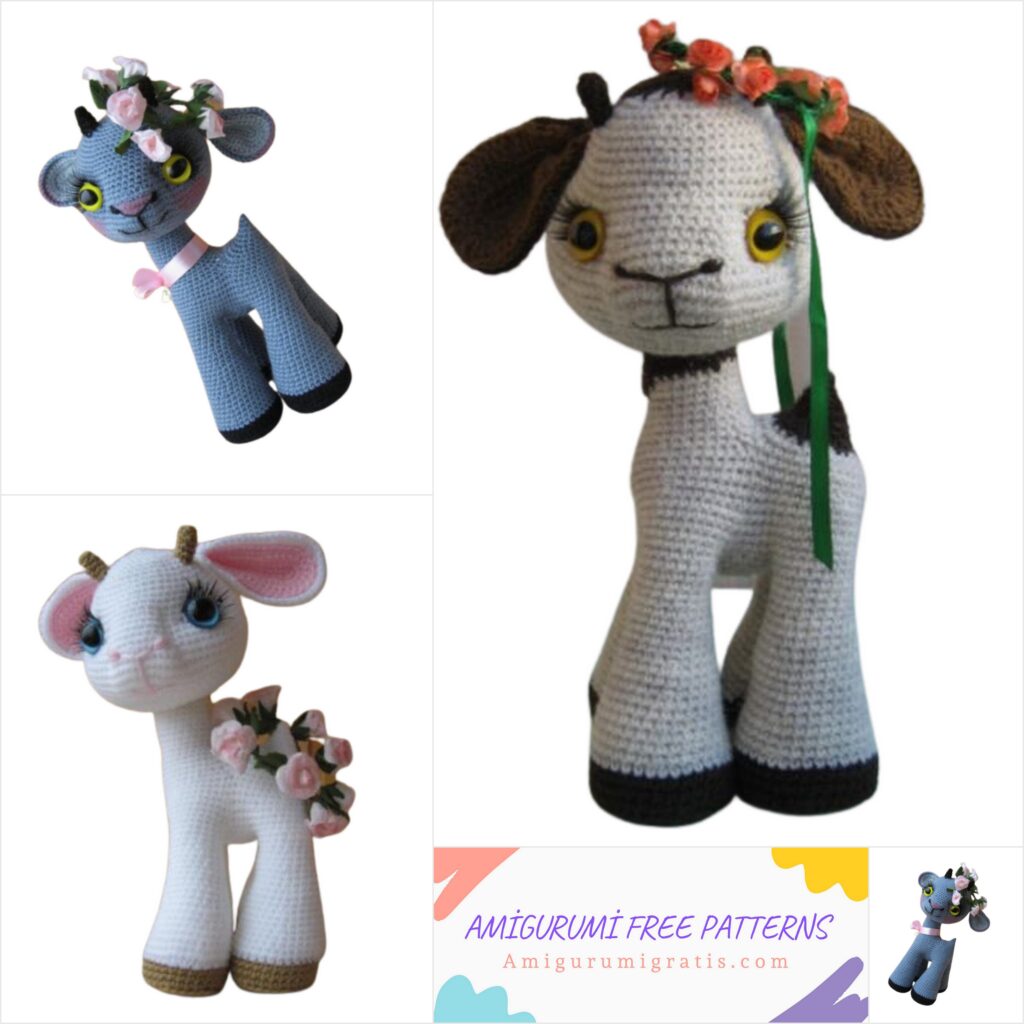
Amigurumi Goatling Free Crochet Pattern
Tools:
1. Crochet hook 1.5mm (or whichever size you prefer that works best with
your Yarn);
2. Small pliers Scissors;
3. Long sewing needle.
Materials:
1. Yarn “Alize superlana klasic” for the body and head
2. Yarn “Alize Sekerim” for Ear the light part
3. Stuffing;
4. One big and one medium sized buttons
5. Eyes 10-15 mm,
6. Small stones or coins for weight;
7. Eyelashes for dolls
8. Sewing thread, strong, not stretchy, for joints.
Abbreviations:
St = stitch
Sts = stitches
ch = chain
sl st = slip stitch
sc = single crochet
hdc = half double crochet
dc = double crochet
BLO = Back loops only
inc = increase: crochet 2 stitches in the next stitch
dec = decrease: crochet the next 2 stitches together creating one stitch
Rnd = round
sl st = slip stitch
Hindleg Make 2. Work in a spiral, do not join the rounds.
Stuff as you go, tight but not deforming the shape.
Start knitting in black
Rnd 1- Start 6 ch in a magic ring [6]
Rnd 2- Work 2 sc in each st around [12]
Rnd 3- (1 sc, inc) x 6 [18]
Rnd 4- (2 sc, inc) x 6 [24]
Rnd 5- (3 sc, inc) x 6 [30]
Rnd 6- (4 sc, inc) x 6 [36]
Rnd 7- 36 sc BLO, just this row!
Rnd 8р,9- 36 sc
The sole is ready. Cut cardboard or plastic inserts the size of the sole (I use old computer disk).
Put the insert into the foot.
change color
Rnd 10- 36 sc
Rnd 11- (dec, 10 sc)x3 [33]
Rnd 12,13- 33sc
Rnd 14- (dec, 9 sc)x3 [30]
Rnd 15,16- 30sc
Rnd 17- (dec, 8 sc)x3 [27]
Rnd 18,19- 27sc
Rnd 20- (dec, 7 sc)x3 [24]
Rnd 21,22- 24sc
Rnd 23- (dec, 6 sc)x3 [21]
Rnd 24,25- 21sc
Rnd 26- (dec, 5 sc)x3 [18]
Rnd 27,28- 18sc
Complete knitting.
Foreleg Make 2. Work in a spiral, do not join the rounds.
Stuff as you go, tight but not deforming the shape.
Start knitting in black
Rnd 1- Start 6 ch in a magic ring [6]
Rnd 2- Work 2 sc in each st around [12]
Rnd 3- (1 sc, inc) x 6 [18]
Rnd 4- (2 sc, inc) x 6 [24]
Rnd 5- (3 sc, inc) x 6 [30]
Rnd 6- (4 sc, inc) x 6 [36]
Rnd 7- 36 sc BLO, just this row!
Rnd 8,9- 36 sc
The sole is ready. Cut cardboard or plastic inserts the size of the sole (I use old computer disk).
Put the insert into the foot.
change color
Rnd 10- 36 sc
Rnd 11- (dec, 10 sc)x3 [33]
Rnd 12,13- 33sc
Rnd 14- (dec, 9 sc)x3 [30]
Rnd 15,16- 30sc
Rnd 17- (dec, 8 sc)x3 [27]
Rnd 18,19- 27sc
Rnd 20- (dec, 7 sc)x3 [24]
Rnd 21,22- 24sc
Rnd 23- (dec, 6 sc)x3 [21]
Rnd 24,25- 21sc
Rnd 26- (dec, 5 sc)x3 [18]
Rnd 27,28,29,30- 18sc
Complete knitting.
Tummy Work in a spiral, do not join the rounds.
Rnd 1- Start 6 ch in a magic ring [6]
Rnd 2- Work 2 sc in each st around [12]
Rnd 3- (2sc, inc)x4 [16]
Rnd 4- (3sc, inc)x4 [20]
Now we will attach the legs, if your front legs are longer, be careful, first take the 2 front legs, then the 2 rear legs, then
Rnd 1- (18sc Foreleg, 5sc tummy)x2, (18sc Hindleg, 5sc tummy)x2 [92]
Rnd 2- (16sc, dec, 3sc, dec)x4 [84]
Rnd 3,4- 84sc
Rnd 5- (dec, 13sc, dec, 5sc)x2, dec, 13sc, dec, 1sc, dec, 13sc, dec, 5sc [76]
Rnd 6- 76 sc
Rnd 7- (dec, 17sc)x4 [72]
Rnd 8- (7sc, dec)x8 [64]
Rnd 9- 64sc
Rnd 10- 12sc, dec, 3sc, dec, 24sc, (dec, 1sc)x2, dec, 14sc [59]
Rnd 11- 9ch, skip 30, 1sl st
Staff Hindlegs
continue to knit only the back of the body
Rnd 1- 29sc, 9sc in 9сh [38]
Rnd 2- (dec, 4sc)x5, (dec, 1sc)x2, dec [30]
Rnd 3- (2sc, dec)x2, 6sc, (dec, 2sc)x4 [24]
Rnd 4- (1sc, dec)x2, 4sc, (dec, 1sc)[4 [18]
make a tail
Rnd 5- dec, 1sc, dec, 1sc, 4sc, dec, 1sc, dec, 4sc [14]
Rnd 6,7- 14sc
Rnd 8- 2sc, (dec, 1sc)x4 [10]
Rnd 9- 5dec [5]
Complete knitting.
close the hole
staff
Neck
continue to knit only the front of the body
Rnd 1- 29sc, ( dec, 7sc, dec) in 9ch [38]
Rnd 2- 6sc, dec, 11sc, dec, 17sc [36]
Rnd 3- 10sc, dec, 1sc, dec, 14sc, dec, 4sc [33]
Rnd 4- 33sc
Rnd 5- (9sc, dec)x3 [30]
Rnd 6- (dec, 4sc)x5 [25]
Rnd 7-11- 25sc
Rnd 8- 1sc, (dec, 1sc)x8 [17]
Staff, insert the lower part of button joint.
Button joint is made with 2 buttons and wire. Take a button (about 2-3 cm in diameter) with 2 holes and a piece of wire about 5 cm long. Bend the wire into U shape and insert into button holes.
Insert this into the body – the button inward, the wire outwards – then decrease, working around the wire, closing the opening, leave 6-7 sc. Cut off yarn, weave in the end.
Do not overdo it: while turning, the wire can rub too small of an opening.
Head
Crochet in a spiral with no lifting chains, stuff as you go, tight but not deforming the shape.
6 ch in a circle (6 ch, sl st in the 1st chain). This is the opening for the joint, connecting the head with the body.
Rnd 1- 6inc (12)
Rnd 2- (1sc, 1inc)x6 (18)
Rnd 3- (2sc, 1inc)x6 (24)
Rnd 4- (3sc, 1inc)x6 (30)
Rnd 5- (4sc, 1inc)x6 (36)
Rnd 6- (5sc, 1inc)x6 (42)
Rnd 7- (6sc, 1inc)x6 (48)
Rnd 8- (7sc, 1inc)x6 (54)
Rnd 9- 4sc, 1inc, (8sc, 1inc)x5, 4sc (60)
Rnd 10- (9sc, 1inc)x6 (66)
Rnd 11- 4sc, 3inc, 59sc
Rnd 12- 5sc, (inc, 1sc)x2, inc, 59sc
Rnd 13- 6sc, (inc, 1sc)x3, inc, 59sc
Rnd 14- 7sc, (inc, 2sc)x3, inc, 59sc [80]
Rnd 15,16- 80sc
Rnd 17- 7sc, dec, 11sc, dec, 58sc [78]
Rnd 18- 7sc, dec, 4sc, dec, 4sc, dec, 57sc [75]
Rnd 19- 75sc
Rnd 20- 6sc, dec, 8sc, dec, 6sc, dec, 11sc, dec, (10sc, dec)x3, [68]
Rnd 21- 68
Rnd 22- (6sc, dec)x3, (7sc, dec)x4, 6sc, dec [60]
Rnd 23- 60
Rnd 24- (8sc, dec)x6 [54]
Rnd 25,26- 54sc
Rnd 27- (7sc, dec)x6 [48]
Rnd 28,29- 48sc
Rnd 30- (6sc, dec)x6 [42]
Rnd 31- 42
If you are using safety eyes, it’s time to insert them.
On the head find place to insert the eyes – 21 rounds
Place the eyes, see if you like how they look there. Use scissors to widen the gap between the stitches (do not cut, just puncture), insert the eyes and secure the clamp.
Attaching the head to the body:
Take the body, with the wire sticking out, pull both ends of the wire through the opening in the head (not stuffed), and through the holes in the button that you place inside the head (the button must be big, so that the head doesn’t lean to the side), twist the wire ends together, making sure that the head can be turned with a little bit of force.
staff
Rnd 32- (dec, 4sc)x7 [35]
Rnd 33- (dec, 3sc)x7 [28]
Rnd 34- 14dec, [14]
Rnd 35- 7dec [7]
Complete knitting. Cut off yarn, weave in the end.
Do contractions now, using thread (yarn) and needle: pull the thread from both corners of the eye to the neck, making cheeks.
If you are doing contractions (needle sculpting) for the first time, here is how:
You will need a long needle and thread (yarn). Making right cheek.
Thread the needle (you will need about 30cm of thread), tie a knot on one end.
Attach the thread to the front of the head close to the button edge, hiding the knot inside the head.
Insert the needle with the thread in the directions shown in the photo below: first from neck to the inside corner of the eye. Pull, until you get a plump cheek. Hold the cheek with your fingers, now sew in the opposite direction, skipping one stitch. Pull more and fix with a knot.
Do not cut the end. Skip 2-3 stitches to the left (hiding the thread inside the head), fix the thread with a knot. Insert the needle and exit it through the outer corner of the eye. Pull the thread, sew in the opposite direction, skipping a stitch.
Fix with a knot. Repeat for the other eye.
Ear the dark part. Make 2.
16 ch.
Rnd 1- Sc in 2nd ch from hook, 13sc, inc. Keep working around the chain – inc,14sc [32]
Rnd 2- 5sc, 5hdc, 4dc, (2dc shell)x4, 4dc, 5hdc, 5sc [36]
Rnd 3- 36
Rnd 4- 5sc, 5hdc, 4dc, (2dc shell)x7, 4dc, 5hdc, 5sc [44]
Ear the light part. Make 2.
16 ch.
Rnd 1- Sc in 2nd ch from hook, 13sc, inc. Keep working around the chain – inc,14sc [32]
Rnd 2- 5sc, 5hdc, 4dc, (2dc shell)x4, 4dc, 5hdc, 5sc [36]
Rnd 3- 5sc, 5hdc, 4dc, (2dc shell)x7, 4dc, 5hdc, 5sc [44]
Sew ears on the head
Embroider your nose and mouth as shown in the picture below.
Glue eye lashes.
Horns Make 2
2 ch
Rnd 1- 5Sc in 2nd ch from hook
Rnd 2-4 5sc